Download presentation
Presentation is loading. Please wait.

1
FIRST AID

2
Goals for this class Identify Emergencies Personal Safety Basic care Hygiene

3
Identifying an Emergency

4
What has happened? Personal Safety – “Am I in danger?” Personal Protection – “What can I do to protect myself?” What specifically is going on? Additional resources – Do I need help

5
Hazards and Protection Blood and body fluids – Wear Gloves or use something to create a barrier Unsafe scene – Don’t enter unless the scene is safe, or you can do something to remove the hazard Unseen hazards – Pay attention to your surroundings (Look up, look down, look all around)
")
6
Possible Solutions I can deal with this Begin treatment I can’t deal with this Get help immediately If at any time you begin to feel unsure about managing a problem get help

7
Life threatening emergencies Unconsciousness Not Breathing Severe Bleeding Neck injuries

8
Not breathing If you find that a person is unconscious send someone to get help then check if they are breathing. Look, Listen, Feel Open their airway using the head tilt/chin lift or jaw thrust

9
Severe Bleeding Control Bleeding Call for help If they have lost a significant amount of blood have them lie down and elevate their feet

10
Types of Bleeding Venous – Dark, oozing Arterial – Bright red, spurting Internal – Bruising External – Abrasions, laceration, punctures, amputations

11
General Bleeding Control Remember to try and protect yourself from contact with blood and other body fluids Steps to control bleeding Direct pressure Elevation Ice – for bruising Pressure points

12
Bleeding control cont. Do not remove bandages once they have been applied Do not use a tourniquet unless all other efforts have failed to stop bleeding Remember applying a tourniquet means that the person will probably lose that limb

13
Wound Management Abrasions Involve top layer of skin Blood is dark and oozing Classic scraped knee Care Clean with soap and water Use antibiotic ointment Bandage wound and change the dressing once or twice a day (Change dressing if you get it wet)
")
14
Lacerations Cuts through various layers of skin Blood can be venous or arterial Care Clean wound by irrigation After cleaning wound needs to be held shut with some sort of bandage (i.e. butterfly bandage or tape) Once closed keep it closed (That’s why we clean it first) Once wound is closed, use antibiotic ointment on the surface and bandage Decide if stitches are needed (if you feel stitches are necessary you should get them within about 8 hrs)
 Once closed keep it closed (That’s why we clean it first) Once wound is closed, use antibiotic ointment on the surface and bandage Decide if stitches are needed (if you feel stitches are necessary you should get them within about 8 hrs).")
15
Punctures Usually involves minimal bleeding Poses high risk of infection Care If object is still impaled stabilize in place Clean with water Consider if tetanus shot is needed

16
Amputations Bone and skin are removed from body Care Control bleeding Wrap amputated part in gauze or clean cloth then put it on ice

17
Strains and Sprains cont. Treatment for strains and sprains – H I R I C E Heat Ibuprofen Rest Ice Compression Elevation

18
Fractures Basic care for fractures Support injured limb Leave in position of comfort Protect from further injury/damage Get medical assistance Splinting – Do not attempt to splint the injury unless the patient must move to get medical assistance

19
Fractures cont. Simple splinting techniques Anatomical splints Sling and Swathe Cautions when splinting Do not cut off circulation by tying bandages too tight If you use something hard to splint an extremity, be sure to pad around it

20
Hypothermia = Low Body Temperature Ways we lose heat - Radiation – Heat lost to a colder environment Convection – Circulating Air Conduction – Direct contact with cold objects Evaporation – Moisture on the body Respiration - Breathing

21
Environmental factors Cold air Water immersion Contributing factors Old Age Lack of exercise Illness Injury

22
Signs of hypothermia Cool skin Decreased mental function Stiff muscles Shivering in mild cases No Shivering in severe cases “Umbles” – Mumbles, Stumbles, Fumbles, Grumbles, Tumbles

23
Treatment for hypothermia Remove victim from the cold environment Remove wet clothing Cover with a blanket Handle victim gently Don’t allow victim to exert themselves Do not attempt to massage extremities If victim is drowsy, do not let them eat or drink

24
Treatment cont. If no shelter is immediately available – Build one Start fire Warm some water and place warm water bottles around the neck armpits and groin Try to get the victim to medical help as soon as possible

25
Hyperthermia = High body temperature Environmental factors High temperature and humidity High activity levels Other factors Very young or old Dehydration Illness Obesity

26
Heat Exhaustion ranges from mild to severe Sign and symptoms Muscle Cramps Weakness Dizziness, faintness Altered mental status Mild cases – skin is moist and normal to cool in temperature Severe cases – skin is dry and hot

27
Treatment for heat exhaustion Remove from hot environment Loosen or remove clothing Cool with moist towels and fanning If pt is responsive give them water Apply cool packs to neck, armpits, and groin If unresponsive get help immediately

28
Bites and Stings Primary concerns here in Texas regarding bites and stings: Snakes Water moccasins, Rattlesnakes, Copperheads, Coral Snakes Spiders Black Widow, Brown Recluse

29
General Bite and Sting management Try to identify what bit you Wash area with soap and water

30
Snakes Identification of poisonous snakes Typically have a triangular shaped head Coral Snakes can be identified by the colored bands found on their body (Red touch yellow, kill a fellow)
")
31
Treatment of Snakebites Wash with soap and water Immobilize bitten limb Apply cold pack to slow blood flow in the area of the bite Seek medical attention immediately

32
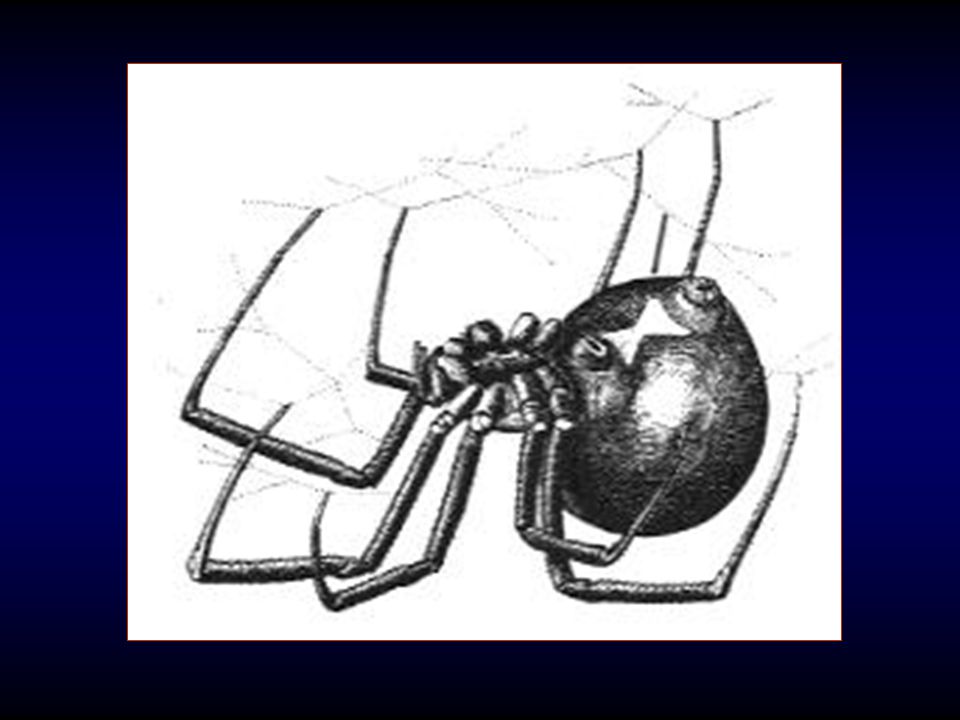
Identification of poisonous Spiders Black widow Black spider with rounded abdomen Distinct red hourglass shape on the underside of the abdomen

34
Signs of a Black Widow bite Minor discomfort following bite Painful muscle cramps within 15 min starting at the site of the bite and spreading throughout the whole body Weakness and intense painful muscle spasms

35
Toxins eventually attack the brain causing: Sweating Nausea Dizziness Labored breathing Slurred speech Convulsions

36
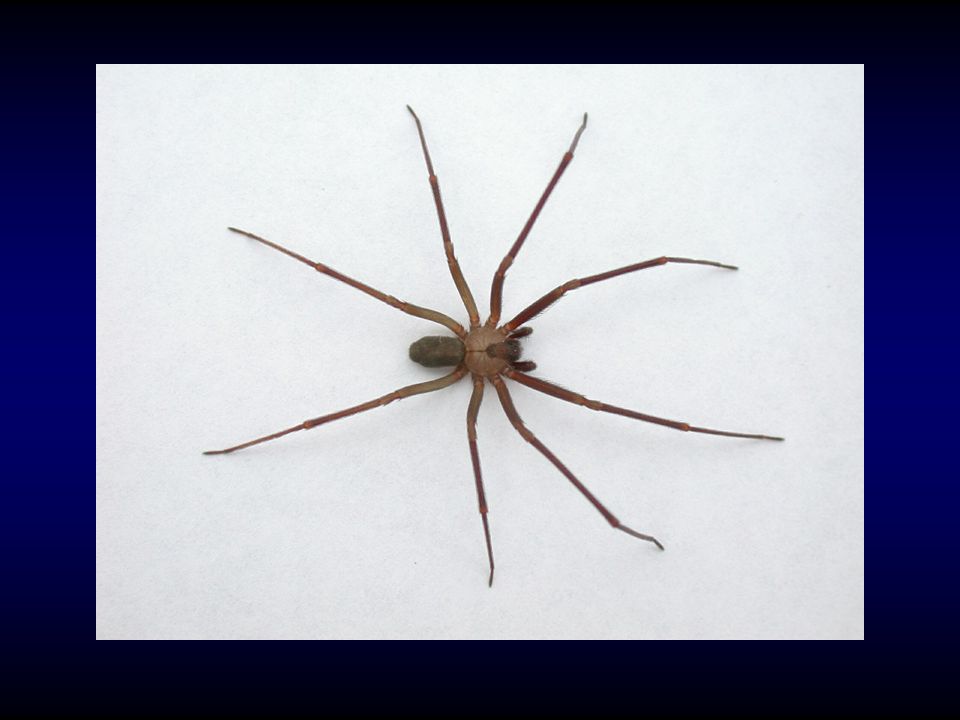
Brown Recluse identification Brown in color Distinct violin shape on its head

39
Signs of a Brown Recluse bite May have localized pain Over time develops into a bullseye look with a dark center surrounded by a red area Forms blister After several days blister ruptures and turns black or brown Dead tissue falls off and forms a crater in the skin

40
Brown Recluse cont. While Brown Recluse bites are not typically fatal they can result in the loss of a limb if not properly treated.

41
Hygiene Proper hand washing techniques Foot care Sanitation

42
Frequent, proper hand washing is your number one defense against transmission of disease

43
How should your hands should be washed With water and soap Work up lather and coat your palms, top of your hands, and between your fingers with soap Rub hands together vigorously for about 15 sec Rinse thoroughly When should they be washed – Prior to eating After using the bathroom After touching animals or raw meat After touching blood or body fluids Any other time you feel like it. It never hurts to wash your hands

44
Proper Showering Similar principles to hand washing Key areas which should be thoroughly cleaned Hair Armpits Groin Feet

45
Foot care Regularly trim toenails Scrub feet when showering Allow feet to air out as you get a chance Change socks regularly (i.e. socks should not be worn more than one day and should be washed between each use) Socks should be changed more frequently when feet are subjected to wet conditions Take care of blisters early on
 Socks should be changed more frequently when feet are subjected to wet conditions Take care of blisters early on.")
46
Foot care cont. Jungle Rot and Athletes Foot Soak feet it epsom salts or a diluted bleach solution Don’t walk around barefoot (this will prevent getting it or passing it on to squad mates

47
Poison Ivy/Poison oak Wash area with soap and water Wash hands after touching it, since you can spread it around your body by touching it then other areas Resist the urge to scratch or rub on the effected areas Try to dry out areas with a diluted bleach solution or alcohol

48
Question and Answer time

Similar presentations