Meeting In A Box Set Up Guide

Slides:


Advertisements
Similar presentations
How to utilize your iTunes for use with your SwiMP3 Please be aware that all the SwiMP3 line of players do not have licensing to any of the songs that.
Advertisements

How to use the NEC projector Its easy! Really!. How to use the NEC projector IMPORTANT-make sure you have reserved the equipment (projector and/or laptop).
How to hook up a Projector to a Laptop
Data Projector Setting Up/Connecting Laptop & Data Projector.
Presenting A Power Point Program. Computer Checklist Computer Checklist Power Cord Mouse Computer.
So you want to do a presentation in the Council Chamber?? No problem, here’s how… Note: If you are using the laptop to conduct your presentation, either.
Components: Sansa Clip Mp3, earbuds, USB cable, Quick Start Guide.
Department of Environmental Conservation 1 DATAMAX PRINTER SETUP MODULE 1.
I TEC TRAINING This training session will explain how to use ITEC equipment and support learning in the classroom setting. Presented by: R. Schmid.
LogTag Training January 2015
Optical Manufacturing Solutions 1 Probe Assembly.
University of Manitoba A How to Guide for Theatre B & C.
AUDIO VISUAL TRAINING University Center. BLACK BOX EQUIPMENT IN CLASS University Center LCD Projector/Built In Screen Laptop Connection (VGA Cord) Control.
College of Education 103 Conference Room The Multimedia Podium.
VGA Input Cable Connect to the VGA jack on the back of the laptop Connect to VGA Input 1 on the back of the projector.
Meridien Conference How-To Guide for Speakers Setting Up the Projector.
Detailed Room Guides Select from the list of Willard Building technology classrooms to view more detailed operating instructions. The instructions are.
1 Check all equipment is included before returning. If you have an accident or the equipment is damaged or you need support please contact Blaize
Digital StarLab Set-Up, Operation, Maintenance, and Teacher Manual for the Digital StarLab are in the links below or on the training tab in the BlackBoard.
Teaching Room User Guide – Using the AV Pod, Projector and Screen If the touch panel is blank, press firmly to wake up. Start up the Pod To turn on the.
BACKEND MULTIMEDIA ROOM Home User Guide Computer Projector DVD/ VCR Remote Mouse Save tutorial on desktop to watch full screen. Click boxes to jump into.
 Power Cable-plug in when ready to project.  Audio/Video Cable- attach per directions on the next slide.  Mark your spot-you may wish to use tape on.
Lecture Theatre User Guide – Using the AV Pod, Projector and Screens If the touch panel is blank, press firmly to wake up. Start up the Pod To turn on.
Getting Started Setting up your multimedia equipment.
Flatbed scanning in the HoA Computer Room How to use the Epson scanner.
+ USING THE POWER CHARGER AND BATTERY MINI-DV CAMCORDER Connect the charger to the power cord Attach the battery to the charger Plug it in and watch for.
COBAE - Smart Classroom Technology Vic Catalasan For immediate in-class assistant please call X1500 or
AUDIO VISUAL TRAINING Center for Academic Success.
AUDIO VISUAL TRAINING STEM Building. EQUIPMENT IN CLASSROOM STEM Building LCD Projector/Built In Screen Laptop Connection (VGA Cord) Touch Screen Credenza.
The Mavica for the Maverick: A How-to Guide Operating instructions for the Sony Mavica CD350 Digital Camera An Easy-to-Follow Guide to Everything You Need.
Constant Hall A Mediated Classroom Guide. In Constant Hall classrooms, media and computer equipment is stored in a Media Desk. You will also find this.
Sony Handycam Instructions Directions Written By: Stephen Hall, Student Technical Assistant Ms. Miri Kim, Director of Instructional Design and Technology.
Smart Boards in the Classroom We will learn to: We will learn to: Physically connect the smartboard. Physically connect the smartboard. Configure the smartboard.
Starting screen for Google Sketchup Sketchup is used to make 3 dimensional objects 3 axis – Green is x axis Red is y axis Blue is z axis.
Set Up for Live Streaming Video This presentation will walk you through the set up and delivery for streaming video of a live event over the internet.
310 Series Basic Leveling Procedure
Readying Instructional Environment Setting Up the Interactive Whiteboard.
Instructional E-Classroom Instructional Guide Seneca College, Audio-Visual Services.
AUDIO VISUAL TRAINING Vaughn Eames-Lite Class. LITE CLASSROOM EQUIPMENT Lite Class LCD Projector/Built In Screen Laptop Connection (VGA Cord) Control.
AUDIO VISUAL TRAINING Wilkins Theatre-Black Box. BLACK BOX EQUIPMENT IN CLASS Black Box LCD Projector/Built In Screen Laptop Connection (VGA Cord) Control.
AUDIO VISUAL TRAINING Bruce Hall-Smart Class. SMART CLASS EQUIPMENT Smart Class LCD Projector/Built In Screen Control Panel Credenza (DVD/VCR & P.C. inside)
This is what we want to produce Import sketch dimensions Label angles Set the scale Add linear dimensions.
IOPtiMate™ OT-135P2 Technical Training – Part I System Description, Installation & Operation IOP (07)
Introduction The Epson LCD projector is a highly versatile presentation tool. The projector can utilize up to two computer sources, and up to three video.
Smart Board Troubleshooting.  The User Guide contains useful information such as installing, connecting, maintaining, and troubleshooting your Smart.
Select your System Freedom Micro DI.
Troubleshooting classroom technology
Center for Advanced Technology and Training CATT Room Instruction Demo
CASD Mobile Labs.
STEM Building Audio Visual Training.
Getting to Know the imaging Equipment
East Cafeteria Projector
Technology Building-Smart Class
Getting to Know the imaging Equipment
35mm slide scanning in the HoA Visual Resources Centre
Setting Up the Interactive Whiteboard
User guide for Direct Observations equipment use
Computer Bunker Training
Classroom Digital Camera
Using and Caring for Laptops and LCD Projectors
iVotronic Precinct Worker Training Presentation
2) Connect the VGA cable from the monitor output of the laptop [D] to the computer input of the projector [E]. [D] [E]
Hutchinson Hall-Black Box
Hennings Hall-Black Box
Laser 3000™ Operating Instructions
Laptops and Windows tips
1/17/2019.
How to Perform Preventive Maintenance of the Personal Computer
Sony PCM-M10 Recorder Asst. Superintendent for H.R.
Presentation transcript:

Meeting In A Box Set Up Guide This tutorial is designed to assist you in setting up your Meeting In A Box

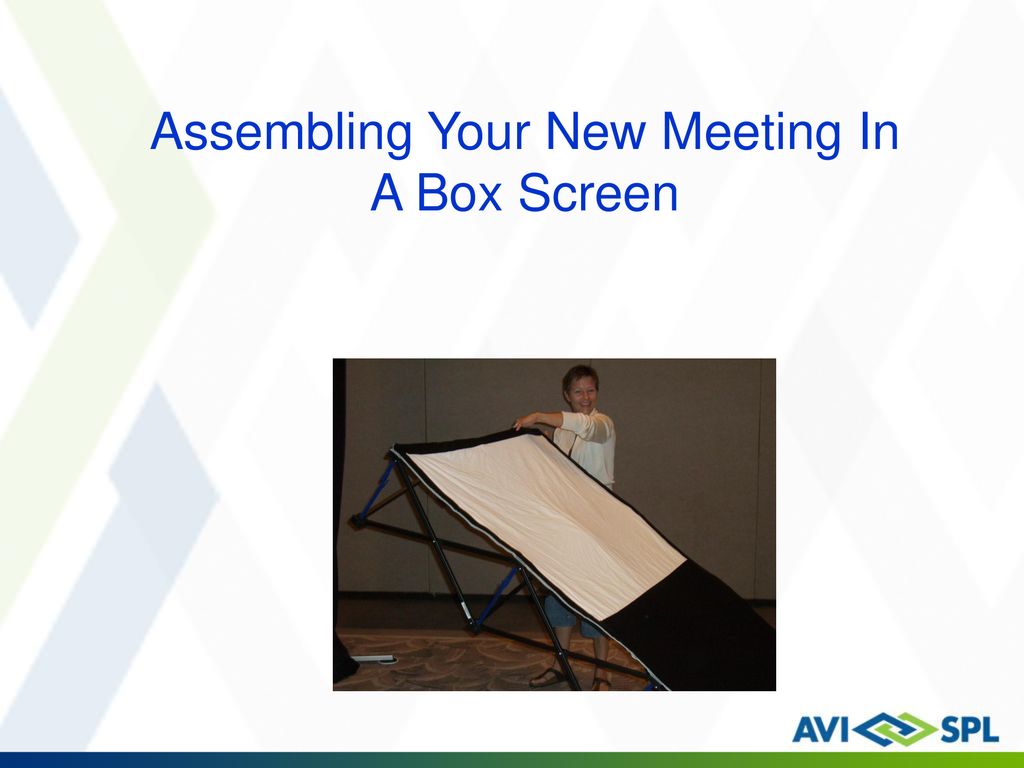
Assembling Your New Meeting In A Box Screen

Remove the screen’s frame from the MIAB. Remove the blue Velcro strap from the screen and put it back in the MIAB case.

Remove the screen material from the sleeve.

Make sure that all 12 blue locking points are lined up properly. Put the frame together. Make sure that all 12 blue locking points are lined up properly.

Stand the frame up and attach screen material.

When screen is sturdy and standing securely proceed to lock the two inner locking points. Once all locking points are in place you are ready to use your MIAB screen!

Setting up the LCD Projector Connect the power cable with red tape to the jack on the side of the projector marked with red tape.

Connect the 15 pin VGA cable with blue ends to the RGB on jack located on rear of projector.

Setting up the LCD projector When the projector is plugged in and the main power switch is set to On, the orange Power indicator light will be solid. When powered on, the Power indicator light will blink Green until set up is finished.

Setting up the Laptop Connect the power cable with yellow tape to the jack on the back of the laptop marked with yellow tape.

Connect the 15 pin VGA cable from LCD projector with blue ends to jack on rear of laptop marked by blue tape.

Connecting the Interlink Wireless Remote and Laser Pointer Connect the receiver to the USB jack marked with green tape on the rear of the laptop.

Presentations Presentations are loaded onto the desktop in the upper left hand corner. Double click the folder labeled pre-loaded presentation. Double click the name of the presentation to be used to open.

Now that everything is connected, power on the LCD projector and laptop. The image from the laptop should automatically appear on screen. If you have any questions regarding any of the equipment please see the troubleshooting section of this guide in the following slides.

Focusing Gently rotate the lens until it comes into focus

Hiding the Screen Image Press the bottom button on the wireless remote

After your presentation is over Before breaking down your MIAB screen make sure that all clients or attendees have departed.

Powering down the Projector When powering down the LCD projector press the power button once. When you see the on screen display, press power button again. The projector will initiate a cool down process before shutting off. Do not unplug the power cord until the blinking green light is solid. Important!! Unplugging the projector prematurely will result in damage to the projector.

** Do not release the red lock.** Repacking your Meeting In A Box Screen Release all of the blue locking points on the back of the screen by gently pulling up on the tips. ** Do not release the red lock.**

Be sure that all obstructions are clear of the screen and release the red tip last. ***Be sure to be arms distance away from the screen so that it can collapse easily to the floor.***

Remove the screen material and replace back into supplied sleeve.

Push the screen legs as close together as possible. Retrieve the blue Velcro strap from the MIAB case and fasten it around the screen legs.

Put the frame back in the MIAB case

Troubleshooting your LCD Projector Projector will not power on If the projector does not power on, make sure the power cord is plugged in and that the main power switch on the side of the projector is set to | for on.

Image is too low To raise the image higher, use the two adjustable legs located under the front of the projector. Depress lever on each side of the projector leg to release. Adjustment leg Adjustment leg

Image out of focus & zoom To adjust the focus & zoom of the image, use the manual controls located on the lens of the projector.

Image is not showing through projector If the image fails to appear on the laptop and through the projector, hold down the Fn key and press F7. Use the down arrow to highlight “Presentation on Projector and ThinkPad”. Press Enter to select. Pop up box will disappear and image should be seen on laptop and through projector.

Image showing through projector is discolored Check that the 15 pin VGA cable is connected properly to both the laptop and LCD projector and that all of the pins are straight and seated properly.

Laptop will not read presentation disc If you are using a CD-rom for your presentation, make sure the disc is inserted with the writing face up.

Technical Support For technical assistance and shipping inquiries, call MIAB technical support hotline 888.695.8127

Have a Successful Meeting!