Download presentation
Presentation is loading. Please wait.

1
‘The MUSU’

2
The MUSU was designed from basic concepts to a final design starting with simple sketches

3
More technical type drawings helping to establish a ……..

4
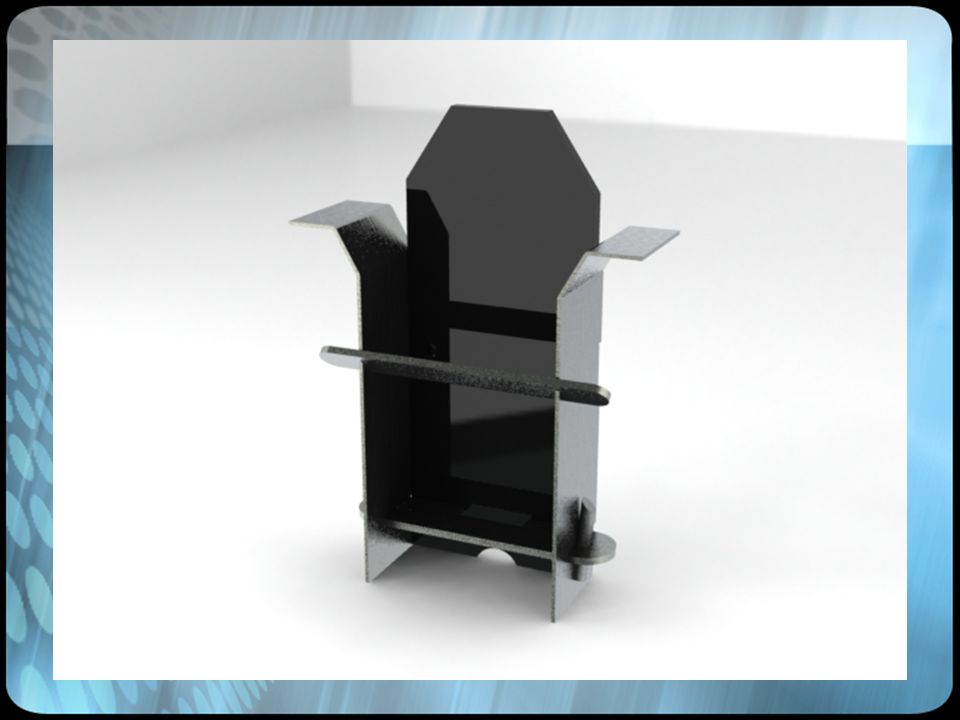
Final design for the MUSU ‘Multi Use Storage Unit’

5
Refined using CAD – ‘Solidworks’ An ‘exploded view’ of all component parts in the MUSU

6
Manufacture a prototype

7
Why? What? Where? The MUSU The MUSU Location? Desk / table Wall mounted Holdin g? size? Mobile Phone Jewellery Theme? Sporting Vampire Make links between the topics this is where the answer to your design needs are hiding!

8
8 Main Stages of Manufacture

9
Main Stages of Manufacture Stage 1- Checking Materials Is my metal square (90’) Have I all the parts I need marked with my name - stored securely Ensure your metal stays as scratch free as possible
 Have I all the parts I need marked with my name - stored securely Ensure your metal stays as scratch free as possible")
10
Main Stages of Manufacture Stage 2- Marking out Check the measurements of your work piece against the technical drawing ‘Measure twice, mark once!’ Get to know the correct technical names of equipment.

11
Main Stages of Manufacture Stage 3 – Filing Use a smooth cut flat file / Needle files Keep work low in vice Let the file do the work – don’t be aggressive

12
Main Stages of Manufacture Stage 4 – Cutting Use a fine toothed hacksaw and or a piercing saw Let the saw do the work- don’t be aggressive Watch the sharp ‘burr’ edges

13
Main Stages of Manufacture Stage 5 – Drilling Ensure work is securely held in machine vice or clamped. Use the correct drill speed – if unsure keep it slow!

14
Main Stages of Manufacture Stage 6 – Bending You can really only bend 1.5 mm sheet material successfully once Do not attempt to bend sheet material by hand without the aid of a jig or vice.

15
Main Stages of Manufacture Stage 7 – Finishing Using a flat and or square needle file – ‘Draw file’ to finish edges; For aluminium use 150 grit Wet & Dry paper Caution heat from friction

16
Main Stages of Manufacture Stage 8 – Assembly Keeping all component parts safe unscratched will pay off at this stage. Enjoy using your ‘MUSU’

17
Tools and equipment required to manufacture the MUSU

18
Tools and equipment This is a metalwork scriber Used to score a faint marking out line on a metal surface Sharp end! This is a metalwork Dot punch Used to indent a dot onto a metal surface usually to mark the centre of a drilling point

19
This is a set of Odd Leg Callipers. Used to scribe a line parallel to the edge of a piece of metal Tools and equipment

20
Senior Hacksaw This saw used with a fine toothed blade can easily cut Metal Sheet, Metal Bar and plastic tubing. At least three teeth on the blade should be in contact with the cutting surface at anytime to ensure a good cutting action.

21
This is a piercing saw. With its very fine blade it is ideal for cutting very fine lines in sheet and thin bar metal. A correctly set and tensioned piercing saw blade will cut easily along a marked line with a smooth cutting action Slowly let the blade cut – No force required! Tools and equipment

22
Smooth Cut Flat file This type of file is ideal for fine metalwork. Remember your flat file has one serrated thin edge and one smooth- non filing edge. No filing action on this smooth edge

23
Tools and equipment Folding / Bending Press This is ideal for forming fine metalwork sheet material. Remember clamp your work at 90’ to folder and watch your fingers it will nip!

24
Resources available You have some fantastic resources available to help you achieve a great final product Work safely and as independently as possible to achieve the best results Technical Drawing pages with all dimensions and component details Manufacturing Storyboard showing you step by step processes If unsure please ask !

25
Component Parts Technical Drawing

26
Manufacturing Storyboard Stage 6 – Bending Check that you have achieved the both bends 90’ as required. After removal ensure tabs are vertical to the side 90’ using the engineers square. Think Quality!

27
Just some of the possible uses for The MUSU

28
Even more possible uses for The MUSU

Similar presentations