Download presentation
Presentation is loading. Please wait.

1
Susan Klinzing Tobin, PG TASK Environmental, Inc.

2
The Chevron Way Chevron’s Approach to Job Safety Analysis Simple mechanism to categorize hazards Training tools to demystify the JSA process Requirement for team participation Budget and schedule for team participation

3
The Success Story TASK’s job - facilitate JSA development and implementation; safety oversight. New contractor – no safety training. New site activity – no JSA model available. Results JSA process embraced by project team. Hierarchy of Controls (remove hazard) drove scope changes. Project completed with no injuries or near-misses, below budget and with a happy, self-aware project team.
 drove scope changes. Project completed with no injuries or near-misses, below budget and with a happy, self-aware project team..")
6
History of Job Safety Analysis 1911 – Frederick Taylor - The Principles of Scientific Management Break job tasks down into sequence of steps; find and document the most efficient way of completing the task (Job Analysis) 1931 – Herbert Heinrich - Industrial Accident Prevention: A Scientific Approach Prevent accidents by using Job Analysis prior to hiring employees “Break the job down into its several constituent operations and show the hazards of each so that the latter may be recognized in advance and made known to the employee, and so that he may be fully instructed in avoiding them.”
 1931 – Herbert Heinrich - Industrial Accident Prevention: A Scientific Approach Prevent accidents by using Job Analysis prior to hiring employees Break the job down into its several constituent operations and show the hazards of each so that the latter may be recognized in advance and made known to the employee, and so that he may be fully instructed in avoiding them.")
7
National Safety Council - 1964

8
NSC’s JSA Three Columns: 1. Sequence of Basic Job Steps 2. Potential Hazards 3. Recommended Action or Procedure

9
NSC’s Potential Hazards Struck by Caught in Slip, trip, fall Strains from pushing, pulling, lifting Hazardous environments

10
NSC Actions/Procedures 1. Engineer the hazard out 2. Provide guards/safety devices 3. PPE 4. Provide training 5. Good housekeeping 6. Ergonomic instruction

11
JSA Reality? Find the least expensive person with the least experience and tell them to fill out the forms pronto. Copy one from another job. Write so much meaningless drivel that no one will read it anyway. Hand out the completed JSA at the first safety meeting and tell everyone to read it.

12
JSA Reality? Find the least expensive person with the least experience and tell them to fill out the forms pronto. Copy one from another job. Write so much meaningless drivel that no one will read it anyway. Hand out the completed JSA at the first safety meeting and tell everyone to read it.

13
Embrace the Process! Job Safety Analysis is the most effective way to quickly engage the project team in the safety management process. If done correctly, it will induce self-awareness and safe behavior.

14
The Chevron Way Do it safely or not at all! There is always time (and budget) to do it right! All team members have ‘stop work’ authority.

15
Training Videos JSA Form Hazard Wheel Hierarchy of Controls

16
Improving Job Safety Analysis: Can You See It?

17
Chevron’s Message JSA process must include the entire team Meet before the job begins Keep the tasks specific – instead of “perform maintenance” try “repair pump.” Use ‘stop work’ when conditions change or are not as expected; revise JSA. Make each team member responsible for specific resources needed for hazard control.

23
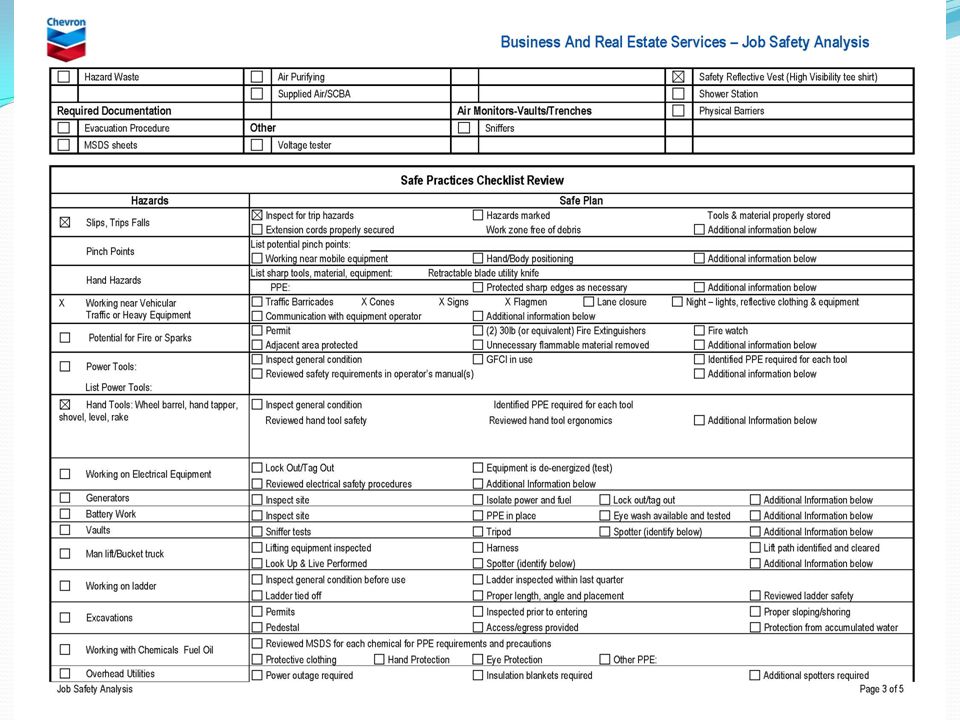
Key Components Hazard Wheel – 10 Energy Sources Hierarchy of Controls 4 Columns Sequence of task steps Potential hazards/risk events Safe planning/recommended control Resources needed (including person responsible)
")
24
Hazard Wheel – 10 Energy Sources

25
Hierarchy of Controls Remove energy source. Prevent the release of energy. Protect from the release. Use Stop Work authority.

26
Before Work Begins Meet with all project personnel. Identify the specific sequence of work Begin with packing equipment and traveling to job site. The facilitator must engage all of the team members Ask each person to describe his/her portion of each job. Find out what tools are used for what purposes. Ask what work activities each person considers the most hazardous.

27
Example JSA - Surveying 1. Sequence of Basic Task Steps 2.Potential Hazards/Risk Events 3. Safe Planning/RecommendedControl4. Resources Needed corner markers Find permanent 1. Drive to map location 2. Park truck 3. Unpack equipment 4. Use metal detector to find monument 5. Expose monument 6. Verify horizontal location with GPS 7. Repack equipment 8. Travel to next corner marker bodily 1. Motion and Mechanical - injury from vehicle accidents. 1. Follow state vehicle operation laws. Do not talk or text and drive. If backing vehicle is required, utilize a spotter. Mark parked vehicle and work area with traffic cones. Wear safety vests and employ spotters and appropriate MOT controls when working near active roadways. 2. Gravity -bodily injury from trips, slips, and falls. 2. Observe walking and working area for uneven terrain, curbs, gutters, and parking stops. Do not talk or text on the cell phone while walking. Wear appropriate footwear for the task and terrain. 3. Mechanical -hand and finger injury from pinch points on equipment cases and equipment. 3. Wear gloves appropriate for the task. Repair broken or damaged cases and/or equipment. Mark pinch-points. 4. Electrical - electrocution from contact with potential buriedunderground wires. 4. Use metal detector to find buried electrical lines. If buried lines are suspected to be near monuments, remove soil from the vicinity of the monument using non- conducting tools (wood, rubber or plastic). Wear appropriate hand protection. PPE -gloves, safety glasses, sturdy boots, green or orange safety vests, broad brimmed hats. Traffic cones and MOT markers. Metal detector. Wooden or plastic trowel. Cool drinking water. 5. Biological - hand, foot, leg injuries from fire ants, spiders, bees, wasps, bobcats, wolves, and snakes. 5. Inspect area of monument for fire ants, ground bees, overhead wasps & bees, snakes and other biological hazards before beginning work. Eradicate pests or contact a pest control company to remove pests (for bee hives, wasp nests, alligators, and/or snakes). 6. Radiation and temperature - solar - sunburn, heat stress/stroke from over exposure to sun and elevated temperatures. 6. Wear a broad-brimmed sun hat and sun screen. Stay hydrated - drink plenty of water and minimize caffeine consumption. Take sufficient rest breaks in shaded areas.
. Wear appropriate hand protection. PPE -gloves, safety glasses, sturdy boots, green or orange safety vests, broad brimmed hats. Traffic cones and MOT markers. Metal detector. Wooden or plastic trowel. Cool drinking water. 5. Biological - hand, foot, leg injuries from fire ants, spiders, bees, wasps, bobcats, wolves, and snakes. 5. Inspect area of monument for fire ants, ground bees, overhead wasps & bees, snakes and other biological hazards before beginning work. Eradicate pests or contact a pest control company to remove pests (for bee hives, wasp nests, alligators, and/or snakes). 6. Radiation and temperature - solar - sunburn, heat stress/stroke from over exposure to sun and elevated temperatures. 6. Wear a broad-brimmed sun hat and sun screen. Stay hydrated - drink plenty of water and minimize caffeine consumption. Take sufficient rest breaks in shaded areas..")
28
Example JSA - Surveying 1. Sequence of Basic Task Steps 2.Potential Hazards/Risk Events 3. Safe Planning/RecommendedControl4. Resources Needed Set Local Traverse Points Off-site and On- site 1. Drive to site and unpack equipment 2. Set up MOT controls when working along roadways. 3. Walk to selected locations. 4. Set rebar and cap to mark each location. 5. Place wooden stakes and flagging around each rebar and cap. 6. Measure horizontal control using GPS. 7. Chemical - potential exposure to agricultural and test chemicals in the soil. 7. Avoid direct contact with the soil. Wear appropriate gloves for the task. Wash hands thoroughly before eating, smoking, or other hand to mouth contact. 6. Radiation and temperature - solar- sunburn, heat stress/stroke from over exposure to sun and elevated temperatures. 6. Wear a broad-brimmed sun hat and sun screen. Stay hydrated - drink plenty of water and minimize caffeine consumption. 5. Biological - hand, foot, leg injuries from fire ants, spiders, bees, wasps, bobcats, wolves, and snakes. 5. Inspect work area for fire ants, ground bees, overhead wasps & bees, snakes and other biological hazards before beginning work. Stop work and move from the area until hazard animals relocate and/or move traverse point to un-impacted area away from the hazard. 4. Electrical - electrocution from contact with potential buried underground wires. 4. Use metal detector to find buried electrical lines. If buried lines are suspected to be near traverse points, move the point(s) to a location away from buried wires/cables. Wear appropriate hand protection. 3. Mechanical and Motion - hand and finger injury from pinch points on equipment cases and equipment. Hand and finger injuries from driving rebar and stakes into the ground with a hammer. 3. Wear gloves appropriate for the task. Repair broken or damaged cases and/or equipment. Mark pinch-points. Check rebar and stakes for sharp areas and splinters before use. Use an appropriately sized hammer for the job. 2. Gravity - bodily injury from trips, slips, and falls. 2. Observe walking and working area for uneven terrain, curbs, gutters, and parking stops. Do not talk or text on the cell phone while walking. Wear appropriate footwear for the task and terrain. 1. Motion and Mechanical - bodily injury from vehicle accidents. 1. Follow state vehicle operation laws. Do not talk or text and drive. If backing vehicle is required, utilize a spotter. Mark parked vehicle and work area with traffic cones. Wear safety vests and employ spotters and appropriate MOT controls when working near active roadways. PPE - gloves (work gloves and nitrile gloves), safety glasses, sturdy boots, green or orange safety vests, broad brimmed hats. Traffic cones and MOT markers. Metal detector. Cool drinking water. Shade tent or vehicle.
 to a location away from buried wires/cables. Wear appropriate hand protection. 3. Mechanical and Motion - hand and finger injury from pinch points on equipment cases and equipment. Hand and finger injuries from driving rebar and stakes into the ground with a hammer. 3. Wear gloves appropriate for the task. Repair broken or damaged cases and/or equipment. Mark pinch-points. Check rebar and stakes for sharp areas and splinters before use. Use an appropriately sized hammer for the job. 2. Gravity - bodily injury from trips, slips, and falls. 2. Observe walking and working area for uneven terrain, curbs, gutters, and parking stops. Do not talk or text on the cell phone while walking. Wear appropriate footwear for the task and terrain. 1. Motion and Mechanical - bodily injury from vehicle accidents. 1. Follow state vehicle operation laws. Do not talk or text and drive. If backing vehicle is required, utilize a spotter. Mark parked vehicle and work area with traffic cones. Wear safety vests and employ spotters and appropriate MOT controls when working near active roadways. PPE - gloves (work gloves and nitrile gloves), safety glasses, sturdy boots, green or orange safety vests, broad brimmed hats. Traffic cones and MOT markers. Metal detector. Cool drinking water. Shade tent or vehicle..")
29
Example JSA - Surveying 1. Sequence of Basic Task Steps 2.Potential Hazards/Risk Events 3. Safe Planning/RecommendedControl4. Resources Needed Topography Mapping 1. Drive to site or specific area of site. 2. Set up MOT controls if working outside of site fence. 3. Unpack equipment. 4. Clear vegetation with machete, as needed. 5. Set-up tripod and scope. 6. Walk to elevation grid points with rod. 6. Radiation and temperature - solar- sunburn, heat stress/stroke from over exposure to sun and elevated temperatures. 6. Wear a broad-brimmed sun hat and sun screen. Stay hydrated - drink plenty of water and minimize caffeine consumption. 5. Biological - hand, foot, leg injuries from fire ants, spiders, bees, wasps, bobcats, wolves, and snakes. 5. Inspect work area for fire ants, ground bees, overhead wasps & bees, snakes and other biological hazards before beginning work. Stop work and move from the area until hazard animals relocate and/or move traverse point to un-impacted area away from the hazard. 3. Mechanical - hand and finger injury from pinch points on equipment cases and equipment. 3. Wear gloves appropriate for the task. Repair broken or damaged cases and/or equipment. Mark pinch-points. 2. Gravity - bodily injury from trips, slips, and falls. 2. Observe walking and working area for uneven terrain, curbs, gutters, and parking stops. Do not talk or text on the cell phone while walking. Wear appropriate footwear for the task and terrain. 1. Motion and Mechanical - bodily injury from vehicle accidents or vehicle contact with rough terrain. 1. Follow state vehicle operation laws. Do not talk or text and drive. If backing vehicle is required, utilize a spotter. Mark parked vehicle and work area with traffic cones. Wear safety vests and employ spotters and appropriate MOT controls when working near active roadways. PPE - gloves (work gloves), safety glasses, sturdy boots, green or orange safety vests, broad brimmed hats. Traffic cones and MOT markers. Cool drinking water. Shade tent or vehicle. 4. Motion – hand and leg injuries from contact with machete and/or sharp vegetation 4. Stay at least 5 feet behind person using machete. Inspect machete for weak or thinning areas before each 1/2 day of use. Replace as needed. Cut vegetation near ground level and move it out of the walking path. Scabbard machete when not in use. Wear gloves with slip resistance palms and fingers if using machete.
, safety glasses, sturdy boots, green or orange safety vests, broad brimmed hats. Traffic cones and MOT markers. Cool drinking water. Shade tent or vehicle. 4. Motion – hand and leg injuries from contact with machete and/or sharp vegetation 4. Stay at least 5 feet behind person using machete. Inspect machete for weak or thinning areas before each 1/2 day of use. Replace as needed. Cut vegetation near ground level and move it out of the walking path. Scabbard machete when not in use. Wear gloves with slip resistance palms and fingers if using machete..")
30
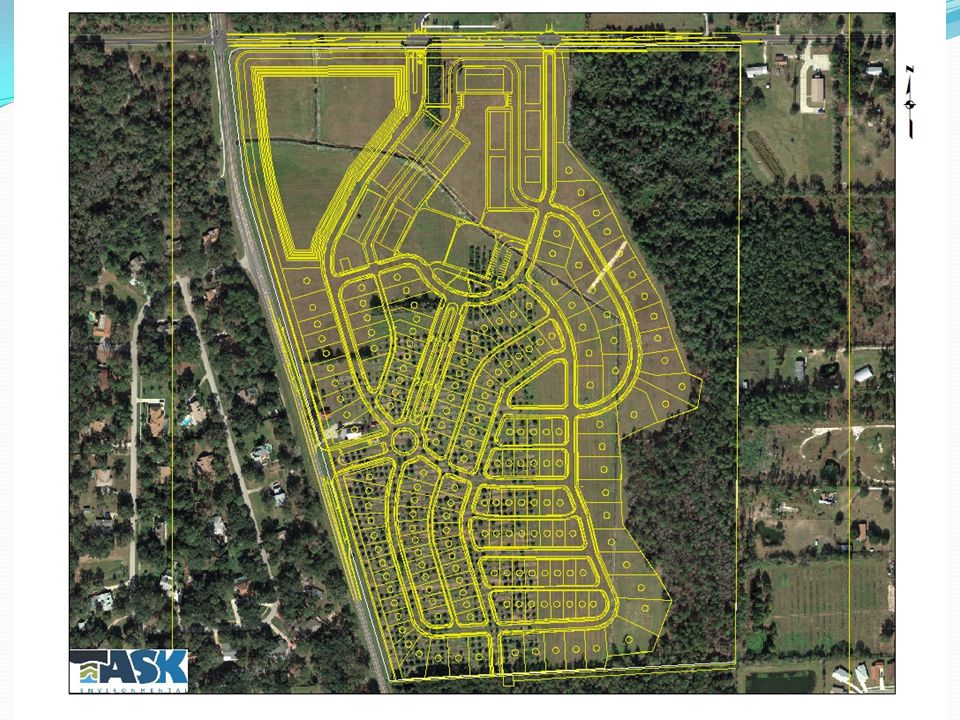
Draft JSA What activities are the most hazardous? Surveying in the roadway intersections. Cutting survey lines through swamps (with big machetes)! What did we learn from the field crew? Density of intersection and wetlands survey points was excessive relative to their work for others in this area.
. What did we learn from the field crew. Density of intersection and wetlands survey points was excessive relative to their work for others in this area..")
31
Stop Work – Revisit Scope Coordinated with design engineers and survey company management. Specifications were ‘packaged’ from another state with more topography. Wetlands elevations weren’t pertinent to hydraulic design. Reduced the number of survey points to reduce exposure to hazardous conditions.

32
Lessons Learned JSA development process engaged the field crew members. By changing the scope to address concerns, each crew member understood the importance of their ideas, input and concerns. Change in scope reduced labor hours needed to complete the job and saved money.

33
Key Components Project team prepares the JSA. Provide tools and training to facilitate the JSA development process. Use Hierarchy of Controls – when possible, remove the hazard (energy source) through design changes. Budget time and money to do it right (or don’t do it at all).
 through design changes. Budget time and money to do it right (or don’t do it at all)..")
34
Tips Revisit training material and JSA often during project. Use Stop Work Authority when conditions change Provide positive feedback often. Instill Trust – free-sharing is essential to identification of actual hazards. Encourage sharing of ideas and experiences. Give away cool stuff!

Similar presentations