Download presentation
Presentation is loading. Please wait.

1
David C. Leader Vice President HydroLynx Systems, Inc.

2
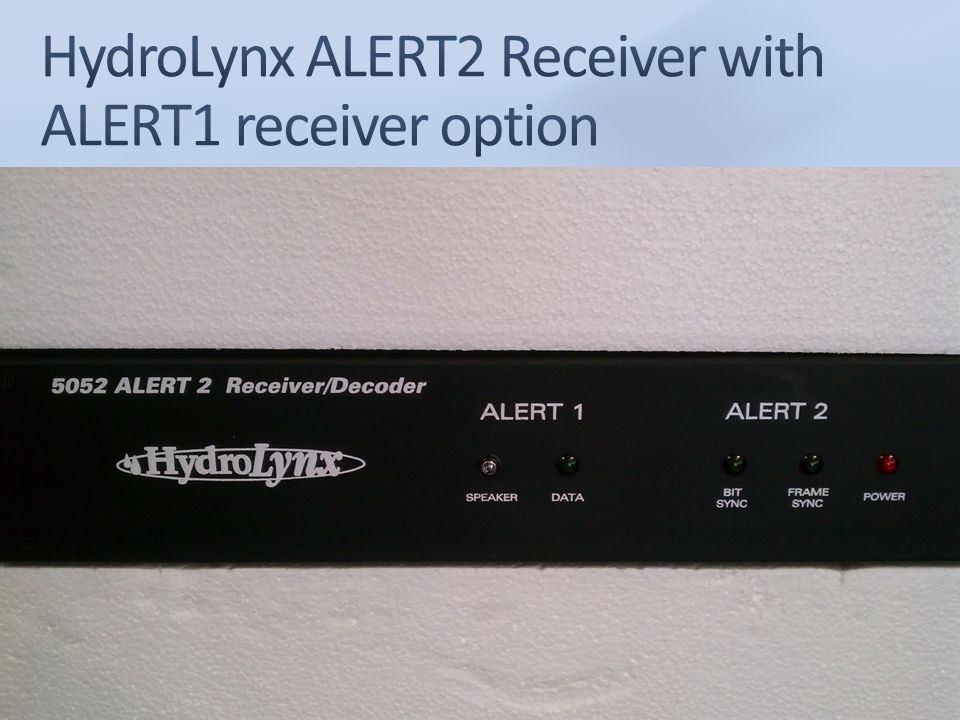
Replace ALERT1 receiver with 5052RD-K ALERT2 receiver/decoder Add ALERT1 receiver/decoder option to collect legacy ALERT1 date during upgrade transition Rack mount installation recommended Desktop installation possible Use AC power adapter Connect to battery backup power system Stand alone battery with charge no longer used Antenna splitter uses same receiver antenna for ALERT1 and ALERT2

7
ALERT2 Receiver Decoder ALERT1 Receiver ALERT1 Transmitter ALERT1 ALERT1 and ALERT2 Antenna Splitter ALERT1 Receiver Decoder Polyphaser Battery Backup Battery with charger AC Power

8
Install powered preamp after polyphaser Increases received signal to offset splitter and filter insertion losses Install antenna splitter after preamp Antenna splitters have small insertion loss Install cavity or crystal filters after splitter Separate filters required for ALERT1 and ALERT2 receiver frequencies Crystal filters have the best performance as filters Very compact size and inline installation 7dB insertion loss requires preamp for signal boost 8 week delivery so order in advance

9
ALERT1 Receive ALERT2 Receive Receiver Antenna AC Power Supply PreAmpSplitter

10
ALERT2 Receiver Decoder ALERT1 Receiver ALERT1 Transmitter ALERT1 ALERT1 and ALERT2 Antenna Splitter Crystal Filter ALERT1 Receiver Decoder Polyphaser Battery Backup Battery with charger AC Power

11
Connect network cables to ALERT1 and ALERT2 network ports ALERT2 receiver time is synced from internet Base station computers can make IP connections to receiver for data collection Network connection types Listen on TCP port for connections from multiple base station servers Make a connection to a base station server

12
ALERT2 Receiver Decoder ALERT Base Station ALERT1 Decoder ALERT1 Receiver Serial ALERT1 Transmitter ALERT1 Audio X ALERT1 and ALERT2 Antenna Splitter Network Crystal Filter ALERT1 Receiver Decoder Polyphaser AC Power Battery with charger Battery Backup

13
Connect serial cables to ALERT1 and ALERT2 serial ports Serial cable to portserver Base station computers can make IP connections to portserver for data collection Network connection required for ALERT2 receiver for time sync

14
ALERT2 Receiver Decoder ALERT Base Station ALERT1 Decoder ALERT1 Receiver Serial ALERT1 Transmitter ALERT1 Audio X ALERT1 and ALERT2 Antenna Splitter Network time sync Crystal Filter ALERT1 Receiver Decoder Polyphaser AC Power Battery with charger Battery Backup Serial PortServer Serial Network

15
Check type and gender of antenna cable connectors Polyphasers, splitters, crystal filters connect to N male cable connector ALERT2 receiver connects to a BNC male connector Connecting cable from polyphaser to splitter Check length of cable required Remove existing polyphaser from ALERT1 receiver? Preamp increase in signal level for ALERT1 may require a higher squelch level in radio receiver -104 dB instead of -113 dB

16
50386 ALERT1 repeater trade up supported ALERT2 Concentrator Receive ALERT1, transmit ALERT2 50386 time sync with GPS Battery, GPS status, local sensors transmit in ALERT2 Legacy ALERT1 transmit as well as ALERT2 ALERT2 Repeater Receive ALERT1 and ALERT2 on same antenna but two different radios Legacy ALERT1 transmit as well as ALERT2 on third radio

21
Phase 1 converts ALERT1 repeaters into ALERT2 concentrators Receive ALERT1, transmit ALERT2 Transmit ALERT1 for parallel legacy system Single or dual antenna installations Phase 2 converts ALERT2 concentrators into ALERT2 repeaters Receive ALERT1 and ALERT2, transmit ALERT2 Antenna splitter and filter use same receive antenna for ALERT1 and ALERT2 Transmit ALERT1 for parallel legacy system Single or dual antenna installations

22
ALERT1 Receive ALERT2 Receive Receiver Antenna AC Power Supply PreAmpSplitter

23
ALERT1 Receive ALERT2 Receive Repeater Antenna PreAmp Splitter Battery

24
Upgrade existing 50386 ALERT1 repeater Add ALERT2 encoder and GPS antenna to repeater Receive ALERT1, transmit ALERT2 Battery, GPS status, local sensors transmit in ALERT2 Single omni antenna repeater Standard concentrator configuration only Dual antenna repeater Omni receive, directional transmit Crystal filter can be added to receive antenna ALERT1, ALERT2 transmit on same and antenna

25
ALERT2 Transmit Polyphaser ALERT1 Receive 50386 Repeater ALERT1 Modem ALERT1 Transmit ALERT1 Receive 50386 Repeater ALERT1 Modem ALERT2 Encoder Polyphaser ALERT1 Antenna OLD: ALERT1 receive, ALERT1 transmit UPGRADE: ALERT1 receive, ALERT2 transmit Polyphaser GPS Antenna ALERT1,2 Antenna

26
Polyphaser ALERT1 Receive 50386 Repeater ALERT1 Modem ALERT1 Transmit ALERT1 Receive Antenna OLD: ALERT1 receive, ALERT1 transmit UPGRADE: ALERT1 receive with preamp, crystal filter, ALERT2 transmit Polyphaser ALERT1 Transmit Antenna Polyphaser ALERT1 Receive 50386 Repeater ALERT1 Modem ALERT1 Receive Antenna Polyphaser ALERT1 Transmit Antenna ALERT2 Transmit ALERT2 Encoder Polyphaser GPS Antenna Crystal Filter Pre AMP

27
Polyphaser ALERT1 Receive 50386 Repeater ALERT1 Modem ALERT1 Transmit ALERT1 Receive Antenna OLD: ALERT1 receive, ALERT1 transmit UPGRADE: ALERT1 receive with preamp, crystal filter, ALERT1/ALERT2 transmit Polyphaser ALERT1 Transmit Antenna Polyphaser ALERT1 Receive 50386 Repeater ALERT1 Modem ALERT1 Receive Antenna Polyphaser ALERT1 Transmit Antenna ALERT1/2 Transmit ALERT2 Encoder Polyphaser GPS Antenna Crystal Filter Pre AMP

28
Upgrade existing 50386 ALERT1 repeater Add ALERT2 encoder and GPS antenna to repeater Add ALERT2 receive radio, demodulator, decoder Receive ALERT1 and ALERT2, transmit ALERT2 Battery, GPS status, local sensors transmit in ALERT2 Omni receive antenna shared by two radios Preamp, splitter for ALERT1, ALERT2 receiver radios Crystal filters for ALERT1, ALERT2 radio receivers Dual antenna required for filter use Dual antenna repeater ALERT1, ALERT2 transmit on third radio and antenna

29
Polyphaser ALERT1 Receive 50386 Repeater ALERT1 Modem ALERT1 Transmit ALERT1 Receive 50386 Repeater ALERT1 Modem ALERT2 Encoder Polyphaser ALERT1 Antenna OLD: ALERT1 receive, ALERT1 transmit UPGRADE: ALERT1, ALERT2 receive, ALERT2 transmit ALERT2 Receive Transmit Antenna Splitter ALERT2 Demod ALERT2 Decoder ALERT1,2 Antenna Polyphaser GPS Antenna

30
Polyphaser ALERT1 Receive 50386 Repeater ALERT1 Modem ALERT1 Transmit ALERT1 Receive Antenna OLD: ALERT1 receive, ALERT1 transmit UPGRADE: ALERT1,2 receive with splitter, crystal filters, ALERT2 transmit Polyphaser ALERT1 Transmit Antenna Polyphaser ALERT1 Receive 50386 Repeater ALERT1 Modem ALERT1,2 Receive Antenna Polyphaser ALERT2 Transmit Antenna ALERT2 Transmit ALERT2 Encoder Polyphaser GPS Antenna Crystal Filter Antenna Splitter ALERT2 Demod ALERT2 Decoder ALERT2 Receive Crystal Filter

31
Polyphaser ALERT1 Receive 50386 Repeater ALERT1 Modem ALERT1 Transmit ALERT1 Receive Antenna OLD: ALERT1 receive, ALERT1 transmit UPGRADE: ALERT1,2 receive with splitter, crystal filters, ALERT1,2 transmit Polyphaser ALERT1 Transmit Antenna Polyphaser ALERT1 Receive 50386 Repeater ALERT1 Modem ALERT1,2 Receive Antenna Polyphaser ALERT1,2 Transmit Antenna ALERT1,2 Transmit ALERT2 Encoder Polyphaser GPS Antenna Crystal Filter Antenna Splitter ALERT2 Demod ALERT2 Decoder ALERT2 Receive Crystal Filter

32
ALERT2 repeater firmware does not support pass block lists 50386 repeater stills supports ALERT1 receive pass/block lists in concentrator mode Firmware upgrade in 2015 will add this feature

33
ScadaLynx Toolbox version 2.0 supports ALERT2 Example configurations supplied repeater types Single antenna repeater Dual antenna repeater Dual antenna repeater with ALERT1 transmit Example configurations supplied for sensor types No sensors Rain only Rain and level Weather station

34
ScadaLynx Toolbox sets station ID and ALERT2 source address on DCU tab

35
ALERT1 port setup as receive only ALERT2 encoder on COM2 is a repeater

36
Use default ALERT2 Airlink parameters Maxon SD-125E V2 use inverted modulation

37
Set Hop Limit to 0 to prevent repeat of repeater battery, GPS, and local sensor reports

38
Set repeater frame and slot size 15 second frame, 10 second offset, 5 second length

39
Check GPS time sync status every 1 minute 15 minute timeout on power up GPS time sync lock in 15 min

40
Set ALERT1 radio for no repeat on ALERT1 Repeat on ALERT2 if in pass/block range

41
ALERT2 reports received bypass the 50386 and are repeated by the ALERT2 encoder directly

42
HydroLynx provides a kit to upgrade 5096 and 50386 transmitters to ALERT2 ALERT2 encoder PCB Mounting hardware Power harness Internal programming cable GPS antenna Mounting bracket, polyphaser, cables, strain relief, ties SMA antenna bulkhead connector and internal harness Maxon radio hardware ALERT2 radio harness and Firmware update

43
REMOVE 5096 PCB RIBBON CONNECTORS- J1 & 2, POWER -J3, RADIO -J4 & CONSOLE -J5 REMOVE 5096 PCB ASSEMBLY FROM MTG PLATE - SAVE WINGNUTS REMOVE MAXON RADIO FROM MTG PLATE - SAVE HARDWARE REMOVE RADIO HARNESSES THEY WILL NOT BE USED.

44
DRILL TOP PLATE - USE 1/4" DRILL BIT - SEE PHOTO FOR PLACEMENT. USE A HAND PUNCH TO MARKSPOT FOR EASY DRILLING.INSTALL BULKHEAD CONNECTOR TIGHTEN WITH #6 NUT DRIVER. APPLY ALERT2 LABEL ON TOP PLATE.

45
SEE PHOTO FOR PLACEMENT MARK MTG HOLES ON PLATE Check position of the SMA antenna on the PCB Leave room for Rt angle SMA connector to be installed For easy drilling use a hand punch, mark center of holes DRILL PCB MTG PLATE - #30 DRILL BIT (.1360), FOR # 4 HARDWARE Do not install the PCB yet
, FOR # 4 HARDWARE Do not install the PCB yet")
46
Check if transmitter has holes drilled at bottom of plate, if not Place Maxon radio per photo, mark holes on plate Check that position of holes are not too close to the mounting rod, leave room for the head of the screws. For easy drilling use a hand punch, mark center of holes Drill mounting plate #25 drill bit (.1495), for #6 hardware Put right angle BNC on radio before mounting
, for #6 hardware Put right angle BNC on radio before mounting.")
47
USING #4 HARDWARE PROVIDED, INSTALL IN THIS ORDER: SCREW, INSERT THROUGH MTG PLATE; NYLON STANDOFF, NYLON NUT AND TIGHTEN NUT, ALERT2 PCB ASSY, NYLON NUT AND TIGHTEN NUT.

48
Y CABLE ALERT2 PCB; DB9 MALE- J6 (3 wires) 5096 PCB; DB9 MALE-J5 (5wires), DB9 FEMALE installed on DB9 bracket with 4-40x3/8" screws Remove the nut, standoff and 1- 1/4 “ screw from the top right PCB mount. Put the long screw through the bracket and screw it back into place, put the standoff and nut back on.

49
Connect power harness and ribbon cables PCB goes back in the same location, secure with wingnuts. Install new EPROM version 5.2

50
108503 INTERNAL GPS ANTENNA ; RT ANGLE SMA CONNECTOR ON ALERT2 PCB; STRAIGHT SMA CONNECTOR TO BULKHEAD SMA CONNECTOR UNDER TOP PLATE. 108504 ALERT2 PCB 6 PIN-J1 TO MAXON RADIO DB9 108505 ALERT2 PCB 2 PIN-J7 TO 5096 PCB J4 33 11 22 44

51
Remove any cables already on the mast so they will not be damaged. Drill a 5/8 hole in the mast about 9"up from the mast enclosure. Run the cables thru the mast, use long nose pliers to pull the connector through the hole. Install GPS Antenna on mast with Bracket + U-Bolt. The Snap Bushing is split so it will go around the coaxial cable, press the bushing in the 5/8 hole and install the strain relief provided.

52
Add Alert2 station types to database Assign station type to ALERT2 station upgrades Set point sensor ID numbers for ALERT2 stations

53
On NovaStar5 menu click Stations then Station Type List Click Edit for HydroLynx 5096 Click Copy to add a a new station type 33 44 11 22

54
Change station type name to HydroLynx 5096/A2 Change protocol from ALERT1 to ALERT2 Click Apply to save new station type 11 22 33

55
Change station type to ALERT2 station type: HydroLynx 5096/A2 Enter Source Address Click Apply to save changes Click Edit for point assigned to station 22 11 33 44

56
Set ALERT2 sensor ID for station point Match with remote station programming Common sensor types Click Apply to Save 11 22

57
Click System then Configuration List to setup ALERT2 data collection Click Edit for alert_port1 to update the ALERT1 data collection 33 11 22

58
Get ALERT1 network address from 5052RD-K Test Result Sheet Change ALERT1 data collection from serial port /dev/rtdd1 to IP address:port 192.168.1.91:2101 Click Apply to Save 11 22

59
Copy ALERT1 data collection and change name: alert_port2 Assign ALERT2 network address from 5052RD-K Test Result Sheet 192.168.1.90:4200 Change source to –S2 ALERT2 format: -Galert2 Click Apply to Save 11 44 22 33 55

60
Click Start for Execute command ALERT2 data collection is now running 11

Similar presentations


>")


