Download presentation
Presentation is loading. Please wait.

1
How to edit the P11 in PDF format June 2014

2
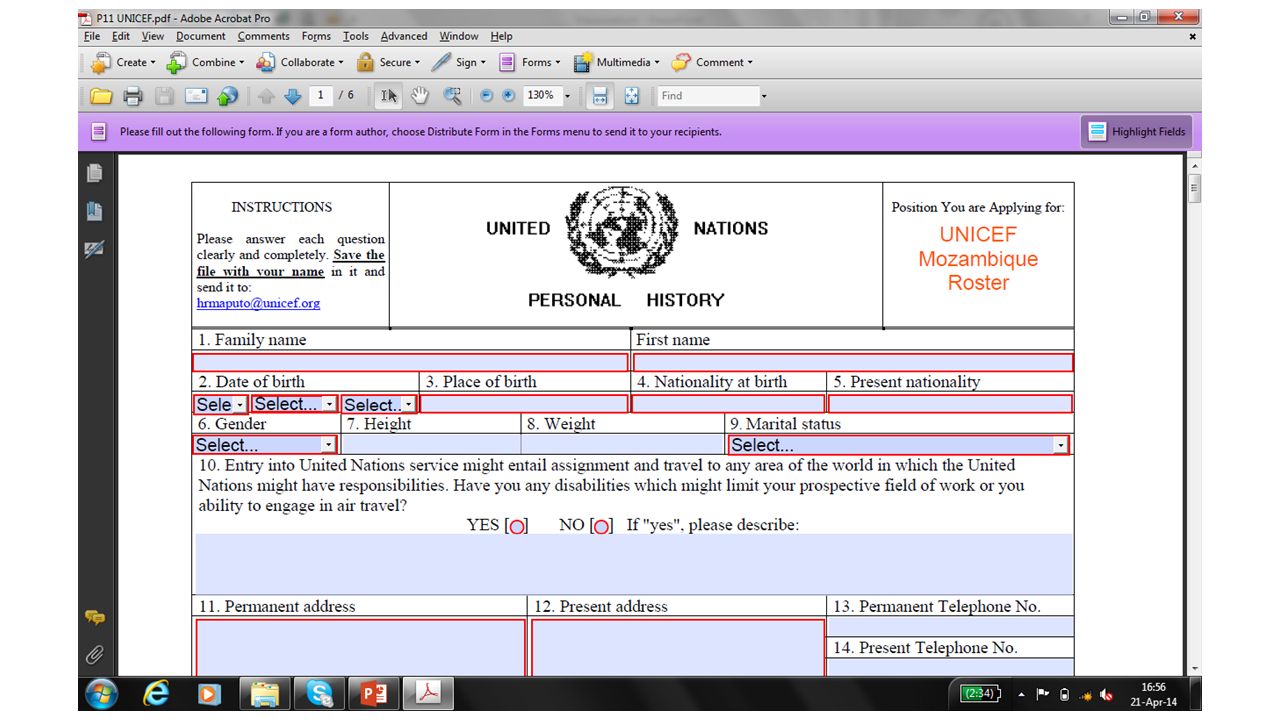
Open the file “P11 UNICEF.PDF” with Adobe Acrobat 9.3

4
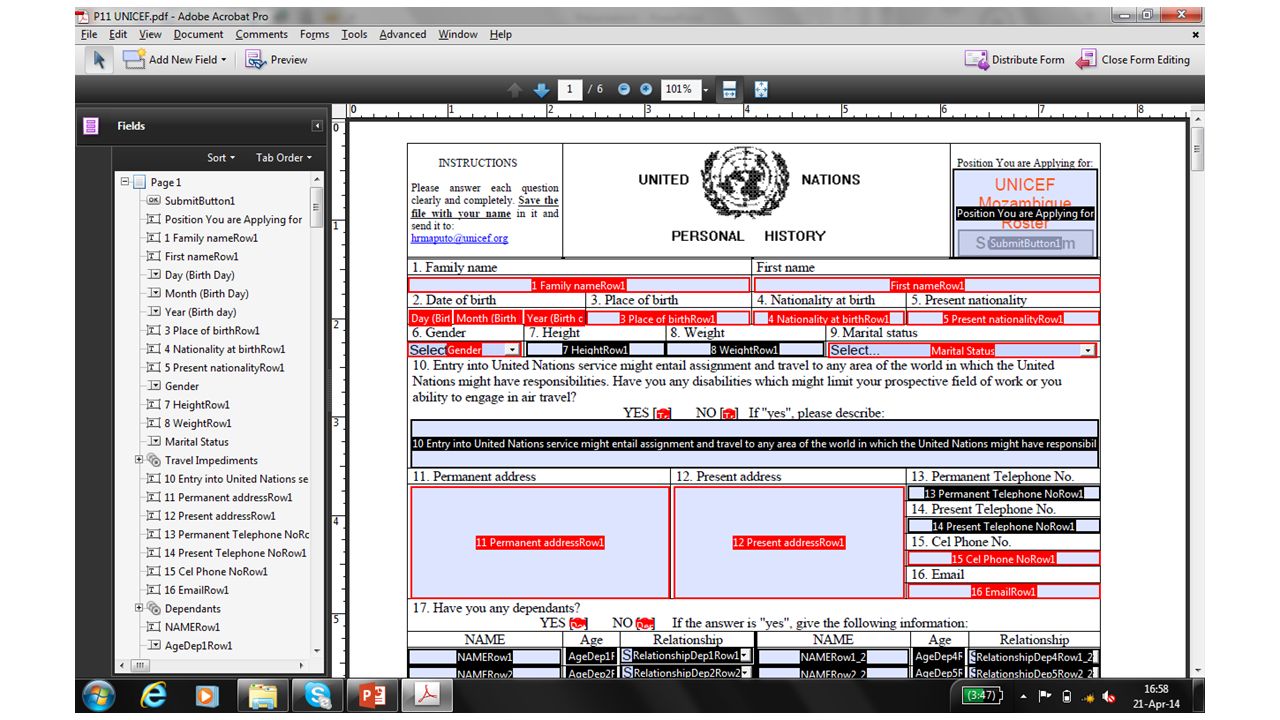
To be able to edit any field, select “Forms” then “Add or Edit Fields…”

5
This screen will appear. To edit any field, double click in the corresponding field i.e. “Position you are applying for”.

6
This screen will appear. Click “locked” to be able to edit this field.

7
This screen will appear. Go to “Options”.

8
This screen will appear. In the “Default Value” field, type the name of the vacant position. Then go back to “General” and click in “locked” again, so candidates could not change the field name.

9
Select “Close” and will bring you back to the editing original screen.

11
Save the file with the name for the specific vacant position. i.e. “Child Protection Officer FT”

12
Select “Close” and will bring you back to the editing original screen but now will have the new name of the file.

14
This screen will appear. Select “Previous”.

15
This screen will appear. Select “Save a local copy and manually send it later” and will pop up the field to specify where to save the file. Just click “Next”.

16
This screen will appear. Select “Finish” and the system will process your request. It is important to mention that two additional files will be generated.

17
This screen will appear. Just click in the top right “X”.

18
This screen will appear. Just close the application again by clicking the top right “X”.

19
If you look back where you started this process, you will se that you now have: The original file you created. Another one created for “Distribution” (automatically created). And one last file to collect the responses (automatically created).
. And one last file to collect the responses (automatically created)..")
20
How to collect and export P11 information to an excel spread sheet May 2014

21
Once you have receive all the applications, go to the explorer and open the responses file by selecting it, clicking the right button in your mouse and select “open with” and then “Adobe Acrobat 9.3”

22
This screen will appear. Click “add” to start consolidating the information.

23
This screen will appear. Select “Add File” and the system will automatically open the explorer in the folder where you have all the received responses as you will see in the next page.

24
Once the system opens this screen, select all the files you want to include in the consolidated report. Then select “Open”.

25
When you have all the files added, then select “OK” and the system will download and consolidate all the candidates in the responses file.

26
The system will display this message while working:

27
Once you see this screen, you select “Export” and then “Export all”

28
This screen will appear. The system will automatically select the folder where all the candidates information is. Here you just click “Save” and the information will be exported to “excel”. Please notice that the file extension at this stage is “.CSV”

29
Once the information has been exported, this message will appear. This means that now you have an excel file with all the candidates’ information. Remember that the file extension at this stage is “.CSV”

30
Open the corresponding folder in which you save the report and open the file with the extension “.CSV” Automatically excel will be used to open the file.

31
The spread sheet will look like this. At this stage I would recommend you to first save the file with “.XLS” extension. For this you have to select “File”, “Save as”, “Current Folder” and the next screen showed in the next page will appear.

32
You have to select “Excel Workbook (*.xlsx)” in the Save as type field and then…
 in the Save as type field and then…")
33
“Save”

34
The screen will not change but the extension of the file will.

35
From this point you can start managing the information first to an initial review for the minimum requirements (i.e. academic degrees, Nationality, experience, etc.) and then to present a shortlist like in the next page
 and then to present a shortlist like in the next page.")
36
For the shortlist I would recommend to assign green to those candidates who exceed the minimum requirements or you consider very good candidates, yellow for those who fulfill the minimum requirements and usually for the internal candidates I use the “institutional” blue. Also you could notice that I include the full list so the supervisor could take a look at it if needed. It’s important to mention that I don’t print anything but the “finalists” P11.

Similar presentations

 Data Entry Instructions for Annual Report of Immunization Status.>")
 follow the hyperlinks to navigate to the specified Topic.>")


>")


 (Adding Auto Signatures) (Setting Priorities)>")


>")


