Download presentation
Presentation is loading. Please wait.

1
Introduction To Clay

2
Ceramics Things made from clay, the basic material for all ceramic creations. Clay is created as a result of the decomposition of igneous rock, which makes up the entire earth’s crust. Everything you will do with clay involves the interplay of these 3 variables: Moisture Plasticity Heat

3
Origins of Ceramics Of all the arts, ceramics has perhaps the longest history, dating back to when people first learned to control fire. Theories: People first began to model clay as a diversion. People used clay for practical purposes.

4
Early Techniques The clay you work with in a studio has been processed and prepared to some degree. Early potters had to actually dig their raw material from the ground and prepare it. There were sometimes impurities that had to be taken out.

5
Primary Clay Clay found at the original site where it was formed by decomposing rock Secondary Clay Clay that has been transported from its original site by water, air or ice and deposited in layers elsewhere Where Clay is found:

6
Working with Clay Clay Properties Plasticity Shrinkage Texture Moisture Handling Clay

7
PLASTICITY Most beginners use highly plastic clay, or one that can easily take different shapes. PLASTIC – The property of clay that allows it to change shape without tearing or breaking. Numerous factors can make clay more plastic. You can spray it with water. You can store it in a bag with water. You can mix new plastic clay with the old.

8
SHRINKAGE All clay shrinks as they dry. Clay can crack when it shrinks if the potter doesn’t carefully monitor the drying process. It is frustrating the spend a lot of time on creating your artwork only to have it crack because you did not take the time to allow it to dry slowly.

9
TEXTURE The texture of a clay body can range from coarse to smooth. Some potters add sand or grog to change the texture of their clay.

10
MOISTURE All clay contains water. You can add water to clay to make it more workable or plastic. Add too much water, however, and the clay loses plasticity – it won’t hold any shape at all. Clay begins to dehydrate, or lose moisture, when it is exposed to air. You will occasionally need to rehydrate, or put water back into the clay, to keep it moist.

11
MOISTURE You can mist it with a spray bottle or dampen it with a wet sponge or damp paper towel. Once the clay is fired, it becomes permanently harder, stronger, and less likely to break. It can never become plastic again after being fired.

12
PREPARING THE CLAY Before you can make anything with clay, you’ll need to prepare it. All clay needs to be de-aired before you begin. Kneading or Wedging eliminates air bubbles and keeps the internal structure of clay more cohesive and consistent.

13
Kneading / Wedging Clay Working clay on a surface with the palms of the hands in order to remove air from it and obtain a uniform consistency Before making anything with clay, whether by hand or on the pottery wheel, the clay must be wedged so that it can survive the firing process. Pottery will explode in the kiln if air bubbles or impurities are in the clay or if certain areas are drier than others. In order to remove any air bubbles and evenly distribute water throughout the clay, it must be repetitively kneaded.

14
Clay Safety Tips Little bits of clay that end upon the surface of your table are harmless. However, when they are brushed onto the floor these crumbles break down into smaller and smaller particles which then scatter into the air you breathe. CAPTURE CLAY DUST WITH WATER. Use a wet sponge to clean tables, tools, wheels, and sinks. Brooms and brushes only make more dust.

15
SLIP A fluid suspension of clay in water used in joining clay pieces and for surface decoration. It has the consistency of yogurt.

16
STAGES OF CLAY Plastic Leather-hard Greenware / Bone Dry Bisqueware Glazeware

17
PLASTIC CLAY Clay is pliable and plastic. It is somewhat forgiving at this stage. It is at the “workable” consistency for slabs, coils, and throwing. Ware can be reclaimed at this stage.

18
LEATHER-HARD CLAY Clay is drier than plastic/workable clay but is somewhat stiffer. Clay has the consistency of a chocolate bar. Pots are incised and trimmed at this stage. Clay is still cool to touch and slightly darker. Ware can be claimed at this stage.

19
GREENWARE / BONE DRY CLAY Clay is chalky looking. It is not nearly as cool to the touch. It is VERY FRAGILE at this stage. Ware can still be reclaimed at this stage. Do NOT try to work clay at this stage.

20
Kiln A furnace, built of refractory (resistant to heat and melting) material, for firing ceramic ware
 material, for firing ceramic ware")
21
Firing The heating of clay or glaze to a specific temperature

22
Bisquit or Bisqueware First firing of piece. After firing, the piece will be much more brittle and whiter. Ware can NOT be reclaimed after being bisque fired.

23
Kilns and Firing Kilns are used to fire pottery Pottery is considered to be in the greenware stage until it is fired After its first firing, it is bisqueware Bisqueware can be covered with coats of glaze and fired again numerous times

24
Warping Distortion of a clay shape cause by uneven stresses during shaping, drying or firing

25
Cone Firing Pyrometric cones are devices that gauge heatwork (the combined effect of both time and temperature) when firing materials inside a kiln. Cones range from 022 (the coolest) to 42 (the hottest). Earthenware clay is fired around 1900 degrees Fahrenheit, or between cone 06 and cone 04.
 to 42 (the hottest). Earthenware clay is fired around 1900 degrees Fahrenheit, or between cone 06 and cone 04..")
26
Cone Small, pyramid-shaped forms of ceramic materials made to bend and melt at specific temperatures and gauge the temperature of the kiln

27
GLAZEWARE After piece has been glazed, the piece will be fired a second time. This time, the piece will obtain the qualities of the fired glaze. Many times this is a more glassy finish, but not all the time. Ware can NOT be reclaimed after firing.

28
How to use your clay Coil Method Pinching Slab Building Wheel Throwing

29
Coil Building The coil method is one of the oldest techniques in ceramics. To begin, you will roll strips of clay into a worm shape piece. This can be any shape or size, depending on how large the overall piece will be. After making the coils, you place them over one another and blend them together. This will latch the pieces as one. This can be repeated until you decide when the piece is large enough. This technique is good for making pots and different shapes.

30
Pinching clay together Pinching clay is a simple technique most beginners use. To start, you take a ball of clay and open a hole in the middle. Then, you start pinching the sides to form the shape you want. If you want a square, you pinch consistently to get four sides. If you want a circle, you pinch circler around the clay ball. When talking about “pinching,” this means you press two fingers together with the clay between them. You can push the clay outwards to increase the clays shape.

31
Slab building Slabs are long, flat, stretched pieces of clay. The best way to get a slab is to use a pin roller and consistently roll it on a chunk of clay. Next, you take the slab and lay it over a surface that you want your clay to form to. A good surface could be a bowl or jar. You can place the clay inside the object or over its outside to get that specific shape.

32
Slab Building Using molds! Hump Slump Press

33
Tools we can use!

34
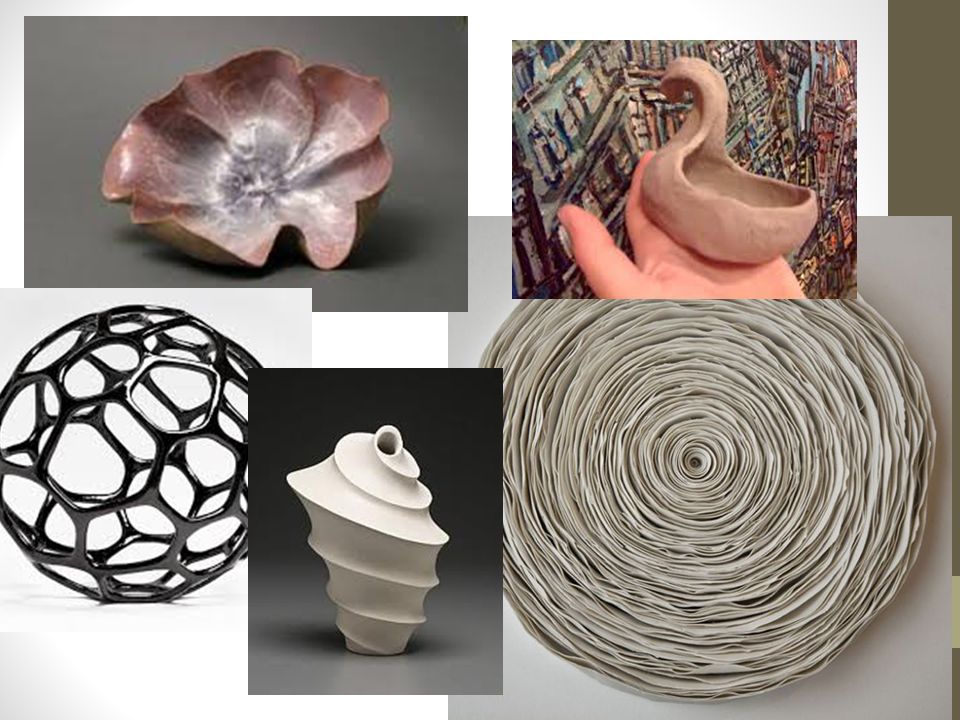
Now here is the project: The Frist Two: One Organic One Hard Edge Must include A closed form An open form Must utilize these processes… Using at least three of the techniques we have learned.

35
Wait… Organic, like nature… Yes and No. An "organic" or "natural" form is loose and undefined. Often things found in nature are organic forms, like clouds.

37
Hard Edge of or relating to geometry or to the principles of geometry. resembling or employing the simple rectilinear or curvilinear lines or figures used in geometry.

39
Ms. Green wants to see your thumbnails!!! Have a game plan so it doesn’t blow up… literally. Think about how you are going to attach it… support it… Be creative. If you ‘steal’ an idea, MAKE IT YOUR OWN! Push your self. We are going to trade off who practices wedging.

Similar presentations


)>")
 for holding something.>")


KV-TVR.>")
