Download presentation
Presentation is loading. Please wait.

2
*Created by Kay Wagner, Ph.D., Edina Public Schools, Edina, Minnesota Drawn images may be used freely, fair use laws apply to all other images

3
Inspired by Maurice Sendak’s book WHERE THE WILD THINGS ARE Making an Original Wild Thing Sculpture

4
ROARGNASH

6
Terrible Eyes

8
Terrible claws

9
We will be making an original Wild Thing sculpture...

10
Here are some examples of Wild Thing Sculptures from other artists...

11
Mexican Brunido Pottery Cat

12
The Only, Only Bird Alexander Calder, 1952 Calder created Contrast with a thick body and thin legs. Calder created Unity by repeating colors and shapes.

13
Mounted Knight William Accorsi Charm Robert Hudson 1964

14
Mexican Turtle Box The Mexican artist created Contrast with a rounded body and straight edge box. The Mexican artist created Unity by repeating colors and shapes.

15
The Generals Marisol 1961-62

16
Mexican Oaxacan Monster This Mexican artist created Variety by decorating the monster with different sized circles

17
African Wood Carving: Zebra This African artist varied the thickness of the lines to make his sculpture more interesting

18
Variety and Contrast Artists make their art work more exciting by adding Variety. They do this by using different colors, lines and shapes. Contrast is extreme variety and will make parts of an art work stand out.

19
Mexican Oaxacan Monster The eyes show contrast we notice them right away because they are larger than the other circles and the colors don’t appear in other places on the sculpture

20
In our Wild Thing Sculpture we will... Make our art work more exciting by adding Variety. We will use different colors, lines and shapes. We will also achieve unity by repeating some line shapes and colors.

21
Our wild thing sculpture will also be a box in which you can hide things.

22
To make your own original Wild Thing sculpture...

23
1 - 12X18 sheet light colored construction paper 1- Pencil 1- eraser 1- scissors 1- Glue 1- tongue depressor (bone folder) Each student needs: ELMER’S GLUE-ALL #2 #3
 Each student needs: ELMER’S GLUE-ALL #2 #3")
24
Lay your paper so it is horizontal on the table in front of you

25
Not vertical

26
Fold the long bottom edge up to the top

30
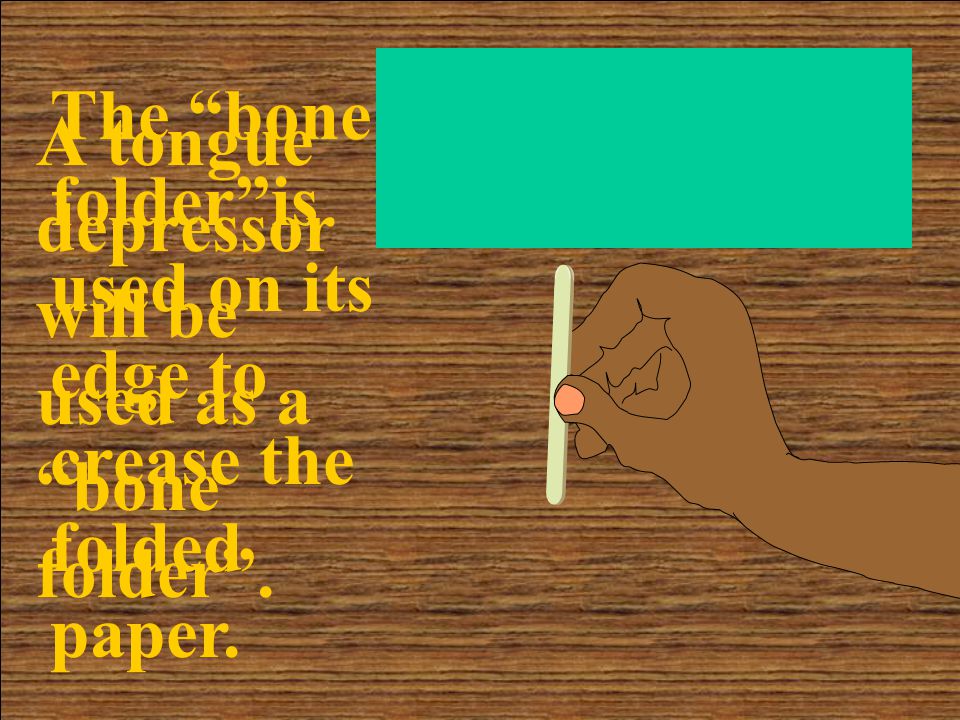
A tongue depressor will be used as a “bone folder”. The “bone folder”is used on its edge to crease the folded paper.

31
Using the edge of the “bone folder” crease the fold

32
Unfold the sheet, keeping it horizontal

36
Fold the long edges so that they line up with the center fold

40
Crease the long edges with the bone folder

41
Unfold the sheet, keeping it horizontal

43
Unfold the sheet, keeping it horizontal fold

45
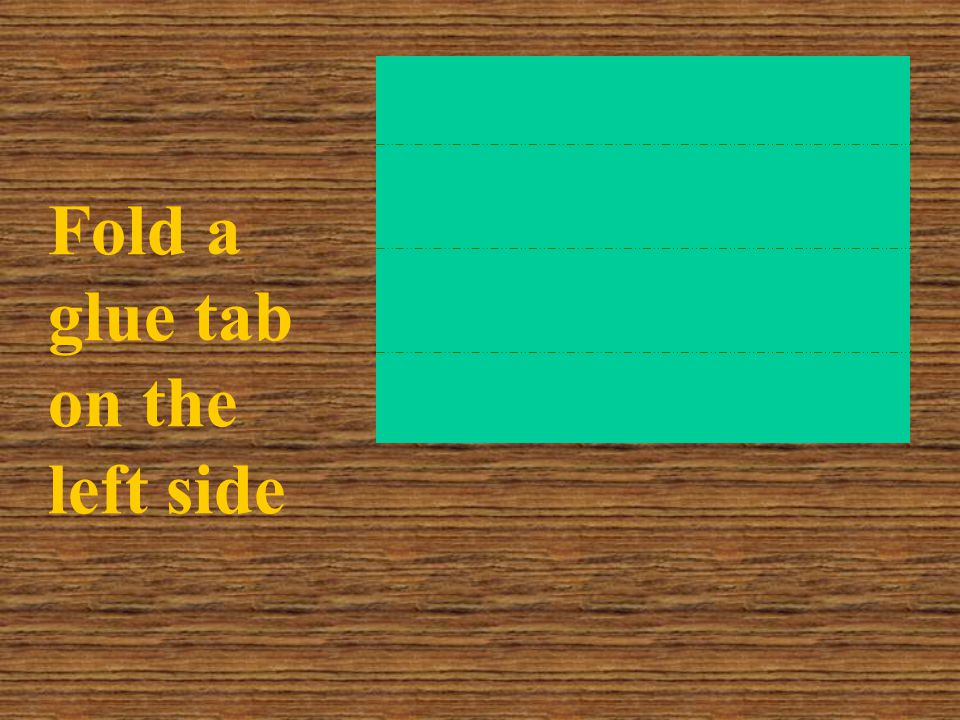
Fold a glue tab on the left side

46
4ZZ Fold a glue tab on the left side

47
4ZZ Fold a glue tab on the left side

48
4ZZ Crease the edge with the bone folder.

49
Line up the glue tab fold with the opposite edge.

50
4ZZ Line up the glue tab fold with the opposite edge.

53
Crease with the bone folder

54
Unfold

56
4ZZ Unfold

58
Fold the short edges into the center fold. Keep the glue tab folded in.

62
Crease the edges.

63
Unfold all the edges.

67
Unfold all the edges, even the glue tab.

68
Unfold all the edges even the glue tab.

69
Cut away the top and bottom of the glue tab.

71
Save the two pieces that you cut off.

72
Using a pencil number the top and bottom rectangles. 2 3 4 5 67 8 1 1

73
Write your name and section in the top center of flap number 5 2 3 4 5 67 8 1 John Smith 3A

74
Smear the glue over the entire back of each scrap. 2 34 5 67 8 1 John Smith 3A

75
Glue the two scraps over the fold at the bottom of rectangle number 2. 2 34 5 67 8 1 John Smith 3A

76
Hold them down with one hand for the count of 50. 2 34 5 67 8 1 John Smith 3A

77
Draw 10 dots and one X in the places indicated. 2 34 5 67 8 1 John Smith 3A Equal

78
Table Folder 1- Pencil 1- eraser 1- scissors 1- Glue 1- (bone folder) 1 - Permanent Black Marker Get the following: ELMER’S GLUE-ALL #2 #3 #1 Black Marker
 1 - Permanent Black Marker Get the following: ELMER’S GLUE-ALL #2 #3 #1 Black Marker")
79
Terrible Eyes

80
2 34 5 67 8 1 We will be drawing the eyes by connecting the dots in rectangle 2 John Smith 3A

81
Some shape suggestions

82
2 34 5 67 8 1 Draw the eyes by connecting the dots in rectangle 2 John Smith 3A

83
Two kinds of terrible claws

84
2 34 5 67 8 1 We will be drawing the feet and claws by connecting the dots in rectangles 5 and 7. John Smith 3A

85
Some shape suggestions 5 55 55 5 John Smith 3A John Smith 3A John Smith 3A John Smith 3A John Smith 3A John Smith 3A

86
You can achieve Contrast by using different kinds of lines for the eyes and the claws 5 John Smith 3A 5 John Smith 3A Rounded Claws Pointed eyes Pointed Claws Rounded eyes

87
2 34 5 67 8 1 Draw the feet and claws by connecting the dots in rectangles 5 and 7. John Smith 3A

88
Terrible teeth

89
2 34 5 67 8 1 We will draw the teeth starting with a straight line at the glue tab, connecting all the dots and ending on the X. John Smith 3A A straight line on the fold Stop at the X.

90
2 34 5 67 8 1 Some examples of terrible teeth John Smith 3A

91
2 34 5 67 8 1 Cut between the sections John Smith 3A

92
2 34 6 8 1 5 7 Cut around eyes and feet John Smith 3A

93
2 34 6 8 1 5 7 Cut on the teeth line. John Smith 3A

94
2 34 6 8 1 5 7 Cut on the teeth line. John Smith 3A

95
34 1 5 6 8 7 Cut on the teeth line. John Smith 3A

96
34 1 5 6 8 7 Turn paper over to the clean side John Smith 3A

97
Turn paper over to the clean side

98
Out line the eyes, feet, and teeth Use the permanent black marker Black Marker

99
Out line the eyes, feet, and teeth Black Marker

100
Finish the details of the eyes, nose and feet

101
Wild things also have pattern and texture. A pattern of lines A pattern of shapes Lines creating texture

102
Now add pattern and/or texture

103
1 - box of assorted water color markers for each table You will need: Markers #2

104
Using watercolor markers. Color in the shapes. Repeat colors to achieve unity in your design

105
To assemble the wild thing, begin by turning it over to the back

106
34 1 5 6 8 7 John Smith 3A

107
34 1 5 6 8 7 John Smith 3A Fold Side 1&5 over, leave the glue tab unfolded.

108
34 1 5 6 8 7 John Smith 3A Apply glue to the glue tabs. ELMER’S GLUE-ALL ELMER’S GLUE-ALL

109
34 1 5 6 8 7 John Smith 3A Apply glue to the glue tabs. ELMER’S GLUE-ALL ELMER’S GLUE-ALL

110
34 1 5 6 8 7 John Smith 3A Smear the glue out to the folds.

111
34 1 5 6 8 7 John Smith 3A Fold side 4 & 8 over the glue tabs Press in place for 60 seconds

112
34 1 5 6 8 7 John Smith 3A Open up the box form.

113
Fold the top side flaps in.

115
Place glue on the back top flap. ELMER’S GLUE-ALL ELMER’S GLUE-ALL

116
Fold flap down.

118
Turn wild thing over.

119
Turn wild thing over

120
Fold back flap in.

121
ELMER’S GLUE-ALL ELMER’S GLUE-ALL ELMER’S GLUE-ALL ELMER’S GLUE-ALL Apply glue to the front flap.

122
Fold flap down.

126
Turn the wild thing over and open the mouth

128
Press your fist into the bottom to hold the glued flaps flat

129
Close the wild thing’s mouth and you are finished

131
Set your Wild Thing on a black sheet of paper

132
Glue your label right in front of your Wild Thing

133
Draw around your Wild Thing and your label.

134
Remove the Wild Thing and cut on the pencil line. Cut the Pencil line completely off.

135
Turn the Wild thing upside down Place one tiny drop of glue on the bottom of each foot. ELMER’S GLUE-ALL

136
Turn the Wild thing upside down Place one tiny drop of glue on the bottom of each foot. ELMER’S GLUE-ALL

137
Turn the Wild thing right side up, and place it behind the label on the black paper.

138
Press on the feet for the count of 30.

139
Lay your Self Assessment Sheet next to your Wild Thing

140
Self Assessment Sheet The top part tells about the unit and how we made the Wild Thing.

141
Self Assessment Sheet Here are some questions to help the grownups at home talk to you about your Wild Thing.

142
Self Assessment Sheet The Student Self Assessment will help you judge your artwork.

143
Self Assessment Sheet NoSomewhatYes

144
Self Assessment Sheet NoSomewhatYes

145
Self Assessment Sheet NoSomewhatYes

146
Self Assessment Sheet NoSomewhatYes

147
Self Assessment Sheet SomewhatYes No

148
Self Assessment Sheet SomewhatYesNo

149
Self Assessment Sheet SomewhatYesNo

150
Self Assessment Sheet SomewhatYesNo

151
Self Assessment Sheet Somewhat Yes No

152
Hand in your Wild Thing as directed.

Similar presentations


 Paper version This guide is intended to be.>")


