Download presentation
Presentation is loading. Please wait.

1
Ext 10 Mr. Jean October 2 nd, 2012

2
The plan: Video clip of the day The Timeline

3
Technology Timeline Part #3

4
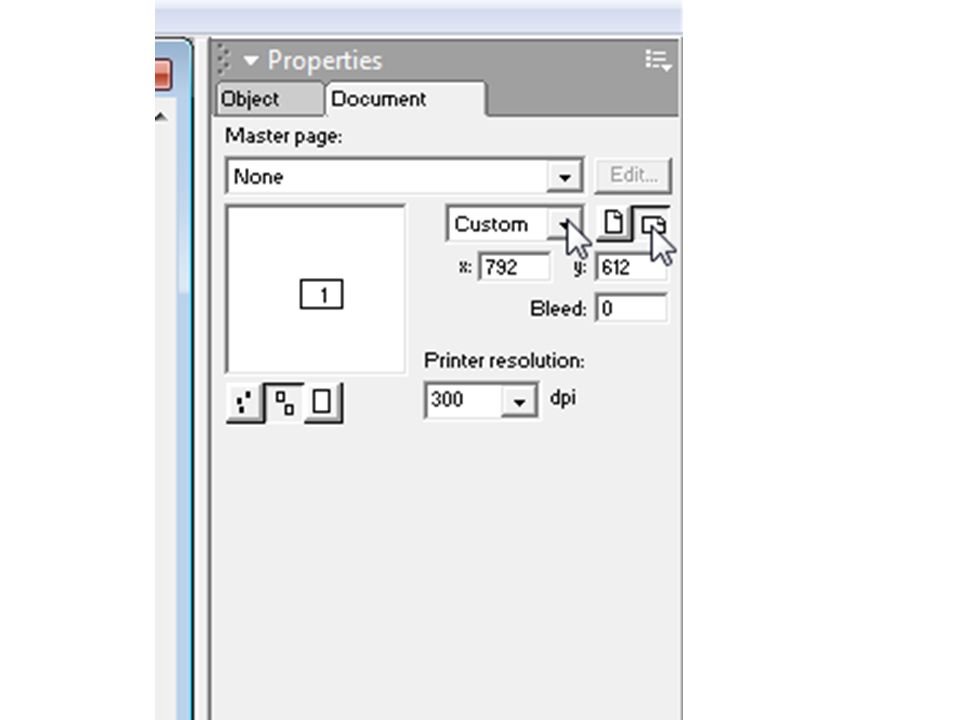
Putting the Timeline together: Method: 1) Open Macromedia Freehand, create a new file. Over in the right hand side of the screen, under Properties, click on the documents tab. Make the changes shown below:

6
2. On the bar at the bottom of the screen, change the units of measurement from Points to Inches:

7
3. Back in the Document palette, change y to 6. Hit enter to change the page size.

8
4. Open up one of the drawings you have completed:

9
5. If the picture layer is visible make it invisible by clicking off the checkmark that is beside the layer it is on. Take the black arrow tool and click and drag a selection box around the entire drawing to select it all. With it selected, go to Modify>Group to turn it into one object

10
5.With the object still selected, go to Edit>Copy. Close or minimize this file. 6. Open up the new file you made and go Edit>Paste to paste the drawing into the new file:

11
7. With the black selection arrow, select on one of the blue dots at the corners, press and hold shift, and shrink the drawing down:

12
8. Repeat these steps until all of your drawings are on this one file:

13
10. Choose a color to convert the drawings to. To convert the color, select the drawing with the Black selection arrow and go to Modify>Ungroup. Then select the outline color as shown below. Finally, with the drawing still select to Modify>Group to regroup the drawing. Repeat until all are converted.

14
11. Next we will create a background color for the flowchart. Start by making a new layer. Use the rectangle tool to draw a big rectangle covering the whole page. With the rectangle selected, choose a color to fill in with:

15
12. Click the new layer and drag it down to the bottom of the stack of layers to move the rectangle below the drawings:

16
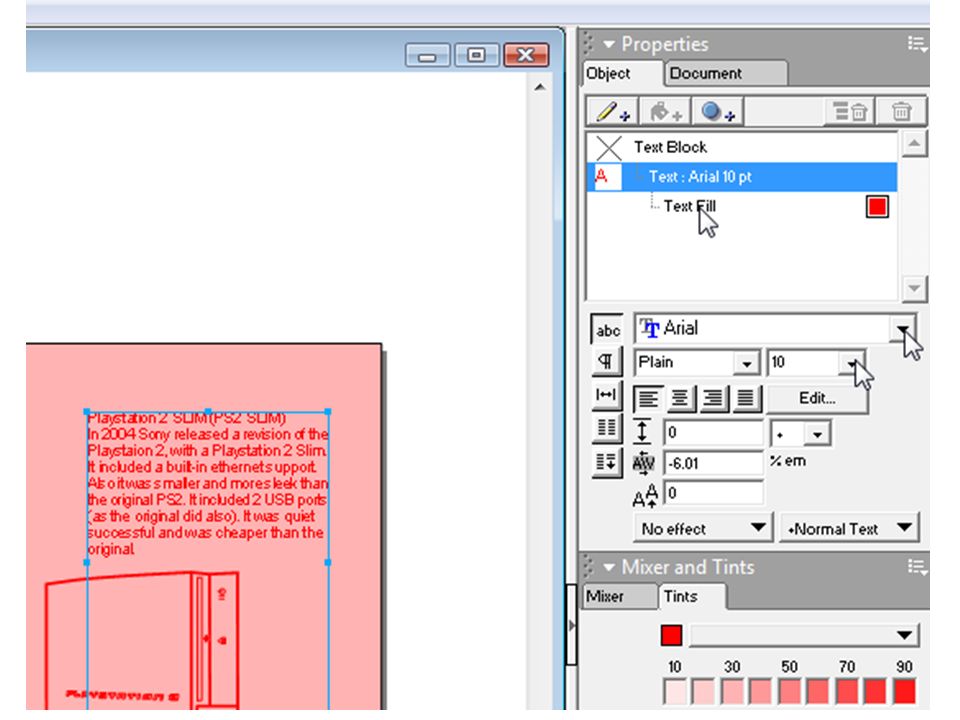
13. Adding text: You can use the same text from the power-point presentation you wrote, or you can write new text. To apply the text, copy and paste it into the Freehand document. You can resize it and change the type of font and color of font over in the Objects palette. Use Ariel or something Non-serif for the type of font at about 9 – 10 pts in size. This will seem small, or you may even see grey boxes where the type should be but that’s OK.

18
14. To draw arrows use the pen tool to draw a line where you want the arrow to go, then change the thickness and color of the line in the Objects palette, you can also give the line an arrow head in the Objects palette:

19
15. Try to align text and pictures into some sort of plan, don’t simply place them randomly. Have an idea of how you want the reader’s eyes to follow the diagram.

Similar presentations


![Animating Web Graphics Using Adobe Edge. 1. Setting up your project Create a new folder on your desktop Call it [YOURNAME]infographic INSIDE THAT FOLDER,](/13/3991121/big_thumb.jpg "Animating Web Graphics Using Adobe Edge. 1. Setting up your project Create a new folder on your desktop Call it [YOURNAME]infographic INSIDE THAT FOLDER,>")


 Part 1: Basic Vocabulary Part 2: Cursors Part 3: Insert Your Text Part 4: Insert Your Pictures Part 5: Basic Tools &>")


>")
