Download presentation
Presentation is loading. Please wait.

1
Digital Photography This professional development course is designed to help teachers enhance their teaching through the integration of digital photography. Instructed by: M.Sogoian

2
Prior Knowledge Need Basic knowledge using a Computer Basic knowledge using the Internet Previous experience using a Digital Camera An individual desire to improved your digital photo taking skills

3
Equipment Need Digital Camera with the following features: Auto Mode Portrait Mode Close up Mode Sport Mode Landscape Program Shutter-priority Tv Aperture-priority Av

4
Equipment Need continued Windows OS Computer or Mac OS Computer Adobe Elements Mozilla Fire Fox Card reader Tripod

5
Standards NETS standards: Standard 2: PLANNING AND DESIGNING LEARNING ENVIRONMENTS AND EXPERIENCES. Teachers plan and design effective learning environments and experiences supported by technology. Standard 3: TEACHING, LEARNING, AND THE CURRICULUM. Teachers implement curriculum plans that include methods and strategies for applying technology to maximize student learning. Standard 5: PRODUCTIVITY AND PROFESSIONAL PRACTICE. Teachers use technology to enhance their productivity and professional practice. Your final project must clearly identify the New York State’s Learning standards that have been enhance through the application digital photography.

6
Today’s Objectives Day 1 Using the Auto setting on a camera Getting your camera to focus on what you want it to focus on Rule of Thirds Framing Getting your photos off your Camera Using a Card Reader Choosing were and how save photos Looking at your photos using Previewer Changing you photo size in Photoshop Elements 3 Emailing photos Creating a yahoo email account Attaching a photo to your email

7
Using your camera’s Auto Mode When taking photos using the Automatic Mode the camera adjusts the camera’s aperture, shutter speed, and ISO settings. Automatic Mode

8
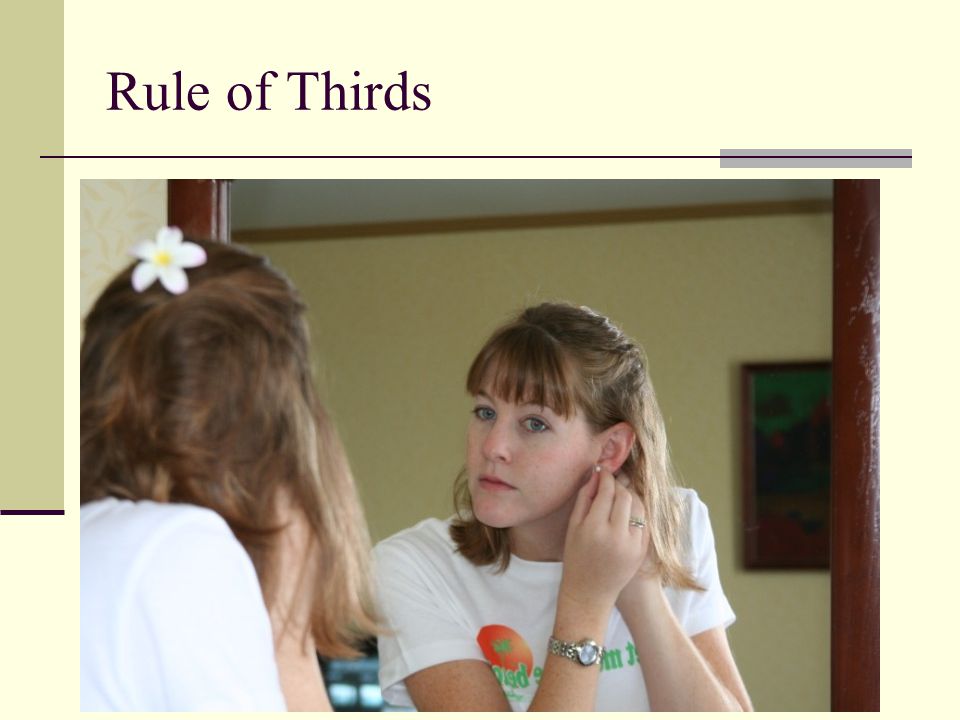
Rule of Thirds http://photoinf.com/Golden_Mean/John_Longenecker/Rule_of_Thirds.htm

9
Rule of Thirds

14
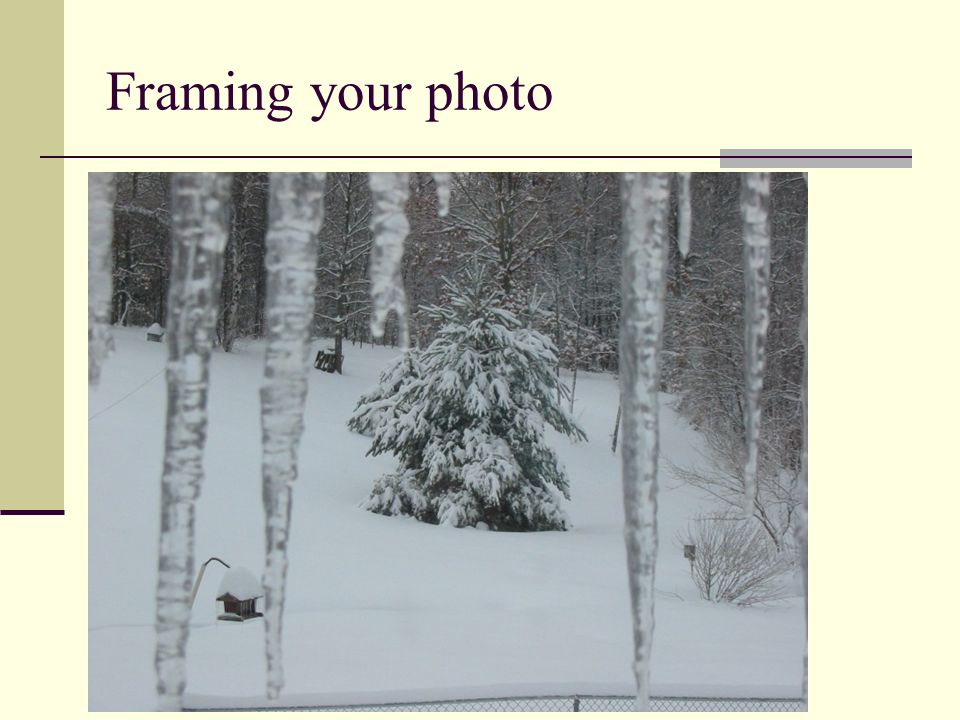
Framing your photo

19
Getting your photos off your camera Camera to Computer or Card Reader to Computer

20
Changing your Photo Size in Photoshop Elements

21
Emailing Photos Setting up a Yahoo account www.yahoo.com Attaching a Photo to an Email Email me your best photo from today Sending email

22
Today’s Objectives Day 2 Photos taking clinic: Flash Closer is better Look at your subject in the eyes Rule of thirds Download your photos using a Card Reader and save them in your folder Look at your photos using Previewer Share your best 3 photos by saving them on the Flash drive Critique the class photos

23
Flash

24
Closer is Better Good Better

25
Look at your subject in the eyes GoodBetter

26
Rule of Thirds http://photoinf.com/Golden_Mean/John_Longenecker/Rule_of_Thirds.htm

27
Today’s Objectives Day 3 Setting your photo Size and Quality on your camera Using Portrait setting Using Close up setting Using Sport Setting Download your photos using a Card Reader and save them in your folder Look at your photos using Previewer Resize your favorite 3 photos Share your best photo using a Card Reader and a Flash drive

28
Using your camera’s Portrait Mode Use this mode when you want the subject to appear sharp and the background to blur. Portrait Mode

29
Using your camera’s Portrait Mode

30
Using your camera’s Close-up Mode Use this mode when to take a close up photo of an object. Close-up Mode

31
Using your camera’s Close-up Mode

34
Using your camera’s Sport Mode This is for fast-moving subjects when you want to freeze the action. Sport Mode

35
Using your camera’s Sport Mode

37
Today’s Objectives Day 4 Share your best photo using a Card Reader and a Flash drive Using Landscape setting ISO 100-??? Using and Setting up (P) Program mode Take same photo using ISO 100-to whatever you camera maximum ISO setting is. Download your photos you took when adjusting your ISO setting using a Card Reader Observer the difference between each photo you took using Previewer Choose and set your cameras ISO setting in Program
 Program mode Take same photo using ISO 100-to whatever you camera maximum ISO setting is. Download your photos you took when adjusting your ISO setting using a Card Reader Observer the difference between each photo you took using Previewer Choose and set your cameras ISO setting in Program.")
38
Using your camera’s Landscape Mode This is for wide scenic views, night scenes, mountains, etc. Landscape

39
Using your camera’s Program Mode Allows you to set your camera’s ISO setting and determine if a flash will fire. Program Mode

40
What does the ISO setting do? High ISO setting (1600) allows you to take photos with less light. But causes you to see noise. (Noise makes the photo look grainy) Low ISO setting(100) allows for smooth photos without noise. But needs a substantial amount of light.
 Low ISO setting(100) allows for smooth photos without noise. But needs a substantial amount of light..")
41
ISO 100

42
ISO 200

43
ISO 400

44
ISO 800

45
ISO 1600

46
ISO 100 vs. 1600 Notice how smooth the black looks in this photo. Notice how GRAINY the black looks in this photo.

47
Today’s Objectives Day 5 Shutter speed (Tv mode) Effect of shutter speed Aperture size (Av modes) Effect of Aperture size Download your photos you took when adjusting your Shutter speed and Aperture size using a Card Reader Observer the difference between each photo you took using Previewer Share your best 3 photos by saving them on the Flash drive Show previous teaching units that have been enhanced through the use of digital photography
 Effect of shutter speed Aperture size (Av modes) Effect of Aperture size Download your photos you took when adjusting your Shutter speed and Aperture size using a Card Reader Observer the difference between each photo you took using Previewer Share your best 3 photos by saving them on the Flash drive Show previous teaching units that have been enhanced through the use of digital photography")
48
Shutter speed (Tv mode) Fast Shutter speed Slow Shutter Speed 1600/1 (second) 13” (seconds)
 Fast Shutter speed Slow Shutter Speed 1600/1 (second) 13 (seconds)")
49
Aperture size (Av modes) F2.5 (Small Depth of Field) F8 (Large Depth of Field) Background in Focus Background out of Focus
 F2.5 (Small Depth of Field) F8 (Large Depth of Field) Background in Focus Background out of Focus")
50
Aperture size (Av modes) F8 (Large Depth of Field) http://herron.50megs.com/aperture%20art.gif Background in Focus Background out of Focus
 F8 (Large Depth of Field) Background in Focus Background out of Focus")
51
Previous projects that were enhanced through Digital Photography PowerPoint Personalized math worksheet Create a story that goes along with a photo that the student took Have student go on a scavenger hunt and take a photo an object for each letter in the alphabet. Then create alphabet study sheet. Create a book illustrated by the author's photographs

52
Instruction enhanced through the use of Digital Photography Example One Example Two Example Three Come to class next week with a Project that you would like to develop that utilizes Digital Photography to enhance Instruction.

53
Today’s Objectives Day 6 Create a classroom project that will utilize digital photography

54
Project Assessment (part 1)
")
55
Project Assessment (part 2)
")
Similar presentations