Download presentation
Presentation is loading. Please wait.

1
Thule Smart RV™ Pod Kit Installation For Smooth-Sided Fiberglass RVs

2
After reviewing all potential interior
Step 1 After reviewing all potential interior and exterior wall obstructions, locate the Pod mounting line by using a stud finder. Turn off all utilities.

3
Using a straight edge or chalk line, mark a Pod mounting line.
Step 2 Using a straight edge or chalk line, mark a Pod mounting line. Note: Pod spacing is determined by the accessory being mounted. Some accessories will require 16” spacing, some accessories will require 12” spacing, some accessories will require no spacing (single pod).
.")
5
Using the provided template, mark the
Step 3 Using the provided template, mark the first Pod location with a bulls eye. Hold the template to the mounting spot, and punch the four starter holes with a center punch.

7
Be careful to only drill into the outer
Step 4 Be careful to only drill into the outer section of the smooth fiberglass wall! Drill the small vertical pilot holes for the backing plate using a 1/16” drill bit. Drill the large horizontal holes for the pod using the 3/8” drill bit. Tip: We recommend applying masking tape to the drill bits to mark the desired depth and to prevent drilling too deep.

9
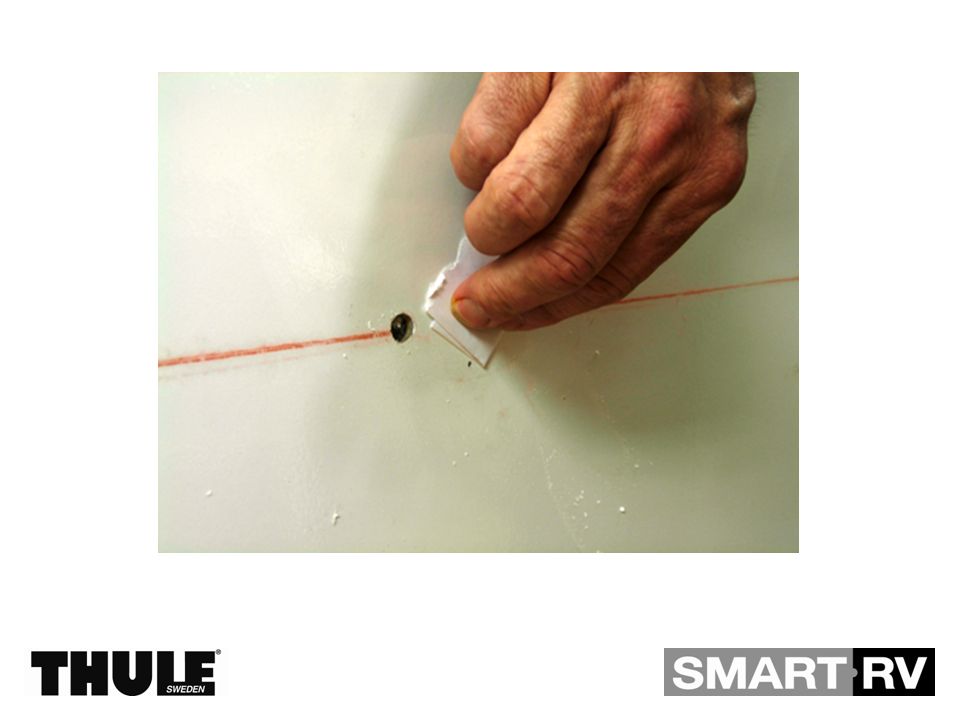
Prepare the mounting area by lightly
Step 5 Prepare the mounting area by lightly sanding the fiberglass between the drilled holes, as shown. Clean the surface of the wall.

11
Apply a thin coat of the waterproof
Step 6 Apply a thin coat of the waterproof adhesive (provided) onto the inside area of the backing plate. Spread evenly to ensure complete coverage.
 onto the inside. area of the backing plate. Spread. evenly to ensure complete coverage.")
13
Insert backing plate into the holes. If
Step 7 Insert backing plate into the holes. If necessary, lightly tap the backing plate with a rubber mallet to ensure that the plate is flush against the RV wall. Wipe off any excess adhesive with a paper towel.

15
Reinforce plate with the two small #6 x
Step 8 Reinforce plate with the two small #6 x ½” screws. These are set screws and prevent the backing plate from moving while the adhesive cures and sets prior to the installation of the pod.

17
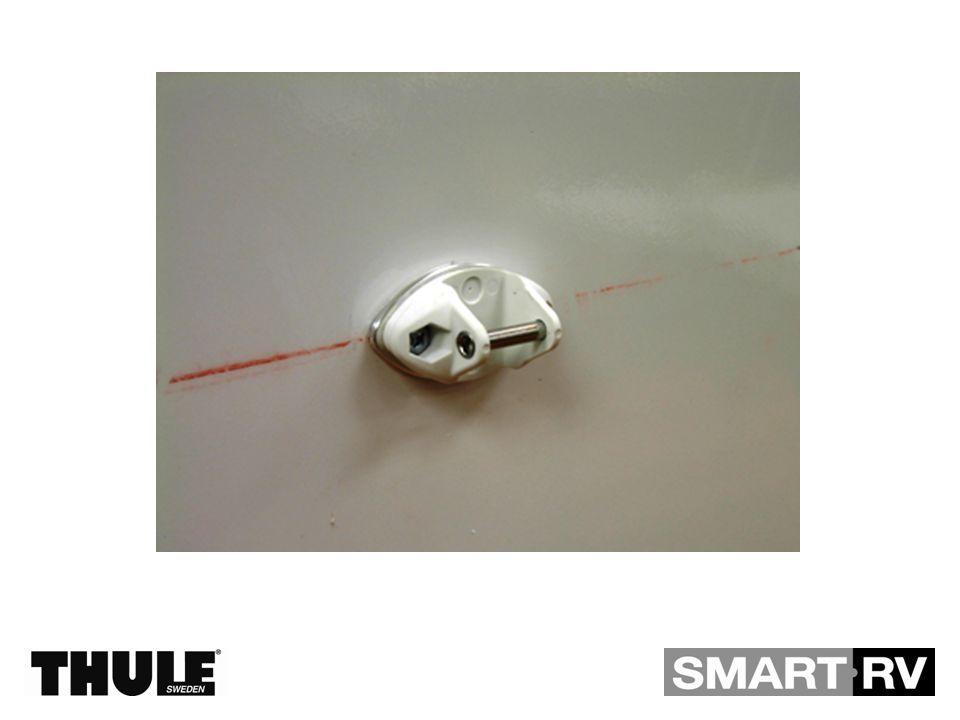
Attach the Pod assembly onto the backing plate using the larger ¼”- 20
Step 9 Attach the Pod assembly onto the backing plate using the larger ¼”- 20 screws after the Pod adhesive has cured completely (24-48 hours).
.")
19
The SMART RV accessories can now be safely mounted.
Finished! The SMART RV accessories can now be safely mounted. When Pods are not is use, you can cover the Pods with the Pod covers, included.

Similar presentations


 in buildings.>")
 Installation principles 1. Cabinets need to be installed straight, plumb, and level. 2. The area you are working in is rarely straight, plumb,>")


