Download presentation
Presentation is loading. Please wait.

1
Linoleum Block Prints Art B Ms. Filiaga

2
Day 1 Bell Work 1. What is a linoleum(lino) block(guess)? 2. What could you do, if you put two images together? 3. What would you do, if you could change the negative space into positive space? 4. When you print one image on top of another, will the image in the background show all the way or not, please explain your answer? *IDK IS NOT AN ACCEPTABLE ANSWER!!!

3
Agenda 02/24/2014 Bell work – review: with class What is this assignment? Library Sketch Studio Time Final sketches for lino-block due Friday 2/28

4
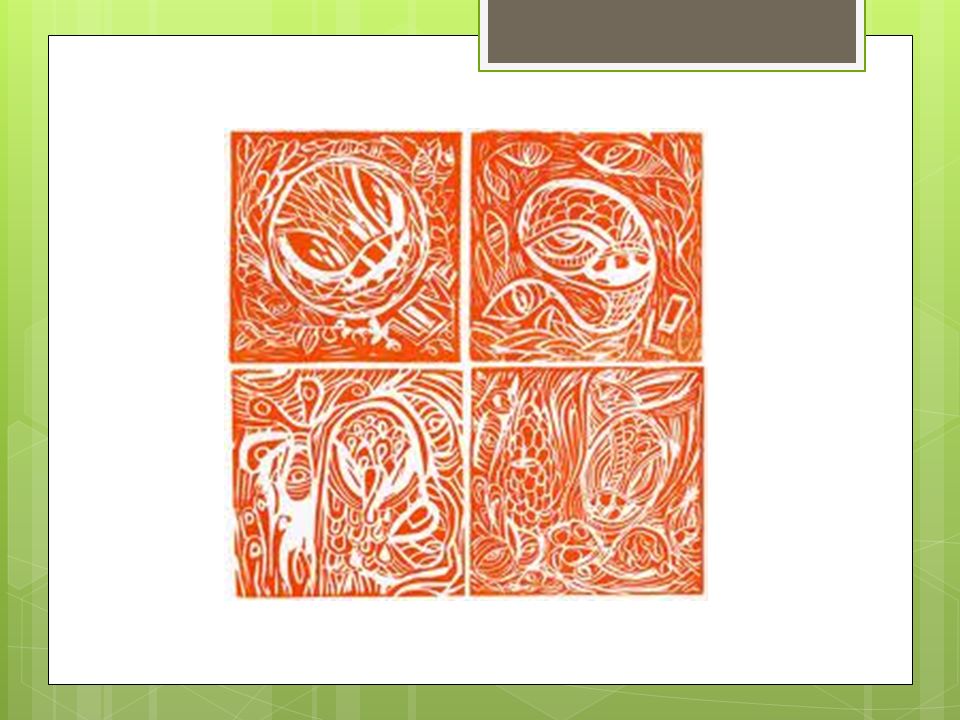
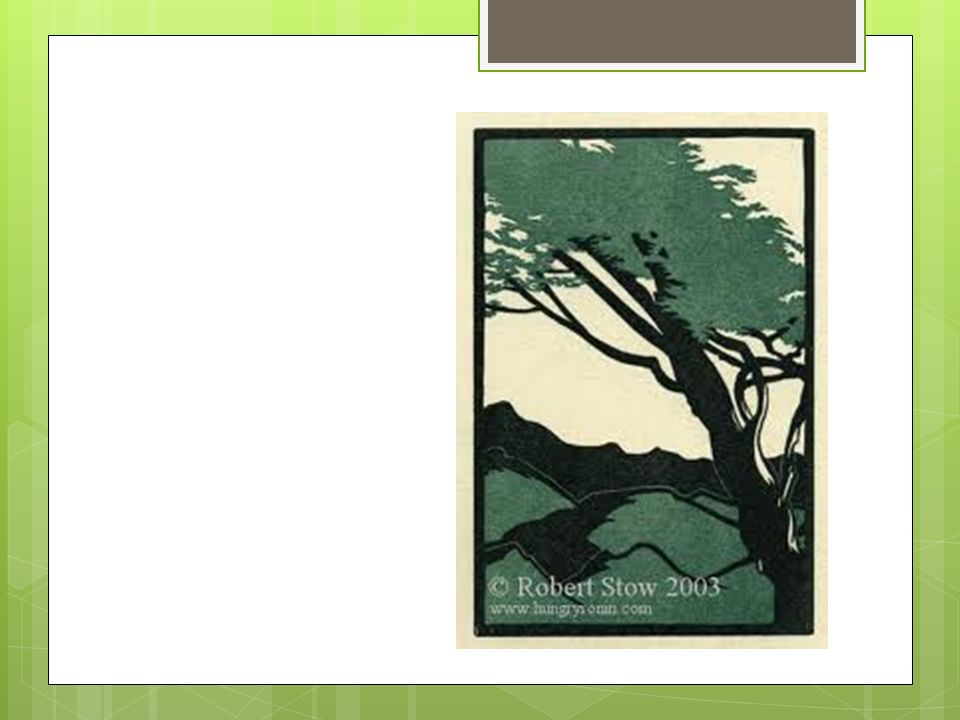
What is a Linoleum Block Print? A Linoleum Block Print is an art media/medium & printing method. The artist carves a linoleum block creating an image with positive and negative space to be printed.

5
What is a Print? A Print is a work of art made up of ink on paper and existing in multiple examples. It is created not by drawing on paper, but through an indirect transfer process.

10
How is it done? During video answer the following: 1 – What is the first step? 2 – What is the artists second step? 3 – When the artist carved the block what will print and what will NOT show up on print?

11
How is it done - Video http://www.youtube.com/watch?v=WmL d4O2ROJo http://www.youtube.com/watch?v=WmL d4O2ROJo

12
Where do we start? Objective 1 Find an image or idea that you would like to print.

13
Library Visit Look up images and print off one page Think of something you want to make a lot of!!! Your piece will need to be: Balanced Have a texture to it(see the cut marks) A variety of lines Good use of positive and negative space
 A variety of lines Good use of positive and negative space.")
14
Library Visit You can print one page Can have more than 1 image on it. Images need to be school appropriate. Friday your sketch for your print is DUE!!!

15
Day 2 Bell Work Process Sketch Fold your paper into 4ths Wait for Instruction

16
Process Sketch Choose a fruit or snack. In first box draw your whole fruit or snack choice Next alter your fruit or snack choice & sketch again. Must Sketch at least 4 times, fruit or snack must change each time.

17
Agenda Process Sketch See Carving Tools Go over Quiz Take Quiz Take Quiz until you pass!!!! Sketch & Finalize Block Design

18
Carve a block

21
Negative and Positive Space What do you want to print and not print?

23
Monotone=one color

27
Prints backwards

35
Quiz and sketch Complete the quiz, you have to get a 100% in order to use the carving tools You can take it as many time as you need to in order to pass When you are done with the quiz, sketch!

36
Safety Test What direction do you cut your lino- block?

37
Away from you And away from other people

38
What tool other than a gouge do you use when cutting your lino- block?

39
Bench plate You always have to have a bench plate under what you are cutting

40
If you get cut, what should you do?

41
Put pressure on the cut Walk over to the sink Rinse it off with water Put a paper towel over it Get a Band-Aid from the back counter Please tell Ms. Filiaga if you cut yourself

42
If you break a gouge tip, what should you do?

43
Accidence happen, Tell Ms. Filiaga and she will give you a new gouge tip If people break more than a few gouge tips, then we will wonder if it’s not an accident

44
What do you have to do to earn your lino- block?

45
You need to get a perfect score on this test & have your sketch for your design turned in. You can take the test as many times as you need to in order to pass

46
How many lino-blocks do you get for this project?

47
Everyone gets only one lino-block

48
Quiz Questions… What direction do you cut your lino-block? What tool other than a gouge do you use when cutting your lino-block? If you get cut, what should you do? If you break a gouge tip, what should you do? What do you have to do to earn your lino- block? How many lino-blocks do you get for this project?

49
What’s next? Once you pass your test Sketch(turn in to get lino block)
")
50
Studio Goal Complete your two sketches for your block Make them the size of your block so you can transfer the sketches to the lino-block next class Think about what area you want to carve out and what area you want to leave so it will take the ink in order to print

51
Day 3 Bell work Leska Sketches Please stay quiet… don’t want to stress her out. Find a seat & grab an art board located under the flag. Wait for instruction.

52
Leska Sketches Draw a line that divides your paper into 2 sections Sketch Leska Draw big Use big Shapes to start & add value to give Leska depth and dimension on your paper. For second sketch move to a different chair across the room.

53
Agenda Leska Sketch Presentation Carving Demo Transfer & Carving Studio Time

54
Carving Tool

55
Please Put the Correct #Back

56
Please Clean-up All Shavings

57
Carving Your Block

58
Think about the direction you carve your line to give it shape

59
Carving Demo On Ms. Filiaga’s Go. Quietly move to the back blue table. If you are in the front (next to the table) please sit in a chair or kneel. DON’T stand behind Ms. Filiaga during Demo
 please sit in a chair or kneel. DON’T stand behind Ms. Filiaga during Demo.")
60
Studio Time Choose & complete one of the following: Finalize Lino. Block Sketch Transfer Sketch to Block Start Carving your Block

61
Day 4 Bell Work 1. What do you think the steps are to a finished lino. block project? (Take a guess) 2. How can you transfer your sketch to your lino. block? (take a guess) 3. What is a bench hook & Gouge tool? 4. When cutting/carving our lino. block you should? 5. What is your next step to completing this lino. block project? **For Full Points Need to Respond in Complete Sentences***
 2. How can you transfer your sketch to your lino. block. (take a guess) 3. What is a bench hook & Gouge tool. 4. When cutting/carving our lino. block you should. 5. What is your next step to completing this lino. block project. **For Full Points Need to Respond in Complete Sentences***.")
62
Agenda Bell Work Review Presentation Printing Demo Printing Studio Time

63
Video http://www.youtube.com/watch?v=WmLd4O 2ROJo http://www.youtube.com/watch?v=WmLd4O 2ROJo To min – During Video answer the following on back of your Bell Work: 1. What is the process the artist does for printing more than one color on same print? 2. How many blocks are used for the above process?

64
Video Question Review 1. What is the process the artist does for printing more than one color on same print? 2. How many blocks are used for the above process?

65
One Image on top of the other = 2 blocks to print from

66
You could add a boarder

67
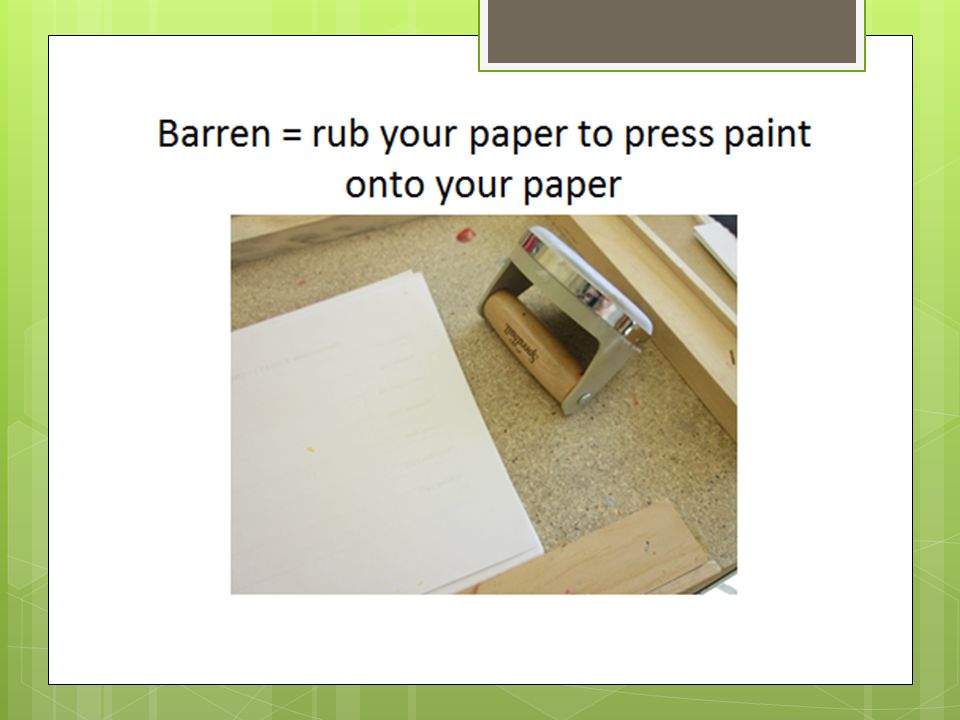
Printing Steps Set up your printing area Prep your ink plate and Brayer Apply ink on Lino block Print Compare prints

73
Lino Block Cleaning & Reprinting

74
Studio Time Your Goal for Today: Transfer your sketch Start & Finish Carving Begin Printing Carved Lino Block & All Prints Due March 17th

75
Printing Quiz 1. what do you use to roll paint/ink on lino block? 2. What do you use to apply pressure to transfer ink from block to paper?

76
Art History Art 21 Andy Warhol

Similar presentations


 What motivated you to take Art B? 2) What do you expect to learn in art? 3) What.>")


 What motivated you to take Art B? 2) What do you expect to learn in art? 3) What.>")


 with answers to the items below in this order:>")
 Go over quiz Intro to next project Vocabulary Get your notebooks or paper!>")
 block(guess)? 2. What could you do, if you put two images together?>")


