Download presentation
Presentation is loading. Please wait.

1
Let’s Monkey Jam!

2
Free software we will use to create our animations: Monkey Jam Windows Moviemaker

3
Examples Whiteboard Pipe cleaner figures ‘Toymation’ ‘Foodmation’

4
Storyboard Project Storyboard Document

5
Monkey Jam Instructions Step 1: Open Monkey Jam in the program files. Menu Bar

6
Step 2: Open file menu and make a new XPS

7
Step 3: Open the setting menu and select preferences.

8
Step 4: Open the General tab and set FPS (frames per second) to 10.
 to 10.")
9
Step 5: Open the Capture tab and set Capture Mode to Stop Motion and use the indicated settings below.

10
Step 6: Open Video Capture window F6, you should see a preview of the camera shot.

11
Step 7: Capture your first image by clicking the capture button. Slightly move your figure and repeat the capture process. Remember to follow your storyboard

12
Step 8: Close the capture window to return to the XSP sheet. To preview click the preview button. Play

13
Step 9: Save project by clicking the save button or pressing ctrl+s.

14
Step 10: Click the export button to export the exposure sheet as an avi movie.

15
Moviemaker Instructions Step 1: Open Windows Movie Maker. You will see the step by step guides in the wizard. The first thing we will do is change the view to ‘timeline’.

16
Step 2: To import your.avi video into Moviemaker, click the ‘Import Video’ link under Capture Video.

17
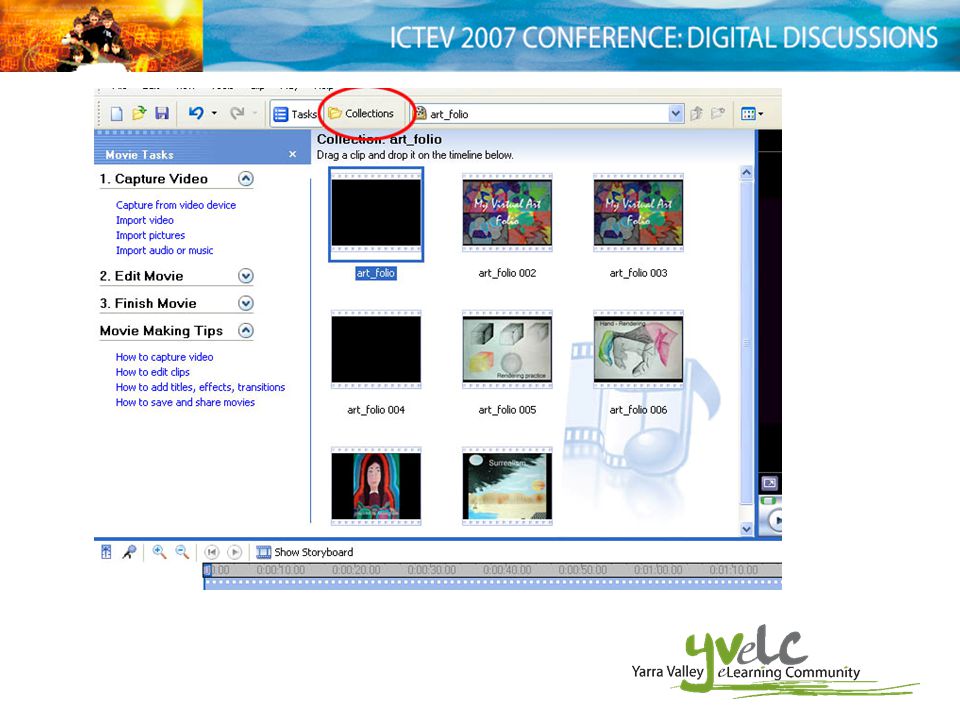
Ctrl click if you need to select several videos. If you import several different videos they will be placed in ‘collections’. To view a list of collections, click the ‘collections’ button and the task menu will change to the collections menu.

19
Please note that long videos will be divided into several smaller files. Click each video that you wish to use and drag them, in order, to the timeline. You may like to enlarge the view of the timeline so you can see more details.

20
Step 3: Under ‘Edit Movie’, you may choose to add a transition or effect to your video. Perhaps a transition between scenes, or adding a title page. If not, you can move straight on to adding your sound.

21
Step 4. Moviemaker has only one audio track. Choose to add music, or narration to your movie. If you wish to import some music, go back to step one of the task menu, and import music, as you did your video. If you would like to add character voices or narration to your story, click the microphone symbol above the timeline.

22
Ensure you test your microphone settings to ensure everything is working and your sound balance is correct. When you are ready to proceed, click the ‘Start Narration’ button. Watch the preview on the right as you record your commentary.

23
You may need to do this several times until you are happy with the result. If you wish to start again, click the audio line on the timeline and delete.

24
Step 5. When you are happy with your video, save the file using the ‘save to your computer’ option.

25
Useful Links: Animation Toolworks Making Clay Animation Clay & Stop Motion Animation The Stop Motion Handbook Claymation Examples Free Software: Celtx Free Screenplay Software AcidPlanet Free Music Creation Software

Similar presentations


 structures in painting.>")


