Download presentation
Presentation is loading. Please wait.

1
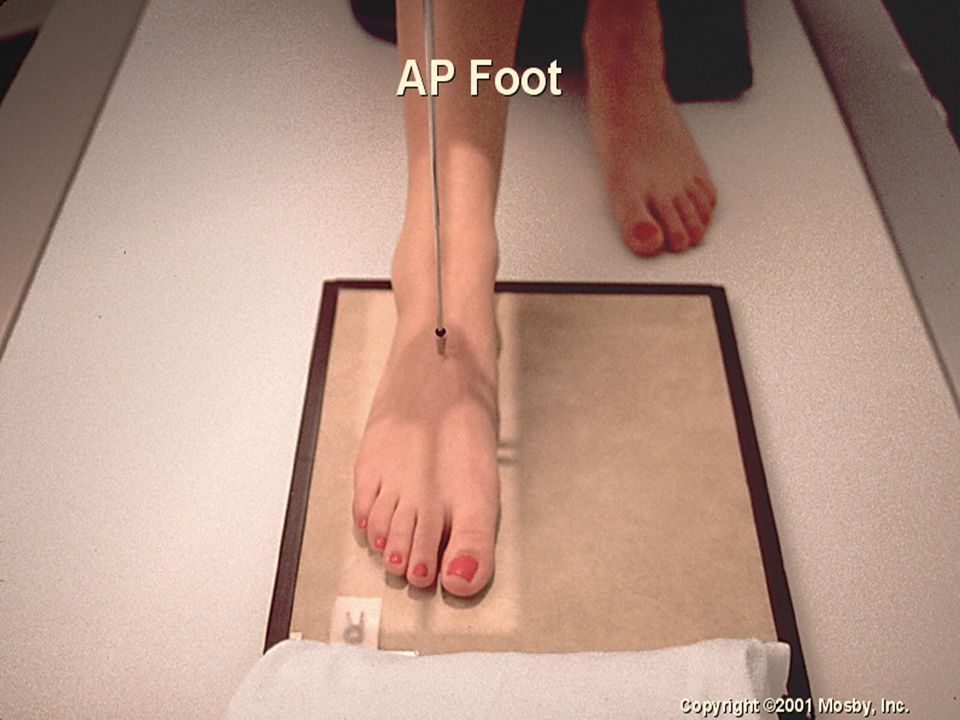
The Foot

2
The Views AP Oblique Lateral

3
Things to know Cassette size: 10x12 lengthwise divided in half and 8 x 10 Shield Marker Hold still Measures: 670@2

4
Part Position for AP Place patient supine on table with foot exposed. (No Shoe or sock) Flex the knee to place foot flat on IR Center foot to IR with long axis of foot with long axis of IR.
 Flex the knee to place foot flat on IR Center foot to IR with long axis of foot with long axis of IR..")
6
Central Ray Angled 10 degrees posterior toward heel For every 5 Degrees angle drop SID by 1 in. Center to Base of third metatarsal SID 40 inches Collimate to outer borders on all four sides

7
Seen on Radiograph Entire foot All phalanges, metatarsals, navicular, cuneiforms and cuboid. No rotation as seen by the bases of the first and second metatarsals separated. 3-5 metatarsals are slightly overlapped

8
Oblique Use the other half of cassette Shield Hold still Marker in light field

9
Part position for Oblique With foot flat against the IR. Rotate foot medially 30- 40 degrees

10
Center to Base of third metatarsal SID 40 inches

11
Seen on Radiograph Entire foot From phalangles to Calcaneus 3-5 metatarsals are free of imposition Joint space around cuboid is open The Sinus tarsi is seen.

12
Lateral Foot 8 X 10 or 10x12 for larger foot Turn diagonally Measures 8 66 @ 4 Mark Shield Hold still

13
Part position Turn patient on side so the lateral portion of foot is in contact with IR Flex knee of affect foot Place opposite leg behind the injured leg. Place the plantar surface of foot perpendicular to IR. Do not over rotate.

14
40 SID To Medial cuneiform

15
Seen on Radiograph Entire foot 1 inch of distal tib/fib Metatarsals superimposed Tibiotalar joint is open Distal fibular is superimposed by distal tibia..

16
Lets work on the Heel

17
Things to knows Cassette size:8 x 10 crosswise divided in half Measures: 10 70@ 5 Done on table top 2 Views Axial and Lateral

18
Position of Part for Axial Patient seated on table with leg fully extended Place the back of heel on IR Dorsiflex foot until plantar surface is perpendicular with IR Can use gauze or something to assist patient with position.

19
Angle 40 Degrees celphald Base of third metatarsal SID 40 Inches

20
Seen on Radiograph Entire calcaneus Open talocalcaneal joint.

21
Lateral View Other half of cassette Measures 10

22
Part position Roll patient with affected side down Center heel to IR Plantar surface perpendicular to film same as lateral foot

23
SID 40 1 inch below the medial malleolous

24
Seen on Radiograph Calcaneus in profile Open joint space of calcaneus and cuboid Imposition of distal tib/fib

25
Ankle

26
Views Ap Lateral Internal and external Obliques

27
Things to know Cassette: 10 x 12 crosswise divided in half Measures 8 65 @ 6 Shield Marker Hold still

28
Part Position for AP Place patient supine on table Do not flex foot allow it to be in a natural position Point toes up to ensure a true AP of lower leg and ankle.

29
40 SID Perpendicular to a point mid-way between malleoli

30
Seen on Radiograph The Distal tib/fib The lateral and medial malleoli The talus Proximal half of metatarsals

31
Lateral The other half of the 10x 12 cassette Shield Marker Hold still

32
Part Position Rotate patient on side of affect foot Place unaffected leg behind affected leg Dorsiflex foot for a true 90 degree angle

33
40 SID Perpendicular to the medial malleolus

34
Seen on Radiograph Distal third of tib/fib superimposed The talus The calcaneus The navicular and cuboid Tibotalar joint open

35
Obliques 10 x12 cassette divided in half Shield Marker Hold still

36
Part Position for oblique Start like on an AP Patient supine and heel against cassette toes up Center ankle to center of Cassette Rotate leg medially (internal) 45 degrees Rotate leg laterally (external) 45 degrees
 45 degrees Rotate leg laterally (external) 45 degrees")
37
40 SID Perpendicular to mid- way between malleoli

38
40 SID Perpendicular to mid- way between malleoli

39
Seen on internal oblique Distal third of tib/fib the malleoli the talus and proximal half of metatarsals tibiofibular joint open the lateral malleoli and talus joint open the medial malleoli and talus partially imposed.

40
Seen on external oblique The Calcaneal sulcus The superior portion of the calcaneus The distal tib/fib superimposed anterior

Similar presentations
. leg Basic projections AP Lateral AP leg Exposure Factors KvmAsFFD (cm)GridFocusCassette 655100NoFine24 x 30 cm Patient Position ٍ Supine.>")
.>")
.>")


 –__________ 3 articulating surfaces (facets) –____________.>")


