Download presentation
Presentation is loading. Please wait.

1
TITLE ClubRunner for Webmasters & Editors Home Page Stories, Site Pages Events and Speakers Email Communications and eBulletins

2
District 7930 Assembly Agenda for April 16 th – ClubRunner for Secretaries Home Page Stories Site Pages Email & eBulletins Login Process Help & Resources

3
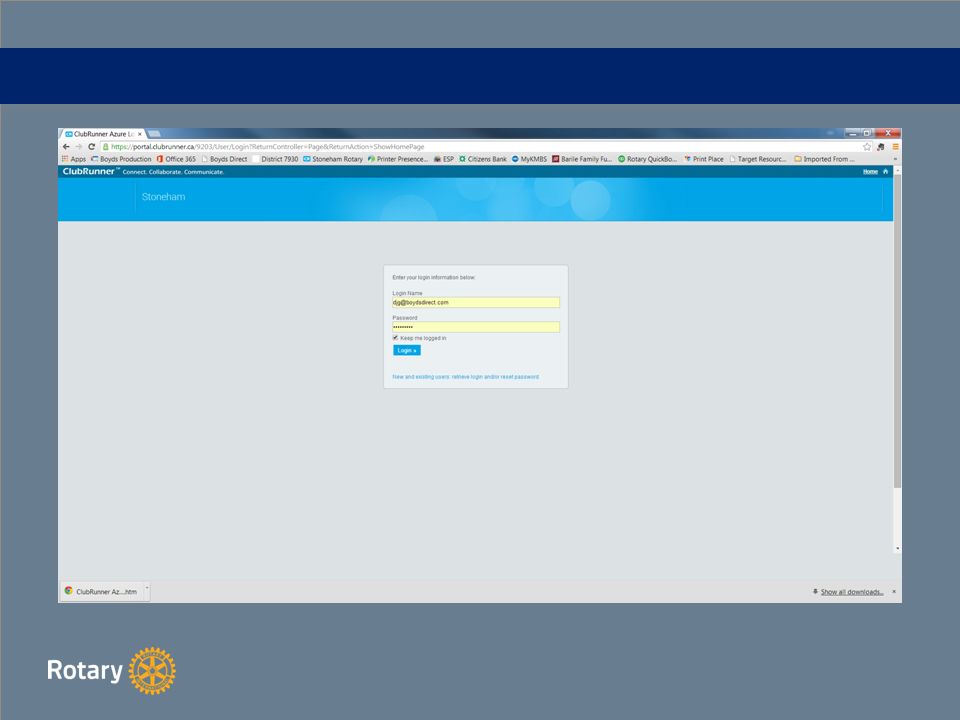
ClubRunner Login

4
Logging in to ClubRunner Club Version Enter Club’s url address Click on Member Area Enter Login Name and Password District Version Enter www.rotary7930.org Click on Member Area Enter Login Name and Password All edits made in Club or District Version are automatically updated throughout Rotary. If you do not know your username or password, click on the link that reads “New and existing users: retrieve login and/or reset password. Follow instructions from the email that you will receive from ClubRunner. You will be directed to the Administration home page.

6
ClubRunner Version 2 or Version 3 If you have not upgraded to Version 3, please do so as soon as possible Based on the Microsoft Azure Platform Better Performance Faster Speed Better Control WYSIWYG Functionality

7
Administration, Website and Stories Pages

8
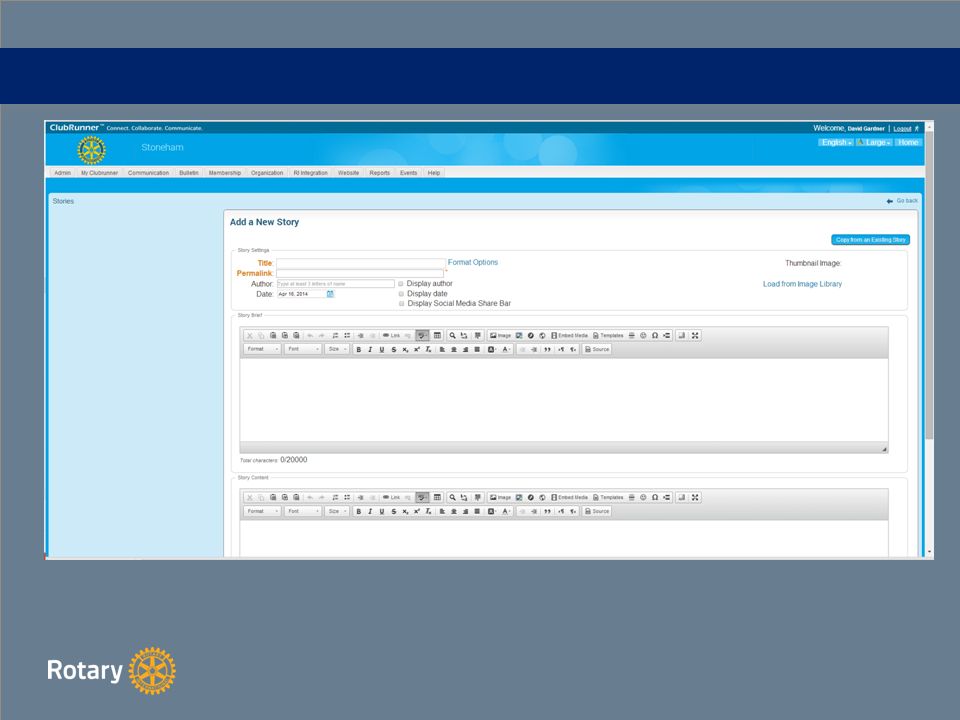
Creating and Editing Home Page Stories Click on Member Area From the menu bar click on Website Click on Website Content Click on Home Page Stories

9
Click on Create New Story Enter a Title for your story Enter author’s name and select if you want to display author and article date Choose if you want to display the Social Media Bar Begin entering your story details Review the New Rotary Design Guidelines for Websites Create a headline and choose font size, color and other attributes using control palette Enter text or cut and paste from Word

11
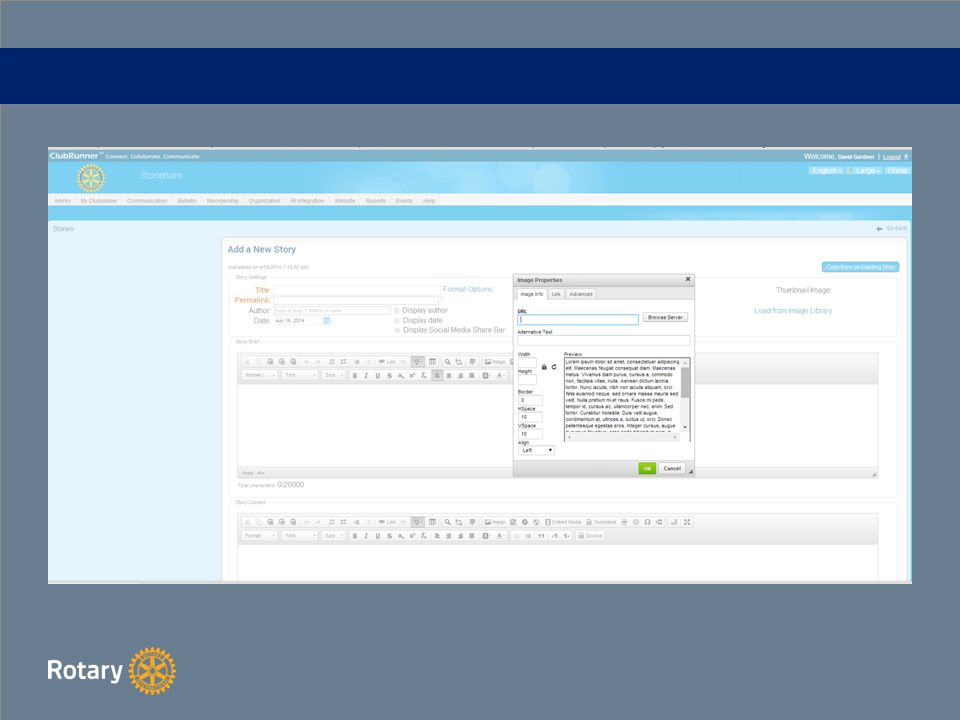
Creating a Story (continued) Begin entering your Story Details Add a photo or photos by clicking on the Image Icon Click on Browse Server Choose a ClubRunner or Rotary Image or upload one from your computer by clicking on Upload Browse Your Computer for the image you want to insert Double click on the New Image and set image properties Click on the Lock Icon to lock image proportions Set width and height (width max is 1024 and recommended width is 256 for medium images Set Horizontal and Vertical Spacing from text (10 – 20) Assign Left, Center or Right Alignment
 Begin entering your Story Details Add a photo or photos by clicking on the Image Icon Click on Browse Server Choose a ClubRunner or Rotary Image or upload one from your computer by clicking on Upload Browse Your Computer for the image you want to insert Double click on the New Image and set image properties Click on the Lock Icon to lock image proportions Set width and height (width max is 1024 and recommended width is 256 for medium images Set Horizontal and Vertical Spacing from text (10 – 20) Assign Left, Center or Right Alignment")
13
Creating a Story (continued) Embed media such as a YouTube video by clicking on the Embed Media icon Find a video on the web and right click on the video, click on Copy Embed Code Copy the Embed Code from the text box and paste it into the Paste Embed Code Here Create a Web Link Open a second window in your browser and find the page you want to link Copy the url address from this window Click on the Link Icon and paste the url address in the URL box Create a Link to another page in your website Open that page in another window and follow instructions from above Create a Link to an Email Address Enter the email address and a message subject ifdDesired Other options to link to a Document for Download, Photo Album, etc. Continued on the next page

14
Creating a Story (continued) Enter the Main Part of the story that will engage the reader in the Story Brief This will be the portion of the story that will appear on the home page Continue with additional details in the Story Content Section This will be the portion of the story that will appear when the reader clicks on Read More Remember to write compelling copy which answers the following concepts Who, What, When, Where, Why and How Remember to save regularly You can preview the story by clicking on the Preview Button To alter the sequence of the stories, click on a story and drag to the position where you want it to appear Add stories from the Home Story Library by clicking on that button Use to recall prior stories and update content as necessary Continued on the next page
 Enter the Main Part of the story that will engage the reader in the Story Brief This will be the portion of the story that will appear on the home page Continue with additional details in the Story Content Section This will be the portion of the story that will appear when the reader clicks on Read More Remember to write compelling copy which answers the following concepts Who, What, When, Where, Why and How Remember to save regularly You can preview the story by clicking on the Preview Button To alter the sequence of the stories, click on a story and drag to the position where you want it to appear Add stories from the Home Story Library by clicking on that button Use to recall prior stories and update content as necessary Continued on the next page")
15
Creating a Story (continued) Open another window in your browser with your Club’s homepage This will allow you to edit and review changes much more quickly Toggle between pages (Be patient as updating takes 10-30 seconds to display) Continue to edit and refine page till you are satisfied
 Open another window in your browser with your Club’s homepage This will allow you to edit and review changes much more quickly Toggle between pages (Be patient as updating takes seconds to display) Continue to edit and refine page till you are satisfied")
16
Editing a Story From the menu bar click on Website Click on Website Content Click on Home Page Stories Click on Edit on the line of the story you want to edit Make edits as necessary Either Save Changes as Draft or Save and Publish to display on the homepage

17
Email Communications Click on the Communication tab on the top of the page Click on Email Services on the sub menu

18
Email Communications (continued) Step 1: Check the box for the list you want to send the email If you want to send to a subset of the list, click on the list name and it will expand to display all members of that group and you can select specific members You can choose to add Inactive (Past) Members, Friends or Executives and other Leadership Positions in other Clubs in the District – You can limit by expanding category Step 2: Title Your Message Enter the text for the message or copy and paste from Word You can add email and website links by clicking on the chain/world icon Send to yourself to check content and accuracy of links etc.
 Step 1: Check the box for the list you want to send the If you want to send to a subset of the list, click on the list name and it will expand to display all members of that group and you can select specific members You can choose to add Inactive (Past) Members, Friends or Executives and other Leadership Positions in other Clubs in the District – You can limit by expanding category Step 2: Title Your Message Enter the text for the message or copy and paste from Word You can add and website links by clicking on the chain/world icon Send to yourself to check content and accuracy of links etc.")
19
Email Communications (continued) Once you have resolved all issues you can either send now or schedule the time for ClubRunner to send the message Recommended send times are mid-morning or early evening when members are most likely to check their email Some of the benefits of using the ClubRunner email system are: The email is stored in the portal for future reference You have access to other club email information The email addresses of members are not transmitted publicly which protects them from spam
 Once you have resolved all issues you can either send now or schedule the time for ClubRunner to send the message Recommended send times are mid-morning or early evening when members are most likely to check their Some of the benefits of using the ClubRunner system are: The is stored in the portal for future reference You have access to other club information The addresses of members are not transmitted publicly which protects them from spam")
20
Creating eBulletins Click on the Bulletin tab on the top of the page Click on Manage Bulletins on the sub menu

21
Click on Edit Bulletins on the left panel Click on Create New Bulletin Enter the Name of the Bulletin Determine if you want the bulletin to be visible on the website Enter the editors name and email as desired Choose a template – Experiment and determine what works best Click Next

22
Creating eBulletins Take the Tour to learn the basics of Bulletins or Close Tour and proceed Click on the category that you want to review – start with essentials Continued on the next page

23
Creating eBulletins (continued) Drag Content from the left Website Designer Panel to the appropriate bulletin section Start with Stories Scroll over the Stories text and click on Properties (gear icon) Choose the options for formatting – Preferred Title for the Stories section Determine the attributes for the title and Header Properties Determine the attributes for the Content Properties Suggest that you Show Brief to only display brief in Bulletin with a Read More link Click the check box on the Read More link under Settings Continued on the next page
 Drag Content from the left Website Designer Panel to the appropriate bulletin section Start with Stories Scroll over the Stories text and click on Properties (gear icon) Choose the options for formatting – Preferred Title for the Stories section Determine the attributes for the title and Header Properties Determine the attributes for the Content Properties Suggest that you Show Brief to only display brief in Bulletin with a Read More link Click the check box on the Read More link under Settings Continued on the next page")
24
Creating eBulletins (continued) Scroll over the Stories text and click on Stories (pencil icon) This will display a list of available stories You can Add Stories from the Story Library by clicking on that button Place a check mark on any story you want to add and click on Add Selected Stories when complete If you want to delete stories from the bulletin, check the box to the left of the story and click on Remove Selected (does not delete from the story library) Preview the current status of the bulletin by clicking on the Preview button Continue to edit until you are ready to send a test email to yourself Continued on the next page
 Scroll over the Stories text and click on Stories (pencil icon) This will display a list of available stories You can Add Stories from the Story Library by clicking on that button Place a check mark on any story you want to add and click on Add Selected Stories when complete If you want to delete stories from the bulletin, check the box to the left of the story and click on Remove Selected (does not delete from the story library) Preview the current status of the bulletin by clicking on the Preview button Continue to edit until you are ready to send a test to yourself Continued on the next page")
25
Creating eBulletins (continued) Click on Send Bulletins on the left and then Select a Bulletin Send the bulletin to yourself prior to sending to your club and other contacts Continued on the next page
 Click on Send Bulletins on the left and then Select a Bulletin Send the bulletin to yourself prior to sending to your club and other contacts Continued on the next page")
26
Creating eBulletins (continued) Review and edit as necessary before final transmission Determine the group you want to send the bulletin to or click on the text of the group which will allow you to expand the list to select specific recipients within that list (Active and Honorary, Inactive and Prior Members, Friends and Bulletin Subscribers) Schedule the day and time you want to send the bulletin Send when you think you will have the higher open rates and adjust through analysis Check the box to Archive your bulletin immediately after sending Send to yourself for one final review Click Send when ready to transmit Continued on the next page
 Review and edit as necessary before final transmission Determine the group you want to send the bulletin to or click on the text of the group which will allow you to expand the list to select specific recipients within that list (Active and Honorary, Inactive and Prior Members, Friends and Bulletin Subscribers) Schedule the day and time you want to send the bulletin Send when you think you will have the higher open rates and adjust through analysis Check the box to Archive your bulletin immediately after sending Send to yourself for one final review Click Send when ready to transmit Continued on the next page")
27
Creating eBulletins (continued) Once you have resolved all issues you can either send now or schedule the time for ClubRunner to send the message Recommended send times are mid-morning or early evening when members are most likely to check their email Some of the benefits of using the ClubRunner email system are: The email is stored in the portal for future reference You have access to other club email information The email addresses of members are not transmitted publicly which protects them from spam
 Once you have resolved all issues you can either send now or schedule the time for ClubRunner to send the message Recommended send times are mid-morning or early evening when members are most likely to check their Some of the benefits of using the ClubRunner system are: The is stored in the portal for future reference You have access to other club information The addresses of members are not transmitted publicly which protects them from spam")
28
Help and Support ClubRunner – 1-877-469-2582 Option 1 for support – Help from the Main Menu Bar Support Center - Knowledgebase On Demand Videos Downloads Webinars – May 15– Website Contents & eBulletin Service Updates Submit a Ticket

29
Help and Support (Continued) District Technology and Communications Committee – David Gardner, Chair djg@boydsdirect.com 617-504-3695 Cell 781-438-4003 Office
 District Technology and Communications Committee – David Gardner, Chair Cell Office")
Similar presentations