Download presentation
Presentation is loading. Please wait.

1
Using a Microscope

3
General Procedures: Make sure all backpacks
are out of the aisles before you get a microscope! Always carry the microscope with one hand on the Arm and one hand on the Base. Carry it close to your body.

4
Remove the cover, plug the microscope in, and place the excess cord on the table! If you let the excess cord dangle over the edge, your knee could get caught on it, and the next sound you hear will be a very expensive crash. I will bill you later!

5
Always start and end with Low Power. The Green means GO
Always start and end with Low Power! The Green means GO! -- “Go ahead and put the slide on the stage.” “Go ahead and use the Coarse focus knob.” “Go ahead and remove the slide from the stage.” “Go ahead and put the microscope away.”

6
Place the slide on the microscope stage, with the specimen directly over the center of the glass circle on the stage (directly over the light). Then you have a 9 out of 10 chance of finding the specimen as soon as you look through the eyepiece!

7
If you wear glasses, take them off;
If you see only your eyelashes, move closer. Be sure to close, or cover your other eye!! NOTE: If you see a dark line that goes part way accross the field of view, try turning the eyepiece. That dark line is a pointer that will be very valuable when you want to point out something to your lab partner, or your teacher!

9
If, and ONLY if, you are on LOW POWER, lower the objective lens to the lowest point, then focus using first the coarse knob, then the fine focus knob. The specimen will be in focus when the LOW POWER objective is close to the lowest point, so start there and focus by slowly raising the lens. If you can’t get it at all into focus using the coarse knob, then switch to the fine focus knob.

10
Adjust the Diaphragm as you look through the Eyepiece, and you will see that MORE detail is visible when you allow in LESS light! Too much light will give the specimen a washed-out appearance.

11
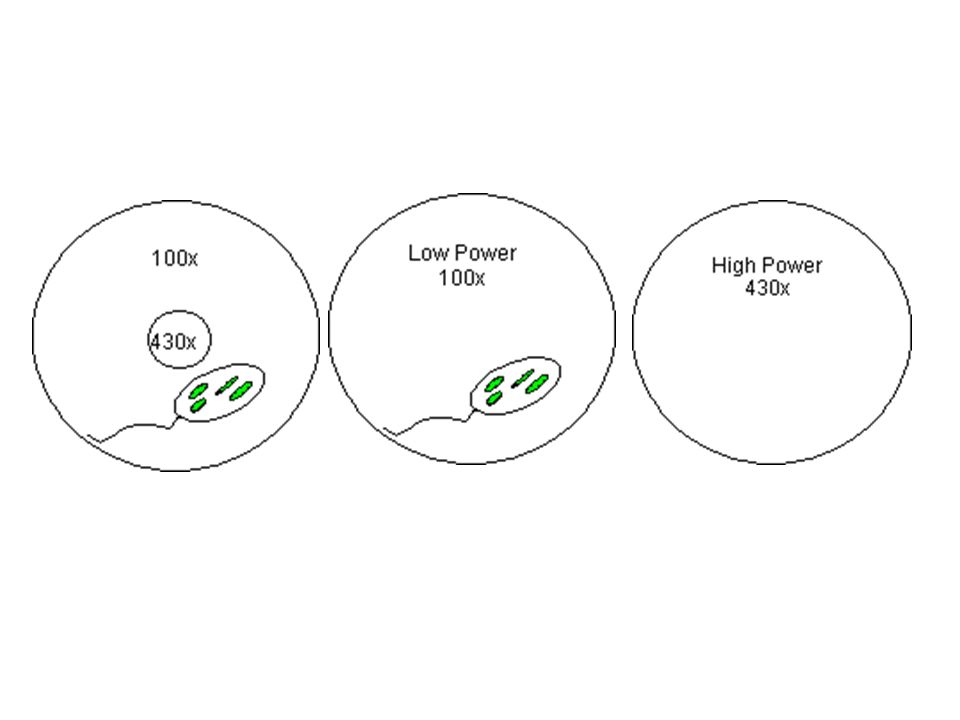
Once you have found the specimen on Low Power (100x), unless specifically asked to draw it on low power, center the specimen in your field of view, then, without changing the focus knobs, switch it to High Power. If you don’t center the specimen you will lose it when you switch to High Power (Yellow).
..")
12
Once you have it on High Power remember that you only use the fine focus knob! The Yellow means CAUTION! -- “Caution, use only the fine focus knob.” “Caution, do not remove the slide when it is on High Power.” -- The High Power Objective (430x) is very close to the slide. Use of the coarse focus knob will scratch the lens, and crack the slide.
 is very close to the slide. Use of the coarse focus knob will scratch the lens, and crack the slide..")
13
Don’t even think of starting your drawing unless you have a PENCIL
Don’t even think of starting your drawing unless you have a PENCIL! Drawings in PEN are UNACCEPTABLE! This is for two reasons: (a) You can erase pencil! (b) You can shade in areas more easily in pencil.
 You can erase pencil! (b) You can shade in areas more easily in pencil.")
14
Each Drawing must be 1/2 page in size, and must include clear, proper labels! In the upper left hand corner of each circle include the specimen name as written on the slide label. In the upper right hand corner, include the magnification (100x or 430x).
..")
15
Labels should start on the outside of the circle
Labels should start on the outside of the circle. The circle indicates the field of view as seen through the eyepiece. All arrows should end with the point touching the object to be labeled! mitochondria Golgi body nucleus

Similar presentations
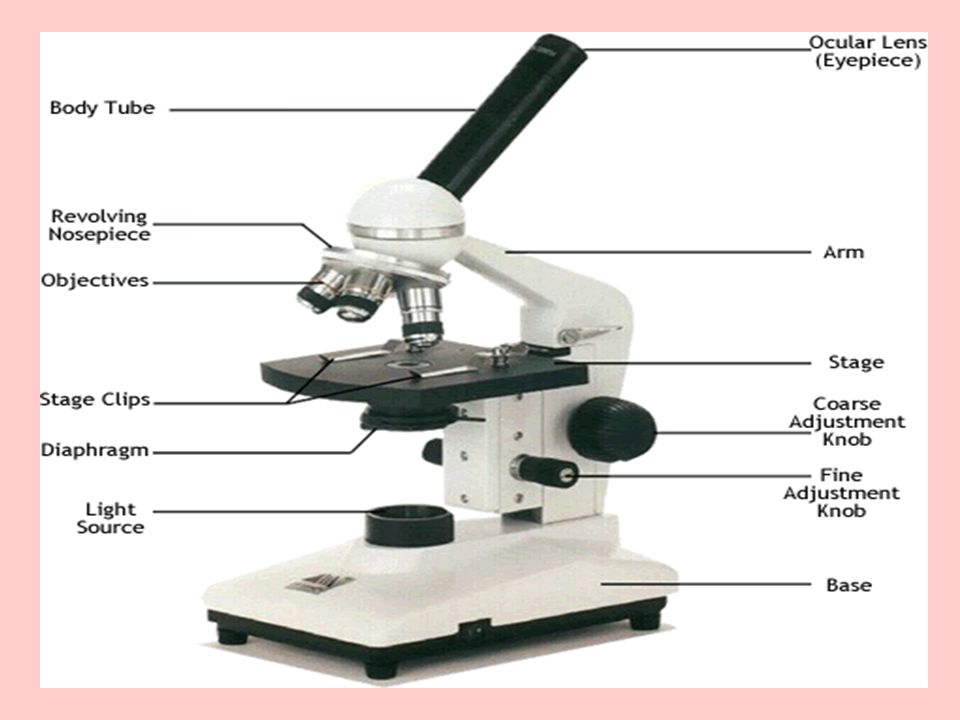


 Arm Stage Coarse Adjustment Fine Adjustment.>")


 Arm Stage Coarse Adjustment Knob Fine Adjustment Knob Always carry a microscope with one.>")


 First lens First lens 2. Arm: connects base and body.>")


