Download presentation
Presentation is loading. Please wait.

1
EE 446 Project Assignment Top Design Sensor Components Pin Assignment and Configuration Completed Physical Setup Project Tasks

2
Project Top Design

3
Motion Detector (HC-SR501) Select Digital Input Pin component Drag and drop to design
 Select Digital Input Pin component Drag and drop to design")
4
Motion Detector (HC-SR501) Configure Digital Input Pin
 Configure Digital Input Pin")
5
Motion Detector (HC-SR501) Configure Digital Input Pin
 Configure Digital Input Pin")
6
PWM – Servo Motor Add PWM component to design.

7
PWM – Servo Motor Configure PWM

8
PWM – Servo Motor Configure PWM

9
PWM – Clock Add clock to design.

10
PWM - Clock Configure Clock

11
PWM - Clock Configure Clock

12
PWM - Clock Connect the clock to the PWM.

13
Servo Motor – Digital Output Pin Add Digital Output Pin.

14
Servo Motor – Digital Output Pin Configure digital output pin, then connect it to the pwm output port of the PWM.

15
Servo Motor – Digital Logic Zero Add Digital Logic Zero.

16
Servo Motor – Digital Logic Zero Connect Digital Logic Zero to the kill and reset inputs of the PWM.

17
Timer Add Timer.

18
Timer Configure Timer

19
Timer Configure Timer

20
Timer Clock Configure the clock component attached to the timer.

21
Timer Clock

22
Interrupt Service Routine (ISR) Add isr and connect it to the interrupt output of the timer.
 Add isr and connect it to the interrupt output of the timer.")
23
Interrupt Service Routine (ISR) Configure the isr.
 Configure the isr.")
24
Interrupt Service Routine (ISR) Configure the isr.
 Configure the isr.")
25
LED Output Add a Digital Output pin and attach it to the tc ouput of the timer. Configure the Digital Output Pin.

26
Cap Sense Add a CapSense component.

27
Cap Sense - General Configure the CapSense component.

28
Cap Sense - General Configure the CapSense component.

29
Cap Sense - Widgets Configuration Configure the CapSense component.

30
Cap Sense - Widgets Configuration Add Button0, Button1, and LinearSlider0 Configure the CapSense component.

31
Cap Sense – Scan Order Configure the CapSense component.

32
Cap Sense – Scan Order Configure the CapSense component.

33
Cap Sense – Advanced Configure the CapSense component.

34
Cap Sense – Advanced Configure the CapSense component.

35
LCD Char Display Add a Character LCD component.

36
LCD Char Display Configure the Character LCD.

37
Inter-Integrated Circuit (I2C) Add an I2C Master component.
 Add an I2C Master component.")
38
Inter-Integrated Circuit (I2C) Configure the I2C.
 Configure the I2C.")
39
Inter-Integrated Circuit (I2C) Configure the I2C.
 Configure the I2C.")
40
I2C – Serial Clock (SCL) Type Configure the I2C.
 Type Configure the I2C.")
41
I2C – Serial Data Line (SDL) Type Configure the I2C.
 Type Configure the I2C.")
42
Digital Output Pin – Temp Alarm Add a Digital Output Pin to the design. Do not connect it to anything. Configure the pin.

43
Pin Configuration

44
Complete Physical Set-up LCD Display Servo Motor JTAG Programming Cable Cap Sense Area P0_6 Cap Sense TMP 102 Sensor Power Cable USB to JTAG Cable JTAG PROG HC-SR501 Motion Sensor

45
PSoC and PSoC-related Datasheets

46
PSoC Tutorials and Project Documents

47
Assignment 1: Initialization / Startup Code

48
Assignment 2: PWM Configuration

49
Assignment 3: Motion Detection Infinite Loop

50
Assignment 4: Timer, TMP102, and Interrupt Service Routine (ISR)
")
51
Assignment 5: Password Set

52
Assignment 6: LCD Configuration

53
Assignment 7: Password Verification

54
Assignment 8: I2C Protocol Configuration - TMP 102 Sensor

55
Transaction over I2C Bus

56
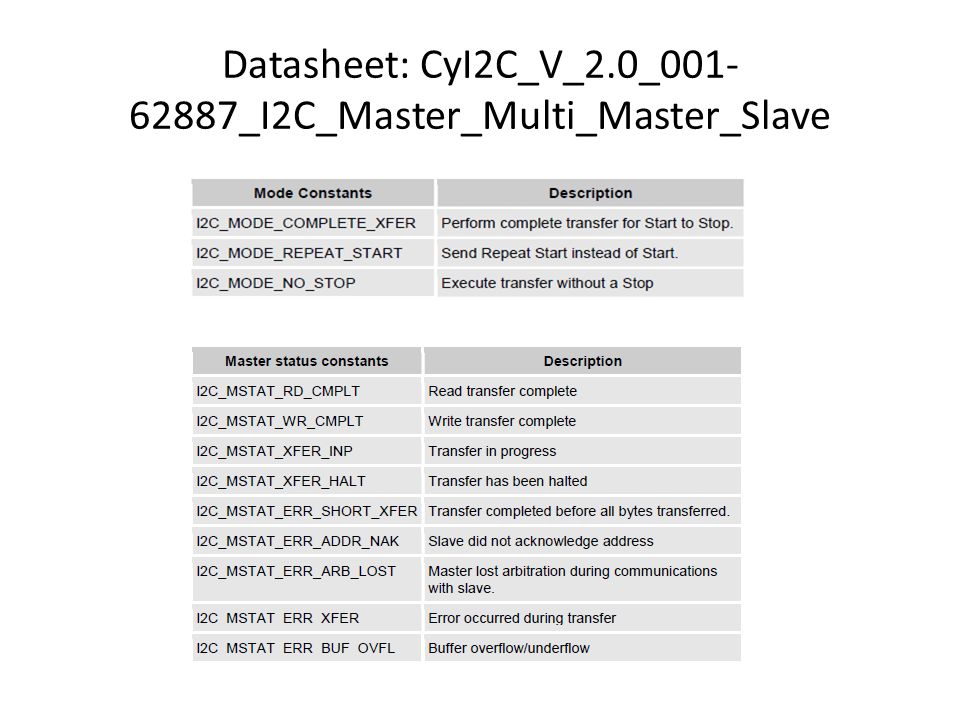
Datasheet: CyI2C_V_2.0_001- 62887_I2C_Master_Multi_Master_Slave

58
Assignment 9: Setting ISR Interrupt using Timer

59
Assignment 10: Initialize TMP 102 Interrupt

60
New Slides

61
Timer: Datasheet Access

62
Timer API

64
Starting Timer – main.c

65
TMP102.H Header File temp_interrupt is a software flag that is set when the interrupt occurs when this flag is set, read the temperature in the main.c

66
Interrupt Service Routine Clearing Register, Setting a flag Interrupt Service Request (ISR) has been set to TEMPISR vector Read Timer Status Register to clear Interrupt and set the software flag
 has been set to TEMPISR vector Read Timer Status Register to clear Interrupt and set the software flag")
67
Interrupt Service Routine: Datasheet Access

68
Interrupt Service Routine API

70
Interrupt Service Routine Function Description: ISR_Start

71
Interrupt Service Routine Function Description: ISR_SetVector

72
Interrupt Service Routine Initializing Interrupt Set the Interrupt Vector : ISR_SetVector(…)
")
73
Conversion Rate Time

74
TMP102 Serial Bus Address

76
I2C I2C connects to multiple slave devices (e.g. temperature sensor). Each of the slave devices has a unique address To access I2C devices a device address, register address, a number of bytes, buffer pointer have to be specified In the project, use existing PSoC_i2c_read() function to read information from the temperature sensor
 function to read information from the temperature sensor.")
77
I2C Datasheet Access

78
Provided I2C Functions

79
I2C Read Function

Similar presentations


 2. Programmable.>")


 Interface.>")


