Download presentation
Presentation is loading. Please wait.

19
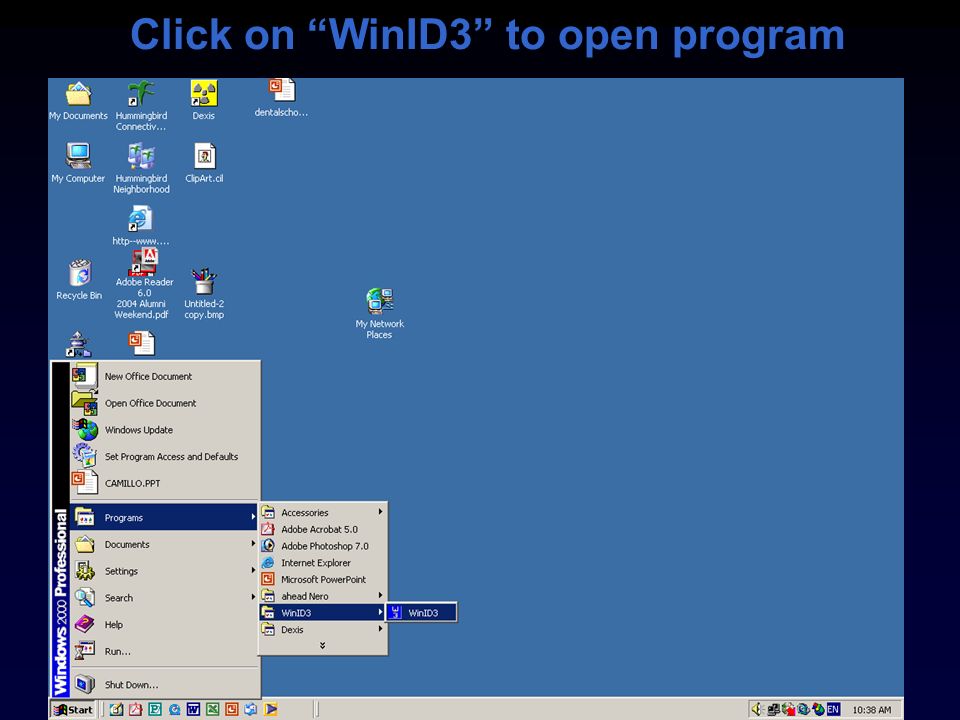
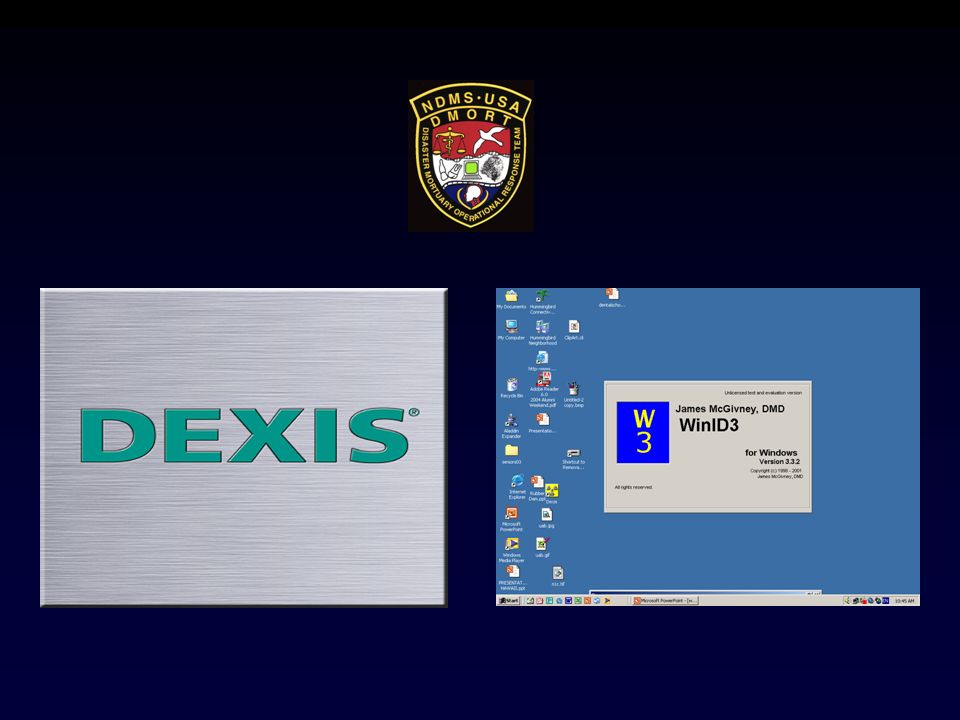
Click on “WinID3” to open program

20
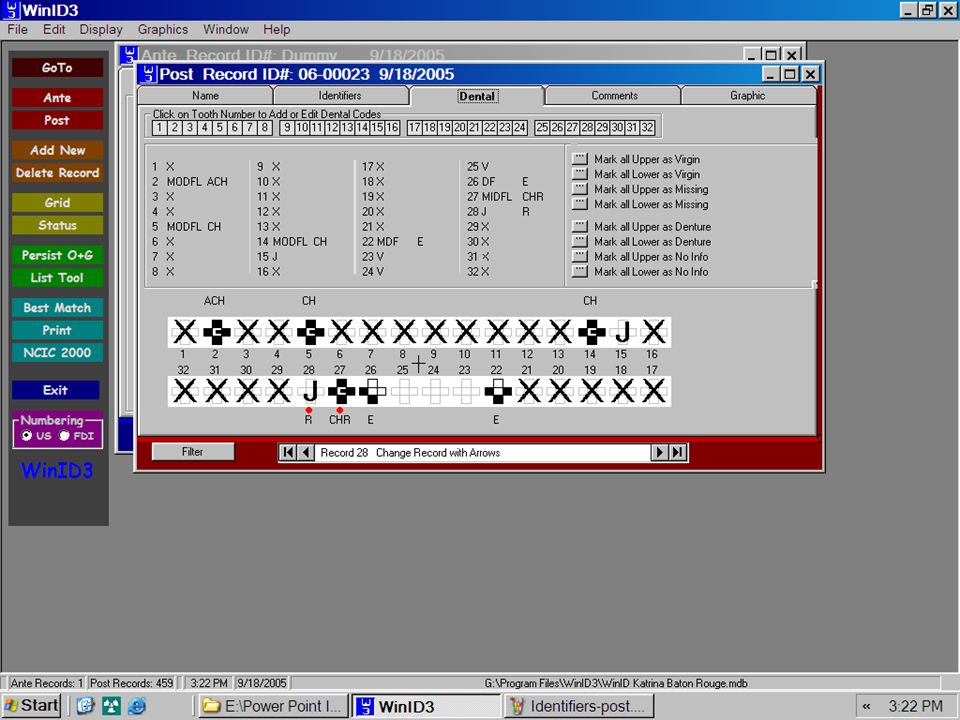
WinID3 Main Window The main screen of WinID3 is simple. It contains a File Bar at the top. A Button Bar on the left side. An Antemortem* and Postmortem Window representing a record in each of the respective databases. * If you create a new database, a dummy record will be created for both the AM and PM database.

21
GoTo Button The GoTo Button allows the user to easily access any antemortem or postmortem record in the database currently displayed. Either scroll down the names or numbers, then double click on the record you want to bring it to the main screen. Or…… In large databases, type the first letter of a name or number and the list will scroll to that point. Then double click to bring it to the main screen.

22
Ante and Post Buttons Clicking either the Ante or Post buttons on the Button Bar will cause the antemortem or postmortem record to become the active record on the screen. The other records will remain on the desktop, but will be inactive. If no record is on the screen, clicking either Ante or Post button will bring the first record in that database to the screen. Postmortem is currently active on this screen.

23
Add New Button Clicking on the New Record Button will bring up a small menu with a choice of creating either an Antemortem or Postmortem Record. Click on the type of new record you wish to create. Now the record will be active on the WinID3 Main Window.

24
Add New Button After clicking on either a new Postmortem or Antemortem record, the window below opens. Enter the next succession number for Postmortem starting with P001, or a name or number for the Antemortem record being generated. Antemortem numbers start with A001. Then enter the name of person entering the record. Only 12 spaces are available for the Unique #, so if entering a name, abbreviations may be necessary. 26 spaces are available for the name of the person entering the record

25
Delete Record The Delete Record Button will permanently delete the active antemortem or postmortem record. A prompt will appear after clicking this button to be certain you wish to delete the record. To delete, click the OK Button.

26
Grid Button The Grid Button will display the active database in a chart format for either antemortem or postmortem records, depending on which record is active on the screen. The chart displays all data that is present in the database. It is used infrequently and is considered an advanced WInID3 function and not routinely used. It has an advanced filter capability so the database can be filtered and only those records meeting the filter criteria will be displayed.

27
Status Button Clicking the Status Button will bring up the status report screen that shows information concerning the status of the two databases, the Antemortem and Postmortem. Do not attempt to use the View or Print reports area unless you have Access 2000 in the proper location.

28
Persist O&G Button The Persist O&G Button will create two small windows, a graphic and an odontogram window for the current active record. This allows any AM or PM record to remain visible while scrolling through the AM or PM databases. Often used when searching for potential matches. Close either window by clicking on the in the upper right corner.

29
List Tool Button The List Tool Button will bring to the screen a small window shown below. While scrolling through a database attempting a match you can click “Add” on the window and this will save the window that is currently displayed on the screen. It displays both the Antemortem and Postmortem window. You can then review the saved pairs or print the list to use as a guide in comparison. I find it somewhat confusing and rarely use this function.

30
Best Match Button The Best Match Button accomplishes one of the most important functions of WInID3. This button is used when the odontologist wishes to compare a single record to a database. Routinely, a postmortem record will be brought to the screen by the GoTo Button and then compared against all the antemortem database records by clicking on the Best Match Button. The Best match will compare the dental surface descriptors and the physical identifiers and display the most likely match in a series of prioritized lists.

31
Best Match Button Future training modules will give a more detailed explanation of the use of the Best Match Button, since this is a vital function and the basis for the use of WinID3 in disaster identification protocols. For now lets view screen generated when attempting a Best Match comparison. Use the GoTo Button and bring up postmortem record #110.

32
Best Match Screen You should now see a screen as pictured. Note the list of names at the bottom right. This is where you will most often focus your attention in the comparison process. The list is of the AM records that have the most restoration matches between the postmortem record and the antemortem database, with the records with the most matches listed first. You highlight the record by clicking on the name. Do that to “Allison”.

33
Best Match Screen You now have “Allison” highlighted. Now click on the comparison button.

34
Comparison Screen - Graphics You now see the graphic comparison screen. It is displaying and comparing the antemortem record “Allison” to the postmortem record #110. The graphic window is the default window, but you can click on either the Dental or Identifier tab to view those windows. Click on the Dental Tab now.

35
Comparison Screen - Dental The dental comparison screen shows the written charting and the odontogram of the two compared records. The areas of concordance on the dental chart are highlighted in green for ease of viewing. On both windows, if the record displayed in not a likely match and you wish to see the next record, click on the “Next Record” button.

36
Print Button The Print Button when clicked, will bring up a composite of the active antemortem or postmortem record. This is useful for transmitting or storing the database data in a non-digital format. Click Print Button to print the composite data record.

37
NCIC 2000 The NCIC 2000 button will not be used in DMORT dental identification protocols. Clicking this button will generate an NCIC Missing Person or Unidentified Person dental report. The FBI has not as yet adopted WinID3 format for dental data entry, but should they reconsider, WinID3 will be capable of generating a NCIC format report

38
Exit Button Clicking the Exit Button will exit the operator from WinID3 and save the additions and changes made to the database since the last save or the last time this particular database was opened. If you wish to preserve the original database without any changes, go to the File Menu and use the “Save Database As” command and save the newly changed database under a different name. See Slide 7-9 of this module to review the “Save Database As” command.

40
Choose a database (WinID Katrina Baton Rouge.mdb)
")
41
Click “Antemortem or Postmortem”

42
Assign unique body number and enter “record creator”

43
Click “add new”

44
Complete case information

45
DMORT Dental Universal 1 to 32 tooth numbering –Be aware of FDI tooth numbering Use of WinID codes DMORT dental coding forms Dot-out film positioning

46
WinID Coding Leave blank if not sure Only primary codes used for sorting Secondary codes for additional info Use comments

47
Junk In Junk Out JIJO

48
WinID Coding In WinID coding the restored surfaces of a tooth are coded. The restorations are not coded. A tooth restored with MO and DO fillings would be coded MOD and not MODO.

49
Primary Codes M - mesial surface of tooth is restored. O - occlusal surface of posterior tooth is restored. D - distal surface of tooth is restored. F - facial surface of tooth is restored. L - lingual surface of tooth is restored. I - incisal edge of anterior tooth is restored.

50
Primary Codes U - tooth is unerupted V - non-restored tooth – virgin X - tooth is missing - extracted J - tooth is missing postmortem or the clinical crown of the tooth is not present for examination. Also used for avulsed tooth. The root or an open socket is present, but no other information is available. / - no information about tooth is available.

51
Secondary Codes A - Annotation - An unusual finding is associated with this tooth. Specifics of the finding are detailed in the comments section. B - tooth is deciduous C - tooth is fitted with a crown. All surfaces are restored. Primary code “MODFL” is in place E - resin filling material.

52
Secondary Codes G - gold restoration. H - porcelain. N - non-precious filling or crown material. Includes stainless steel. P - pontic. Used only when tooth has been marked as missing with “X” primary code.

53
Secondary Codes R - root canal filled. S - silver amalgam. T - denture tooth. Used only when tooth has been marked as missing with “X” primary code. Z - temporary filling material. Also indicates gross caries (used sparingly).
..")
54
Antemortem Dental Coding At the start of data entry for a new record all dental fields are marked / by default, this means no info. All 3rd molars are / unless seen on radiographs. Code as V or U or X from radiographs.

55
Antemortem Dental Coding All anterior interproximal restorations are either M or D, do not code as ML or DF unless restoration is extensive. Posterior amalgams - when coding from radiographs: do not code suspected F or L extensions or pits unless confirmed in written record

56
Dental Coding Chart from radiographs, use written records to clarify. Logic is less AnteMortem features to more PostMortem features.

57
Dental Coding J code used very sparingly: missing crown, extensive fracture, MPM. Crown restorative material ignored unless in written chart Any use of A must be accompanied by notation in the comments.

58
Dental Coding - Comments Standard codes allow comments field searches. Press button to see list of standard codes Include tooth numbers in comments to facilitate searching. The comments field is the institutional memory

59
Primary CodesSecondary Codes M - MesialA – Annotation O - OcclusalB - Deciduous D - DistalC - Crown F - FacialE - Resin L - LingualG - Gold I – IncisalH - Porcelain U – UneruptedN - Non-Precious V – VirginP - Pontic X - MissingR - Root Canal J – MissCr MPMS - Silver Amalgam / - No DataT - Denture Tooth Z - Temporary WinID3 Descriptors

60
AbrasionOrthoRPD ApicoPedoSealant Cong MissPinSilver Pt CystPostSuperNu HemisectResorbTemp ImpactionRetainerTorus ImplantRetroFillWritten Record Narrative OpacityRoot TipDate of X-Rays Standard Comments for WinID3

61
Dental Coding C is shorthand for MODFL-C Assume Amalgam on posterior. Assume Resin on anterior. Use / when in doubt.

62
Dental Coding Sealant - code as VAE Pontic - code as XP Implant - code as XPA explain features in comments

63
Example 1 mesial occlusal distal facial lingual silver amalgam restoration MODFL-S

64
Example 2 tooth has distal lingual restoration – restorative material is unknown DL

65
Example 3 gold crown MODFL-CG

66
Example 4 endodontically treated tooth with porcelain crown MODFL-CHR or MODFL-CHNR

67
Example 5 mesial incisal resin MI-E

68
Example 6 tooth missing X

69
Example 7 virgin deciduous tooth V-B

70
Example 8 mesial occlusal silver amalgam in deciduous tooth MO-BS

71
Example 9 missing tooth replaced with non-precious pontic X-NP

72
Example 10 missing tooth replaced with denture tooth X-T

73
Example 11 gold MODF onlay MODF-G

74
Example 12 missing postmortem J

75
Example 13 mesial occlusal temporary filling on tooth with an anomaly MO-AZ

76
Example 14 tooth with mesial and distal caries V or V-A

77
Example 15 antemortem tooth with no clinical crown due to fracture J or J-A

78
Example 16 implant retained porcelain crown X-AHNP

79
Example 17 tooth with occlusal sealant V - AE or V

80
Example 18 tooth with occlusal resin, very shallow, but has been prepared with a bur O or O-AE

81
Example 19 Maryland bridge pontic X-AHNP

82
Example 20 tooth with Maryland bridge connector on mesial-lingual ML-AN

83
Example 21 retained primary tooth with mesial-occlusal amalgam filling, no permanent successor MO-ABS Use comments

84
Example 22 tooth with MO amalgam and DO resin fillings MOD-ES or MOD-AES

85
Example 23 MOD porcelain inlay MOD-H

86
Example 24 Tooth #19 has been extracted, tooth #18 has drifted mesially. #18 restored with a non-precious crown. 19: X-A18: MODFL-ACN The mesial drift of tooth #18 may be noted in the comments field.

87
Charting Errors Flips –Tooth on opposite side of arch –19 to 30 3 to 14 Flops –Transpose restoration –MO to DO OF to OL Slides –Mis-numbering of molars due to extractions and mesial drift 1 - 2 - 3 14 - 15 - 16 17 - 18 - 19 30 - 31 - 32

88
Adding Records to a Database Each time a new database is created, a postmortem and antemortem “dummy” record is created. Do not delete these records until you have entered at least one antemortem and postmortem record. Now let’s review what data must be entered for either a postmortem or antemortem record.

89
New Record Command To add a new record to an existing database, or to begin adding records to a new database, you click on the “Add New” Button. A drop down menu will appear, click on either postmortem or antemortem depending on which record you wish to enter.

90
Entering Data After clicking “Ok” the following screen will appear. The ID entered will appear in the first entry box on this screen.

91
NCIC # The NCIC 3 will not be utilized in a DMORT deployment. It pertains to the use of the WinID3 database for missing or unidentified persons. AM & PM

92
Entering Data – Originating # Now that we have entered the unique ID # (P001), we need to consider entering further postmortem data. The next areas to consider are “Originating Agency “ and “Originating agency #”. Both are normally left blank, unless working with an agency in conjunction with a medical examiner or coroner such as the FBI, and they have a unique tracking number. AM & PM

93
Body Parts Not Recovered To enter body parts not recovered, click on the small triangle at the end of the entry box. Then click on the part not recovered. If multiple parts are not recovered, hold down the Ctrl Key and click the parts not recovered in the list on the right. When finished press the Tab Key. This data entry may not be utilized in incidents with fragmented remains. PM Only

94
Post Mortem Condition The Post Mortem Condition data box is used to describe the condition of the remains at the dental postmortem examination. After clicking on the data entry box, you can either enter you own description or you can by click on one of the descriptions on the list. PM Only

95
User Designated Fields User designated fields will not be used for DMORT WinID3 data entry. They are user determined optional data fields. PM & AM

96
Dental Data Entry The entry screen also has a rapid entry area for individuals with dentures, all missing teeth or all virgin teeth. If your record has these specific conditions you may use these “shortcuts” to save time and ensure an accurate entry PM & AM

97
Dental Data Entry When you click on the box #1, an Enter Dental box opens and displays the dental entry screen. A small rectangle on the left side of the Enter Dental box is highlighted. In the center is a series of boxes with letters that represents dental conditions and tooth surfaces. To enter data, click on the appropriate lettered box or type the entry in the highlighted rectangle. PM & AM

98
Dental Data Entry To aid the entry of data, a list of Primary and Secondary codes is displayed on the right of the Enter Dental screen. The primary and secondary codes shown are the only codes that will be accepted by WinID3. To enter an MOD amalgam on tooth #3, you may either type in “MODS” or click on the M, O, D, square and then type an “S”. PM & AM

99
Dental Data Entry Notice the format is SMOD in the entry box. Confirm that this is the correct designator, and if you need to enter further descriptors click “Next Tooth”. If you are only editing one tooth or are finished entry, click “OK”. To cancel, click cancel. If you click “Next Tooth”, you will see a new screen to enter data for the next tooth in numerical sequence. PM & AM

100
Dental Data Entry When you click “OK” at the end of the entry of data, the original screen appears. Note the “SMOD” is now in the correct format “MOD S’ and the odontogram is appropriately filled out and labeled with an “S” for amalgam. Now click on any other tooth number and enter a sequence of restorations or conditions to practice. PM & AM

101
Data – Entry Comments WinID3 standard codes as you can see do not cover all possible treatment options that may be present in a dental examination or “translation” of a dental chart. To accommodate the “other” category of treatment and pathology options, one has the ability to enter a Comment for each individual tooth. Comments are to be used sparingly. Standard comments are available; however, any type of comment can be entered.

102
Data – Entry Comments This is the Standard Comments Screen that appears when you click YES. Enter a single or multiple comment by clicking on the box to the right of the comment. Only standard comments should be entered, unless approval for non- standard comments has been granted by either the AM or PM Section Leader. To enter date of x-rays click the box and enter a date.

103
Data – Entry Comments When you click Ok at the bottom of the Standard Code Box it will automatically enter the tooth number and code in Comment Section. The comment section can be viewed by clicking on the Comments Tab. PM & AM

106
Summary The WinID Codes provide a standardized way to record dental information. Information that can not be readily coded is explained in the comments section of each record.

112
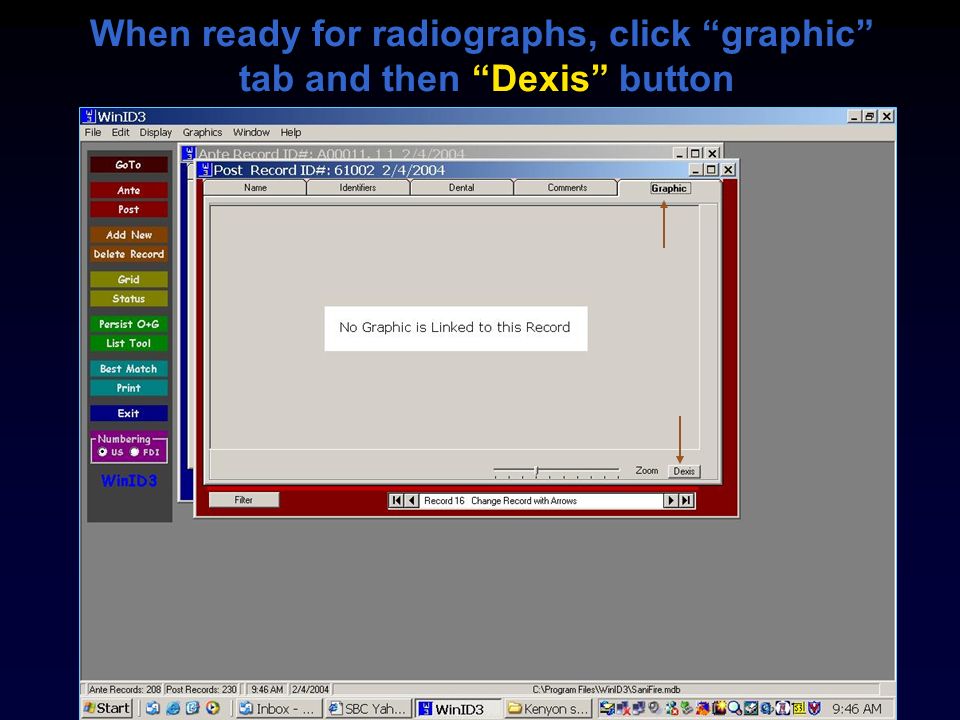
When ready for radiographs, click “graphic” tab and then “Dexis” button

113
Dexis will appear and create a new Dexis image file with the same name or body number

114
Make sure “tooth icon” is selected if taking a full mouth series

115
Click on “x-ray icon”

116
Click on the“full mouth button”. This automatically starts series and prompts next area to be exposed.

117
Place sensor in prompted area of arch and expose (green indicates Dexis is ready)
")
118
Place sensor in next prompted area of arch and expose next image (continue until complete)
")
119
When complete, optimize images and verify location in template with no overlapping images

120
Click on “export icon”

121
Click Export All, confirm format “JPEG” then click Export FMX for WinID

122
Minimize Dexis

123
In WinID, click “name tab”, then “add graphic”

124
Select appropriate jpeg, then click “open”

125
Image file is now automatically linked

126
Click “graphic tab” to view imported radiographs

127
If antemortem then:

128
Enter victim’s name and full name of person entering record

129
Complete case information

130
When ready to scan radiographs, click “graphic” tab and then “Dexis” button

131
Dexis will appear and create a new Dexis image file with the same name

132
Make sure “tooth icon” is selected if scanning a full mouth series

133
Click on “scanner icon”

134
Arrange films dot down with no films touching each other

135
Click “preview”, then limit scan area to cover films

136
Set Resolution to 300 dpi, then click “scan”

137
Use dialog box to place individual images into the template using the location icons

138
Optimize images and verify that all images are in the proper location and orientation (you cannot come back)
")
139
Click on “export icon”

140
Click Export All, confirm format “JPEG” then click “Export FMX for ”

141
Close Dexis

142
In WinID, click “name tab”, then “add graphic”

143
Select appropriate jpeg, then click “open”

144
Click “graphic tab” to view imported radiographs

145
IDENTIFICATION

146
Comparison IDs from comparison of radiographs Written records always suspect Closed population May only have supportive dental information Other methods of ID if not dental positive –Anthropology - Pathology - Fingerprints

147
Comparison ABFO Guidelines for body identification –Possible Identification: The antemortem and postmortem data have consistent features, but, due to the quality of either the postmortem remains or the antemortem evidence, it is not possible to positively establish dental identification.

148
Comparison ABFO Guidelines for body identification –Positive Identification: The antemortem and postmortem data match in sufficient detail to establish that they are from the same individual. In addition, there are no irreconcilable discrepancies.

149
Comparison ABFO Guidelines for body identification - continued –Insufficient Evidence: The available information is insufficient to form the basis for a conclusion.

150
Comparison ABFO Guidelines for body identification - continued –Exclusion: The antemortem and postmortem data are clearly inconsistent. However, it should be understood that identification by exclusion is a valid technique in certain circumstances.

151
Use WinID to Aid IDs Two methods –Best Match –Persist Odontogram and Graphic, then Filter on specific Restorations

152
Best Match Search With the specific postmortem record that you wish to compare to the antemortem database selected, in this case record #103, all that is needed to begin the search is to click on the Best Match Button on the tool bar on the left of the screen. Doing this will open a new window called the “Best Matches to Post Record #103”.

153
Best Match 4 ranked lists –Most dental hits –Least dental mismatches –Most dental restoration hits –Most identifier hits Double-click record from list to display comparison screen

154
Best Match Search Window

155
Best Match Search As you see from the previous slide, there are four search lists open in the window. They are : Most Dental Hits Least Dental Mis- Matches Most Identifier Matches Most Restoration Hits

156
Best Match Search Window When you attempt a comparison such as PM #103 with the “Donaldson record”, you will now see this screen.

157
Dental Comparison Window The Comparison window opens, and displays the Dental Descriptor comparison of the postmortem record #103 and the antemortem record of Donaldson. When the dental descriptors of a specific tooth are identical (match) the tooth number is highlighted in green. This allows the odontologist to make an immediate assessment of the number of matches present. Other data such as sex age and race are shown to immediately consider the validity of the match
 the tooth number is highlighted in green. This allows the odontologist to make an immediate assessment of the number of matches present. Other data such as sex age and race are shown to immediately consider the validity of the match.")
158
Radiograph Window Now click on the “Graphics Tab” and the radiographic comparison window will be displayed. This window displays the dental radiographs of the AM and PM record that is being compared. You may print this page for a hard copy

159
Radiographic Comparison Most odontologists are visually oriented, so the graphic display is the primary means of determining the concordance between an AM and PM record. We all know that two MO restorations are identical in charting, but are completely different when viewed by a radiograph. Therefore his view will be the primary comparison screen.

160
Radiographic Comparison On the previous screen, the AM record is on top and the PM record below. The size of the radiographic image is determined by the Zoom control above each of the images. To zoom, left click anywhere on the zoom bar. Clicking on the right of the zoom bar will increase the image size one increment, and clicking on the left of the bar will decrease the image size one increment. You may also zoom the image larger by holding down the control key and clicking anywhere on the radiograph with the right or left mouse button.

161
Dental Comparison Window In our comparison of PM record #103 and the AM record of Donaldson, we can see that the radiographs have sufficient concordance to be considered a positive dental identification. To document this you may print this page showing the graphic comparison. A printed record of the dental descriptor com- parison may also be printed.

162
WinID Matching Matching: antemortem to postmortem Hit – an exact match of primary codes –X = X Mismatch – an impossibility –MOD = V Possible – a conceivable progression of dental treatment –O = MO, O = C, O=X

163
Persist and Filter on Restoration Move to a record of interest Use Persist O+G to display Odontogram and Graphic Filter in records opposing screen by a specific restoration –Ante to Post- Post to Ante Scroll through records to find match –Look at Odontogram or Graphic

164
Filter Function in WinID Use to limit records available for view Limits records in Best Match Can filter on Restorations Disposition Age User defined filter string Race Sex Height Comments

165
Search Strategies Missing teeth, Perio 3 rd molars, Impacted, Unerupted, Restored Root canals, Posts Crowns, Gold, Porcelain Implants, Pins Pedo, Retained primary teeth Pattern of restorations in quadrant Ortho, missing bicuspids

167
ID Committee Coroner Incident commander View-box Be prepared to defend your findings

168
DMORT ID Form Names of team members Radiographs and other material used to make ID Postmortem and antemortem ID# The permanent record of the ID Sign form

169
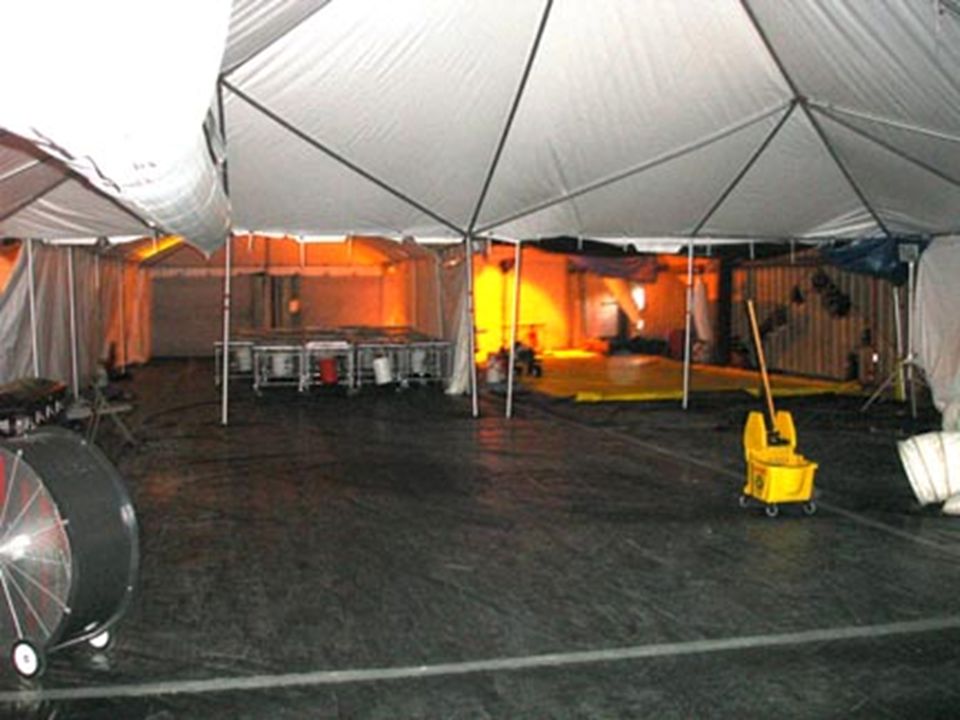
At Conclusion Tear down Pack up – DPMU Forms Paper work Get paid Go home

170
SUMMARY The dental team compares antemortem and postmortem records to identify human remains through the comparison of dental characteristics. Many dental strategies to make ID. Not all remains can be identified with dental methods. Finish your work, lose your stress, go home.

171
www.winid.com
Similar presentations


 with Excel.>")


 Search Invoice Manage.>")


 follow the hyperlinks to navigate to the specified Topic or Figure.>")
