Download presentation
Presentation is loading. Please wait.

1
POWERPOINT TRICKS April 7, 2011

2
IMAGE IN A SHAPE

3
COPY AN IMAGE Control Key and D

4
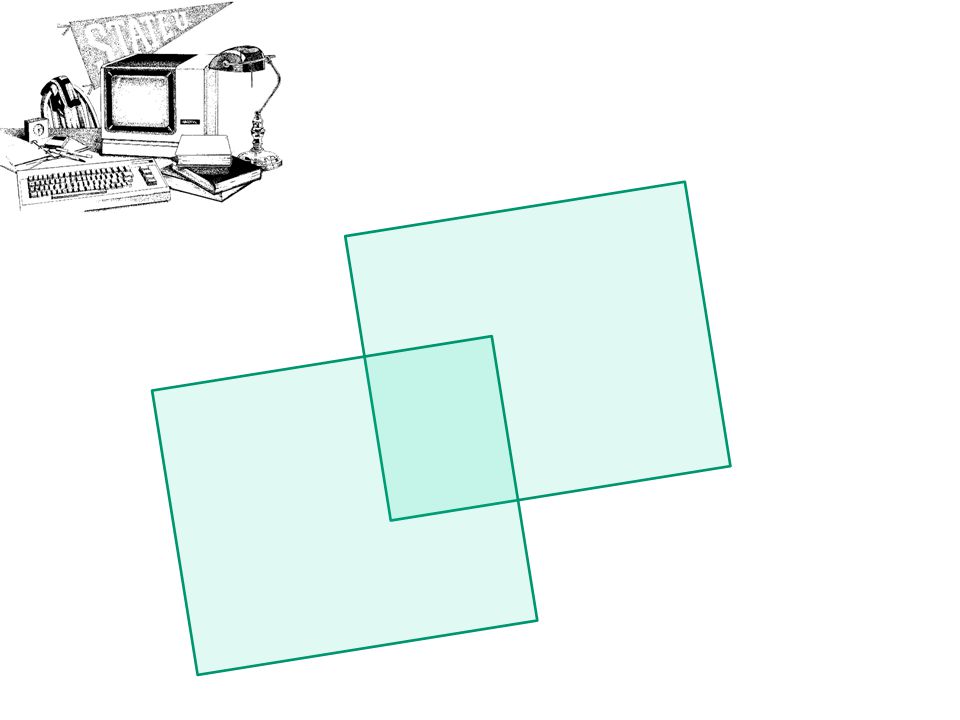
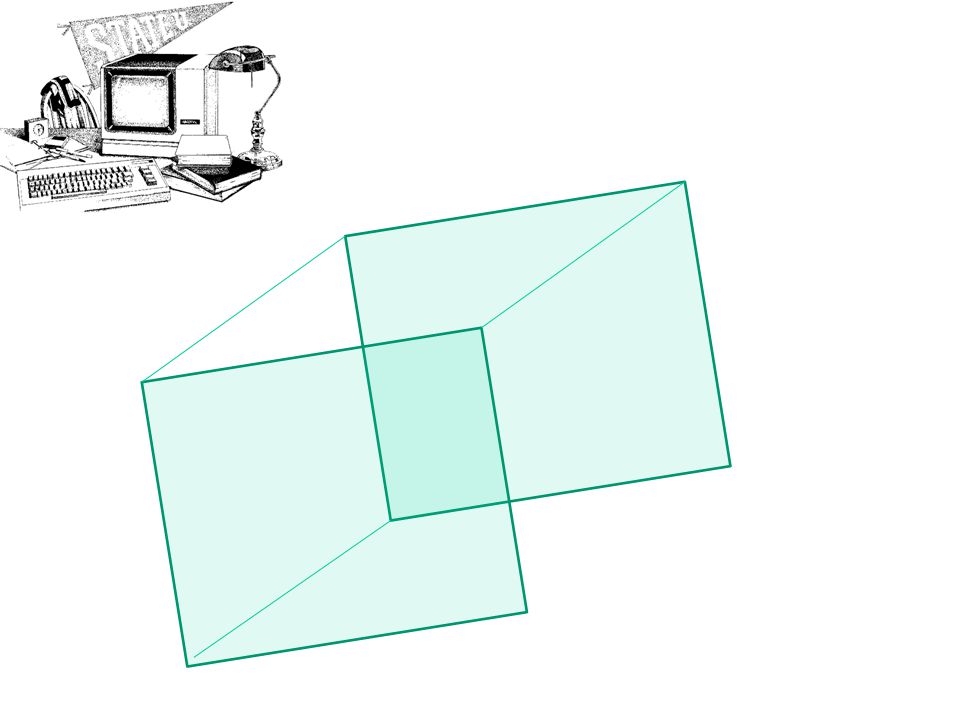
ALIGNMENT

5
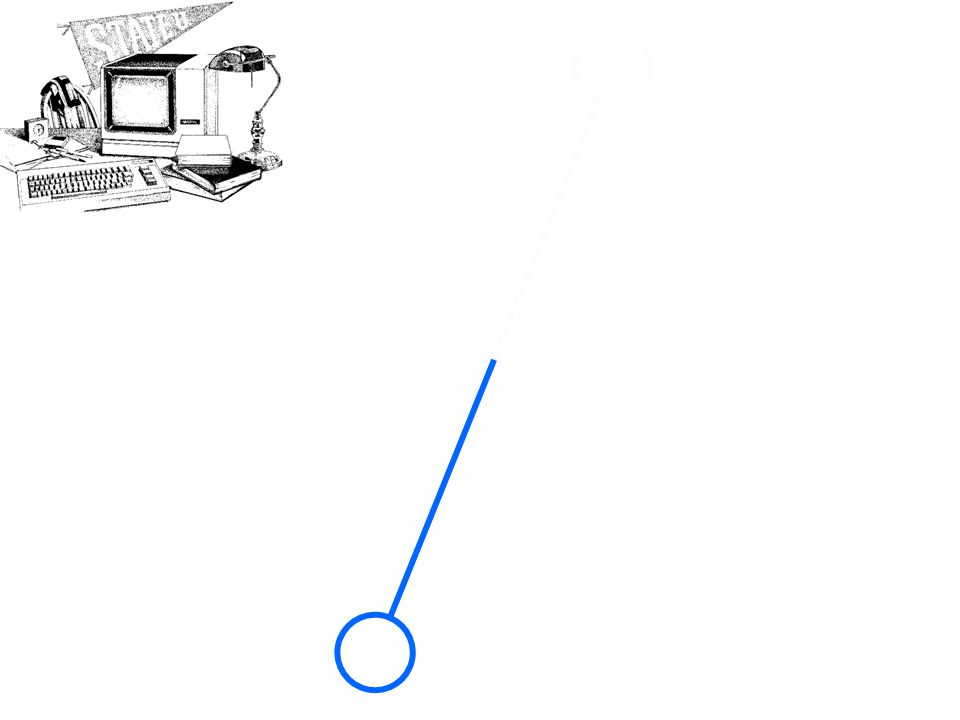
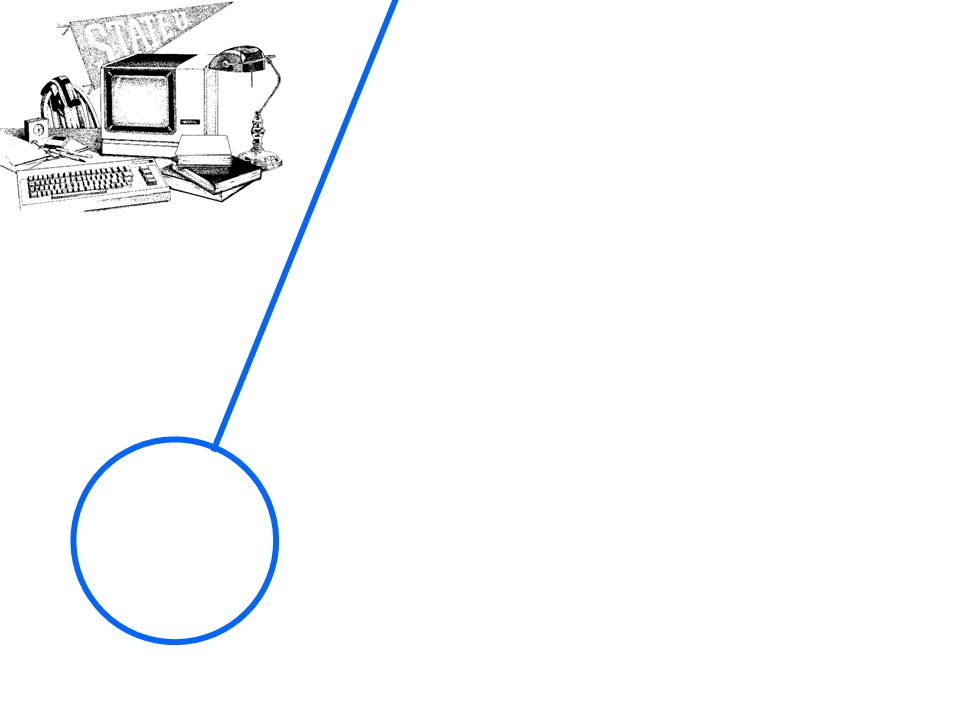
MOTION PATH

6
PRACTICE

8
PRACTICE

10
practice

11
Students of the Year Students of the Year

12
This is only a practice. Scrolling Ticker

26
TIMERS

27
5

28
4

29
3

30
2

31
1

34
Hidden Pivot Tutorial on rotating an object on hidden pivot

35
Normal dimension to side screen during a slideshow! It is impossible to go from a normal dimension presentation to a wide screen version on the fly. but you can fake it. Start with a normal dimension presentation, Add autoshapes top and bottom to "Fly In" That simple!!!

36
Example 1 = Pivot

37
Example 2 Normal Spin Effect

38
= Pivot Example 2 Spin Effect with hidden pivot

39
Example 3 Spin Effect with hidden pivot (On image) = Pivot
 = Pivot")
40
PENDULUM Scenario: The Emphasis > Spin effect in PowerPoint 2002/XP and above allows you to rotate an object. Unfortunately, the point of rotation is on the center of the object and there is no setting for you to modify its rotation point.

41
First of all, insert an AutoShape of your choice. In this scenario, we will assume that the AutoShape is an arrow pointing to the top. Next, select the AutoShape. Hold down Ctrl key and press D to create a duplicate of the AutoShape. Select the duplicated AutoShape. On the drawing toolbar, click Draw > Rotate or Flip > Flip Vertical. Move the duplicated AutoShape right below the original AutoShape so they look symmetrical. Double click on the duplicated AutoShape to bring up the Format AutoShape dialog box.

42
pendulum Under Fill, set the Transparency to 99%. Under Line, set the Color to No Line. Click Ok. Now, select both the AutoShapes. Right click on the AutoShapes and click Grouping > Group. Click Slide Show > Custom Animation. Click Add Effect > Emphasis > Spin

43
FLOATING BALLOONS Move the mouse over the green arrow until the cursor changes to a diagonal line. Drag green arrow straight down to the bottom of text box. Zoom to show more workspace

44
Balloons Paste balloons, If you want them to move together, group them. 3. Click on the group and drag it to the top of the slide. Some of the balloons will now appear to be off of the slide. This is what you want to happen. 4. Drag the balloons toward the top until they are all on the grey portion of the screen. You will have to grab the bottom of the group and ‘inch’ them upward until they are all off the screen. Once they are on the grey background they would not show up in a regular slide show, but once you animate them, they will appear to float away. 5. Drag your other groups of balloons so that they, too, are on the grey portion of your screen.

45
The above image used is a copyright of Washington Department of Fish and Wildlife. Gallery: WDFW Image Gallery WDFW Image Gallery Album: WDFW Wildlife Areas, and Habitat WDFW Wildlife Areas, and Habitat Album: Habitat Illustrations Habitat Illustrations Leaf Motion Effect More animations at : http://pptheaven.mvps.org Click again to replay, Press ‘Esc’ to exit.

46
leaves Before we start, you will need to get a picture of a leaf (Either from Microsoft Clip Art Gallery, internet, or create one on your own). * Microsoft Clip Art Gallery has a picture of leaves. Here's what you can do: –Click Insert > Picture > Clip Art. –Search for leaf. Click Go. –Add first one on the list. –Notice there is a brown background at the back and an extra leaf. We just need one. We will need to remove it. –Right click on the clip art, click Grouping > Ungroup. When prompt to convert, click Yes. –Ungroup again. –The clip art will then be editable. Remove the unwanted ones and group the rest back. Move the picture out of the slide/working area, outside of the top left hand corner.

48
Motion Path Click on the picture. Click Slide Show > Custom Animation. Under the Custom Animation Panel, click Add Effect > Motion Paths > Draw Custom Path > Scribble. Draw a curve that goes from the top left to middle right. (Download the finalized ppt at the end of the tutorial to see the path.) Set the Speed: "Medium" to "Slow". Right click on the motion path effect and click Effect Options. Under Settings, put a checkmark on "Smooth End". Click Ok. We are done with the path. Now, we will move on to rotating the leaf.
 Set the Speed: Medium to Slow . Right click on the motion path effect and click Effect Options. Under Settings, put a checkmark on Smooth End . Click Ok. We are done with the path. Now, we will move on to rotating the leaf..")
49
leaves Spin Effect Click Add Effect > Emphasis > Spin. Set the Start: "On Click" to "With Previous". Right click on the Spin effect, select Timing. Click on the input field of Speed. Set it to 2.5 seconds. Click Ok. Lastly, create a "flipping" effect.

50
leaves Swivel Click Add Effect > Entrance > Swivel. Set the Start: "On Click" to "With Previous". Right click on the Swivel effect, select Timing. Click on the input field of Speed. Set it to 2.5 seconds. Click Ok. Done! If the leaf stops spinning/swiveling before it reaches the desired destination, increase the speed of the motion path.

51
References: http://www.examiner.com/presentation-skills-in- national/how-to-use-color-to-make- presentations-more-effective-part-onehttp://www.examiner.com/presentation-skills-in- national/how-to-use-color-to-make- presentations-more-effective-part-one http://www.indezine.com/ideas/davesurvey.html http://www.peterli.com/spm/resources/articles/ar chive.php?article_id=551http://www.peterli.com/spm/resources/articles/ar chive.php?article_id=551

Similar presentations


>")


 1. Right click on picture you want to animate. 2. Click on Custom Animation. 2 1 R.>")
 1. Click on Insert. 2. Click Text box. 2 1.>")


 1. Click on Insert. 2. Click Movies and Sounds. 3. Click Sound from file. 2 3 1.>")