Download presentation
Presentation is loading. Please wait.

1
Museum Box is a free website that allows users to create a project using cubes to organize information. Users can use text, images, sounds, web links and video to enhance the presentation. Museum Box Thinking Outside of the “PowerPoint” Box.

2
Museum Box Click Start to Begin. This link gives you instructions on creating student accounts and approving student projects.

3
Customize your box here. How to Change Box Each cube can be up to 3 layers deep. That would give you 24 faces to work with. Choose the number of cubes you want in your box. You can change the color and texture of your box and cubes. Click change box to make changes.

4
Setting up Box 2. Save the changes you have made. Follow the steps on the next page. Name your box and give it a description. The “My Drawer” option allows you to save items to use in your cubes. This is handy if you are not on your own personal profile.

5
Saving and Log in You will create an account by clicking ‘Join for free’ the first time you log in. Email tsample@misd.org for info on creating your account. Each time after, you will simply log in.tsample@misd.org

6
Creating a Cube Choose a side of the cube that you want to begin with. Decide on a caption for that side of your cube. You will continue doing this for each side of the cube.

7
Images When you choose ‘Images’ you are brought to the home gallery. From there you can choose from a large selection of artist’s work, including paintings, photography and drawings etc. You may choose to use your own saved images from your computer by selecting ‘Your Images.’ It will then bring you to this login page, from there you will be able to view and decide on your images.

8
Images Select ‘Add to Cube’ and the image you chose will appear on one side of your box. If you ever add anything to a cube you do not like, click ‘Clear this Side’ or ‘Clear all Sides’ to delete everything from cube.

9
My Drawer When looking for images, texts, sounds etc. you can click the ‘Add to drawer’ button which will save items you find to your drawer. You may then access any of these items by clicking ‘My Drawer’ instead of having to search your computer or the internet.

10
Text Add text by typing your information inside the text box. Personalize it by adjusting the font, color and size. You can also choose the ‘Upload’ button which will allow you to upload text from websites, or saved documents. Click ‘ Add to Cube’ and view your work.

11
Sounds Add sounds to your box by choosing a sound from the E2BN Gallery. You may also record your own sounds by clicking on the ‘Your Sounds’ option. Use a microphone and record your own sounds to add to your cube.

12
Video Upload personal videos, videos from the internet or create your own video with a web cam.

13
Files and Links Upload Files to your cube. Students will not see the text until the cube has been submitted and approved. A Word Icon will appear instead. Paste URL address in the address bar and then create a title. You must then click add to Cube.

14
Once your box has been created, you must log in to see it again. Select the box you want to load. After you have proofed your work and saved you completed ‘Box’, click the Submit icon to have ‘Box” approved and posted to the web. Submitting Project

15
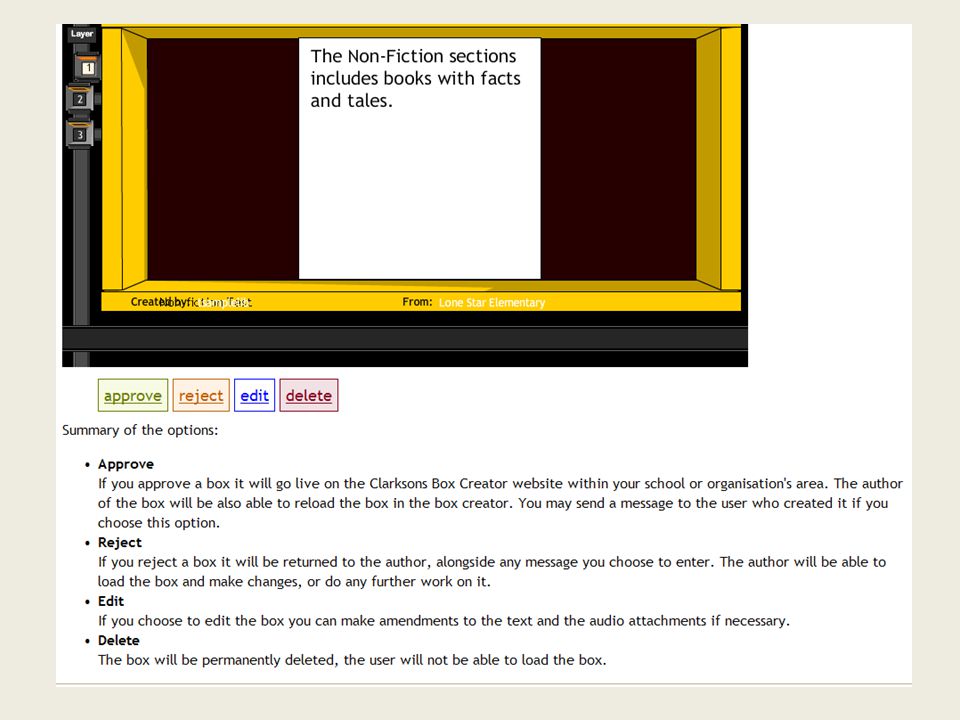
Approving Student Work Click Login to Teacher Adminstration Area. Enter your username and password. Choose Review Boxes.

Similar presentations