Download presentation
Presentation is loading. Please wait.

1
Introduction to Incident Scene Photography New Mexico State Police Criminal Investigations Section Crime Scene Team

2
Learning Objectives Identify the requirements for a photo to be admissible in a court of law Identify the requirements for a photo to be admissible in a court of law Identify the elements of a good, technical photograph Identify the elements of a good, technical photograph

3
Learning Objectives Identify the elements of technical photography Demonstrate how to properly photograph footwear impressions Demonstrate how to properly photograph tire impressions Demonstrate how to properly photograph latent prints

4
Introduction to Incident Scene Photography

5
Introduction For police officers, photography has become the primary way of documenting crime & traffic collision scenes. For police officers, photography has become the primary way of documenting crime & traffic collision scenes. Photography is a combination of art & science. Photography is a combination of art & science.

6
Why Take Photographs At A Crime Scene? Photographs document the scene in a way people can understand. Photographs document the scene in a way people can understand. Photographs can be used to recreate the crime and to prove or disprove a suspect’s explanation. Photographs can be used to recreate the crime and to prove or disprove a suspect’s explanation. They can help a jury understand where and how the crime was committed. They can help a jury understand where and how the crime was committed. A picture is worth a thousand words. A picture is worth a thousand words.

7
To Be Admissible in Court Fair Fair Not biased or prejudicial Not biased or prejudicial Must not appeal to the emotions of the jury Must not appeal to the emotions of the jury Accurate Accurate Technically correct Technically correct Form, Tone, Color and Scale Form, Tone, Color and Scale

8
To Be Admissible in Court Relevant Relevant Of value to the court and jury in making decisions Of value to the court and jury in making decisions Chain of Custody must be maintained Chain of Custody must be maintained The photo must be identified The photo must be identified Introduced in court by a person who is qualified to identify it Introduced in court by a person who is qualified to identify it

9
NM DPS Digital Imaging Policy Capture Capture Take pictures in accordance with the manufacture's instructions, DPS policy and your training and experience. Take pictures in accordance with the manufacture's instructions, DPS policy and your training and experience. Do not view the images (other than by the camera's built-in monitor) prior to the images being transferred to CD. Do not view the images (other than by the camera's built-in monitor) prior to the images being transferred to CD. Storage Storage Store the images onto a permanent media (CD) as soon as possible. Once the images are stored onto a CD, the CD will be treated as original evidence... Store the images onto a permanent media (CD) as soon as possible. Once the images are stored onto a CD, the CD will be treated as original evidence...
 prior to the images being transferred to CD. Do not view the images (other than by the camera s built-in monitor) prior to the images being transferred to CD. Storage Storage Store the images onto a permanent media (CD) as soon as possible. Once the images are stored onto a CD, the CD will be treated as original evidence... Store the images onto a permanent media (CD) as soon as possible. Once the images are stored onto a CD, the CD will be treated as original evidence....")
10
NM DPS Digital Imaging Policy The CD should be labeled with a permanent (Sharpie) marker: The CD should be labeled with a permanent (Sharpie) marker: Case # Case # Item # Item # Photographer's name Photographer's name Date images were captured & date transferred to disc Date images were captured & date transferred to disc Location where the images were captured Location where the images were captured Dissemination and image enhancement Dissemination and image enhancement Before any enhancements are made, you must make a working copy of the CD. Before any enhancements are made, you must make a working copy of the CD. An “Image-Processing Log" shall be kept for enhancements. The log will detail all steps used to obtain the enhanced image. The software (& version) shall be documented. An “Image-Processing Log" shall be kept for enhancements. The log will detail all steps used to obtain the enhanced image. The software (& version) shall be documented. Software shall be generally or scientifically accepted in the photography community as a valid tool for enhancement. Software shall be generally or scientifically accepted in the photography community as a valid tool for enhancement.
 shall be documented. An Image-Processing Log shall be kept for enhancements. The log will detail all steps used to obtain the enhanced image. The software (& version) shall be documented. Software shall be generally or scientifically accepted in the photography community as a valid tool for enhancement. Software shall be generally or scientifically accepted in the photography community as a valid tool for enhancement..")
11
Labeling the Disc as Evidence Label as Original Label as Original Case# Case# Item# Item# Case Agent Case Agent Description Description Date taken Date taken Date to disc Date to disc Photographer Photographer

12
Elements of a Good, Technical Photograph Must be correctly exposed Have maximum depth of field Have an accurate perspective Be in sharp focus

13
Impression Evidence Orientation (overview and midrange shots) Show where the impression is located in the crime scene. Close-up Use a scale on the same plane as the impression. Keep the film plane parallel to the plane of the impression MUST USE A TRIPOD Lighting Block out ambient light with a large piece of cardboard and use a strong light source at oblique angle to show the best detail in the impression.

14
Footwear Impression @ 90°

15
Tire Impressions Photograph tire impressions in sections showing one circumference of the tire. Taking overlapping photographs, with a tape measure, parallel to the tire impression.

16
Tire Impressions

17
Photography of Very Important Vehicles Exterior Photos Use the “21 point” method Sometimes it is not possible to get all 21 photos Do your best If you have multiple vehicles involved in a crash Take the standard over-view photos of the ENTIRE scene first Then, take 21 photos of each vehicle individually Then, take mid-range and close-up photos of the evidence

18
Front Edge Front Axle Side Rear Axle Rear Edge Diagonal Edge Rear Edge Front Diagonal Front Edge Front Axle Side Rear Axle Rear Edge These 20 Photos + 1 Photo Directly Down = 21 Photos 21 Point Method

19
Begin by Taking Over-view Photos of the Scene

20
Then, Take 21 Photos of Each Vehicle

21
Example of 21 Photos of Each Vehicle

22
21 Photos of Each Vehicle

30
You will not be able to get all 21 shots due to the position of the vehicles Just do your best

31
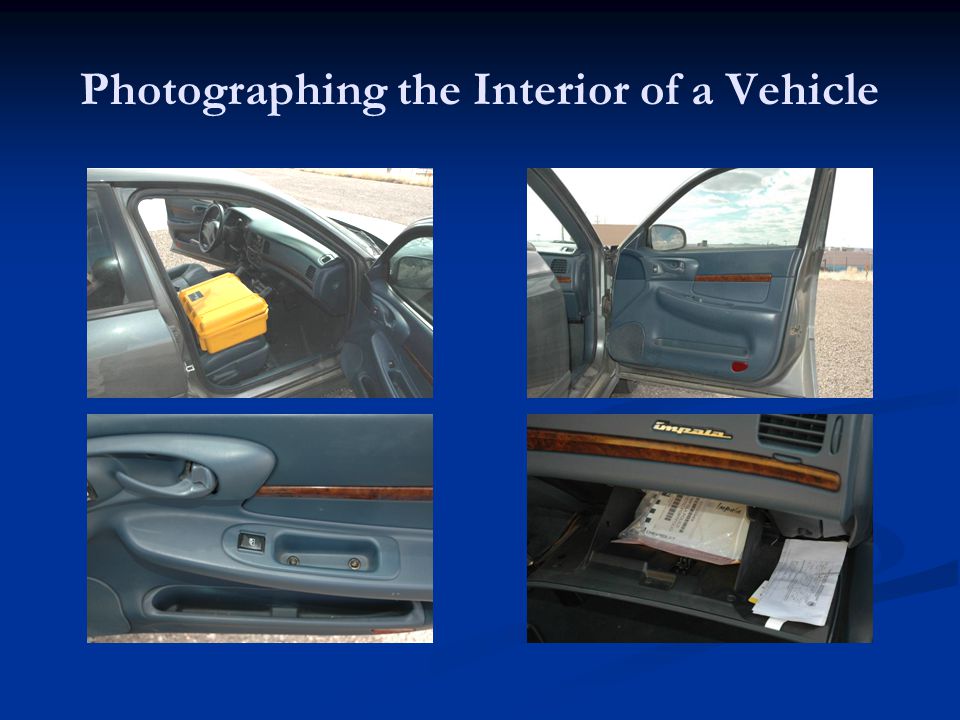
Photographing the Interior of a Vehicle

36
Photographing the Tread Pattern

37
Fingerprints Should be photographed before lifting Orientation shot to show location Consider using black & white film for greater contrast Macro or close-up lens Scale on the same plane must be used 90 degree shot Use a tripod

38
Fingerprints

39
Tool marks & serial numbers Orientation photo Evidence at the scene Close-up photos Use a scale on the same plane as the evidence 90 degree photo Oblique light to create small shadows in the detail Use a tripod.

40
Serial Number

41
Toolmarks

42
Impression Evidence Orientation Show where the impression is located in the overall crime scene. Lighting Block out the ambient light with an umbrella and use a strong light source at an oblique angle to show the best details. Close-up Use a scale on the same plane as the impression. Keep the film plane 90° to the impression Consider using a tripod

43
Footwear Impression

44
Tire Impressions Photograph tire impressions in sections showing one circumference of the tire. Taking overlapping photographs, with a tape measure, parallel to the tire impression. Keep the film plane 90° to the impression

45
Tire Impressions

46
Photography of Bloodstains Use color film Take orientation photos to show location Take close-up photos to show detail Keep the film plane 90° to the print L-shape ruler is preferred to get both width and length of stain Consider using a tripod

47
Photography of Bloodstains Use bounced lighting or diffused light. Oblique lighting works best when dealing with stains on fabric (very low angles). May need additional magnification A macro lens or the macro feature on the camera A step-up lens
. May need additional magnification A macro lens or the macro feature on the camera A step-up lens.")
48
Overview, midrange, close up

49
Photos of bloodstains

50
Bloodstains @ 90° To the Floor

51
Bloodstains @ 90° to Wall

52
Low Light Photography Issues We often need to photograph scenes in low light, the following is an overview. The CSI Effect means that Juries no longer rely on just your word. They want to see what you saw. Your ability to shoot in low light will depend on Ambient light Your photography equipment Lighting Equipment that you can supply DWI equipment, etc. Other resources available to you Fire Department lighting equipment, etc.

53
One Flash

54
Flash + Existing Light

55
Flash & flashlight uses Bounce flash Light is bounced off white, reflective surface Fill flash To fill the shadow/shaded area Multiple flash Painting with light Flashlight Painting with light Direct One or more light sources at 45 degree angles

56
Flash Photography Direct reflective Light is reflected directly off the subject into lens, and causes very high contrast Oblique lighting Light source at low angle, usually to show detail by creating shadows in the subject surface Diffused lighting An translucent material is placed between the light source and subject Transmitted lighting With transparent subjects the light source is transmitted through the subject toward the lens

57
No Flash vs. Multiple Flash

59
1, 2 & Multiple Flash

60
The basics of low light photos Put your camera on a tripod or sturdy surface turn your car off if that is what you are using Put you camera on a manual type setting (M) Set the aperture (A) as low as it will go Set the shutter speed (S, Tv) as slow as it will go Turn on the timer function, turn off the flash The flash will automatically make the shutter speed too fast for this.
 Set the aperture (A) as low as it will go Set the shutter speed (S, Tv) as slow as it will go Turn on the timer function, turn off the flash The flash will automatically make the shutter speed too fast for this.")
61
The basics of low light photos Light up the scene with a flashlight, and focus the camera. Press the button to take the photo, and when the shutter opens (you hear the click) Shine as many lights into the scene from as many different angles as you can until the shutter closes (it clicks again) Don’t shine the light toward your camera. Off shoe flashes are best, incandescent bulb flashlights are OK, LEDs are not so good (beam of light is too focused) Look at the back of your camera to see if you need more or less light, and take more photos.
 Shine as many lights into the scene from as many different angles as you can until the shutter closes (it clicks again) Don’t shine the light toward your camera. Off shoe flashes are best, incandescent bulb flashlights are OK, LEDs are not so good (beam of light is too focused) Look at the back of your camera to see if you need more or less light, and take more photos..")
62
PHOTOS OF A.L.S. AND LUMINOL The rules are different for these photos. They require additional training and experience to do them correctly

63
The End

Similar presentations


. Before we get started… - These are only very simple explanations - I could be wrong! - Mainly aimed at digital users.>")


 Meter (measures light in a scene and calculates proper exposure) Aperture ( controls the.>")

