Download presentation
Presentation is loading. Please wait.

1
KFETS Kentucky Field Experience Tracking System
Institution
![]()
2
The preferred browser for KFETS is IE 9 and above
Login to EPSB The preferred browser for KFETS is IE 9 and above Create an EPSB account (if you do not already have one) An EPSB account is required for access to KFETS Go to Click “Login to EPSB” under the EPSB Web Portal Click “New User? Create an Account Here” Enter required information Access to KFETS should be requested by the Chair/Unit Head to Lauren Graves- An will be sent out to Chairs/Unit Heads for the initial request of permissions to access KFETS Additional requests may be made by Chairs/Unit Heads at any time by sending an to Lauren Graves
 An EPSB account is required for access to KFETS. Go to Click Login to EPSB under the EPSB Web Portal. Click New User Create an Account Here Enter required information. Access to KFETS should be requested by the Chair/Unit Head to Lauren Graves- An will be sent out to Chairs/Unit Heads for the initial request of permissions to access KFETS. Additional requests may be made by Chairs/Unit Heads at any time by sending an to Lauren Graves.")
3
Log in to EPSB

4
If you have an EPSB account, enter your username and password under “Existing User? Log in Here” If you do not have an EPSB account, click “Create New Account” under “New User? Create Account Here” If you have an account but forgot your log in information, click “Reset Account” under “Forgot Log in Info? Reset Here”

5
Click on KFETS under EPSB Online Services
If you do not have the KFETS option, please contact to request rights for your institution

6
Add Course Click on the “Add Course” link to begin adding or uploading course information. Before a candidate can start recording activities, each university/college must create a catalog of courses within KFETS. Courses may be added manually (individually) or through batch load.
 or through batch load.")
7
Add Course Manual

8
Add Course Batch Load

9
Add Course Batch Load An “End Date” should not be included unless the course is no longer offered.

10
Add Course Edit/Delete
Courses may be edited or deleted by clicking the appropriate function button. If a course is deleted, all attached data will be deleted. If you want to close a course, click “Edit”, enter an “End Date”, and click the check mark. The course will no longer be available for students to enter data.

11
Once a course is added, it will remain an option for candidates until an end date is entered. An end date should be entered only when the course is no longer available.
12
Manage Activity This section is available for adding summary hours for candidates and should be used sparingly. Candidates are responsible for reporting their hours, but this section may be used by institutions if necessary.

13
Detailed Report Enables IHE to filter reported field experiences based on School Year, Semester, IHE Course, District, College ID, Job Function(of school personnel), Category, Course Number, or Diverse Groups. This data may be exported to excel by clicking “Export to Excel”.
, Category, Course Number, or Diverse Groups. This data may be exported to excel by clicking Export to Excel .")
14
Detailed Summary Click on the activities under “Engagement with Diverse Populations” to view details about the recorded hours. This shows the breakdown of the hour(s) for that one activity.
 for that one activity.")
15
Detailed Summary This box shows the breakdown of the diverse group information for the selected number of activities and hours. The checked boxes indicate the interactions with Diverse Groups within that field experience.

16
Transfers Initiate transfer Field experience hours may be transferred from one institution to another. A candidate must request his/her hours be transferred from institution “A” to institution “B”. Click “Transfers” to begin.

17
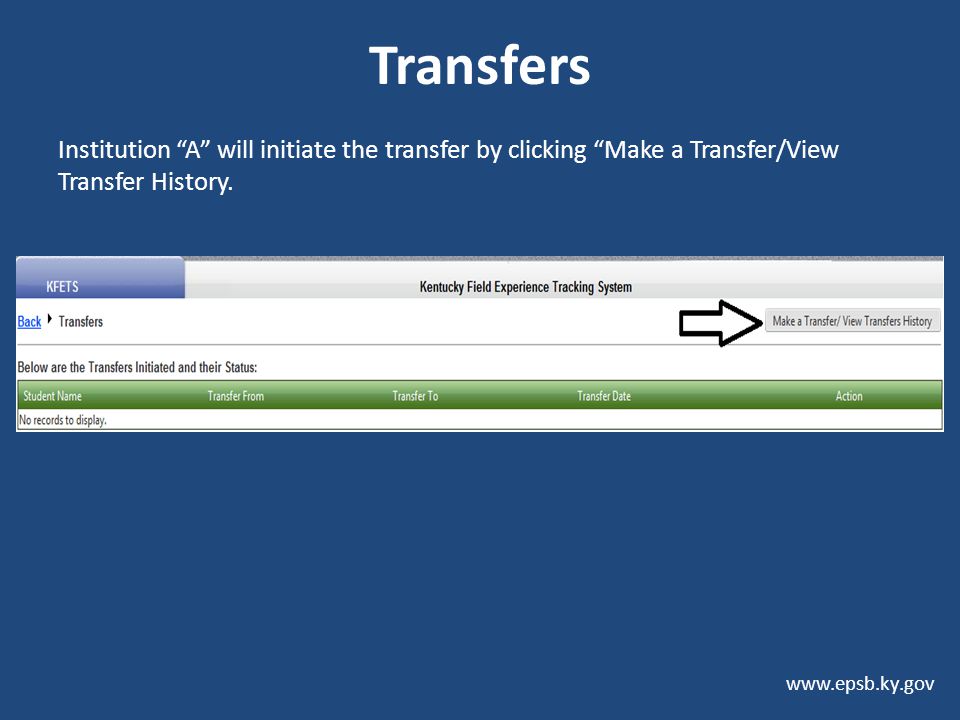
Transfers Institution “A” will initiate the transfer by clicking “Make a Transfer/View Transfer History.
18
Transferred hours may be accepted or denied.
Transfers Transferred hours may be accepted or denied.

19
Initiated Transfers from institution “A” to institution “B”

20
Transfers Status of transferred field experience hours from institution “A” to institution “B” A Status of Pending will remain until institution “B” accepts or denies the transferred field experience hours.

21
Transfers View transfer(s) Once institution “A” initiates a transfer, institution “B” will be notified with a red number next to “Transfer” after logging in to KFETS. The red number represents the number of initiated transfers for approval/denial.

22
Accept/deny transfer(s)
Each activity will begin with a Status of “Pending”. Once an activity is accepted, the activity will appear in the “List of Transferred Activities”. Denied activities will be deleted from the list.

23
Transfers Accepted Accepted activities will be added to the “List of Transferred Activities” box and have a Status of “Accepted”. If an activity needs to be deleted, click the red “X” under “Delete”. All information attached to that activity will be deleted.

24
Exporting Data Data may be exported to Excel from each of the following sections Add Course: Export your uploaded courses to Excel by clicking the Excel icon Manage Activity: Export data input by the IHE on behalf of candidates to Excel by clicking the Excel icon Detailed Report: Click the Export to Excel button Detailed Summary: Export field experience activity data to Excel by clicking the Excel icon Transfers: Export List of Transferred Activities to Excel by clicking the Excel icon

Similar presentations


 and Performance.>")


