Download presentation
Presentation is loading. Please wait.

1
Presented by: Bob Kogler, Rampart LLC
Protecting Steel Edges Presented by: Bob Kogler, Rampart LLC

2
Learning Outcomes At the end of this webinar, you will be able to:
Recognize sharp edges, outside corners, crevices and welds Define the proper steps to be taken to treat sharp edges, outside corners, crevices and welds in order to avoid reduced coating barrier protection

3
Introduction This webinar will describe:
The importance of edge protection to the overall corrosion protection of the structure The reasons coatings tend to often fail at edges the advantages and disadvantages of specific methods of obtaining sufficient coating thickness on steel edges and other irregular steel surfaces, where coatings tend to pull away during curing, leaving thin or non-existent coverage

4
What is an “edge”? Corners (inside/outside) Cutouts Welds
Fastener heads Anything with an angle approaching 90 degrees (or worse)
")
5
Why do we can particularly about edges?
Sharp edges, outside corners, crevices and welds are often sites where coating failures and corrosion begin due to reduced coating barrier protection

6
Reduced coating thickness is a result of surface tension created during the curing of the wet coating causing the coating to shrink, pulling the coating film away from the edges - solventborne coatings

9
Typical Failure initiation points

10
Avoiding Edge Failure Design out the edges and irregularities

11
Avoiding Edge Failure Fabricate out the edge problem

12
Avoiding Edge Failure Surface prep to remove the failure point

13
Avoiding Edge Failure Coating selection to mitigate the failure point

14
Each Takes Investment Its all about tolerance for risk
How harsh is the exposure – locally at the edge? How long does the coating need to perform? Will there be access for inspection and maintenance? Consequences of a coating failure?

15
Steps for Avoiding Reduced Coating Barrier Protection
The following steps are explained in SSPC PA Guide 11, Protecting Edges, Crevices, and Irregular Steel Surfaces by Stripe Coating Step 1: Eliminate the irregularities by grinding, mechanical sanding or filing Step 2: Apply a thicker protective coating film to problem areas (Stripe Coating) Step 3: Apply a full coat of paint with edge retention properties, allowing application of a penetrating and/or good wetting coating to problem areas
 Step 3: Apply a full coat of paint with edge retention properties, allowing application of a penetrating and/or good wetting coating to problem areas.")
16
Step 1 Outside corners and sharp edges should be:
Ground such that the edge is rounded to a 1/16-1/8 inch radius (NSRP SP-3 Panel reports) Chamfered, which reduces a sharp 90 degree corner to two 135 degree angles The distance between the two 135 degree angles is approximately 1/16-1/8 inch
 Chamfered, which reduces a sharp 90 degree corner to two 135 degree angles. The distance between the two 135 degree angles is approximately 1/16-1/8 inch.")
17
Step 1 (Continued)
")
18
Step 1 (Continued) The increased performance resulting from rounding or chamfering edges depends on: The service environment The generic type of coating The radius or size of the chamfer Proper coating application per SSPC-PA 1, Shop, Field, and Maintenance Painting of Steel

19
Step 1 (Continued) Note: Research has shown that rounding or chamfering had no measurable effect if an ethyl silicate inorganic zinc-rich (IOZ) coating is applied. Additional information on this topic can be found in, Corbett, W. D. “The Same Old Grind...An Investigation of Zinc-Rich Primer Performance Over Steel Corners.” Modern Steel Construction, Vol. 40, No. 6: p
 coating is applied. Additional information on this topic can be found in, Corbett, W. D. The Same Old Grind...An Investigation of Zinc-Rich Primer Performance Over Steel Corners. Modern Steel Construction, Vol. 40, No. 6: p")
20
Step 1 (Continued) For best practice, edge grinding should be done in the shop, BEFORE blast cleaning where the work is accessible
 For best practice, edge grinding should be done in the shop, BEFORE blast cleaning where the work is accessible.")
22
Step 2 Edges Welds Outside corners Bolt heads and threads Crevices
A “Stripe Coat” is a coat of paint applied either before or after a full coat is applied to an entire surface. A “Stripe Coat” is typically applied to: Edges Welds Outside corners Bolt heads and threads Crevices

23
Step 2 (Continued) The project specification should clearly state stripe coating requirements: The areas that are to be striped How to apply the stripe coat (brush or spray) In what order to apply the stripe coat (before or after the full coat) Which coats are to be striped Whether tinting of the stripe coat or use of another color of coating is required Details on the drying/curing requirements between application of the stripe and full coat
 In what order to apply the stripe coat (before or after the full coat) Which coats are to be striped. Whether tinting of the stripe coat or use of another color of coating is required. Details on the drying/curing requirements between application of the stripe and full coat.")
24
Step 2 (Continued) Situations where stripe coating is usually warranted are: Immersion service (e.g., interiors of fuel or water storage tanks; ship hulls) Areas with high corrosion rates (e.g., cooling towers and splash zones) Areas where access is difficult (e.g., towers, some bridges) Built up members (e.g., lattice bars and boxes)
 Areas with high corrosion rates (e.g., cooling towers and splash zones) Areas where access is difficult (e.g., towers, some bridges) Built up members (e.g., lattice bars and boxes)")
25
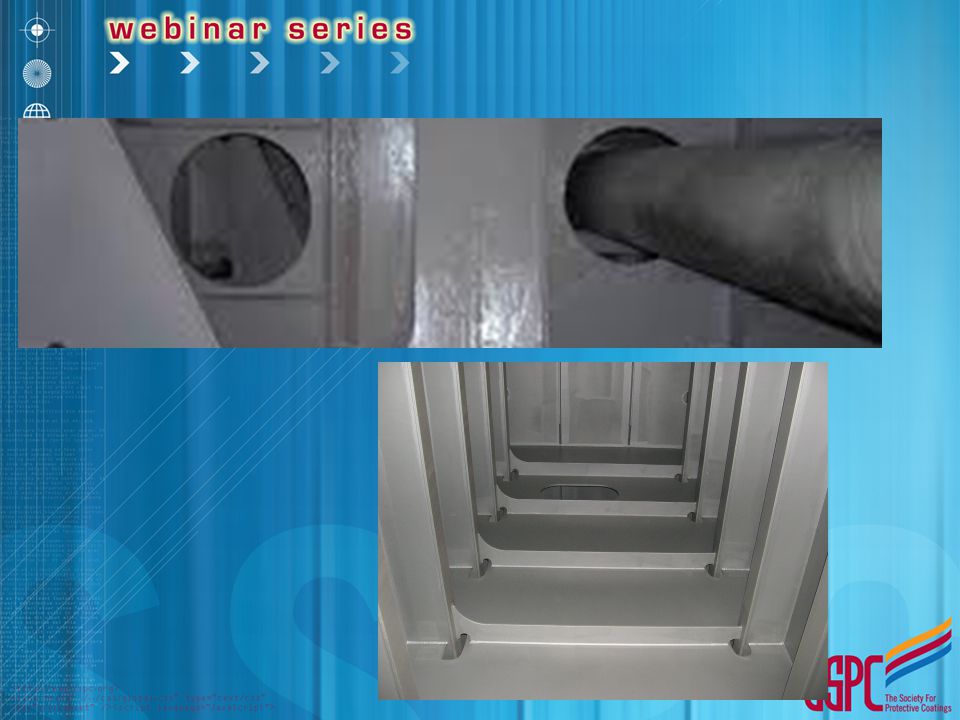
Examples of Where Strip Coating Is Warranted
Step 2 (Continued) Examples of Where Strip Coating Is Warranted
 Examples of Where Strip Coating Is Warranted.")
26
Step 2 (Continued) Situations where stripe coating may not be cost effective are: (RISK?) Non-critical components (e.g., interior bulkheads in habitable space on a ship) Mild exposure (e.g., SSPC Environmental zones 1A and 1B) Inside corners (can be adequately covered using proper spray technique)
 Mild exposure (e.g., SSPC Environmental zones 1A and 1B) Inside corners (can be adequately covered using proper spray technique)")
27
Step 2 (Continued) Application of the stripe coat can be performed by brush or spray. The table below shows the advantages and disadvantages of the 2 methods Brush – control and working coating into complex details; labor intensive Spray – faster, less labor, good for edge retentive coatings and zinc-rich; may bridge small defects, risk of high builds

28
Step 2 (Continued) When applying a stripe coat:
The brush strokes should run parallel to, not across, edges and crevices Apply constant pressure of the brush during application Bolt heads and nuts should be striped in a circular motion Extend the stripe coating at least 1 inch from edges and other irregular surfaces Use round or oval brushes

29
Step 2 (Continued) Spraying the stripe coat can reduce the amount of time spent in brush application, but the painter has less control over the precise boundaries of the area being coated The applicator should spray the coating along the flat surface, not directly at the edge itself, to prevent the atomization pressure from pushing the coating away from the edge

30
Step 2 (Continued) It is good practice for the stripe coat to be a different color from the adjoining full coats or substrate Enables painters and inspectors to visually verify there are no misses, skips or thin spots

31
Step 2 (Continued) -When to Stripe- Before or After????
 -When to Stripe- Before or After")
32
Step 2 (Continued) Welds and crevices are best protected when striped with a coating with good wetting properties High build coatings are best for striping edges Consult coating manufacturer to determine the appropriate coating to be used The coating selected should be designed for the service environment

33
Step 3 An alternative method for protection of edges that may avoid the need for grinding and chamfering is the use of a coating that has edge retention properties Typically high solids products that provide improved film thickness retention at the apex of an edge

34
Step 3 (Continued) A method for measuring the edge retention properties of a coating is published in MIL-PRF-23236C Compares the film thickness of 3 specimens cut from a sample of coating applied to a non-chamfered 90 degree angle The ratio of the film thickness at the apex vs. the film thickness on the flat area is calculated and expressed as the percentage of edge retention of the coating

35
Step 3 (Continued)
")
36
Step 3 (Continued) According to MIL-PRF-23236C:
Any specimen having less than 50% edge retention fails the test An average value of 70% edge retention for 3 test specimens measuring using an optical microscope is required to qualify a coating

37
POLYASPARTIC URETHANE EDGE RETENTION
System: Zinc Primer Polyaspartic Urethane Edge Retention > 70%

38
Summary Edges and complex geometries are the key to success or failure in a typical coating job SSPC Guide 11 is a provides a nice roadmap to Good Painting Practice for addressing edges By following the processes described in Guide 11 you can provide extra corrosion protection measures on edges, outside corners, crevices, bolt heads, welds and other irregular steel surfaces

39
Summary (con’t) Avoiding edge failure in a PRACTICAL and ACHIEVABLE manner requires a specification that is clear and targets added effort and material (cost) toward the details that are most likely to fail first Recent success has been achieved in mitigating risk of edge failure through the use of new, high solids, rapid cure coating systems IN CONJUNCTION WITH implementation of improved practices
 toward the details that are most likely to fail first. Recent success has been achieved in mitigating risk of edge failure through the use of new, high solids, rapid cure coating systems IN CONJUNCTION WITH implementation of improved practices.")
40
The industry continues to look for value based solutions

41
Optimizing QA

Similar presentations