Download presentation
Presentation is loading. Please wait.

1
Computer/LMS Access To log onto one of these computers: Enter your Username, for example: 2014BNS099 followed by: @students.must.ac.ug So a complete login would look like this: 2014BNS999@students.must.ac.ug Your individual password would then have to be entered. If you have not paid your fees, you will not have a password (sorry).
..")
2
Wrong Answers

3
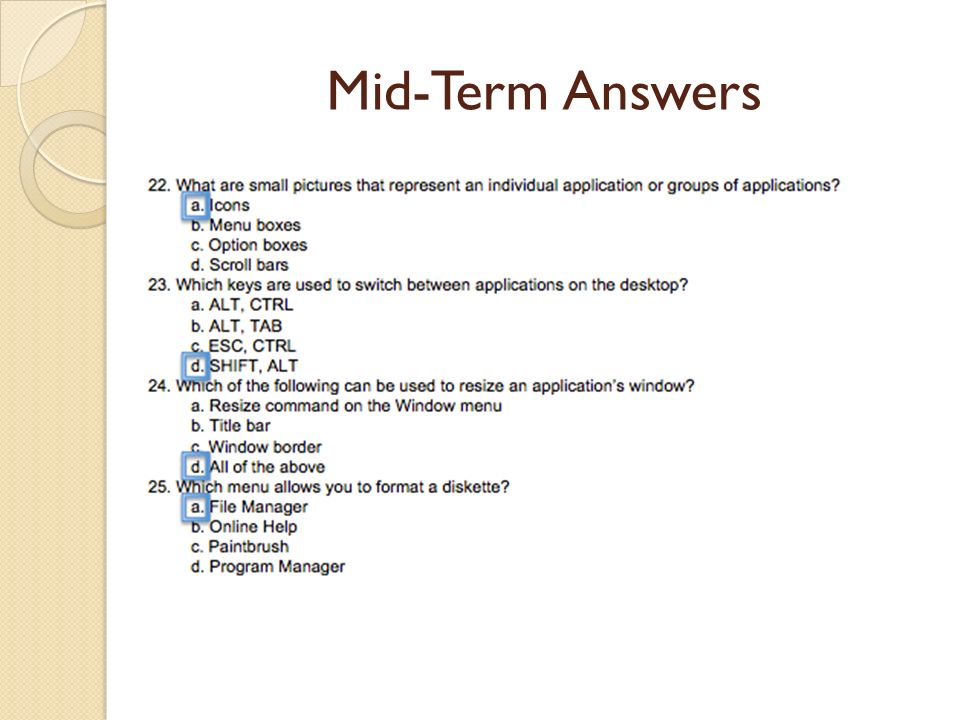
Mid-Term Answers MB Anti-Virus CPU Megahertz Multitasking Bit RAM Format Operating System Word Proc App Software Interface 64-bit Boot Disk drive Peripheral Device Start Button Flash/USB/Thumb Average score = 66% Passing >50%

4
Mid-Term Answers

6
Microsoft Office Word 2010 HOME TAB This is the most used tab; it incorporates all text formatting features such as font and paragraph changes.

7
Introduction to Microsoft 2010 Office – MS Excel

8
Start Button to START You may have a shortcut to Excel on your desktop, if so double click the icon and Excel will open. If not follow the steps below: 1. Click on the Start button 2. Highlight Programs 3. Highlight Microsoft Office 4. Click on Microsoft Excel 2010 1 2 3 4

9
The Excel screen will look like this, but we will look at some of the other features.

10
First… Excel is a spreadsheet program in the Microsoft Office system. You can use Excel to create and format workbooks (a collection of spreadsheets) in order to analyze data and make more informed business decisions. Specifically, you can use Excel to track data, build models for analyzing data, write formulas to perform calculations on that data, pivot the data in numerous ways, and present data in a variety of professional looking charts.
 in order to analyze data and make more informed business decisions. Specifically, you can use Excel to track data, build models for analyzing data, write formulas to perform calculations on that data, pivot the data in numerous ways, and present data in a variety of professional looking charts..")
11
The Ribbon Understanding the Ribbon is very similar to what we saw in MS Word. The ribbon holds all of the information in previous versions of Microsoft Office in a more visual stream line manner through a series of tabs that include an wide variety of program features.

12
Home Tab This is the most used tab; it incorporates all text and cell formatting features such as font and paragraph changes. The Home Tab also includes basic spreadsheet formatting elements such as text wrap, merging cells and cell style.

13
Home Tab The Home Tab includes basic spreadsheet formatting elements such as text wrap, merging cells and cell style. Let’s look at it closer.

14
Insert Tab This tab allows you to insert a variety of items into a document from pictures, clip art, and headers and footers.

15
Formulas Tab There is also a page layout Tab, but it is very similar to the Word Page Layout Tab so we will focus on the Excel Tabs. This tab has commands to use when creating Formulas. This tab holds an immense function library which can assist when creating any formula or function in your spreadsheet.

16
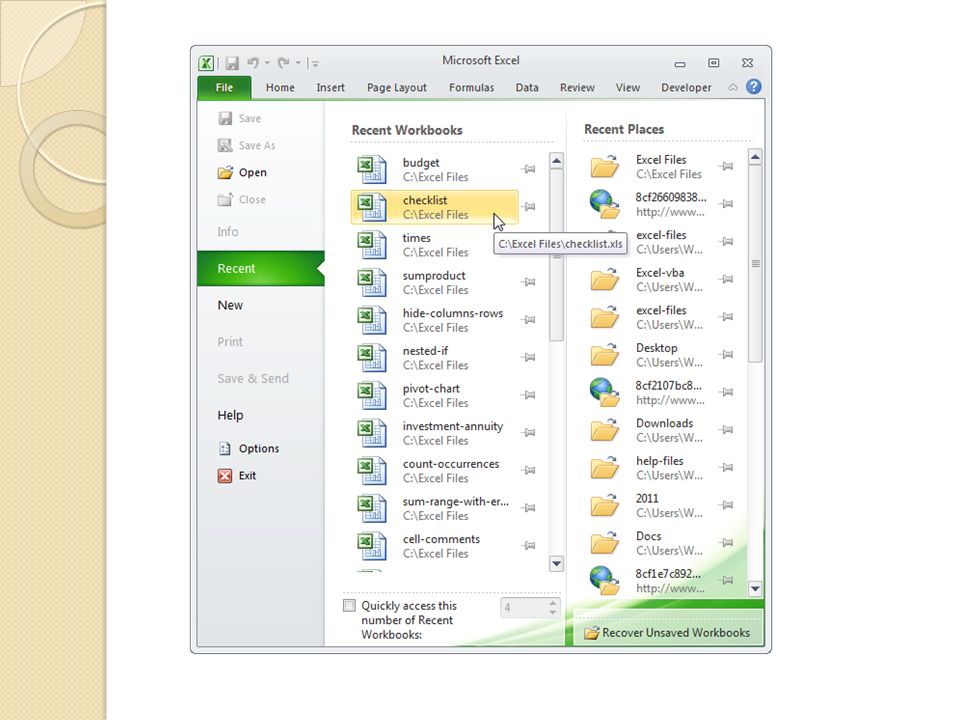
Workbooks Create a New Workbook 1. Click the File tab and then click New. 2. Under Available Templates, double click Blank Workbook or Click Create. A workbook is another word for your Excel file. Excel automatically creates a blank workbook when you open it.

17
Worksheet A worksheet is a collection of cells where you keep and manipulate the data. By default, each Excel workbook contains three worksheets. Microsoft Excel consists of worksheets. Each worksheet contains columns and rows. The columns are lettered A to Z and then continuing with AA, AB, AC and so on; the rows are numbered 1 to 1,048,576. The number of columns and rows you can have in a worksheet is limited by your computer memory and your system resources.

18
Excel Worksheet When you open Excel, Excel automatically selects Sheet1 for you. The name of the worksheet appears on its sheet tab at the bottom of the document window.

19
Moving Around the Worksheet By using the arrow keys, you can move around your worksheet. You can use the down arrow key to move downward one cell at a time. You can use the up arrow key to move upward one cell at a time. You can use the Tab key to move across the page to the right, one cell at a time. You can hold down the Shift key and then press the Tab key to move to the left, one cell at a time. You can use the right and left arrow keys to move right or left one cell at a time. The Page Up and Page Down keys move up and down one page at a time. If you hold down the Ctrl key and then press the Home key, you move to the beginning of the worksheet.

20
EXERCISE 1 Move Around the Worksheet The Down Arrow Key Press the down arrow key several times. Note that the cursor moves downward one cell at a time. The Up Arrow Key Press the up arrow key several times. Note that the cursor moves upward one cell at a time. The Tab Key Move to cell A1. Press the Tab key several times. Note that the cursor moves to the right one cell at a time.

21
EXERCISE 2 Go to -- F5 The F5 function key is the "Go To" key. If you press the F5 key, you are prompted for the cell to which you wish to go. Enter the cell address, and the cursor jumps to that cell. Press F5. The Go To dialog box opens. Type J3 in the Reference field. Press Enter. Excel moves to cell J3. Go to -- Ctrl+G You can also use Ctrl+G to go to a specific cell. Hold down the Ctrl key while you press "g" (Ctrl+g). The Go To dialog box opens. Type C4 in the Reference field. Press Enter. Excel moves to cell C4.
. The Go To dialog box opens. Type C4 in the Reference field. Press Enter. Excel moves to cell C4..")
22
EXERCISE 3 Select Cells To select cells A1 to E1: Go to cell A1. Press the F8 key. This anchors the cursor. Or, you can click and drag the mouse cursor. Note that "Extend Selection" appears on the Status bar in the lower-left corner of the window. You are in the Extend mode. Click in cell E7. Excel highlights cells A1 to E7. Press Esc and click anywhere on the worksheet to clear the highlighting.

23
EXERCISE 3 - Option Go to cell A1. Hold down the Ctrl key. You won't release it until later. Holding down the Ctrl key enables you to select noncontiguous areas of the worksheet. Press the left mouse button. While holding down the left mouse button, use the mouse to move from cell A1 to C5. Continue to hold down the Ctrl key, but release the left mouse button. Using the mouse, place the cursor in cell D7.

24
EXERCISE 3 – Option, cont’d Press the left mouse button. While holding down the left mouse button, move to cell F10. Release the left mouse button. Release the Ctrl key. Cells A1 to C5 and cells D7 to F10 are selected. Press Esc and click anywhere on the worksheet to remove the highlighting.

25
Open an Existing Workbook

27
Closing a Worksheet

28
Creating a New Workbook Although Excel creates a blank workbook when you open it, sometimes you want to start all over again. To create a new workbook, click New and then click Create.

29
Creating a New Worksheet A worksheet is a collection of cells where you keep and manipulate the data. Excel workbook starts with three worksheets. The name of the worksheet appears on its sheet tab at the bottom of the document window.

30
Renaming a Sheet By default, the worksheets are named Sheet1, Sheet2 and Sheet3. To give a worksheet a more specific name, execute the following steps. 1. Right click on the sheet tab of Sheet1. 2. Choose Rename.

31
Cells Format Cells: When we format cells in Excel, we change the appearance of a number without changing the number itself.

32
Format a Cell By default, Excel uses the General format (no specific number format) for numbers. To apply a number format, use the 'Format Cells' dialog box. 1.Select cell B2. 2.Right click, and then click Format Cells (or press CTRL + 1).
..")
33
Format a Cell, cont’d The 'Format Cells' dialog box will appear.

34
Format Cells Dialog Box

35
Formulas and Functions Count and Sum: The most used functions in Excel are the functions that count and sum. You can count and sum based on one criteria or multiple criteria.

36
Entering Data Enter Data in a Worksheet 1. Click the cell where you want to enter data. 2. Type the data in the cell. 3. Press enter or tab to move to the next cell.

37
Entering a Formula A formula is an expression which calculates the value of a cell. Functions are predefined formulas and are already available in Excel. For example, cell A3 below contains a formula which adds the value of cell A2 to the value of cell A1.

38
Entering a Formula, cont’d For example, cell A3 below contains the SUM function which calculates the sum of the range A1:A2.

39
Entering a Formula, cont’d To enter a formula, execute the following steps. 1. Select a cell. 2. To let Excel know that you want to enter a formula, type an equal sign (=). 3. For example, type the formula A1+A2.
. 3. For example, type the formula A1+A2..")
40
Entering a Formula, cont’d Tip: instead of typing A1 and A2, simply select cell A1 and cell A2. 4. Change the value of cell A1 to 3. Excel automatically recalculates the value of cell A3. This is one of Excel's most powerful features!

41
Editing a Formula When you select a cell, Excel shows the value or formula of the cell in the formula bar. To edit a formula, click in the formula bar and change the formula.

42
Change the + to a - Press Enter when done

43
Congratulations! You just created and edited an Excel spreadsheet! Cell A3 Changed from 5 to -1 Because A3=A1 – A2

44
What will be the Answer in A4? First, Excel performs multiplication (A1 * A2). Next, Excel adds the value of cell A3 to this result.

45
Another Example What will be the answer in cell A4? First, Excel calculates the part in parentheses (A2+A3). Next, it multiplies this result by the value of cell A1.
. Next, it multiplies this result by the value of cell A1..")
46
Yet Another Example Create a new Worksheet 1. Move to cell A7. 2. Type =3+3+12/2*4. 3. Press Enter. Note: Microsoft Excel divides 12 by 2, multiplies the answer by 4, adds 3, and then adds another 3. The answer, 30, displays in cell A7.

47
To Change the Order of Calculations Add parentheses: 1. Move to cell A7. 2. Type =(3+3+12)/2*4. 3. Press Enter. Microsoft Excel adds 3 plus 3 plus 12, divides the answer by 2, and then multiplies the result by 4. The answer, 36, displays in cell A7.
/2*4. 3. Press Enter. Microsoft Excel adds 3 plus 3 plus 12, divides the answer by 2, and then multiplies the result by 4. The answer, 36, displays in cell A7..")
48
Copy/Paste a Formula When you copy a formula, Excel automatically adjusts the cell references for each new cell the formula is copied to. To understand this, execute the following steps. Enter the formula shown below into cell A4.

49
Copy/Paste a Formula, cont’d Select cell A4, right click, and then click Copy from the Edit Menu (or press CTRL + c)......next, select cell B4, right click, and then click Paste under 'Paste Options (Edit Menu):' (or press CTRL + v).
......next, select cell B4, right click, and then click Paste under Paste Options (Edit Menu): (or press CTRL + v).")
50
Copy/Paste a Formula, cont’d You can also drag the formula to cell B4. Select cell A4, click on the lower right corner of cell A4 and drag it across to cell B4. This is much easier and gives the exact same result! Result. The formula in cell B4 references the values in column B.

51
Insert a Function Every function has the same structure. For example, SUM(A1:A4). The name of this function is SUM. The part between the brackets (arguments) means we give Excel the range A1:A4 as input. This function adds the values in cells A1, A2, A3 and A4. It's not easy to remember which function and which arguments to use for each task. Fortunately, the Insert Function feature in Excel helps you with this. To insert a function, execute the following steps.
. The name of this function is SUM. The part between the brackets (arguments) means we give Excel the range A1:A4 as input. This function adds the values in cells A1, A2, A3 and A4. It s not easy to remember which function and which arguments to use for each task. Fortunately, the Insert Function feature in Excel helps you with this. To insert a function, execute the following steps..")
52
Insert a Function, cont’d 1.Select a cell. 2.Click the Insert Function button.

53
Insert a Function, cont’d The 'Insert Function' dialog box appears. 3.Search for a function or select a function from a category. For example, choose COUNTIF from the Statistical category. 4.Click “OK”

54
Insert a Function, cont’d 5.The 'Function Arguments' dialog box appears. 6.Click in the Range box and select the range A1:C2. 7.Click in the Criteria box and type >5. 8.Click OK.

55
Insert a Function, cont’d Result. Excel counts the number of cells that are higher than 5. Note: instead of using the Insert Function feature, simply type =COUNTIF(A1:C2,">5"). When you arrive at: =COUNTIF( instead of typing A1:C2, simply select the range A1:C2.
. When you arrive at: =COUNTIF( instead of typing A1:C2, simply select the range A1:C2..")
Similar presentations


 OR Click on Start All Programs Microsoft Office Microsoft Office Excel 2003.>")


 is a computer program used to enter, analyze, and present quantitative.>")