Download presentation
Presentation is loading. Please wait.

1
Unit 2 Reading Inventory Expanded text with bevel and shadow (Basic)
To reproduce the text effects on this slide, do the following: On the Home tab, in the Slides group, click Layout, and then click Blank. On the Insert tab, in the Text group, click Text Box, and then on the slide, drag to draw the text box. Enter text in the text box, select the text, and then on the Home tab, in the Font group, select Calisto MT from the Font list and then select 60 from the Font Size list. On the Home tab, in the Paragraph group, click Center to center the text in the text box. On the Home tab, in the Font group, click Character Spacing, and then click More Spacing. In the Font dialog box, on the Character Spacing tab, in the Spacing list, select Expanded. In the By box, enter 22. Under Drawing Tools, on the Format tab, in the WordArt Styles group, click the arrow next to Text Fill, and then under Theme Colors click Tan, Background 2, Darker 50% (fourth row, third option from the left). Under Drawing Tools, on the Format tab, in the bottom right corner of the WordArt Styles group, click the Format Text Effects dialog box launcher. In the Format Text Effects dialog box, click 3-D Format in the left pane, and then do the following in the 3-D Format pane: Under Bevel, click the button next to Top, and then under Bevel click Soft Round (second row, second option from the left). Next to Top, in the Width box, enter 4 pt, and in the Height box, enter 6 pt. Under Depth, click the button next to Color, and then under Theme Colors click Tan, Background 2, Darker 50% (fourth row, third option from the left). In the Depth box, enter 6 pt. Under Contour, click the button next to Color, and then under Theme Colors click White, Background 1 (first row, first option from the left). In the Size box, enter 0 pt. Under Surface, click the button next to Material, and then under Translucent click Powder. Click the button next to Lighting, and then under Warm click Morning. Also in the Format Text Effects dialog box, click Shadow in the left pane, and then do the following in the Shadow pane: Click the button next to Presets, and under Perspective, click Perspective Diagonal Upper Left (first row, first option from the left). In the Transparency box, enter 85%. To reproduce the background on this slide, do the following: Right-click the slide background area, then click Format Background. In the Format Background dialog box, click Fill in the left pane, select Gradient fill in the Fill pane, and then do the following: In the Type list, select Radial. Click the button next to Direction, and then click From Corner (first option from the left). Under Gradient stops, click Add or Remove until three stops appear in the drop-down list. Also under Gradient stops, customize the gradient stops that you added as follows: Select Stop 1 from the list, and then do the following: In the Stop position box, enter 45%. Click the button next to Color, and then under Theme Colors click White, Background 1 (first row, first option from the left). Select Stop 2 from the list, and then do the following: In the Stop position box, enter 80%. Click the button next to Color, click More Colors, and then in the Colors dialog box, on the Custom tab, enter values for Red: 223, Green: 219, Blue: 211. Select Stop 3 from the list, and then do the following: In the Stop position box, enter 100%. Click the button next to Color, click More Colors, and then in the Colors dialog box, on the Custom tab, enter values for Red: 213, Green: 208, Blue: 197. Reading Inventory
. Under Drawing Tools, on the Format tab, in the bottom right corner of the WordArt Styles group, click the Format Text Effects dialog box launcher. In the Format Text Effects dialog box, click 3-D Format in the left pane, and then do the following in the 3-D Format pane: Under Bevel, click the button next to Top, and then under Bevel click Soft Round (second row, second option from the left). Next to Top, in the Width box, enter 4 pt, and in the Height box, enter 6 pt. Under Depth, click the button next to Color, and then under Theme Colors click Tan, Background 2, Darker 50% (fourth row, third option from the left). In the Depth box, enter 6 pt. Under Contour, click the button next to Color, and then under Theme Colors click White, Background 1 (first row, first option from the left). In the Size box, enter 0 pt. Under Surface, click the button next to Material, and then under Translucent click Powder. Click the button next to Lighting, and then under Warm click Morning. Also in the Format Text Effects dialog box, click Shadow in the left pane, and then do the following in the Shadow pane: Click the button next to Presets, and under Perspective, click Perspective Diagonal Upper Left (first row, first option from the left). In the Transparency box, enter 85%. To reproduce the background on this slide, do the following: Right-click the slide background area, then click Format Background. In the Format Background dialog box, click Fill in the left pane, select Gradient fill in the Fill pane, and then do the following: In the Type list, select Radial. Click the button next to Direction, and then click From Corner (first option from the left). Under Gradient stops, click Add or Remove until three stops appear in the drop-down list. Also under Gradient stops, customize the gradient stops that you added as follows: Select Stop 1 from the list, and then do the following: In the Stop position box, enter 45%. Click the button next to Color, and then under Theme Colors click White, Background 1 (first row, first option from the left). Select Stop 2 from the list, and then do the following: In the Stop position box, enter 80%. Click the button next to Color, click More Colors, and then in the Colors dialog box, on the Custom tab, enter values for Red: 223, Green: 219, Blue: 211. Select Stop 3 from the list, and then do the following: In the Stop position box, enter 100%. Click the button next to Color, click More Colors, and then in the Colors dialog box, on the Custom tab, enter values for Red: 213, Green: 208, Blue: 197. Reading Inventory.")
2
The Boy in the Striped Pajamas 9/26 NOTES The Cover Observation
Your thoughts and questions PREDICTIONS >>> What sort of things do you think will happen in the story?

3
The Boy in the Striped Pajamas Chapter 1 and 2 NOTES Characters
Name of Character Page # Descriptions Prediction –How Important do you think this character will be? =greatest A=Bruno B=Gretel C=Bruno’s mother D =Bruno’s father E = Maria F =the serious young man in the uniform

4
Lesson 2 Read Pages Gradient-filled text with soft shadow (Basic) To reproduce the effects on this slide, do the following: On the Insert tab, in the Text group, click Text Box, and then on the slide, drag to draw the text box. On the Home tab, in the Slides group, click Layout, and then click Blank. Enter text in the text box, select the text, and then on the Home tab, in the Font group, select TW Cen MT from the Font list, and then select 48 from the Font Size list. On the Home tab, in the Paragraph group, click Center to center the text on the slide. Select the text box. Under Drawing Tools, on the Format tab, in the bottom right corner of the WordArt Styles group, click the Format Text Effects dialog box launcher. In the Format Text Effects dialog box, click Text Fill in the left pane, select Gradient fill in the Text Fill pane, and then do the following: In the Type list, select Linear. Click the button next to Direction, and then click Linear Down (first row, second option from the left). In the Angle box, enter 90°. Under Gradient stops, click Add or Remove until two stops appear in the drop-down list. Also under Gradient stops, customize the gradient stops that you added as follows: Select Stop 1 from the list, and then do the following: In the Stop position box, enter 37%. Click the button next to Color, and then under Theme Colors click White, Background 1 (first row, first option from the left). Select Stop 2 from the list, and then do the following: In the Stop position box, enter 99%. Click the button next to Color, click More Colors, and then in the Colors dialog box, on the Custom tab, enter values for Red: 196, Green: 189, Blue: 151. Also in the Format Text Effects dialog box, click Text Outline in the left pane, and then in the Text Outline pane select Solid line. Click the button next to Color, and then under Theme Colors click White, Background 1 (first row, first option from the left). Also in the Format Text Effects dialog box, click Outline Style in the left pane, and then do the following in the Outline Style pane: In the Width box, enter 1 pt. Click the button next to Dash type, and then click Solid (first option from the top). Also in the Format Text Effects dialog box, click Shadow in the left pane, and then do the following in the Shadow pane: In the Blur box, enter 12 pt. Click the button next to Presets, and then under Outer click Offset Bottom (first row, second option from the left). To reproduce the background on this slide, do the following: Right-click the slide background area, and then click Format Background. In the Format Background dialog box, click Fill in the left pane, select Gradient fill in the Fill pane, and then do the following: In the Type list, select Radial. Click the button next to Direction, and then click From Center (third option from the left). In the Stop position box, enter 10%. Click the button next to Color, and then under Theme Colors click White, Background 1, Darker 5% (second row, first option from the left). Click the button next to Color, and then under Theme Colors click White, Background 1, Darker 35% (fifth row, first option from the left). Please answer the following questions on the back or on another sheet of paper. Thanks. Remember, do your best!
. In the Angle box, enter 90°. Under Gradient stops, click Add or Remove until two stops appear in the drop-down list. Also under Gradient stops, customize the gradient stops that you added as follows: Select Stop 1 from the list, and then do the following: In the Stop position box, enter 37%. Click the button next to Color, and then under Theme Colors click White, Background 1 (first row, first option from the left). Select Stop 2 from the list, and then do the following: In the Stop position box, enter 99%. Click the button next to Color, click More Colors, and then in the Colors dialog box, on the Custom tab, enter values for Red: 196, Green: 189, Blue: 151. Also in the Format Text Effects dialog box, click Text Outline in the left pane, and then in the Text Outline pane select Solid line. Click the button next to Color, and then under Theme Colors click White, Background 1 (first row, first option from the left). Also in the Format Text Effects dialog box, click Outline Style in the left pane, and then do the following in the Outline Style pane: In the Width box, enter 1 pt. Click the button next to Dash type, and then click Solid (first option from the top). Also in the Format Text Effects dialog box, click Shadow in the left pane, and then do the following in the Shadow pane: In the Blur box, enter 12 pt. Click the button next to Presets, and then under Outer click Offset Bottom (first row, second option from the left). To reproduce the background on this slide, do the following: Right-click the slide background area, and then click Format Background. In the Format Background dialog box, click Fill in the left pane, select Gradient fill in the Fill pane, and then do the following: In the Type list, select Radial. Click the button next to Direction, and then click From Center (third option from the left). In the Stop position box, enter 10%. Click the button next to Color, and then under Theme Colors click White, Background 1, Darker 5% (second row, first option from the left). Click the button next to Color, and then under Theme Colors click White, Background 1, Darker 35% (fifth row, first option from the left). Please answer the following questions on the back or on another sheet of paper. Thanks. Remember, do your best!")
5
What hooks have been used to entice you as a reader?
Which narrative hooks being are used? Shaded text wrapped around a corner (Basic) To reproduce the effects on this slide, do the following: On the Insert tab, in the Text group, click Text Box, and then on the slide, drag to draw the text box. On the Home tab, in the Slides group, click Layout, and then click Blank. Enter text in the text box, select the text, and then on the Home tab, in the Font group, select Haettenschweiler from the Font list, and then select 24 from the Font Size list. On the Home tab, in the Paragraph group, click Center to center the text on the slide. Select the text box. Under Drawing Tools, on the Format tab, in the WordArt Styles group, click Text Effects, point to Transform, and then under Warp click Triangle Up (first row, third option from the left). Drag the pink diamond adjustment handle (at the left side of the text box) to adjust the amount of text warp. Select the text. Under Drawing Tools, on the Format tab, in the WordArt Styles group, click the arrow next to Text Fill, point to Gradient, and click More Gradients. In the Format Text Effects dialog box, click Text Fill in the left pane, select Gradient fill in the Text Fill pane, and then do the following: In the Type list, select Linear. Click the button next to Direction, and then click Linear Right (first row, fourth option from the left). In the Angle box, enter 0°. Under Gradient stops, click Add or Remove until five stops appear in the drop-down list. Also under Gradient stops, customize the gradient stops that you added as follows: Select Stop 1 from the list, and then do the following: In the Stop position box, enter 0%. Click the button next to Color, and then under Theme Colors click Blue, Accent 1, Lighter 60% (third row, fifth option from the left). Select Stop 2 from the list, and then do the following: Click the button next to Color, and then under Theme Colors click Blue, Accent 1, Lighter 80% (second row, fifth option from the left). In the Stop position box, enter 17%. Select Stop 3 from the list, and then do the following: In the Stop position box, enter 50%. Click the button next to Color, and then under Theme Colors click White, Background 1 (first row, first option from the left). Select Stop 4 from the list, and then do the following: In the Stop position box, enter 51%. Click the button next to Color, and then under Theme Colors click Blue, Accent 1, Lighter 40% (fourth row, fifth option from the left). Select Stop 5 from the list, and then do the following: In the Stop position box, enter 100%. Under Drawing Tools, on the Format tab, in the WordArt Styles group, click Text Effects, point to Reflection, and then under Reflection Variations click Tight Reflection, touching (first row, first option from the left). Click the button next to Color, and then under Theme Colors click Blue, Accent 1, Darker 25% (fifth row, fifth option from the left). To reproduce the background on this slide, do the following: Right-click the slide background area, and then click Format Background. In the Format Background dialog box, click Fill in the left pane, select Gradient fill in the Fill pane, and then do the following: Click the button next to Direction, and then click Linear Down (first row, second option from the left). Under Gradient stops, click Add or Remove until two stops appear in the drop-down list. In the Stop position box, enter 64%. Click the button next to Color, and then under Theme Colors click Black, Text 1 (first row, second option from the left). What hooks have been used to entice you as a reader? Can you find evidence in the text to support your ides?
 To reproduce the effects on this slide, do the following: On the Insert tab, in the Text group, click Text Box, and then on the slide, drag to draw the text box. On the Home tab, in the Slides group, click Layout, and then click Blank. Enter text in the text box, select the text, and then on the Home tab, in the Font group, select Haettenschweiler from the Font list, and then select 24 from the Font Size list. On the Home tab, in the Paragraph group, click Center to center the text on the slide. Select the text box. Under Drawing Tools, on the Format tab, in the WordArt Styles group, click Text Effects, point to Transform, and then under Warp click Triangle Up (first row, third option from the left). Drag the pink diamond adjustment handle (at the left side of the text box) to adjust the amount of text warp. Select the text. Under Drawing Tools, on the Format tab, in the WordArt Styles group, click the arrow next to Text Fill, point to Gradient, and click More Gradients. In the Format Text Effects dialog box, click Text Fill in the left pane, select Gradient fill in the Text Fill pane, and then do the following: In the Type list, select Linear. Click the button next to Direction, and then click Linear Right (first row, fourth option from the left). In the Angle box, enter 0°. Under Gradient stops, click Add or Remove until five stops appear in the drop-down list. Also under Gradient stops, customize the gradient stops that you added as follows: Select Stop 1 from the list, and then do the following: In the Stop position box, enter 0%. Click the button next to Color, and then under Theme Colors click Blue, Accent 1, Lighter 60% (third row, fifth option from the left). Select Stop 2 from the list, and then do the following: Click the button next to Color, and then under Theme Colors click Blue, Accent 1, Lighter 80% (second row, fifth option from the left). In the Stop position box, enter 17%. Select Stop 3 from the list, and then do the following: In the Stop position box, enter 50%. Click the button next to Color, and then under Theme Colors click White, Background 1 (first row, first option from the left). Select Stop 4 from the list, and then do the following: In the Stop position box, enter 51%. Click the button next to Color, and then under Theme Colors click Blue, Accent 1, Lighter 40% (fourth row, fifth option from the left). Select Stop 5 from the list, and then do the following: In the Stop position box, enter 100%. Under Drawing Tools, on the Format tab, in the WordArt Styles group, click Text Effects, point to Reflection, and then under Reflection Variations click Tight Reflection, touching (first row, first option from the left). Click the button next to Color, and then under Theme Colors click Blue, Accent 1, Darker 25% (fifth row, fifth option from the left). To reproduce the background on this slide, do the following: Right-click the slide background area, and then click Format Background. In the Format Background dialog box, click Fill in the left pane, select Gradient fill in the Fill pane, and then do the following: Click the button next to Direction, and then click Linear Down (first row, second option from the left). Under Gradient stops, click Add or Remove until two stops appear in the drop-down list. In the Stop position box, enter 64%. Click the button next to Color, and then under Theme Colors click Black, Text 1 (first row, second option from the left). What hooks have been used to entice you as a reader Can you find evidence in the text to support your ides")
6
1. What do you know about Poland and Germany during the last months
of Word War II? Horizontal gradient-filled text with soft shadow (Basic) To reproduce the effects on this slide, do the following: On the Home tab, in the Slides group, click Layout, and then click Blank. On the Insert tab, in the Text group, click Text Box, and then on the slide, drag to draw the text box. Enter text in the text box, select the text, and then on the Home tab, in the Font group, select Trebuchet MS from the Font list and then select 48 from the Font Size list. On the Home tab, in the Paragraph group, click Center to center the text in the text box. Select the text. Under Drawing Tools, on the Format tab, in the bottom right corner of the WordArt Styles group, click the Format Text Effects dialog box launcher. In the Format Text Effects dialog box, click Text Fill in the left pane, select Gradient fill in the Text Fill pane, and then do the following: In the Type list, select Linear. Click the button next to Direction, and then click Linear Right (first row, fourth option from the left). Under Gradient stops, click Add or Remove until four stops appear in the drop-down list. Also under Gradient stops, customize the gradient stops that you added as follows: Select Stop 1 from the list, and then do the following: In the Stop position box, enter 6%. Click the button next to Color, and then under Theme Colors click White, Background 1 (first row, first option from the left). Select Stop 2 from the list, and then do the following: In the Stop position box, enter 37%. Click the button next to Color, click More Colors, and then in the Colors dialog box, on the Custom tab, enter values for Red: 112, Green: 206, Blue: 236. Select Stop 3 from the list, and then do the following: In the Stop position box, enter 75%. Click the button next to Color, click More Colors, and then in the Colors dialog box, on the Custom tab, enter values for Red: 237, Green: 228, Blue: 111. Select Stop 4 from the list, and then do the following: In the Stop position box, enter 100%. Also in the Format Text Effects dialog box, click Text Outline in the left pane, and then do the following in the Text Outline pane: Select Solid line. Click the button next to Color, and then under Theme Colors click White, Background 1, Darker 50% (sixth row, first option from the left). Also in the Format Text Effects dialog box, click Outline Style in the left pane, and then do the following in the Outline Style pane: In the Width box, enter 1 pt. Click the button next to Dash type, and then click Solid (first option from the top). Also in the Format Text Effects dialog box, click Shadow in the left pane, and then do the following in the Shadow pane: Click the button next to Presets, and then under Outer click Offset Bottom (first row, second option from the left). In the Transparency box, enter 84%. In the Size box, enter 101%. In the Blur box, enter 6 pt. In the Distance box, enter 7 pt. Also in the Format Text Effects dialog box, click 3-D Format in the left pane, and then do the following in the 3-D Format pane: Under Bevel, click the button next to Top, and then under Bevel click Circle (first row, first option from the left). Next to Top, in the Width box, enter 3 pt. Next to Top, in the Height box, enter 3 pt. To reproduce the background on this slide, do the following: On the Design tab, in the Background group, click the arrow next to Background Styles, and click Style 5 (second row, first option from the left). (Note: If this action is taken in a PowerPoint presentation containing more than one slide, the background style will be applied to all of the slides.)
 To reproduce the effects on this slide, do the following: On the Home tab, in the Slides group, click Layout, and then click Blank. On the Insert tab, in the Text group, click Text Box, and then on the slide, drag to draw the text box. Enter text in the text box, select the text, and then on the Home tab, in the Font group, select Trebuchet MS from the Font list and then select 48 from the Font Size list. On the Home tab, in the Paragraph group, click Center to center the text in the text box. Select the text. Under Drawing Tools, on the Format tab, in the bottom right corner of the WordArt Styles group, click the Format Text Effects dialog box launcher. In the Format Text Effects dialog box, click Text Fill in the left pane, select Gradient fill in the Text Fill pane, and then do the following: In the Type list, select Linear. Click the button next to Direction, and then click Linear Right (first row, fourth option from the left). Under Gradient stops, click Add or Remove until four stops appear in the drop-down list. Also under Gradient stops, customize the gradient stops that you added as follows: Select Stop 1 from the list, and then do the following: In the Stop position box, enter 6%. Click the button next to Color, and then under Theme Colors click White, Background 1 (first row, first option from the left). Select Stop 2 from the list, and then do the following: In the Stop position box, enter 37%. Click the button next to Color, click More Colors, and then in the Colors dialog box, on the Custom tab, enter values for Red: 112, Green: 206, Blue: 236. Select Stop 3 from the list, and then do the following: In the Stop position box, enter 75%. Click the button next to Color, click More Colors, and then in the Colors dialog box, on the Custom tab, enter values for Red: 237, Green: 228, Blue: 111. Select Stop 4 from the list, and then do the following: In the Stop position box, enter 100%. Also in the Format Text Effects dialog box, click Text Outline in the left pane, and then do the following in the Text Outline pane: Select Solid line. Click the button next to Color, and then under Theme Colors click White, Background 1, Darker 50% (sixth row, first option from the left). Also in the Format Text Effects dialog box, click Outline Style in the left pane, and then do the following in the Outline Style pane: In the Width box, enter 1 pt. Click the button next to Dash type, and then click Solid (first option from the top). Also in the Format Text Effects dialog box, click Shadow in the left pane, and then do the following in the Shadow pane: Click the button next to Presets, and then under Outer click Offset Bottom (first row, second option from the left). In the Transparency box, enter 84%. In the Size box, enter 101%. In the Blur box, enter 6 pt. In the Distance box, enter 7 pt. Also in the Format Text Effects dialog box, click 3-D Format in the left pane, and then do the following in the 3-D Format pane: Under Bevel, click the button next to Top, and then under Bevel click Circle (first row, first option from the left). Next to Top, in the Width box, enter 3 pt. Next to Top, in the Height box, enter 3 pt. To reproduce the background on this slide, do the following: On the Design tab, in the Background group, click the arrow next to Background Styles, and click Style 5 (second row, first option from the left). (Note: If this action is taken in a PowerPoint presentation containing more than one slide, the background style will be applied to all of the slides.)")
7
2. What other books have you read that will help you to understand the background of this novel?
Horizontal gradient-filled text with soft shadow (Basic) To reproduce the effects on this slide, do the following: On the Home tab, in the Slides group, click Layout, and then click Blank. On the Insert tab, in the Text group, click Text Box, and then on the slide, drag to draw the text box. Enter text in the text box, select the text, and then on the Home tab, in the Font group, select Trebuchet MS from the Font list and then select 48 from the Font Size list. On the Home tab, in the Paragraph group, click Center to center the text in the text box. Select the text. Under Drawing Tools, on the Format tab, in the bottom right corner of the WordArt Styles group, click the Format Text Effects dialog box launcher. In the Format Text Effects dialog box, click Text Fill in the left pane, select Gradient fill in the Text Fill pane, and then do the following: In the Type list, select Linear. Click the button next to Direction, and then click Linear Right (first row, fourth option from the left). Under Gradient stops, click Add or Remove until four stops appear in the drop-down list. Also under Gradient stops, customize the gradient stops that you added as follows: Select Stop 1 from the list, and then do the following: In the Stop position box, enter 6%. Click the button next to Color, and then under Theme Colors click White, Background 1 (first row, first option from the left). Select Stop 2 from the list, and then do the following: In the Stop position box, enter 37%. Click the button next to Color, click More Colors, and then in the Colors dialog box, on the Custom tab, enter values for Red: 112, Green: 206, Blue: 236. Select Stop 3 from the list, and then do the following: In the Stop position box, enter 75%. Click the button next to Color, click More Colors, and then in the Colors dialog box, on the Custom tab, enter values for Red: 237, Green: 228, Blue: 111. Select Stop 4 from the list, and then do the following: In the Stop position box, enter 100%. Also in the Format Text Effects dialog box, click Text Outline in the left pane, and then do the following in the Text Outline pane: Select Solid line. Click the button next to Color, and then under Theme Colors click White, Background 1, Darker 50% (sixth row, first option from the left). Also in the Format Text Effects dialog box, click Outline Style in the left pane, and then do the following in the Outline Style pane: In the Width box, enter 1 pt. Click the button next to Dash type, and then click Solid (first option from the top). Also in the Format Text Effects dialog box, click Shadow in the left pane, and then do the following in the Shadow pane: Click the button next to Presets, and then under Outer click Offset Bottom (first row, second option from the left). In the Transparency box, enter 84%. In the Size box, enter 101%. In the Blur box, enter 6 pt. In the Distance box, enter 7 pt. Also in the Format Text Effects dialog box, click 3-D Format in the left pane, and then do the following in the 3-D Format pane: Under Bevel, click the button next to Top, and then under Bevel click Circle (first row, first option from the left). Next to Top, in the Width box, enter 3 pt. Next to Top, in the Height box, enter 3 pt. To reproduce the background on this slide, do the following: On the Design tab, in the Background group, click the arrow next to Background Styles, and click Style 5 (second row, first option from the left). (Note: If this action is taken in a PowerPoint presentation containing more than one slide, the background style will be applied to all of the slides.)
 To reproduce the effects on this slide, do the following: On the Home tab, in the Slides group, click Layout, and then click Blank. On the Insert tab, in the Text group, click Text Box, and then on the slide, drag to draw the text box. Enter text in the text box, select the text, and then on the Home tab, in the Font group, select Trebuchet MS from the Font list and then select 48 from the Font Size list. On the Home tab, in the Paragraph group, click Center to center the text in the text box. Select the text. Under Drawing Tools, on the Format tab, in the bottom right corner of the WordArt Styles group, click the Format Text Effects dialog box launcher. In the Format Text Effects dialog box, click Text Fill in the left pane, select Gradient fill in the Text Fill pane, and then do the following: In the Type list, select Linear. Click the button next to Direction, and then click Linear Right (first row, fourth option from the left). Under Gradient stops, click Add or Remove until four stops appear in the drop-down list. Also under Gradient stops, customize the gradient stops that you added as follows: Select Stop 1 from the list, and then do the following: In the Stop position box, enter 6%. Click the button next to Color, and then under Theme Colors click White, Background 1 (first row, first option from the left). Select Stop 2 from the list, and then do the following: In the Stop position box, enter 37%. Click the button next to Color, click More Colors, and then in the Colors dialog box, on the Custom tab, enter values for Red: 112, Green: 206, Blue: 236. Select Stop 3 from the list, and then do the following: In the Stop position box, enter 75%. Click the button next to Color, click More Colors, and then in the Colors dialog box, on the Custom tab, enter values for Red: 237, Green: 228, Blue: 111. Select Stop 4 from the list, and then do the following: In the Stop position box, enter 100%. Also in the Format Text Effects dialog box, click Text Outline in the left pane, and then do the following in the Text Outline pane: Select Solid line. Click the button next to Color, and then under Theme Colors click White, Background 1, Darker 50% (sixth row, first option from the left). Also in the Format Text Effects dialog box, click Outline Style in the left pane, and then do the following in the Outline Style pane: In the Width box, enter 1 pt. Click the button next to Dash type, and then click Solid (first option from the top). Also in the Format Text Effects dialog box, click Shadow in the left pane, and then do the following in the Shadow pane: Click the button next to Presets, and then under Outer click Offset Bottom (first row, second option from the left). In the Transparency box, enter 84%. In the Size box, enter 101%. In the Blur box, enter 6 pt. In the Distance box, enter 7 pt. Also in the Format Text Effects dialog box, click 3-D Format in the left pane, and then do the following in the 3-D Format pane: Under Bevel, click the button next to Top, and then under Bevel click Circle (first row, first option from the left). Next to Top, in the Width box, enter 3 pt. Next to Top, in the Height box, enter 3 pt. To reproduce the background on this slide, do the following: On the Design tab, in the Background group, click the arrow next to Background Styles, and click Style 5 (second row, first option from the left). (Note: If this action is taken in a PowerPoint presentation containing more than one slide, the background style will be applied to all of the slides.)")
8
The Boy in the Striped Pajamas? mood tone setting events
3. What kind of story is The Boy in the Striped Pajamas? Look for clues: mood tone setting events Horizontal gradient-filled text with soft shadow (Basic) To reproduce the effects on this slide, do the following: On the Home tab, in the Slides group, click Layout, and then click Blank. On the Insert tab, in the Text group, click Text Box, and then on the slide, drag to draw the text box. Enter text in the text box, select the text, and then on the Home tab, in the Font group, select Trebuchet MS from the Font list and then select 48 from the Font Size list. On the Home tab, in the Paragraph group, click Center to center the text in the text box. Select the text. Under Drawing Tools, on the Format tab, in the bottom right corner of the WordArt Styles group, click the Format Text Effects dialog box launcher. In the Format Text Effects dialog box, click Text Fill in the left pane, select Gradient fill in the Text Fill pane, and then do the following: In the Type list, select Linear. Click the button next to Direction, and then click Linear Right (first row, fourth option from the left). Under Gradient stops, click Add or Remove until four stops appear in the drop-down list. Also under Gradient stops, customize the gradient stops that you added as follows: Select Stop 1 from the list, and then do the following: In the Stop position box, enter 6%. Click the button next to Color, and then under Theme Colors click White, Background 1 (first row, first option from the left). Select Stop 2 from the list, and then do the following: In the Stop position box, enter 37%. Click the button next to Color, click More Colors, and then in the Colors dialog box, on the Custom tab, enter values for Red: 112, Green: 206, Blue: 236. Select Stop 3 from the list, and then do the following: In the Stop position box, enter 75%. Click the button next to Color, click More Colors, and then in the Colors dialog box, on the Custom tab, enter values for Red: 237, Green: 228, Blue: 111. Select Stop 4 from the list, and then do the following: In the Stop position box, enter 100%. Also in the Format Text Effects dialog box, click Text Outline in the left pane, and then do the following in the Text Outline pane: Select Solid line. Click the button next to Color, and then under Theme Colors click White, Background 1, Darker 50% (sixth row, first option from the left). Also in the Format Text Effects dialog box, click Outline Style in the left pane, and then do the following in the Outline Style pane: In the Width box, enter 1 pt. Click the button next to Dash type, and then click Solid (first option from the top). Also in the Format Text Effects dialog box, click Shadow in the left pane, and then do the following in the Shadow pane: Click the button next to Presets, and then under Outer click Offset Bottom (first row, second option from the left). In the Transparency box, enter 84%. In the Size box, enter 101%. In the Blur box, enter 6 pt. In the Distance box, enter 7 pt. Also in the Format Text Effects dialog box, click 3-D Format in the left pane, and then do the following in the 3-D Format pane: Under Bevel, click the button next to Top, and then under Bevel click Circle (first row, first option from the left). Next to Top, in the Width box, enter 3 pt. Next to Top, in the Height box, enter 3 pt. To reproduce the background on this slide, do the following: On the Design tab, in the Background group, click the arrow next to Background Styles, and click Style 5 (second row, first option from the left). (Note: If this action is taken in a PowerPoint presentation containing more than one slide, the background style will be applied to all of the slides.)
 To reproduce the effects on this slide, do the following: On the Home tab, in the Slides group, click Layout, and then click Blank. On the Insert tab, in the Text group, click Text Box, and then on the slide, drag to draw the text box. Enter text in the text box, select the text, and then on the Home tab, in the Font group, select Trebuchet MS from the Font list and then select 48 from the Font Size list. On the Home tab, in the Paragraph group, click Center to center the text in the text box. Select the text. Under Drawing Tools, on the Format tab, in the bottom right corner of the WordArt Styles group, click the Format Text Effects dialog box launcher. In the Format Text Effects dialog box, click Text Fill in the left pane, select Gradient fill in the Text Fill pane, and then do the following: In the Type list, select Linear. Click the button next to Direction, and then click Linear Right (first row, fourth option from the left). Under Gradient stops, click Add or Remove until four stops appear in the drop-down list. Also under Gradient stops, customize the gradient stops that you added as follows: Select Stop 1 from the list, and then do the following: In the Stop position box, enter 6%. Click the button next to Color, and then under Theme Colors click White, Background 1 (first row, first option from the left). Select Stop 2 from the list, and then do the following: In the Stop position box, enter 37%. Click the button next to Color, click More Colors, and then in the Colors dialog box, on the Custom tab, enter values for Red: 112, Green: 206, Blue: 236. Select Stop 3 from the list, and then do the following: In the Stop position box, enter 75%. Click the button next to Color, click More Colors, and then in the Colors dialog box, on the Custom tab, enter values for Red: 237, Green: 228, Blue: 111. Select Stop 4 from the list, and then do the following: In the Stop position box, enter 100%. Also in the Format Text Effects dialog box, click Text Outline in the left pane, and then do the following in the Text Outline pane: Select Solid line. Click the button next to Color, and then under Theme Colors click White, Background 1, Darker 50% (sixth row, first option from the left). Also in the Format Text Effects dialog box, click Outline Style in the left pane, and then do the following in the Outline Style pane: In the Width box, enter 1 pt. Click the button next to Dash type, and then click Solid (first option from the top). Also in the Format Text Effects dialog box, click Shadow in the left pane, and then do the following in the Shadow pane: Click the button next to Presets, and then under Outer click Offset Bottom (first row, second option from the left). In the Transparency box, enter 84%. In the Size box, enter 101%. In the Blur box, enter 6 pt. In the Distance box, enter 7 pt. Also in the Format Text Effects dialog box, click 3-D Format in the left pane, and then do the following in the 3-D Format pane: Under Bevel, click the button next to Top, and then under Bevel click Circle (first row, first option from the left). Next to Top, in the Width box, enter 3 pt. Next to Top, in the Height box, enter 3 pt. To reproduce the background on this slide, do the following: On the Design tab, in the Background group, click the arrow next to Background Styles, and click Style 5 (second row, first option from the left). (Note: If this action is taken in a PowerPoint presentation containing more than one slide, the background style will be applied to all of the slides.)")
9
Why do you think this way?
4. What can you speculate about how things are going to change in the future for Bruno? Horizontal gradient-filled text with soft shadow (Basic) To reproduce the effects on this slide, do the following: On the Home tab, in the Slides group, click Layout, and then click Blank. On the Insert tab, in the Text group, click Text Box, and then on the slide, drag to draw the text box. Enter text in the text box, select the text, and then on the Home tab, in the Font group, select Trebuchet MS from the Font list and then select 48 from the Font Size list. On the Home tab, in the Paragraph group, click Center to center the text in the text box. Select the text. Under Drawing Tools, on the Format tab, in the bottom right corner of the WordArt Styles group, click the Format Text Effects dialog box launcher. In the Format Text Effects dialog box, click Text Fill in the left pane, select Gradient fill in the Text Fill pane, and then do the following: In the Type list, select Linear. Click the button next to Direction, and then click Linear Right (first row, fourth option from the left). Under Gradient stops, click Add or Remove until four stops appear in the drop-down list. Also under Gradient stops, customize the gradient stops that you added as follows: Select Stop 1 from the list, and then do the following: In the Stop position box, enter 6%. Click the button next to Color, and then under Theme Colors click White, Background 1 (first row, first option from the left). Select Stop 2 from the list, and then do the following: In the Stop position box, enter 37%. Click the button next to Color, click More Colors, and then in the Colors dialog box, on the Custom tab, enter values for Red: 112, Green: 206, Blue: 236. Select Stop 3 from the list, and then do the following: In the Stop position box, enter 75%. Click the button next to Color, click More Colors, and then in the Colors dialog box, on the Custom tab, enter values for Red: 237, Green: 228, Blue: 111. Select Stop 4 from the list, and then do the following: In the Stop position box, enter 100%. Also in the Format Text Effects dialog box, click Text Outline in the left pane, and then do the following in the Text Outline pane: Select Solid line. Click the button next to Color, and then under Theme Colors click White, Background 1, Darker 50% (sixth row, first option from the left). Also in the Format Text Effects dialog box, click Outline Style in the left pane, and then do the following in the Outline Style pane: In the Width box, enter 1 pt. Click the button next to Dash type, and then click Solid (first option from the top). Also in the Format Text Effects dialog box, click Shadow in the left pane, and then do the following in the Shadow pane: Click the button next to Presets, and then under Outer click Offset Bottom (first row, second option from the left). In the Transparency box, enter 84%. In the Size box, enter 101%. In the Blur box, enter 6 pt. In the Distance box, enter 7 pt. Also in the Format Text Effects dialog box, click 3-D Format in the left pane, and then do the following in the 3-D Format pane: Under Bevel, click the button next to Top, and then under Bevel click Circle (first row, first option from the left). Next to Top, in the Width box, enter 3 pt. Next to Top, in the Height box, enter 3 pt. To reproduce the background on this slide, do the following: On the Design tab, in the Background group, click the arrow next to Background Styles, and click Style 5 (second row, first option from the left). (Note: If this action is taken in a PowerPoint presentation containing more than one slide, the background style will be applied to all of the slides.) Why do you think this way?
 To reproduce the effects on this slide, do the following: On the Home tab, in the Slides group, click Layout, and then click Blank. On the Insert tab, in the Text group, click Text Box, and then on the slide, drag to draw the text box. Enter text in the text box, select the text, and then on the Home tab, in the Font group, select Trebuchet MS from the Font list and then select 48 from the Font Size list. On the Home tab, in the Paragraph group, click Center to center the text in the text box. Select the text. Under Drawing Tools, on the Format tab, in the bottom right corner of the WordArt Styles group, click the Format Text Effects dialog box launcher. In the Format Text Effects dialog box, click Text Fill in the left pane, select Gradient fill in the Text Fill pane, and then do the following: In the Type list, select Linear. Click the button next to Direction, and then click Linear Right (first row, fourth option from the left). Under Gradient stops, click Add or Remove until four stops appear in the drop-down list. Also under Gradient stops, customize the gradient stops that you added as follows: Select Stop 1 from the list, and then do the following: In the Stop position box, enter 6%. Click the button next to Color, and then under Theme Colors click White, Background 1 (first row, first option from the left). Select Stop 2 from the list, and then do the following: In the Stop position box, enter 37%. Click the button next to Color, click More Colors, and then in the Colors dialog box, on the Custom tab, enter values for Red: 112, Green: 206, Blue: 236. Select Stop 3 from the list, and then do the following: In the Stop position box, enter 75%. Click the button next to Color, click More Colors, and then in the Colors dialog box, on the Custom tab, enter values for Red: 237, Green: 228, Blue: 111. Select Stop 4 from the list, and then do the following: In the Stop position box, enter 100%. Also in the Format Text Effects dialog box, click Text Outline in the left pane, and then do the following in the Text Outline pane: Select Solid line. Click the button next to Color, and then under Theme Colors click White, Background 1, Darker 50% (sixth row, first option from the left). Also in the Format Text Effects dialog box, click Outline Style in the left pane, and then do the following in the Outline Style pane: In the Width box, enter 1 pt. Click the button next to Dash type, and then click Solid (first option from the top). Also in the Format Text Effects dialog box, click Shadow in the left pane, and then do the following in the Shadow pane: Click the button next to Presets, and then under Outer click Offset Bottom (first row, second option from the left). In the Transparency box, enter 84%. In the Size box, enter 101%. In the Blur box, enter 6 pt. In the Distance box, enter 7 pt. Also in the Format Text Effects dialog box, click 3-D Format in the left pane, and then do the following in the 3-D Format pane: Under Bevel, click the button next to Top, and then under Bevel click Circle (first row, first option from the left). Next to Top, in the Width box, enter 3 pt. Next to Top, in the Height box, enter 3 pt. To reproduce the background on this slide, do the following: On the Design tab, in the Background group, click the arrow next to Background Styles, and click Style 5 (second row, first option from the left). (Note: If this action is taken in a PowerPoint presentation containing more than one slide, the background style will be applied to all of the slides.) Why do you think this way")
10
Lesson 3 Expanded text with bevel and reflection (Basic)
To reproduce the text effects on this slide, do the following: On the Home tab, in the Slides group, click Layout, and then click Blank. On the Insert tab, in the Text group, click Text Box, and then on the slide, drag to draw the text box. Enter text in the text box, select the text, and then on the Home tab, in the Font group, select Gill Sans MT Condensed from the Font list, enter 95 in the Font Size box, and then click Bold. On the Home tab, in the Paragraph group, click Center to center the text in the text box. On the Home tab, in the Font group, click Character Spacing, and then click More Spacing. In the Font dialog box, on the Character Spacing tab, in the Spacing list, select Expanded. In the By box, enter 16. Select the space between two of the words in the text. On the Home tab, in the Font group, click Character Spacing, and then click Tight. Repeat the process for each space between words. Select the text. Under Drawing Tools, on the Format tab, in the WordArt Styles group, click the arrow next to Text Fill, click More Fill Colors, and then in the Colors dialog box, on the Custom tab, enter values for Red: 238, Green: 86, Blue: 10. Under Drawing Tools, on the Format tab, in the bottom right corner of the WordArt Styles group, click the Format Text Effects dialog box launcher. In the Format Text Effects dialog box, Click 3-D Format in the left pane, and then do the following in the 3-D Format pane: Under Bevel, click the button next to Top, and then under Bevel click Circle (first row, first option from the left). Next to Top, in the Width box, enter 6.5 pt, and in the Height box, enter 8 pt. Under Contour, click the button next to Color, and then click Black, Text 1 (first row, second option from the left). In the Size box, enter 0.5 pt. Under Surface, click the button next to Material, and then under Standard click Metal (fourth option from the left). Click the button next to Lighting, and then under Neutral click Three Point (first row, first option from the left). In the Angle box, enter 30°. Under Drawing Tools, on the Format tab, in the WordArt Styles group, click Text Effects, point to Reflection, and then under Reflection Variations click Tight Reflection, touching (first row, first option from the left). To reproduce the background on this slide, do the following: Right-click the slide background area, and then click Format Background. In the Format Background dialog box, click Fill in the left pane, select Gradient fill in the Fill pane, and then do the following: In the Type list, select Linear. Click the button next to Direction, and then click Linear Down (first row, second option from the left). Under Gradient stops, click Add or Remove until three stops appear in the drop-down list. Also under Gradient stops, customize the gradient stops that you added as follows: Select Stop 1 from the list, and then do the following: In the Stop position box, enter 78%. Click the button next to Color, and then under Theme Colors click Black, Text 1 (first row, second option from the left). Select Stop 2 from the list, and then do the following: In the Stop position box, enter 92%. Click the button next to Color, click More Colors, and then in the Colors dialog box, on the Custom tab, enter values for Red: 49, Green: 18, Blue: 17. Select Stop 3 from the list, and then do the following: In the Stop position box, enter 100%. Click the button next to Color, and then under Theme Colors click Red, Accent 2, Darker 50% (sixth row, sixth option from the left).
. Next to Top, in the Width box, enter 6.5 pt, and in the Height box, enter 8 pt. Under Contour, click the button next to Color, and then click Black, Text 1 (first row, second option from the left). In the Size box, enter 0.5 pt. Under Surface, click the button next to Material, and then under Standard click Metal (fourth option from the left). Click the button next to Lighting, and then under Neutral click Three Point (first row, first option from the left). In the Angle box, enter 30°. Under Drawing Tools, on the Format tab, in the WordArt Styles group, click Text Effects, point to Reflection, and then under Reflection Variations click Tight Reflection, touching (first row, first option from the left). To reproduce the background on this slide, do the following: Right-click the slide background area, and then click Format Background. In the Format Background dialog box, click Fill in the left pane, select Gradient fill in the Fill pane, and then do the following: In the Type list, select Linear. Click the button next to Direction, and then click Linear Down (first row, second option from the left). Under Gradient stops, click Add or Remove until three stops appear in the drop-down list. Also under Gradient stops, customize the gradient stops that you added as follows: Select Stop 1 from the list, and then do the following: In the Stop position box, enter 78%. Click the button next to Color, and then under Theme Colors click Black, Text 1 (first row, second option from the left). Select Stop 2 from the list, and then do the following: In the Stop position box, enter 92%. Click the button next to Color, click More Colors, and then in the Colors dialog box, on the Custom tab, enter values for Red: 49, Green: 18, Blue: 17. Select Stop 3 from the list, and then do the following: In the Stop position box, enter 100%. Click the button next to Color, and then under Theme Colors click Red, Accent 2, Darker 50% (sixth row, sixth option from the left).")
11
39-54 Read Pages Floating, glowing letters (Basic)
Select the second text box. Under Drawing Tools, on the Format tab, in the bottom right corner of the WordArt Styles group, click the Format Text Effects dialog box launcher. In the Format Text Effects dialog box, click Text Fill in the left pane, select Gradient fill in the Text Fill pane, and then do the following: (Basic) Tip: To draw the curved line on this slide, you will need to use the ruler and the drawing guides. To display the ruler and the drawing guides, do the following: On the Home tab, in the Slides group, click Layout, and then click Blank. On the View tab, in the Show/Hide group, select Ruler. Right-click the slide background area, and then click Grid and Guides. In the Grid and Guides dialog box, under Guide settings, select Display drawing guides on screen. (Note: One horizontal and one vertical guide will display on the slide at 0.00, the default position.) To reproduce the curved line on this slide, do the following: On the Home tab, in the Drawing group, click Shapes, and then under Lines click Curve (10th option from the left). To draw the curved line on the slide, do the following: Click the button next to Color, click More Colors, and then in the Colors dialog box, on the Custom tab, enter values for Red: 198, Green: 217, Blue: 241. Click the first point 0.25” to the left of the left edge of the slide and 0.75” below the horizontal drawing guide. Click the second point 3” to the left of the vertical drawing guide and 1” above the horizontal drawing guide. Also in the Format Text Effects dialog box, click Text Outline in the left pane. In the Text Outline pane, select Solid line, click the button next to Color, and then click More Colors. In the Colors dialog box, on the Custom tab, enter values for Red: 228, Green: 108, Blue: 10. Click the third point 1.5” to the right of the vertical drawing guide and 0.5” below the horizontal drawing guide. Double-click the fourth and final point 0.25” to the right of the right edge of the slide and 1.5” above the horizontal drawing guide. Also in the Format Text Effects dialog box, click 3-D Rotation in the left pane. In the 3-D Rotation pane, under Rotation, in the Z box, enter 350°. Select the curved line. Under Drawing Tools, on the Format tab, in the Shape Styles group, click the arrow next to Shape Outline, and then do the following: Under Drawing Tools, on the Format tab, in the WordArt Styles group, click Text Effects, point to Glow, point to More Glow Colors, and then click More Colors. In the Colors dialog box, on the Custom tab, enter values for Red: 255, Green: 144, Blue: 4. Under Theme Colors, click White, Background 1, Darker 35% (fifth row, first option from the left). Point to Dashes, and then click Square Dot (third option from the top). Point to Weight, and then click 1 1/2 pt. To reproduce the “C” on this slide, do the following: Select the second text box. On the Home tab, in the Clipboard group, click the arrow under Paste, and then click Duplicate. To reproduce the “A” on this slide, do the following: On the Insert tab, in the Text group, click Text Box, and then on the slide, drag to draw the text box. Click in the third text box, delete B, and then enter C. Enter A in the text box, select the text, and then on the Home tab, in the Font group, select Impact from the Font list, and then enter 140 in the Font Size box. Select the third text box. Under Drawing Tools, on the Format tab, in the bottom right corner of the WordArt Styles group, click the Format Text Effects dialog box launcher. In the Format Text Effects dialog box, click Text Fill in the left pane, select Gradient fill in the Text Fill pane, and then do the following: On the Home tab, in the Paragraph group, click Align Text Left to align the text left in the text box. Select the text box. Under Drawing Tools, on the Format tab, in the bottom right corner of the WordArt Styles group, click the Format Text Effects dialog box launcher. In the Format Text Effects dialog box, click Text Fill in the left pane, select Gradient fill in the Text Fill pane, and then do the following: In the Type list, select Linear. Click the button next to Direction, and then click Linear Down (first row, second option from the left). Under Gradient stops, click Add or Remove until two stops appear in the drop-down list. Also under Gradient stops, customize the gradient stops that you added as follows: Select Stop 1 from the list, and then do the following: In the Stop position box, enter 0%. Click the button next to Color, and then click White, Background 1 (first row, first option from the left). In the Transparency box, enter 50%. Select Stop 2 from the list, and then do the following: In the Stop position box, enter 85%. Also in the Format Text Effects dialog box, click Text Outline in the left pane. In the Text Outline pane, select Solid line, click the button next to Color, and then click More Colors. In the Colors dialog box, on the Custom tab, enter values for Red: 119, Green: 147, Blue: 60. In the Transparency box, enter 0%. Also in the Format Text Effects dialog box, click Text Outline in the left pane. In the Text Outline pane, select Solid line, click the button next to Color, and then click More Colors. In the Colors dialog box, on the Custom tab, enter values for Red: 49, Green: 133, Blue: 156. Also in the Format Text Effects dialog box, click 3-D Rotation in the left pane. In the 3-D Rotation pane, under Rotation, in the Z box, enter 5°. Under Drawing Tools, on the Format tab, in the WordArt Styles group, click Text Effects, point to Glow, point to More Glow Colors, and then click More Colors. In the Colors dialog box, on the Custom tab, enter values for Red: 168, Green: 224, Blue: 52. Also in the Format Text Effects dialog box, click Outline Style in the left pane. In the Outline Style pane, in the Width box, enter 2.5 pt. Also in the Format Text Effects dialog box, click Shadow in the left pane, and then do the following in the Shadow pane: Drag the objects on the slide to position as needed on the curved line. Click the button next to Presets and then under Outer click Offset Diagonal Bottom Left (first row, third option from the left). To reproduce the background on this slide, do the following: In the Transparency box, enter 82%. Right-click the slide background area, and then click Format Background. In the Format Background dialog box, click Fill in the left pane, select Gradient fill in the Fill pane, and then do the following: In the Size box, enter 100%. In the Blur box, enter 8 pt. In the Angle box, enter 135°. In the Distance box, enter 30 pt. In the Type list, select Radial. Also in the Format Text Effects dialog box, click 3-D Rotation in the left pane. In the 3-D Rotation pane, under Rotation, in the Z box, enter 15°. Click the button next to Direction, and then click From Corner (fifth option from the left) Under Drawing Tools, on the Format tab, in the WordArt Styles group, click Text Effects, point to Glow, and then do the following: Under Glow Variations, click Accent color 1, 8 pt glow (second row, first option from the left). Point to More Glow Colors, and then click More Colors. In the Colors dialog box, on the Custom tab, enter values for Red: 29, Green: 199, Blue: 244. Click the button next to Color, and then under Theme Colors click White, Background 1 (first row, first option from the left). To reproduce the “B” on this slide, do the following: Select the text box. On the Home tab, in the Clipboard group, click the arrow under Paste, and then click Duplicate. In the Stop position box, enter 100%. Click the button next to Color, click More Colors, and then in the Colors dialog box, on the Custom tab, enter values for Red: 178, Green: 179, Blue: 169. Click in the second text box, delete A, and then enter B.
 Tip: To draw the curved line on this slide, you will need to use the ruler and the drawing guides. To display the ruler and the drawing guides, do the following: On the Home tab, in the Slides group, click Layout, and then click Blank. On the View tab, in the Show/Hide group, select Ruler. Right-click the slide background area, and then click Grid and Guides. In the Grid and Guides dialog box, under Guide settings, select Display drawing guides on screen. (Note: One horizontal and one vertical guide will display on the slide at 0.00, the default position.) To reproduce the curved line on this slide, do the following: On the Home tab, in the Drawing group, click Shapes, and then under Lines click Curve (10th option from the left). To draw the curved line on the slide, do the following: Click the button next to Color, click More Colors, and then in the Colors dialog box, on the Custom tab, enter values for Red: 198, Green: 217, Blue: 241. Click the first point 0.25 to the left of the left edge of the slide and 0.75 below the horizontal drawing guide. Click the second point 3 to the left of the vertical drawing guide and 1 above the horizontal drawing guide. Also in the Format Text Effects dialog box, click Text Outline in the left pane. In the Text Outline pane, select Solid line, click the button next to Color, and then click More Colors. In the Colors dialog box, on the Custom tab, enter values for Red: 228, Green: 108, Blue: 10. Click the third point 1.5 to the right of the vertical drawing guide and 0.5 below the horizontal drawing guide. Double-click the fourth and final point 0.25 to the right of the right edge of the slide and 1.5 above the horizontal drawing guide. Also in the Format Text Effects dialog box, click 3-D Rotation in the left pane. In the 3-D Rotation pane, under Rotation, in the Z box, enter 350°. Select the curved line. Under Drawing Tools, on the Format tab, in the Shape Styles group, click the arrow next to Shape Outline, and then do the following: Under Drawing Tools, on the Format tab, in the WordArt Styles group, click Text Effects, point to Glow, point to More Glow Colors, and then click More Colors. In the Colors dialog box, on the Custom tab, enter values for Red: 255, Green: 144, Blue: 4. Under Theme Colors, click White, Background 1, Darker 35% (fifth row, first option from the left). Point to Dashes, and then click Square Dot (third option from the top). Point to Weight, and then click 1 1/2 pt. To reproduce the C on this slide, do the following: Select the second text box. On the Home tab, in the Clipboard group, click the arrow under Paste, and then click Duplicate. To reproduce the A on this slide, do the following: On the Insert tab, in the Text group, click Text Box, and then on the slide, drag to draw the text box. Click in the third text box, delete B, and then enter C. Enter A in the text box, select the text, and then on the Home tab, in the Font group, select Impact from the Font list, and then enter 140 in the Font Size box. Select the third text box. Under Drawing Tools, on the Format tab, in the bottom right corner of the WordArt Styles group, click the Format Text Effects dialog box launcher. In the Format Text Effects dialog box, click Text Fill in the left pane, select Gradient fill in the Text Fill pane, and then do the following: On the Home tab, in the Paragraph group, click Align Text Left to align the text left in the text box. Select the text box. Under Drawing Tools, on the Format tab, in the bottom right corner of the WordArt Styles group, click the Format Text Effects dialog box launcher. In the Format Text Effects dialog box, click Text Fill in the left pane, select Gradient fill in the Text Fill pane, and then do the following: In the Type list, select Linear. Click the button next to Direction, and then click Linear Down (first row, second option from the left). Under Gradient stops, click Add or Remove until two stops appear in the drop-down list. Also under Gradient stops, customize the gradient stops that you added as follows: Select Stop 1 from the list, and then do the following: In the Stop position box, enter 0%. Click the button next to Color, and then click White, Background 1 (first row, first option from the left). In the Transparency box, enter 50%. Select Stop 2 from the list, and then do the following: In the Stop position box, enter 85%. Also in the Format Text Effects dialog box, click Text Outline in the left pane. In the Text Outline pane, select Solid line, click the button next to Color, and then click More Colors. In the Colors dialog box, on the Custom tab, enter values for Red: 119, Green: 147, Blue: 60. In the Transparency box, enter 0%. Also in the Format Text Effects dialog box, click Text Outline in the left pane. In the Text Outline pane, select Solid line, click the button next to Color, and then click More Colors. In the Colors dialog box, on the Custom tab, enter values for Red: 49, Green: 133, Blue: 156. Also in the Format Text Effects dialog box, click 3-D Rotation in the left pane. In the 3-D Rotation pane, under Rotation, in the Z box, enter 5°. Under Drawing Tools, on the Format tab, in the WordArt Styles group, click Text Effects, point to Glow, point to More Glow Colors, and then click More Colors. In the Colors dialog box, on the Custom tab, enter values for Red: 168, Green: 224, Blue: 52. Also in the Format Text Effects dialog box, click Outline Style in the left pane. In the Outline Style pane, in the Width box, enter 2.5 pt. Also in the Format Text Effects dialog box, click Shadow in the left pane, and then do the following in the Shadow pane: Drag the objects on the slide to position as needed on the curved line. Click the button next to Presets and then under Outer click Offset Diagonal Bottom Left (first row, third option from the left). To reproduce the background on this slide, do the following: In the Transparency box, enter 82%. Right-click the slide background area, and then click Format Background. In the Format Background dialog box, click Fill in the left pane, select Gradient fill in the Fill pane, and then do the following: In the Size box, enter 100%. In the Blur box, enter 8 pt. In the Angle box, enter 135°. In the Distance box, enter 30 pt. In the Type list, select Radial. Also in the Format Text Effects dialog box, click 3-D Rotation in the left pane. In the 3-D Rotation pane, under Rotation, in the Z box, enter 15°. Click the button next to Direction, and then click From Corner (fifth option from the left) Under Drawing Tools, on the Format tab, in the WordArt Styles group, click Text Effects, point to Glow, and then do the following: Under Glow Variations, click Accent color 1, 8 pt glow (second row, first option from the left). Point to More Glow Colors, and then click More Colors. In the Colors dialog box, on the Custom tab, enter values for Red: 29, Green: 199, Blue: 244. Click the button next to Color, and then under Theme Colors click White, Background 1 (first row, first option from the left). To reproduce the B on this slide, do the following: Select the text box. On the Home tab, in the Clipboard group, click the arrow under Paste, and then click Duplicate. In the Stop position box, enter 100%. Click the button next to Color, click More Colors, and then in the Colors dialog box, on the Custom tab, enter values for Red: 178, Green: 179, Blue: 169. Click in the second text box, delete A, and then enter B.")
12
Sometimes people’s views on a subject are explicit and easy to find
Sometimes people’s views on a subject are explicit and easy to find. Sometimes, views are hidden and the reader has to do a little digging. Hitler’s visit to Bruno’s home, changed the lives of his family – but how? Soldiers’ response to the new officer 2 3 The Commandant’s attitude toward the people in PJs Differing feelings towards Hitler 1 For reproduction steps for this slide, refer to the PowerPoint template titled “Combined picture and text effects for PowerPoint slides” (ANI_TEXT.potx), slide number 8. 4 Differing feelings regarding the move from Berlin to the new home because of Bruno’s father’s job.
, slide number Differing feelings regarding the move from Berlin to the new home because of Bruno’s father’s job.")
13
Changes ??? How are the Characters Developing?
Clear, floating 3-D text (Intermediate) To reproduce the text effects on this slide, do the following: On the Home tab, in the Slides group, click Layout, and then click Blank. On the Insert tab, in the Text group, click Text Box, and then on the slide, drag to draw the text box. Enter text in the text box, select the text, and then on the Home tab, in the Font group, select Impact from the Font list, and then enter 130 in the Font Size box. On the Home tab, in the Paragraph group, click Align Text Left to align the text left in the text box. On the Home tab, in the Font group, click Character Spacing, and then click More Spacing. In the Font dialog box, on the Character Spacing tab, in the Spacing list, select Expanded. In the By box, enter 7. Under Drawing Tools, on the Format tab, in the WordArt Styles group, click the arrow next to Text Fill, point to Gradient, and then click More Gradients. In the Format Text Effects dialog box, click Text Fill in the left pane, select Gradient Fill in the Text Fill pane, and then do the following : Click the button next to Preset colors, and then click Silver (fifth row, third option from the left). In the Type list, select Linear. Click the button next to Direction, and then click Linear Diagonal (first row, first option from the left). In the Angle box, enter 220°. Under Drawing Tools, on the Format tab, in the WordArt Styles group, click Text Effects, point to 3-D Rotation, and then under Perspective click Perspective Heroic Extreme Left (third row, second option from the left). Under Drawing Tools, on the Format tab, in the WordArt Styles group, click Text Effects, point to Bevel, and then under Bevel click Cool Slant (first row, fourth option from the left). Under Drawing Tools, on the Format tab, in the bottom right corner of the WordArt Styles group, click the Format Text Effects dialog box launcher. In the Format Text Effects dialog box, click 3-D Format in the left pane and then do the following in the 3-D Format pane: Under Depth, in the Depth box, enter 15.5 pt. Under Surface, click the button next to Material, and then under Translucent click Clear (third option from the left). Click the button next to Lighting, and then under Special click Flat (first option from the left). 12. Under Drawing Tools, on the Format tab, in the WordArt Styles group, click Text Effects, point to Shadow, and then under Perspective click Perspective Diagonal Lower Left (second row, first option from the left). To reproduce the background on this slide, do the following: Right-click the slide background area, then click Format Background. In the Format Background dialog box, click Fill in the left pane, select Gradient fill in the Fill pane, and then do the following: In the Angle box, enter 45%. Under Gradient stops, click Add or Remove until three stops appear in the drop-down list. Also under Gradient stops, customize the gradient stops that you added as follows: Select Stop 1 from the list, and then do the following: In the Stop position box, enter 0%. Click the button next to Color, and then under Theme Colors click Black, Text 1 (first row, second option from the left). Select Stop 2 from the list, and then do the following: In the Stop position box, enter 25%. Select Stop 3 from the list, and then do the following: In the Stop position box, enter 100%. Click the button next to Color, and then under Theme Colors click Aqua, Accent 5, Darker 25% (fifth row, ninth option from the left).
 To reproduce the text effects on this slide, do the following: On the Home tab, in the Slides group, click Layout, and then click Blank. On the Insert tab, in the Text group, click Text Box, and then on the slide, drag to draw the text box. Enter text in the text box, select the text, and then on the Home tab, in the Font group, select Impact from the Font list, and then enter 130 in the Font Size box. On the Home tab, in the Paragraph group, click Align Text Left to align the text left in the text box. On the Home tab, in the Font group, click Character Spacing, and then click More Spacing. In the Font dialog box, on the Character Spacing tab, in the Spacing list, select Expanded. In the By box, enter 7. Under Drawing Tools, on the Format tab, in the WordArt Styles group, click the arrow next to Text Fill, point to Gradient, and then click More Gradients. In the Format Text Effects dialog box, click Text Fill in the left pane, select Gradient Fill in the Text Fill pane, and then do the following : Click the button next to Preset colors, and then click Silver (fifth row, third option from the left). In the Type list, select Linear. Click the button next to Direction, and then click Linear Diagonal (first row, first option from the left). In the Angle box, enter 220°. Under Drawing Tools, on the Format tab, in the WordArt Styles group, click Text Effects, point to 3-D Rotation, and then under Perspective click Perspective Heroic Extreme Left (third row, second option from the left). Under Drawing Tools, on the Format tab, in the WordArt Styles group, click Text Effects, point to Bevel, and then under Bevel click Cool Slant (first row, fourth option from the left). Under Drawing Tools, on the Format tab, in the bottom right corner of the WordArt Styles group, click the Format Text Effects dialog box launcher. In the Format Text Effects dialog box, click 3-D Format in the left pane and then do the following in the 3-D Format pane: Under Depth, in the Depth box, enter 15.5 pt. Under Surface, click the button next to Material, and then under Translucent click Clear (third option from the left). Click the button next to Lighting, and then under Special click Flat (first option from the left). 12. Under Drawing Tools, on the Format tab, in the WordArt Styles group, click Text Effects, point to Shadow, and then under Perspective click Perspective Diagonal Lower Left (second row, first option from the left). To reproduce the background on this slide, do the following: Right-click the slide background area, then click Format Background. In the Format Background dialog box, click Fill in the left pane, select Gradient fill in the Fill pane, and then do the following: In the Angle box, enter 45%. Under Gradient stops, click Add or Remove until three stops appear in the drop-down list. Also under Gradient stops, customize the gradient stops that you added as follows: Select Stop 1 from the list, and then do the following: In the Stop position box, enter 0%. Click the button next to Color, and then under Theme Colors click Black, Text 1 (first row, second option from the left). Select Stop 2 from the list, and then do the following: In the Stop position box, enter 25%. Select Stop 3 from the list, and then do the following: In the Stop position box, enter 100%. Click the button next to Color, and then under Theme Colors click Aqua, Accent 5, Darker 25% (fifth row, ninth option from the left).")
14
Protagonist Antagonist flat round

15
static dynamic major minor

16
Lesson 4 Expanded text with bevel and reflection (Basic)
To reproduce the text effects on this slide, do the following: On the Home tab, in the Slides group, click Layout, and then click Blank. On the Insert tab, in the Text group, click Text Box, and then on the slide, drag to draw the text box. Enter text in the text box, select the text, and then on the Home tab, in the Font group, select Gill Sans MT Condensed from the Font list, enter 95 in the Font Size box, and then click Bold. On the Home tab, in the Paragraph group, click Center to center the text in the text box. On the Home tab, in the Font group, click Character Spacing, and then click More Spacing. In the Font dialog box, on the Character Spacing tab, in the Spacing list, select Expanded. In the By box, enter 16. Select the space between two of the words in the text. On the Home tab, in the Font group, click Character Spacing, and then click Tight. Repeat the process for each space between words. Select the text. Under Drawing Tools, on the Format tab, in the WordArt Styles group, click the arrow next to Text Fill, click More Fill Colors, and then in the Colors dialog box, on the Custom tab, enter values for Red: 238, Green: 86, Blue: 10. Under Drawing Tools, on the Format tab, in the bottom right corner of the WordArt Styles group, click the Format Text Effects dialog box launcher. In the Format Text Effects dialog box, Click 3-D Format in the left pane, and then do the following in the 3-D Format pane: Under Bevel, click the button next to Top, and then under Bevel click Circle (first row, first option from the left). Next to Top, in the Width box, enter 6.5 pt, and in the Height box, enter 8 pt. Under Contour, click the button next to Color, and then click Black, Text 1 (first row, second option from the left). In the Size box, enter 0.5 pt. Under Surface, click the button next to Material, and then under Standard click Metal (fourth option from the left). Click the button next to Lighting, and then under Neutral click Three Point (first row, first option from the left). In the Angle box, enter 30°. Under Drawing Tools, on the Format tab, in the WordArt Styles group, click Text Effects, point to Reflection, and then under Reflection Variations click Tight Reflection, touching (first row, first option from the left). To reproduce the background on this slide, do the following: Right-click the slide background area, and then click Format Background. In the Format Background dialog box, click Fill in the left pane, select Gradient fill in the Fill pane, and then do the following: In the Type list, select Linear. Click the button next to Direction, and then click Linear Down (first row, second option from the left). Under Gradient stops, click Add or Remove until three stops appear in the drop-down list. Also under Gradient stops, customize the gradient stops that you added as follows: Select Stop 1 from the list, and then do the following: In the Stop position box, enter 78%. Click the button next to Color, and then under Theme Colors click Black, Text 1 (first row, second option from the left). Select Stop 2 from the list, and then do the following: In the Stop position box, enter 92%. Click the button next to Color, click More Colors, and then in the Colors dialog box, on the Custom tab, enter values for Red: 49, Green: 18, Blue: 17. Select Stop 3 from the list, and then do the following: In the Stop position box, enter 100%. Click the button next to Color, and then under Theme Colors click Red, Accent 2, Darker 50% (sixth row, sixth option from the left).
. Next to Top, in the Width box, enter 6.5 pt, and in the Height box, enter 8 pt. Under Contour, click the button next to Color, and then click Black, Text 1 (first row, second option from the left). In the Size box, enter 0.5 pt. Under Surface, click the button next to Material, and then under Standard click Metal (fourth option from the left). Click the button next to Lighting, and then under Neutral click Three Point (first row, first option from the left). In the Angle box, enter 30°. Under Drawing Tools, on the Format tab, in the WordArt Styles group, click Text Effects, point to Reflection, and then under Reflection Variations click Tight Reflection, touching (first row, first option from the left). To reproduce the background on this slide, do the following: Right-click the slide background area, and then click Format Background. In the Format Background dialog box, click Fill in the left pane, select Gradient fill in the Fill pane, and then do the following: In the Type list, select Linear. Click the button next to Direction, and then click Linear Down (first row, second option from the left). Under Gradient stops, click Add or Remove until three stops appear in the drop-down list. Also under Gradient stops, customize the gradient stops that you added as follows: Select Stop 1 from the list, and then do the following: In the Stop position box, enter 78%. Click the button next to Color, and then under Theme Colors click Black, Text 1 (first row, second option from the left). Select Stop 2 from the list, and then do the following: In the Stop position box, enter 92%. Click the button next to Color, click More Colors, and then in the Colors dialog box, on the Custom tab, enter values for Red: 49, Green: 18, Blue: 17. Select Stop 3 from the list, and then do the following: In the Stop position box, enter 100%. Click the button next to Color, and then under Theme Colors click Red, Accent 2, Darker 50% (sixth row, sixth option from the left).")
17
Read pages 67 - 85 Stacked, 3-D text with center perspective
(Intermediate) To reproduce the text effects on this slide, do the following: On the Insert tab, in the Text group, click Text Box, and then on the slide, drag to draw the text box. On the Home tab, in the Slides group, click Layout, and then click Blank. Enter text in the text box, select the text, and then on the Home tab, in the Font group, select Impact from the Font list, and then change the font size of each line so that the text is approximately the same width. For example, if you entered FIRST on the first line, SECOND on the second line, and THIRD on the third line (as shown on the slide), do the following: Select the first line of text, and then on the Home tab, in the Font group, enter 92 in the Font Size box. Select the third line of text, and then on the Home tab, in the Font group, enter 92 in the Font Size box. Select the second line of text, and then on the Home tab, in the Font group, enter 65 in the Font Size box. Select all of the text. On the Home tab, in the Font group, click Character Spacing, and then click More Spacing. In the Font dialog box, on the Character Spacing tab, in the Spacing list, select Expanded. In the By box, enter 2. On the Home tab, in the Paragraph group, click Center to center the text in the text box. Under Drawing Tools, on the Format tab, in the bottom right corner of the WordArt Styles group, click the Format Text Effects dialog box launcher. In the Format Text Effects dialog box, click Text Fill in the left pane. Select Solid fill in the Text Fill pane, click the button next to Color, and then under Theme Colors click Black, Text 1, Lighter 15% (fifth row, second option from the left). Also in the Format Text Effects dialog box, click 3-D Rotation in the left pane, click the button next to Presets in the 3-D Rotation pane, and then under Perspective click Perspective Front (first row, first option from the left). Also in the Format Text Effects dialog box, click 3-D Format in the left pane, and then do the following in the 3-D Format pane: Under Surface, click the button next to Material, and then under Standard click Matte (first row, first option from the left). Click the button next to Lighting, and then under Neutral click Balance (first row, second option from the left). Under Depth, click the button next to Color, and then under Theme Colors click White, Background 1 (first row, first option from the left). In the Depth box, enter 300 pt. To reproduce the lines behind the text, do the following: On the Home tab, in the Drawing group, click Shapes, and then under Rectangles, click Rectangle (first option from the left). On the slide, drag to draw a rectangle. On the Home tab, in the Drawing group, click the arrow next to Shape Fill, and then click No Fill. On the Home tab, in the Drawing group, click the arrow next to Shape Outline, and then under Theme Colors click White, Background 1 (first row, first option from the left). On the Home tab, in the Drawing group, click the arrow next to Shape Outline, point to Weight, and then click More Lines. In the Format Shape dialog box, click Line Style in the left pane. In the Line Style pane, in the Width box, enter 2 pt. On the Home tab, in the Drawing group, click Arrange, and then click Send to Back. To reproduce the background on this slide, do the following: Right-click the slide background area, and then click Format Background. In the Format Background dialog box, click Fill in the left pane, select Gradient fill in the Fill pane, and then do the following: In the Type list, select Radial. Click the button next to Direction, and then click From Center (third option from the left). Under Gradient stops, click Add or Remove until two stops appear in the drop-down list. Also under Gradient stops, customize the gradient stops that you added as follows: Select Stop 1 from the list, and then do the following: In the Stop position box, enter 10%. Click the button next to Color, and then under Theme Colors click White, Background 1 (first row, first option from the left). Select Stop 2 from the list, and then do the following: In the Stop position box, enter 100%. Click the button next to Color, and then under Theme Colors click Black, Text 1 (first row, second option from the left).
 To reproduce the text effects on this slide, do the following: On the Insert tab, in the Text group, click Text Box, and then on the slide, drag to draw the text box. On the Home tab, in the Slides group, click Layout, and then click Blank. Enter text in the text box, select the text, and then on the Home tab, in the Font group, select Impact from the Font list, and then change the font size of each line so that the text is approximately the same width. For example, if you entered FIRST on the first line, SECOND on the second line, and THIRD on the third line (as shown on the slide), do the following: Select the first line of text, and then on the Home tab, in the Font group, enter 92 in the Font Size box. Select the third line of text, and then on the Home tab, in the Font group, enter 92 in the Font Size box. Select the second line of text, and then on the Home tab, in the Font group, enter 65 in the Font Size box. Select all of the text. On the Home tab, in the Font group, click Character Spacing, and then click More Spacing. In the Font dialog box, on the Character Spacing tab, in the Spacing list, select Expanded. In the By box, enter 2. On the Home tab, in the Paragraph group, click Center to center the text in the text box. Under Drawing Tools, on the Format tab, in the bottom right corner of the WordArt Styles group, click the Format Text Effects dialog box launcher. In the Format Text Effects dialog box, click Text Fill in the left pane. Select Solid fill in the Text Fill pane, click the button next to Color, and then under Theme Colors click Black, Text 1, Lighter 15% (fifth row, second option from the left). Also in the Format Text Effects dialog box, click 3-D Rotation in the left pane, click the button next to Presets in the 3-D Rotation pane, and then under Perspective click Perspective Front (first row, first option from the left). Also in the Format Text Effects dialog box, click 3-D Format in the left pane, and then do the following in the 3-D Format pane: Under Surface, click the button next to Material, and then under Standard click Matte (first row, first option from the left). Click the button next to Lighting, and then under Neutral click Balance (first row, second option from the left). Under Depth, click the button next to Color, and then under Theme Colors click White, Background 1 (first row, first option from the left). In the Depth box, enter 300 pt. To reproduce the lines behind the text, do the following: On the Home tab, in the Drawing group, click Shapes, and then under Rectangles, click Rectangle (first option from the left). On the slide, drag to draw a rectangle. On the Home tab, in the Drawing group, click the arrow next to Shape Fill, and then click No Fill. On the Home tab, in the Drawing group, click the arrow next to Shape Outline, and then under Theme Colors click White, Background 1 (first row, first option from the left). On the Home tab, in the Drawing group, click the arrow next to Shape Outline, point to Weight, and then click More Lines. In the Format Shape dialog box, click Line Style in the left pane. In the Line Style pane, in the Width box, enter 2 pt. On the Home tab, in the Drawing group, click Arrange, and then click Send to Back. To reproduce the background on this slide, do the following: Right-click the slide background area, and then click Format Background. In the Format Background dialog box, click Fill in the left pane, select Gradient fill in the Fill pane, and then do the following: In the Type list, select Radial. Click the button next to Direction, and then click From Center (third option from the left). Under Gradient stops, click Add or Remove until two stops appear in the drop-down list. Also under Gradient stops, customize the gradient stops that you added as follows: Select Stop 1 from the list, and then do the following: In the Stop position box, enter 10%. Click the button next to Color, and then under Theme Colors click White, Background 1 (first row, first option from the left). Select Stop 2 from the list, and then do the following: In the Stop position box, enter 100%. Click the button next to Color, and then under Theme Colors click Black, Text 1 (first row, second option from the left).")
18
Because of the swing incident, what does Bruno learn about ….
Effect Because of the swing incident, what does Bruno learn about …. Pavel and his former life? His mother and her attitude towards Pavel? His father and his attitude towards Pavel? Why might this minor incident be significant for Bruno’s understanding of adults and their behavior? Are there clues that will help you predict what might happen next?

19
Lesson 5 Expanded text with bevel and reflection (Basic)
To reproduce the text effects on this slide, do the following: On the Home tab, in the Slides group, click Layout, and then click Blank. On the Insert tab, in the Text group, click Text Box, and then on the slide, drag to draw the text box. Enter text in the text box, select the text, and then on the Home tab, in the Font group, select Gill Sans MT Condensed from the Font list, enter 95 in the Font Size box, and then click Bold. On the Home tab, in the Paragraph group, click Center to center the text in the text box. On the Home tab, in the Font group, click Character Spacing, and then click More Spacing. In the Font dialog box, on the Character Spacing tab, in the Spacing list, select Expanded. In the By box, enter 16. Select the space between two of the words in the text. On the Home tab, in the Font group, click Character Spacing, and then click Tight. Repeat the process for each space between words. Select the text. Under Drawing Tools, on the Format tab, in the WordArt Styles group, click the arrow next to Text Fill, click More Fill Colors, and then in the Colors dialog box, on the Custom tab, enter values for Red: 238, Green: 86, Blue: 10. Under Drawing Tools, on the Format tab, in the bottom right corner of the WordArt Styles group, click the Format Text Effects dialog box launcher. In the Format Text Effects dialog box, Click 3-D Format in the left pane, and then do the following in the 3-D Format pane: Under Bevel, click the button next to Top, and then under Bevel click Circle (first row, first option from the left). Next to Top, in the Width box, enter 6.5 pt, and in the Height box, enter 8 pt. Under Contour, click the button next to Color, and then click Black, Text 1 (first row, second option from the left). In the Size box, enter 0.5 pt. Under Surface, click the button next to Material, and then under Standard click Metal (fourth option from the left). Click the button next to Lighting, and then under Neutral click Three Point (first row, first option from the left). In the Angle box, enter 30°. Under Drawing Tools, on the Format tab, in the WordArt Styles group, click Text Effects, point to Reflection, and then under Reflection Variations click Tight Reflection, touching (first row, first option from the left). To reproduce the background on this slide, do the following: Right-click the slide background area, and then click Format Background. In the Format Background dialog box, click Fill in the left pane, select Gradient fill in the Fill pane, and then do the following: In the Type list, select Linear. Click the button next to Direction, and then click Linear Down (first row, second option from the left). Under Gradient stops, click Add or Remove until three stops appear in the drop-down list. Also under Gradient stops, customize the gradient stops that you added as follows: Select Stop 1 from the list, and then do the following: In the Stop position box, enter 78%. Click the button next to Color, and then under Theme Colors click Black, Text 1 (first row, second option from the left). Select Stop 2 from the list, and then do the following: In the Stop position box, enter 92%. Click the button next to Color, click More Colors, and then in the Colors dialog box, on the Custom tab, enter values for Red: 49, Green: 18, Blue: 17. Select Stop 3 from the list, and then do the following: In the Stop position box, enter 100%. Click the button next to Color, and then under Theme Colors click Red, Accent 2, Darker 50% (sixth row, sixth option from the left).
. Next to Top, in the Width box, enter 6.5 pt, and in the Height box, enter 8 pt. Under Contour, click the button next to Color, and then click Black, Text 1 (first row, second option from the left). In the Size box, enter 0.5 pt. Under Surface, click the button next to Material, and then under Standard click Metal (fourth option from the left). Click the button next to Lighting, and then under Neutral click Three Point (first row, first option from the left). In the Angle box, enter 30°. Under Drawing Tools, on the Format tab, in the WordArt Styles group, click Text Effects, point to Reflection, and then under Reflection Variations click Tight Reflection, touching (first row, first option from the left). To reproduce the background on this slide, do the following: Right-click the slide background area, and then click Format Background. In the Format Background dialog box, click Fill in the left pane, select Gradient fill in the Fill pane, and then do the following: In the Type list, select Linear. Click the button next to Direction, and then click Linear Down (first row, second option from the left). Under Gradient stops, click Add or Remove until three stops appear in the drop-down list. Also under Gradient stops, customize the gradient stops that you added as follows: Select Stop 1 from the list, and then do the following: In the Stop position box, enter 78%. Click the button next to Color, and then under Theme Colors click Black, Text 1 (first row, second option from the left). Select Stop 2 from the list, and then do the following: In the Stop position box, enter 92%. Click the button next to Color, click More Colors, and then in the Colors dialog box, on the Custom tab, enter values for Red: 49, Green: 18, Blue: 17. Select Stop 3 from the list, and then do the following: In the Stop position box, enter 100%. Click the button next to Color, and then under Theme Colors click Red, Accent 2, Darker 50% (sixth row, sixth option from the left).")
20
Read 104 - 125 Pages Floating, glowing letters (Basic)
Select the second text box. Under Drawing Tools, on the Format tab, in the bottom right corner of the WordArt Styles group, click the Format Text Effects dialog box launcher. In the Format Text Effects dialog box, click Text Fill in the left pane, select Gradient fill in the Text Fill pane, and then do the following: (Basic) Tip: To draw the curved line on this slide, you will need to use the ruler and the drawing guides. To display the ruler and the drawing guides, do the following: On the Home tab, in the Slides group, click Layout, and then click Blank. On the View tab, in the Show/Hide group, select Ruler. Right-click the slide background area, and then click Grid and Guides. In the Grid and Guides dialog box, under Guide settings, select Display drawing guides on screen. (Note: One horizontal and one vertical guide will display on the slide at 0.00, the default position.) To reproduce the curved line on this slide, do the following: On the Home tab, in the Drawing group, click Shapes, and then under Lines click Curve (10th option from the left). To draw the curved line on the slide, do the following: Click the button next to Color, click More Colors, and then in the Colors dialog box, on the Custom tab, enter values for Red: 198, Green: 217, Blue: 241. Click the first point 0.25” to the left of the left edge of the slide and 0.75” below the horizontal drawing guide. Click the second point 3” to the left of the vertical drawing guide and 1” above the horizontal drawing guide. Also in the Format Text Effects dialog box, click Text Outline in the left pane. In the Text Outline pane, select Solid line, click the button next to Color, and then click More Colors. In the Colors dialog box, on the Custom tab, enter values for Red: 228, Green: 108, Blue: 10. Click the third point 1.5” to the right of the vertical drawing guide and 0.5” below the horizontal drawing guide. Double-click the fourth and final point 0.25” to the right of the right edge of the slide and 1.5” above the horizontal drawing guide. Also in the Format Text Effects dialog box, click 3-D Rotation in the left pane. In the 3-D Rotation pane, under Rotation, in the Z box, enter 350°. Select the curved line. Under Drawing Tools, on the Format tab, in the Shape Styles group, click the arrow next to Shape Outline, and then do the following: Under Drawing Tools, on the Format tab, in the WordArt Styles group, click Text Effects, point to Glow, point to More Glow Colors, and then click More Colors. In the Colors dialog box, on the Custom tab, enter values for Red: 255, Green: 144, Blue: 4. Under Theme Colors, click White, Background 1, Darker 35% (fifth row, first option from the left). Point to Dashes, and then click Square Dot (third option from the top). Point to Weight, and then click 1 1/2 pt. To reproduce the “C” on this slide, do the following: Select the second text box. On the Home tab, in the Clipboard group, click the arrow under Paste, and then click Duplicate. To reproduce the “A” on this slide, do the following: On the Insert tab, in the Text group, click Text Box, and then on the slide, drag to draw the text box. Click in the third text box, delete B, and then enter C. Enter A in the text box, select the text, and then on the Home tab, in the Font group, select Impact from the Font list, and then enter 140 in the Font Size box. Select the third text box. Under Drawing Tools, on the Format tab, in the bottom right corner of the WordArt Styles group, click the Format Text Effects dialog box launcher. In the Format Text Effects dialog box, click Text Fill in the left pane, select Gradient fill in the Text Fill pane, and then do the following: On the Home tab, in the Paragraph group, click Align Text Left to align the text left in the text box. Select the text box. Under Drawing Tools, on the Format tab, in the bottom right corner of the WordArt Styles group, click the Format Text Effects dialog box launcher. In the Format Text Effects dialog box, click Text Fill in the left pane, select Gradient fill in the Text Fill pane, and then do the following: In the Type list, select Linear. Click the button next to Direction, and then click Linear Down (first row, second option from the left). Under Gradient stops, click Add or Remove until two stops appear in the drop-down list. Also under Gradient stops, customize the gradient stops that you added as follows: Select Stop 1 from the list, and then do the following: In the Stop position box, enter 0%. Click the button next to Color, and then click White, Background 1 (first row, first option from the left). In the Transparency box, enter 50%. Select Stop 2 from the list, and then do the following: In the Stop position box, enter 85%. Also in the Format Text Effects dialog box, click Text Outline in the left pane. In the Text Outline pane, select Solid line, click the button next to Color, and then click More Colors. In the Colors dialog box, on the Custom tab, enter values for Red: 119, Green: 147, Blue: 60. In the Transparency box, enter 0%. Also in the Format Text Effects dialog box, click Text Outline in the left pane. In the Text Outline pane, select Solid line, click the button next to Color, and then click More Colors. In the Colors dialog box, on the Custom tab, enter values for Red: 49, Green: 133, Blue: 156. Also in the Format Text Effects dialog box, click 3-D Rotation in the left pane. In the 3-D Rotation pane, under Rotation, in the Z box, enter 5°. Under Drawing Tools, on the Format tab, in the WordArt Styles group, click Text Effects, point to Glow, point to More Glow Colors, and then click More Colors. In the Colors dialog box, on the Custom tab, enter values for Red: 168, Green: 224, Blue: 52. Also in the Format Text Effects dialog box, click Outline Style in the left pane. In the Outline Style pane, in the Width box, enter 2.5 pt. Also in the Format Text Effects dialog box, click Shadow in the left pane, and then do the following in the Shadow pane: Drag the objects on the slide to position as needed on the curved line. Click the button next to Presets and then under Outer click Offset Diagonal Bottom Left (first row, third option from the left). To reproduce the background on this slide, do the following: In the Transparency box, enter 82%. Right-click the slide background area, and then click Format Background. In the Format Background dialog box, click Fill in the left pane, select Gradient fill in the Fill pane, and then do the following: In the Size box, enter 100%. In the Blur box, enter 8 pt. In the Angle box, enter 135°. In the Distance box, enter 30 pt. In the Type list, select Radial. Also in the Format Text Effects dialog box, click 3-D Rotation in the left pane. In the 3-D Rotation pane, under Rotation, in the Z box, enter 15°. Click the button next to Direction, and then click From Corner (fifth option from the left) Under Drawing Tools, on the Format tab, in the WordArt Styles group, click Text Effects, point to Glow, and then do the following: Under Glow Variations, click Accent color 1, 8 pt glow (second row, first option from the left). Point to More Glow Colors, and then click More Colors. In the Colors dialog box, on the Custom tab, enter values for Red: 29, Green: 199, Blue: 244. Click the button next to Color, and then under Theme Colors click White, Background 1 (first row, first option from the left). To reproduce the “B” on this slide, do the following: Select the text box. On the Home tab, in the Clipboard group, click the arrow under Paste, and then click Duplicate. In the Stop position box, enter 100%. Click the button next to Color, click More Colors, and then in the Colors dialog box, on the Custom tab, enter values for Red: 178, Green: 179, Blue: 169. Click in the second text box, delete A, and then enter B.
 Tip: To draw the curved line on this slide, you will need to use the ruler and the drawing guides. To display the ruler and the drawing guides, do the following: On the Home tab, in the Slides group, click Layout, and then click Blank. On the View tab, in the Show/Hide group, select Ruler. Right-click the slide background area, and then click Grid and Guides. In the Grid and Guides dialog box, under Guide settings, select Display drawing guides on screen. (Note: One horizontal and one vertical guide will display on the slide at 0.00, the default position.) To reproduce the curved line on this slide, do the following: On the Home tab, in the Drawing group, click Shapes, and then under Lines click Curve (10th option from the left). To draw the curved line on the slide, do the following: Click the button next to Color, click More Colors, and then in the Colors dialog box, on the Custom tab, enter values for Red: 198, Green: 217, Blue: 241. Click the first point 0.25 to the left of the left edge of the slide and 0.75 below the horizontal drawing guide. Click the second point 3 to the left of the vertical drawing guide and 1 above the horizontal drawing guide. Also in the Format Text Effects dialog box, click Text Outline in the left pane. In the Text Outline pane, select Solid line, click the button next to Color, and then click More Colors. In the Colors dialog box, on the Custom tab, enter values for Red: 228, Green: 108, Blue: 10. Click the third point 1.5 to the right of the vertical drawing guide and 0.5 below the horizontal drawing guide. Double-click the fourth and final point 0.25 to the right of the right edge of the slide and 1.5 above the horizontal drawing guide. Also in the Format Text Effects dialog box, click 3-D Rotation in the left pane. In the 3-D Rotation pane, under Rotation, in the Z box, enter 350°. Select the curved line. Under Drawing Tools, on the Format tab, in the Shape Styles group, click the arrow next to Shape Outline, and then do the following: Under Drawing Tools, on the Format tab, in the WordArt Styles group, click Text Effects, point to Glow, point to More Glow Colors, and then click More Colors. In the Colors dialog box, on the Custom tab, enter values for Red: 255, Green: 144, Blue: 4. Under Theme Colors, click White, Background 1, Darker 35% (fifth row, first option from the left). Point to Dashes, and then click Square Dot (third option from the top). Point to Weight, and then click 1 1/2 pt. To reproduce the C on this slide, do the following: Select the second text box. On the Home tab, in the Clipboard group, click the arrow under Paste, and then click Duplicate. To reproduce the A on this slide, do the following: On the Insert tab, in the Text group, click Text Box, and then on the slide, drag to draw the text box. Click in the third text box, delete B, and then enter C. Enter A in the text box, select the text, and then on the Home tab, in the Font group, select Impact from the Font list, and then enter 140 in the Font Size box. Select the third text box. Under Drawing Tools, on the Format tab, in the bottom right corner of the WordArt Styles group, click the Format Text Effects dialog box launcher. In the Format Text Effects dialog box, click Text Fill in the left pane, select Gradient fill in the Text Fill pane, and then do the following: On the Home tab, in the Paragraph group, click Align Text Left to align the text left in the text box. Select the text box. Under Drawing Tools, on the Format tab, in the bottom right corner of the WordArt Styles group, click the Format Text Effects dialog box launcher. In the Format Text Effects dialog box, click Text Fill in the left pane, select Gradient fill in the Text Fill pane, and then do the following: In the Type list, select Linear. Click the button next to Direction, and then click Linear Down (first row, second option from the left). Under Gradient stops, click Add or Remove until two stops appear in the drop-down list. Also under Gradient stops, customize the gradient stops that you added as follows: Select Stop 1 from the list, and then do the following: In the Stop position box, enter 0%. Click the button next to Color, and then click White, Background 1 (first row, first option from the left). In the Transparency box, enter 50%. Select Stop 2 from the list, and then do the following: In the Stop position box, enter 85%. Also in the Format Text Effects dialog box, click Text Outline in the left pane. In the Text Outline pane, select Solid line, click the button next to Color, and then click More Colors. In the Colors dialog box, on the Custom tab, enter values for Red: 119, Green: 147, Blue: 60. In the Transparency box, enter 0%. Also in the Format Text Effects dialog box, click Text Outline in the left pane. In the Text Outline pane, select Solid line, click the button next to Color, and then click More Colors. In the Colors dialog box, on the Custom tab, enter values for Red: 49, Green: 133, Blue: 156. Also in the Format Text Effects dialog box, click 3-D Rotation in the left pane. In the 3-D Rotation pane, under Rotation, in the Z box, enter 5°. Under Drawing Tools, on the Format tab, in the WordArt Styles group, click Text Effects, point to Glow, point to More Glow Colors, and then click More Colors. In the Colors dialog box, on the Custom tab, enter values for Red: 168, Green: 224, Blue: 52. Also in the Format Text Effects dialog box, click Outline Style in the left pane. In the Outline Style pane, in the Width box, enter 2.5 pt. Also in the Format Text Effects dialog box, click Shadow in the left pane, and then do the following in the Shadow pane: Drag the objects on the slide to position as needed on the curved line. Click the button next to Presets and then under Outer click Offset Diagonal Bottom Left (first row, third option from the left). To reproduce the background on this slide, do the following: In the Transparency box, enter 82%. Right-click the slide background area, and then click Format Background. In the Format Background dialog box, click Fill in the left pane, select Gradient fill in the Fill pane, and then do the following: In the Size box, enter 100%. In the Blur box, enter 8 pt. In the Angle box, enter 135°. In the Distance box, enter 30 pt. In the Type list, select Radial. Also in the Format Text Effects dialog box, click 3-D Rotation in the left pane. In the 3-D Rotation pane, under Rotation, in the Z box, enter 15°. Click the button next to Direction, and then click From Corner (fifth option from the left) Under Drawing Tools, on the Format tab, in the WordArt Styles group, click Text Effects, point to Glow, and then do the following: Under Glow Variations, click Accent color 1, 8 pt glow (second row, first option from the left). Point to More Glow Colors, and then click More Colors. In the Colors dialog box, on the Custom tab, enter values for Red: 29, Green: 199, Blue: 244. Click the button next to Color, and then under Theme Colors click White, Background 1 (first row, first option from the left). To reproduce the B on this slide, do the following: Select the text box. On the Home tab, in the Clipboard group, click the arrow under Paste, and then click Duplicate. In the Stop position box, enter 100%. Click the button next to Color, click More Colors, and then in the Colors dialog box, on the Custom tab, enter values for Red: 178, Green: 179, Blue: 169. Click in the second text box, delete A, and then enter B.")
21
Create a Venn Diagram to compare and contrast
Bruno Shmuel Differences Differences Similarities

22
Lesson 6 Expanded text with bevel and reflection (Basic)
To reproduce the text effects on this slide, do the following: On the Home tab, in the Slides group, click Layout, and then click Blank. On the Insert tab, in the Text group, click Text Box, and then on the slide, drag to draw the text box. Enter text in the text box, select the text, and then on the Home tab, in the Font group, select Gill Sans MT Condensed from the Font list, enter 95 in the Font Size box, and then click Bold. On the Home tab, in the Paragraph group, click Center to center the text in the text box. On the Home tab, in the Font group, click Character Spacing, and then click More Spacing. In the Font dialog box, on the Character Spacing tab, in the Spacing list, select Expanded. In the By box, enter 16. Select the space between two of the words in the text. On the Home tab, in the Font group, click Character Spacing, and then click Tight. Repeat the process for each space between words. Select the text. Under Drawing Tools, on the Format tab, in the WordArt Styles group, click the arrow next to Text Fill, click More Fill Colors, and then in the Colors dialog box, on the Custom tab, enter values for Red: 238, Green: 86, Blue: 10. Under Drawing Tools, on the Format tab, in the bottom right corner of the WordArt Styles group, click the Format Text Effects dialog box launcher. In the Format Text Effects dialog box, Click 3-D Format in the left pane, and then do the following in the 3-D Format pane: Under Bevel, click the button next to Top, and then under Bevel click Circle (first row, first option from the left). Next to Top, in the Width box, enter 6.5 pt, and in the Height box, enter 8 pt. Under Contour, click the button next to Color, and then click Black, Text 1 (first row, second option from the left). In the Size box, enter 0.5 pt. Under Surface, click the button next to Material, and then under Standard click Metal (fourth option from the left). Click the button next to Lighting, and then under Neutral click Three Point (first row, first option from the left). In the Angle box, enter 30°. Under Drawing Tools, on the Format tab, in the WordArt Styles group, click Text Effects, point to Reflection, and then under Reflection Variations click Tight Reflection, touching (first row, first option from the left). To reproduce the background on this slide, do the following: Right-click the slide background area, and then click Format Background. In the Format Background dialog box, click Fill in the left pane, select Gradient fill in the Fill pane, and then do the following: In the Type list, select Linear. Click the button next to Direction, and then click Linear Down (first row, second option from the left). Under Gradient stops, click Add or Remove until three stops appear in the drop-down list. Also under Gradient stops, customize the gradient stops that you added as follows: Select Stop 1 from the list, and then do the following: In the Stop position box, enter 78%. Click the button next to Color, and then under Theme Colors click Black, Text 1 (first row, second option from the left). Select Stop 2 from the list, and then do the following: In the Stop position box, enter 92%. Click the button next to Color, click More Colors, and then in the Colors dialog box, on the Custom tab, enter values for Red: 49, Green: 18, Blue: 17. Select Stop 3 from the list, and then do the following: In the Stop position box, enter 100%. Click the button next to Color, and then under Theme Colors click Red, Accent 2, Darker 50% (sixth row, sixth option from the left).
. Next to Top, in the Width box, enter 6.5 pt, and in the Height box, enter 8 pt. Under Contour, click the button next to Color, and then click Black, Text 1 (first row, second option from the left). In the Size box, enter 0.5 pt. Under Surface, click the button next to Material, and then under Standard click Metal (fourth option from the left). Click the button next to Lighting, and then under Neutral click Three Point (first row, first option from the left). In the Angle box, enter 30°. Under Drawing Tools, on the Format tab, in the WordArt Styles group, click Text Effects, point to Reflection, and then under Reflection Variations click Tight Reflection, touching (first row, first option from the left). To reproduce the background on this slide, do the following: Right-click the slide background area, and then click Format Background. In the Format Background dialog box, click Fill in the left pane, select Gradient fill in the Fill pane, and then do the following: In the Type list, select Linear. Click the button next to Direction, and then click Linear Down (first row, second option from the left). Under Gradient stops, click Add or Remove until three stops appear in the drop-down list. Also under Gradient stops, customize the gradient stops that you added as follows: Select Stop 1 from the list, and then do the following: In the Stop position box, enter 78%. Click the button next to Color, and then under Theme Colors click Black, Text 1 (first row, second option from the left). Select Stop 2 from the list, and then do the following: In the Stop position box, enter 92%. Click the button next to Color, click More Colors, and then in the Colors dialog box, on the Custom tab, enter values for Red: 49, Green: 18, Blue: 17. Select Stop 3 from the list, and then do the following: In the Stop position box, enter 100%. Click the button next to Color, and then under Theme Colors click Red, Accent 2, Darker 50% (sixth row, sixth option from the left).")
23
Read Pages 150-160 Gradient-filled text with soft shadow (Basic)
To reproduce the effects on this slide, do the following: On the Insert tab, in the Text group, click Text Box, and then on the slide, drag to draw the text box. On the Home tab, in the Slides group, click Layout, and then click Blank. Enter text in the text box, select the text, and then on the Home tab, in the Font group, select TW Cen MT from the Font list, and then select 48 from the Font Size list. On the Home tab, in the Paragraph group, click Center to center the text on the slide. Select the text box. Under Drawing Tools, on the Format tab, in the bottom right corner of the WordArt Styles group, click the Format Text Effects dialog box launcher. In the Format Text Effects dialog box, click Text Fill in the left pane, select Gradient fill in the Text Fill pane, and then do the following: In the Type list, select Linear. Click the button next to Direction, and then click Linear Down (first row, second option from the left). In the Angle box, enter 90°. Under Gradient stops, click Add or Remove until two stops appear in the drop-down list. Also under Gradient stops, customize the gradient stops that you added as follows: Select Stop 1 from the list, and then do the following: In the Stop position box, enter 37%. Click the button next to Color, and then under Theme Colors click White, Background 1 (first row, first option from the left). Select Stop 2 from the list, and then do the following: In the Stop position box, enter 99%. Click the button next to Color, click More Colors, and then in the Colors dialog box, on the Custom tab, enter values for Red: 196, Green: 189, Blue: 151. Also in the Format Text Effects dialog box, click Text Outline in the left pane, and then in the Text Outline pane select Solid line. Click the button next to Color, and then under Theme Colors click White, Background 1 (first row, first option from the left). Also in the Format Text Effects dialog box, click Outline Style in the left pane, and then do the following in the Outline Style pane: In the Width box, enter 1 pt. Click the button next to Dash type, and then click Solid (first option from the top). Also in the Format Text Effects dialog box, click Shadow in the left pane, and then do the following in the Shadow pane: In the Blur box, enter 12 pt. Click the button next to Presets, and then under Outer click Offset Bottom (first row, second option from the left). To reproduce the background on this slide, do the following: Right-click the slide background area, and then click Format Background. In the Format Background dialog box, click Fill in the left pane, select Gradient fill in the Fill pane, and then do the following: In the Type list, select Radial. Click the button next to Direction, and then click From Center (third option from the left). In the Stop position box, enter 10%. Click the button next to Color, and then under Theme Colors click White, Background 1, Darker 5% (second row, first option from the left). Click the button next to Color, and then under Theme Colors click White, Background 1, Darker 35% (fifth row, first option from the left).
. In the Angle box, enter 90°. Under Gradient stops, click Add or Remove until two stops appear in the drop-down list. Also under Gradient stops, customize the gradient stops that you added as follows: Select Stop 1 from the list, and then do the following: In the Stop position box, enter 37%. Click the button next to Color, and then under Theme Colors click White, Background 1 (first row, first option from the left). Select Stop 2 from the list, and then do the following: In the Stop position box, enter 99%. Click the button next to Color, click More Colors, and then in the Colors dialog box, on the Custom tab, enter values for Red: 196, Green: 189, Blue: 151. Also in the Format Text Effects dialog box, click Text Outline in the left pane, and then in the Text Outline pane select Solid line. Click the button next to Color, and then under Theme Colors click White, Background 1 (first row, first option from the left). Also in the Format Text Effects dialog box, click Outline Style in the left pane, and then do the following in the Outline Style pane: In the Width box, enter 1 pt. Click the button next to Dash type, and then click Solid (first option from the top). Also in the Format Text Effects dialog box, click Shadow in the left pane, and then do the following in the Shadow pane: In the Blur box, enter 12 pt. Click the button next to Presets, and then under Outer click Offset Bottom (first row, second option from the left). To reproduce the background on this slide, do the following: Right-click the slide background area, and then click Format Background. In the Format Background dialog box, click Fill in the left pane, select Gradient fill in the Fill pane, and then do the following: In the Type list, select Radial. Click the button next to Direction, and then click From Center (third option from the left). In the Stop position box, enter 10%. Click the button next to Color, and then under Theme Colors click White, Background 1, Darker 5% (second row, first option from the left). Click the button next to Color, and then under Theme Colors click White, Background 1, Darker 35% (fifth row, first option from the left).")
24
Write 3 facts about Boyne.

25
Ask Boyne a question. http://www.johnboyne.com
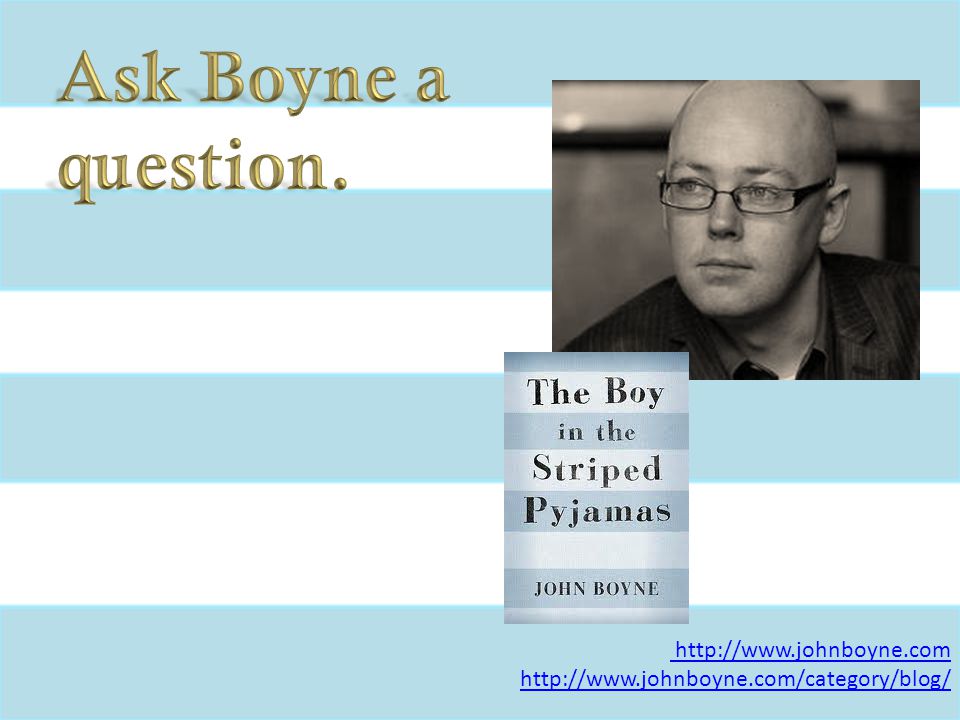
26
“I subtitled the book a fable, a work of fiction with a moral at the centre, so it’s supposed to be an introduction to a study of the subject and hopefully that the story of these two boys would move you enough that you would want to learn more about it. ” Boyne Reflect on the quote

27
Lesson 7 Expanded text with bevel and reflection (Basic)
To reproduce the text effects on this slide, do the following: On the Home tab, in the Slides group, click Layout, and then click Blank. On the Insert tab, in the Text group, click Text Box, and then on the slide, drag to draw the text box. Enter text in the text box, select the text, and then on the Home tab, in the Font group, select Gill Sans MT Condensed from the Font list, enter 95 in the Font Size box, and then click Bold. On the Home tab, in the Paragraph group, click Center to center the text in the text box. On the Home tab, in the Font group, click Character Spacing, and then click More Spacing. In the Font dialog box, on the Character Spacing tab, in the Spacing list, select Expanded. In the By box, enter 16. Select the space between two of the words in the text. On the Home tab, in the Font group, click Character Spacing, and then click Tight. Repeat the process for each space between words. Select the text. Under Drawing Tools, on the Format tab, in the WordArt Styles group, click the arrow next to Text Fill, click More Fill Colors, and then in the Colors dialog box, on the Custom tab, enter values for Red: 238, Green: 86, Blue: 10. Under Drawing Tools, on the Format tab, in the bottom right corner of the WordArt Styles group, click the Format Text Effects dialog box launcher. In the Format Text Effects dialog box, Click 3-D Format in the left pane, and then do the following in the 3-D Format pane: Under Bevel, click the button next to Top, and then under Bevel click Circle (first row, first option from the left). Next to Top, in the Width box, enter 6.5 pt, and in the Height box, enter 8 pt. Under Contour, click the button next to Color, and then click Black, Text 1 (first row, second option from the left). In the Size box, enter 0.5 pt. Under Surface, click the button next to Material, and then under Standard click Metal (fourth option from the left). Click the button next to Lighting, and then under Neutral click Three Point (first row, first option from the left). In the Angle box, enter 30°. Under Drawing Tools, on the Format tab, in the WordArt Styles group, click Text Effects, point to Reflection, and then under Reflection Variations click Tight Reflection, touching (first row, first option from the left). To reproduce the background on this slide, do the following: Right-click the slide background area, and then click Format Background. In the Format Background dialog box, click Fill in the left pane, select Gradient fill in the Fill pane, and then do the following: In the Type list, select Linear. Click the button next to Direction, and then click Linear Down (first row, second option from the left). Under Gradient stops, click Add or Remove until three stops appear in the drop-down list. Also under Gradient stops, customize the gradient stops that you added as follows: Select Stop 1 from the list, and then do the following: In the Stop position box, enter 78%. Click the button next to Color, and then under Theme Colors click Black, Text 1 (first row, second option from the left). Select Stop 2 from the list, and then do the following: In the Stop position box, enter 92%. Click the button next to Color, click More Colors, and then in the Colors dialog box, on the Custom tab, enter values for Red: 49, Green: 18, Blue: 17. Select Stop 3 from the list, and then do the following: In the Stop position box, enter 100%. Click the button next to Color, and then under Theme Colors click Red, Accent 2, Darker 50% (sixth row, sixth option from the left).
. Next to Top, in the Width box, enter 6.5 pt, and in the Height box, enter 8 pt. Under Contour, click the button next to Color, and then click Black, Text 1 (first row, second option from the left). In the Size box, enter 0.5 pt. Under Surface, click the button next to Material, and then under Standard click Metal (fourth option from the left). Click the button next to Lighting, and then under Neutral click Three Point (first row, first option from the left). In the Angle box, enter 30°. Under Drawing Tools, on the Format tab, in the WordArt Styles group, click Text Effects, point to Reflection, and then under Reflection Variations click Tight Reflection, touching (first row, first option from the left). To reproduce the background on this slide, do the following: Right-click the slide background area, and then click Format Background. In the Format Background dialog box, click Fill in the left pane, select Gradient fill in the Fill pane, and then do the following: In the Type list, select Linear. Click the button next to Direction, and then click Linear Down (first row, second option from the left). Under Gradient stops, click Add or Remove until three stops appear in the drop-down list. Also under Gradient stops, customize the gradient stops that you added as follows: Select Stop 1 from the list, and then do the following: In the Stop position box, enter 78%. Click the button next to Color, and then under Theme Colors click Black, Text 1 (first row, second option from the left). Select Stop 2 from the list, and then do the following: In the Stop position box, enter 92%. Click the button next to Color, click More Colors, and then in the Colors dialog box, on the Custom tab, enter values for Red: 49, Green: 18, Blue: 17. Select Stop 3 from the list, and then do the following: In the Stop position box, enter 100%. Click the button next to Color, and then under Theme Colors click Red, Accent 2, Darker 50% (sixth row, sixth option from the left).")
28
Group A Pages 161 - 175 Copy notes please. What Bruno does
What Bruno learns The attitudes people show toward Bruno Any unusual or significant events How the author uses language to make Bruno’s thoughts and feelings clear.

29
Group B Pages 176 - 185 Copy notes please. What Bruno does
What Bruno learns The attitudes people show toward Bruno Any unusual or significant events How the author uses language to make Bruno’s thoughts and feelings clear.

30
Lesson 8 Expanded text with bevel and reflection (Basic)
To reproduce the text effects on this slide, do the following: On the Home tab, in the Slides group, click Layout, and then click Blank. On the Insert tab, in the Text group, click Text Box, and then on the slide, drag to draw the text box. Enter text in the text box, select the text, and then on the Home tab, in the Font group, select Gill Sans MT Condensed from the Font list, enter 95 in the Font Size box, and then click Bold. On the Home tab, in the Paragraph group, click Center to center the text in the text box. On the Home tab, in the Font group, click Character Spacing, and then click More Spacing. In the Font dialog box, on the Character Spacing tab, in the Spacing list, select Expanded. In the By box, enter 16. Select the space between two of the words in the text. On the Home tab, in the Font group, click Character Spacing, and then click Tight. Repeat the process for each space between words. Select the text. Under Drawing Tools, on the Format tab, in the WordArt Styles group, click the arrow next to Text Fill, click More Fill Colors, and then in the Colors dialog box, on the Custom tab, enter values for Red: 238, Green: 86, Blue: 10. Under Drawing Tools, on the Format tab, in the bottom right corner of the WordArt Styles group, click the Format Text Effects dialog box launcher. In the Format Text Effects dialog box, Click 3-D Format in the left pane, and then do the following in the 3-D Format pane: Under Bevel, click the button next to Top, and then under Bevel click Circle (first row, first option from the left). Next to Top, in the Width box, enter 6.5 pt, and in the Height box, enter 8 pt. Under Contour, click the button next to Color, and then click Black, Text 1 (first row, second option from the left). In the Size box, enter 0.5 pt. Under Surface, click the button next to Material, and then under Standard click Metal (fourth option from the left). Click the button next to Lighting, and then under Neutral click Three Point (first row, first option from the left). In the Angle box, enter 30°. Under Drawing Tools, on the Format tab, in the WordArt Styles group, click Text Effects, point to Reflection, and then under Reflection Variations click Tight Reflection, touching (first row, first option from the left). To reproduce the background on this slide, do the following: Right-click the slide background area, and then click Format Background. In the Format Background dialog box, click Fill in the left pane, select Gradient fill in the Fill pane, and then do the following: In the Type list, select Linear. Click the button next to Direction, and then click Linear Down (first row, second option from the left). Under Gradient stops, click Add or Remove until three stops appear in the drop-down list. Also under Gradient stops, customize the gradient stops that you added as follows: Select Stop 1 from the list, and then do the following: In the Stop position box, enter 78%. Click the button next to Color, and then under Theme Colors click Black, Text 1 (first row, second option from the left). Select Stop 2 from the list, and then do the following: In the Stop position box, enter 92%. Click the button next to Color, click More Colors, and then in the Colors dialog box, on the Custom tab, enter values for Red: 49, Green: 18, Blue: 17. Select Stop 3 from the list, and then do the following: In the Stop position box, enter 100%. Click the button next to Color, and then under Theme Colors click Red, Accent 2, Darker 50% (sixth row, sixth option from the left).
. Next to Top, in the Width box, enter 6.5 pt, and in the Height box, enter 8 pt. Under Contour, click the button next to Color, and then click Black, Text 1 (first row, second option from the left). In the Size box, enter 0.5 pt. Under Surface, click the button next to Material, and then under Standard click Metal (fourth option from the left). Click the button next to Lighting, and then under Neutral click Three Point (first row, first option from the left). In the Angle box, enter 30°. Under Drawing Tools, on the Format tab, in the WordArt Styles group, click Text Effects, point to Reflection, and then under Reflection Variations click Tight Reflection, touching (first row, first option from the left). To reproduce the background on this slide, do the following: Right-click the slide background area, and then click Format Background. In the Format Background dialog box, click Fill in the left pane, select Gradient fill in the Fill pane, and then do the following: In the Type list, select Linear. Click the button next to Direction, and then click Linear Down (first row, second option from the left). Under Gradient stops, click Add or Remove until three stops appear in the drop-down list. Also under Gradient stops, customize the gradient stops that you added as follows: Select Stop 1 from the list, and then do the following: In the Stop position box, enter 78%. Click the button next to Color, and then under Theme Colors click Black, Text 1 (first row, second option from the left). Select Stop 2 from the list, and then do the following: In the Stop position box, enter 92%. Click the button next to Color, click More Colors, and then in the Colors dialog box, on the Custom tab, enter values for Red: 49, Green: 18, Blue: 17. Select Stop 3 from the list, and then do the following: In the Stop position box, enter 100%. Click the button next to Color, and then under Theme Colors click Red, Accent 2, Darker 50% (sixth row, sixth option from the left).")
31
LESSON 8 - Copy a sentence from The Boy in the Striped Pajamas in MLA format – (remember the quotation marks and the page number). Draw a picture to illustrate. Write a sentence or two reflecting on the words you quoted. When you are finished – Please turn your Reading Inventory in for a grade – ORDER it – Lesson 1 through 8. Thanks

Similar presentations

>")


