Download presentation
Presentation is loading. Please wait.

1
NKOROI LINDA KARIMI B02/53589/2012 NJOROGE MARION MUTHONI B02/52607/2012 INTERIOR ARCHITECTURE Upholstered Furniture

2
Definition Upholstery is the work of providing furniture, especially seats, with padding, springs, webbing, and fabric or leather covers. The term is equally applicable to domestic, automobile, airplane and boat furniture

3
Types of Upholstery Traditional Upholstery Automobile Upholstery Commercial Upholstery Marine Upholstery

4
Traditional Upholstery A craft which evolved over centuries for padding and covering chairs, seats and sofas, before the development of sewing machines synthetic fabrics and plastic foam.

5
Automobile Upholstery Also known as a trimmer, coach trimmer or motor trimmer.

7
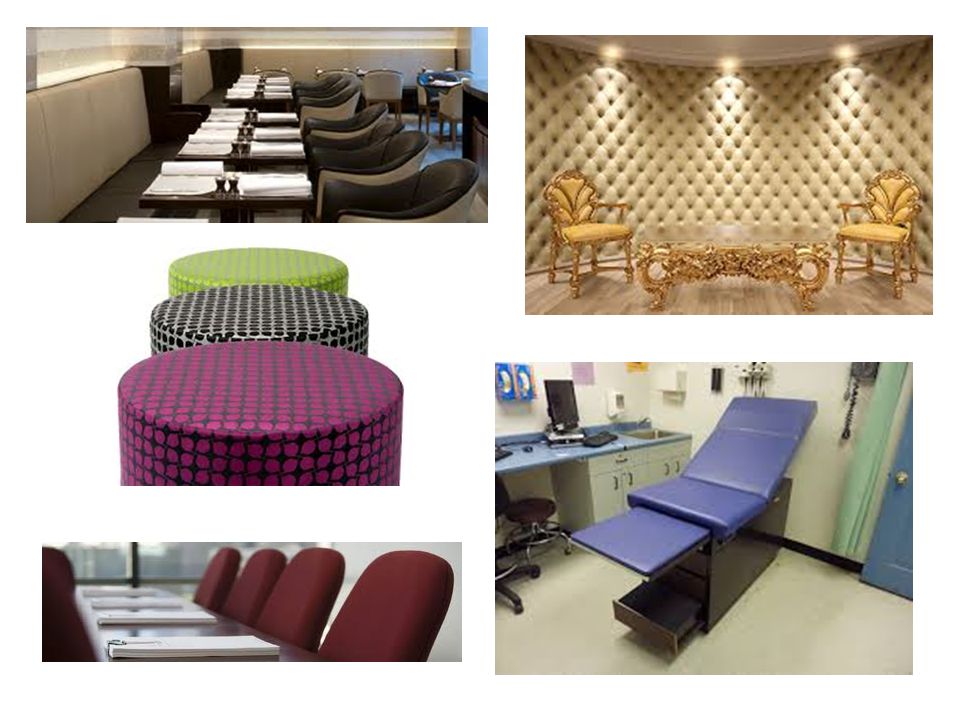
Commercial Upholstery The type of upholstery work offered to businesses. Examples :- restaurant seating (consisting of booth seats), dining room chairs, bar stools, churches, hospitals and clinics (consisting of medical tables, chiropractic tables, dental chairs)
, dining room chairs, bar stools, churches, hospitals and clinics (consisting of medical tables, chiropractic tables, dental chairs).")
9
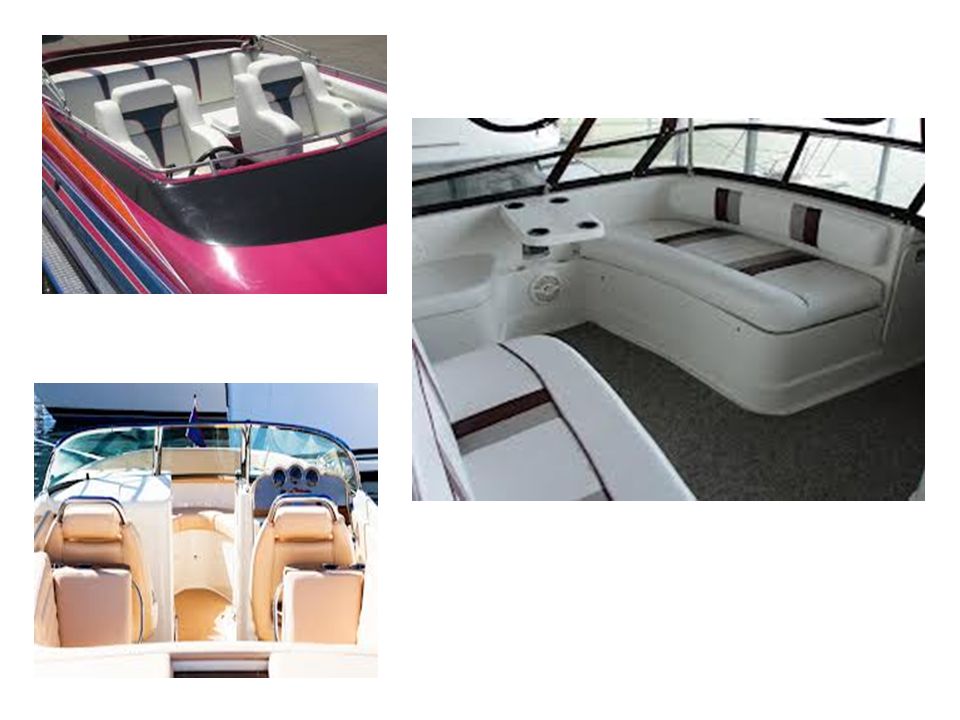
Marine Upholstery One has to consider dampness, sunlight and hard usage. Materials to be used:- – a vinyl or material that is UV and cold-cracking resistant – stainless-steel hardware such as staples, screws – marine quality wood – a high-resiliency, high-density plastic foam with a thin film of plastic over it – closed-cell foam is used on smaller cushions which can double as flotation devices – dacron thread must be used in any sewing work. – zippers should be of nylon.

11
Case studies: Car seats Trim panels cover the interior walls of the car, hiding the structure and providing an attractive finish and sound insulation. The most basic seats, which are easy to make and quite comfortable, have a wooden base, with thick foam cushioning and a covering of vinyl. Cloth-covered seats are often very attractive, but tend to soil easily and can fade their use should be restricted to closed cars, as cloth soaks up water.

12
A basic board of 9mm or 13mm thickness is cut from plywood or chipboard to the shape required for the seat cushions and the back. Foam about 25mm thickness is cut to the same dimensions, and additional foam shaped. Paper patterns are made to use as templates when cutting out the vinyl covering. Once the covering has been cut out, it is 'pockets' so made with 13mm foam strip, pushed down with a ruler or something similar. Alternatively, the vinyl can be sewn through. The piping is optional, but it sets the finished seats off nicely and, like the vinyl, is available in different colors.

13
When the covering is completed, it is pulled over the foam lined base and stapled to the back

14
Wall Upholstery Wall upholstery is designed to make a room feel comfortable, acoustically sound and aesthetically beautiful.

15
Mark and cut out fabric pieces that are the same height as your walls. Make sure the lines you draw and cut are straight and square with the grain or pattern of your fabric.

16
Press open any seam allowances on the fabric so they lay flat.

17
. Find the center of the top and bottom of the fabric for the first wall and mark or cut a notch. Mark the center of the top and bottom of the wall..

18
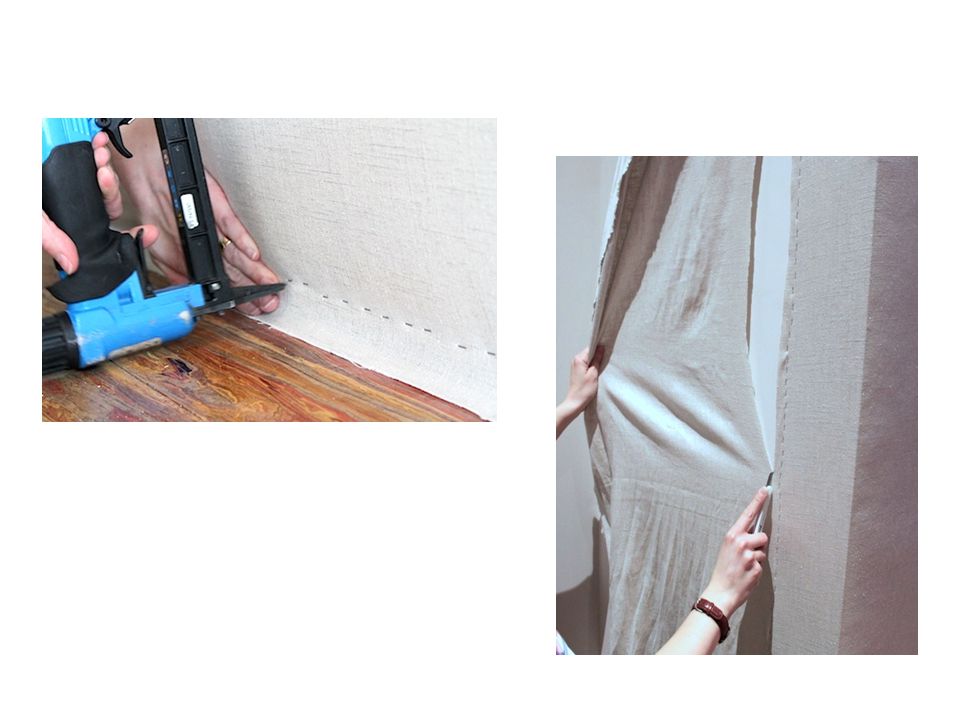
Staple Dacron to the wall : split and staple in between the top and bottom layers of Dacron. Start at the top, then bottom, left and right sides. Stop the Dacron 1/2″ shy of baseboards, crown molding or any other wall trim. For big walls, you’ll need multiple pieces of Dacron. Split and staple additional pieces of Dacron with edges touching (but not overlapping) the adjacent piece.
 the adjacent piece..")
20
Carefully cut around outlets, switches, lighting fixtures, etc.. Staple down the edge of the Dacron around the items in step 9. You can staple right on top of the Dacron instead of splitting the layers.

21
Line up the middle of the fabric with the top middle of the wall and staple. Repeat for the bottom middle of the wall. Stretch your fabric to the left and staple down the seam to the left of the middle. Measure the distance from the edge of the wall to the left seam. If you only have one panel or two panels seamed together Stretch the fabric from the middle to the right and staple the seam the same distance from the right edge of the wall. Repeat steps for the bottom of the fabric.

22
When you have your seams evenly spaced and stapled in place, staple a long piece of string or yarn at the top and bottom of the wall lined up with every seam. Stretch the string pretty tight so it will stay nice and straight. Go back to the top and staple all the way across.

23
Stretch the fabric tightly to the right until the seam is just past the string line. Staple the fabric to the next wall. When the right side is stapled from top to bottom, repeat step for the left side. This time, we’ll be stretching until the seams are lined up with the string lines. Use a utility knife or scissors to cut off excess fabric

25
Upholstery In Sofas The frame of a sofa is made most often wood, though newer options include steel, plastic, and laminated boards or a combination of the above. Padding is primarily made from animal hair, particularly hog or horse. Other paddings used in mass production are foam and polyester fiber-fill wrap. Cushions are fashioned from polyurethane foam, polyester fiber, down, cotton, latex, or cotton- wrapped springs.

26
First the frame is constructed from wood that has been found clear of any defects. The thickness of the wood should allow for the heavy tension webbing to follow.

27
The foundation is then set for padding. Jute, a kind of burlap made in India, is used as webbing. Strips of this material are interwoven, stretched across the frame, and tacked down. Flax twine is then used to strap the springs onto the webbing. If the back comes in sections (sometimes three for design purposes), then each part is separately tied off and the twine ends tacked onto the four-sided frame. The same is true for any sides and arms. Each part is then wrapped in its own sheet of burlap. The burlap is cut to size for each part, tacked into place initially, and then tightly lashed to the springs to minimize movement. This is to prevent the springs from wearing through the burlap over time.
, then each part is separately tied off and the twine ends tacked onto the four-sided frame. The same is true for any sides and arms. Each part is then wrapped in its own sheet of burlap. The burlap is cut to size for each part, tacked into place initially, and then tightly lashed to the springs to minimize movement. This is to prevent the springs from wearing through the burlap over time..")
29
Each part is separately padded as well, with layers of burlap and horsehair or chosen synthetic material.

30
The padding is placed in a burlap envelope, arranged on the edge of the seat, pinned into place, and stitched down. This roll is then shaped according to design requirements and stitched with special needles and more twine. After this is secured yet still pliable, a layer of about 6.81 kg of padding is distributed over the whole area of the seat, extending over the roll. The layer is basted into place with long, loose stitches and covered with lighter weight burlap.

31
Tighter stitching divides the seat into two areas called the platform and the nose or front edge. This front part is reshaped with hand stitching. After the shaping is completed, a final, thicker layer of padding is added to fill in dips left by stitching in the burlap, and basted like the previous layer. A muslin sheet of covering is applied, stitched into the break between the platform and nose, tightened across the front edge and back across the platform; its edges are tacked into place.

32
The arms The arms are done next in the same basic fashion. Layers of padding and burlap are fixed in succession and topped with muslin. The arms also have a front edge of extra thick padding. Once the arms are properly shaped the back sections may be padded.

33
The fabric The panels are plotted out in chalk so they match wherever their seams will meet when finally applied.

34
The seat is covered with panels for the platform and nose and hand-stitched into place along the break between them over a layer of cotton batting. The nose is then covered first to check if the pattern continues along the front properly. The covering is fitted over the back or platform end and secured. The arms are covered next after being prepped with their own layers of cotton batting.

35
The Finished Product.

36
Reasons to Upholster Upholstered furniture is an expression of your personal taste and creativity. It's more comfortable than a hard, wooden chair. If you want to create the look of a bygone era, it's achievable with the right upholstery fabric. The possibilities for color, texture and durability are nearly endless. It's a way to recycle and reuse materials. Wooden and steel construction will last a long time, but fabrics wear out. There's no need to throw out the entire piece, when you can re- upholster and have a nearly new piece

37
References http://en.wikipedia.org/wiki/Upholstery http://www.designsponge.com/2012/03/uph olstery-basics-upholstered-walls-part-1.html http://www.designsponge.com/2012/03/uph olstery-basics-upholstered-walls-part-1.html http://locost7.info/files/other/Upholstery.pdf Google images

Similar presentations