Download presentation
Presentation is loading. Please wait.

1
Florida Department of Environmental Protection (FDEP)
ODEQ: E2 Project 4/6/2017 Florida Department of Environmental Protection (FDEP) How to Get Started eDMR Reporting System Since Peter has explained all the great features that eDMR has to offer. Let us begin learning how to use the system. enfoTech Consulting, Inc.
 How to Get Started. eDMR Reporting System. Since Peter has explained all the great features that eDMR has to offer. Let us begin learning how to use the system. enfoTech Consulting, Inc.")
2
How to… Apply & Receive an Account Log in Create and Submit a DMR:
1. Choose form and monitoring period 2. Choose submission method: Online Form Entry Copy & Paste XML File Upload 3. Comments and Explanation & Operator Information 4. Attach a File 5. Review 6. Submit View Past Submissions & Print DMR Like all web applications, a user must apply and they will receive an account. I will quickly run through that process. After that, I will have a demonstration of how a user will create and submit a DMR. Also, how to view past submissions and print DMRs.

3
How to Apply & Receive an Account
Go to: and download the required application package: Permittee Registration Electronic Signature Application Agreement (for each certifier) Only paper documents submitted for eDMR. To apply, go to DEP’s eDMR website for the link to the required application package, which primarily includes the Permittee Registration and the Electronic Signature Application Agreement, which is required for each certifier. The application package should be the only paper documents you will need to submit for eDMR.
 Only paper documents submitted for eDMR. To apply, go to DEP’s eDMR website for the link to the required application package, which primarily includes. the Permittee Registration and the Electronic Signature Application Agreement, which is required for each certifier. The application package should be the only paper documents you will need to submit for eDMR.")
4
Permittee Registration
This Permittee registration is the application for facility participation in eDMR. There are 3 parts: In Part A, Basic Facility information is needed, such as the Facility ID, Name and mailing address. Part B, List the personnel to be assigned the Viewer or Certifier accounts. The Viewer and Certifier accounts are similar except only the Certifier can make submissions.

5
Permittee Registration
Part C is the Permittee Registration: The Permittee’s signature certifies that all the information provided is true, accurate and complete.

6
Permittee Registration Continued
If spaces is needed for additional Facilities or User Accounts, supplemental sheets are available AND SHOULD BE UTILIZED.

7
Electronic Signature Application Agreement (for each certifier)
The Electronic Signature Application Agreement, is a formal agreement between each certifier and the Department regarding the responsibilities and use of their "PIN".

8
Electronic Signature Application Agreement (for each certifier)
This agreement must be signed by the designated certifier requesting authorization to submit monitoring reports. Their signature must be notarized.

9
How to Apply & Receive an Account
After the information and agreement are completed, signed and notarized, the originals should be sent to: Wastewater eDMR Coordinator FDEP, Division of Water Resource Management 2600 Blair Stone Road, MS 3550 Tallahassee, Florida After the forms are completed, signed and notarized, the originals must be sent to Tallahassee.

10
How to Apply & Receive an Account
Issuance of username and password via . Also, issue those personnel listed as certifiers with PIN codes via . All facility personnel listed on the application will be notified that facility requirements are ready for electronic submissions and they will receive a username and password via . Personnel listed as certifiers will also receive PIN codes via .

11
How to Log In To access eDMR, the user can click the link at the bottom of their s, and it will be posted on DEP’s website. Now that the Certifier has a username, password and PIN, they are ready to make a submission. From here on, we will walk you through the eDMR system. First, you must log in to eDMR. The user can access eDMR by utilizing the link provided at bottom of the s they received with their log in information, or its also available on DEP’s eDMR website.

12
On this screen you’ll see an overview of the eDMR system along with some links to various help documents and instructions.

13
For now, I’ll enter the username and password issued to log in as a certifier.

14
If this is the first time you are logging-in, you’ll be prompted to change your password
Each user who is a certifier will also be prompted to change their PIN and create 5 security questions with answers. On the eDMR homepage: we have report due reminders and system announcements If you ever need to return to this homepage, you can click on the ‘Home’ icon located at the top right.

15
Now, to create and submit a DMR.
Select ‘Create a New Report’ on the left

16
You may search for reporting requirements based on various criteria like:
Report Type, Report Frequency, Facility Name, Monitoring Start Date, and Report due date

17
The Facility drop down menu will only list facilities which I am associated with. Here, I have just two facilities.

18
For the first example, I will enter a report by hand
For the first example, I will enter a report by hand. First, I will choose… Kates Prod Test Facility.

19
Take notice, after you choose the Facility name, the Permit Number auto-populates.
For the Monitoring Period, I’ll enter 03/01/2010 to 07/31/2010

20
Then Click Search

21
A list of reports will appear under the search options.
Each report has these 4 icons:

22
The ‘View Form’ will display a printable DMR template.

23
The ‘Excel’ will allow you to download a spreadsheet template for the copy and paste option. I will show you this example later.

24
The ‘XML’ will allow you to download an XML template file
The ‘XML’ will allow you to download an XML template file. This is recommended for advanced users who have software that will generate an XML submission for them.

25
As for the ‘Online Entry’ icon, you click here when you’re ready to enter data.
Since I will enter data by hand; I will click ‘Online Entry’ for the Monthly Report of July

26
This will give me three different reporting options: online entry form, copy and paste a report, and XML Import. I will continue with ‘Online Entry Form’.

27
This brings me to a form that includes all the basic information a typical paper DMR has, but the layout is different.

28
On the left are monitoring groups, if I have several they will appear in the drop down list.
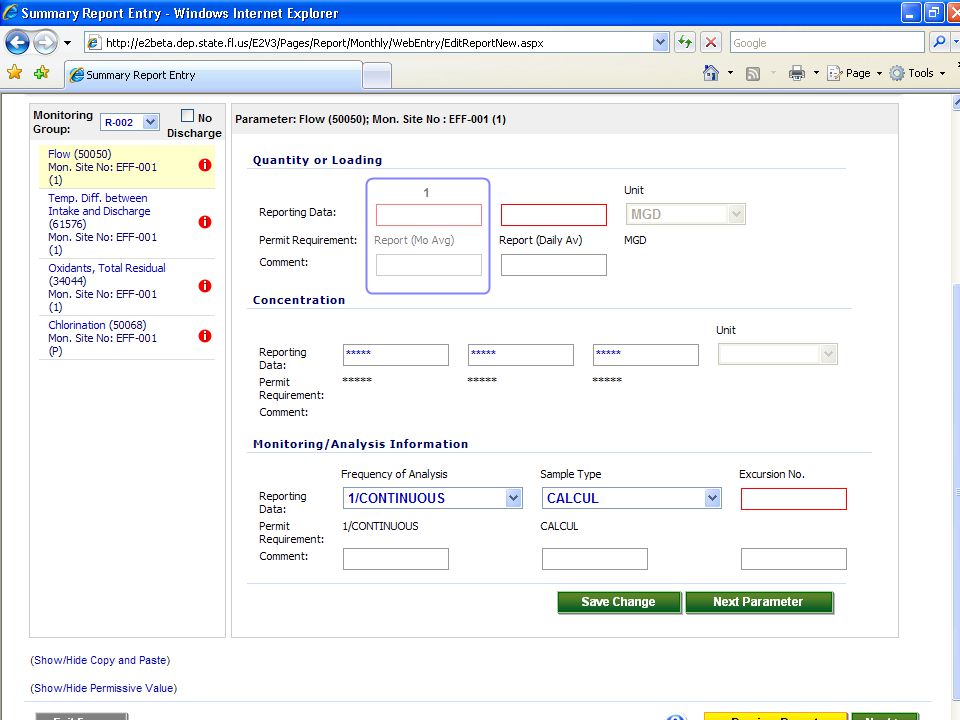
Under the monitoring group is a list of parameters associated with it. One of the enhancements Peter mentioned, are the indicators that appear to the right of each parameter if the fields are left blank or has exceedances. Since we just started this form, all the fields are currently blank and all parameters have a red ‘i’ symbol indicator.

29
Let me scroll down to show you the rest of the form.
Like a paper DMR, the form still includes all 5 columns.

35
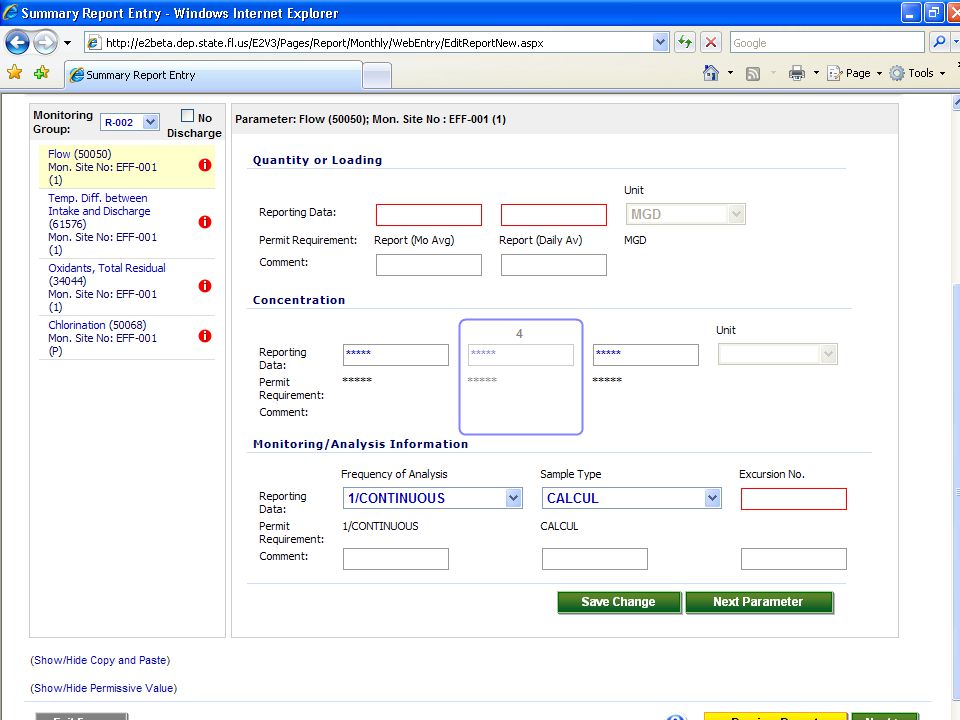
To easily distinguish fields that are required, the fields are outlined in RED, and a field with asterisks prevents data entry in the wrong place.

36
After I enter my data. I click ‘Next Parameter’ and this would automatically save my entry and would bring me to the following parameter.

38
If I ever need to take a break at anytime, I can click ‘Save Change’, and log out.

39
For now, I’ll continue to the next parameter.

40
Now, the other indicator appears
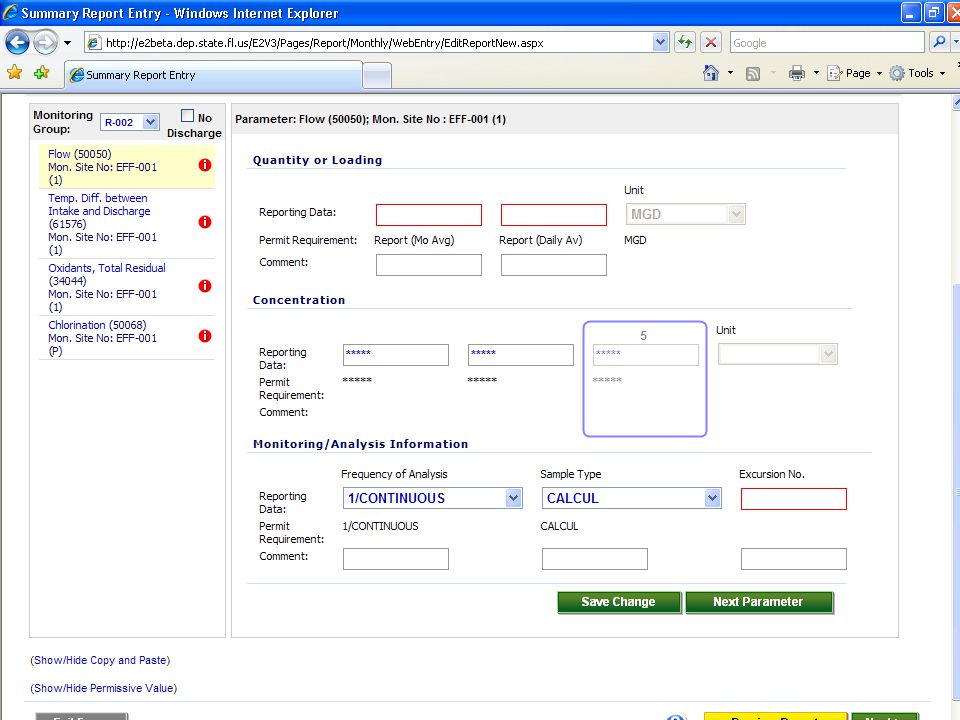
Now, the other indicator appears. The paper symbol indicates an exceedance. If I hover over the symbol it will show me the value entered and value exceeded.

41
Once I have completed entering my data, I click the ‘Next’ button at the bottom right.

42
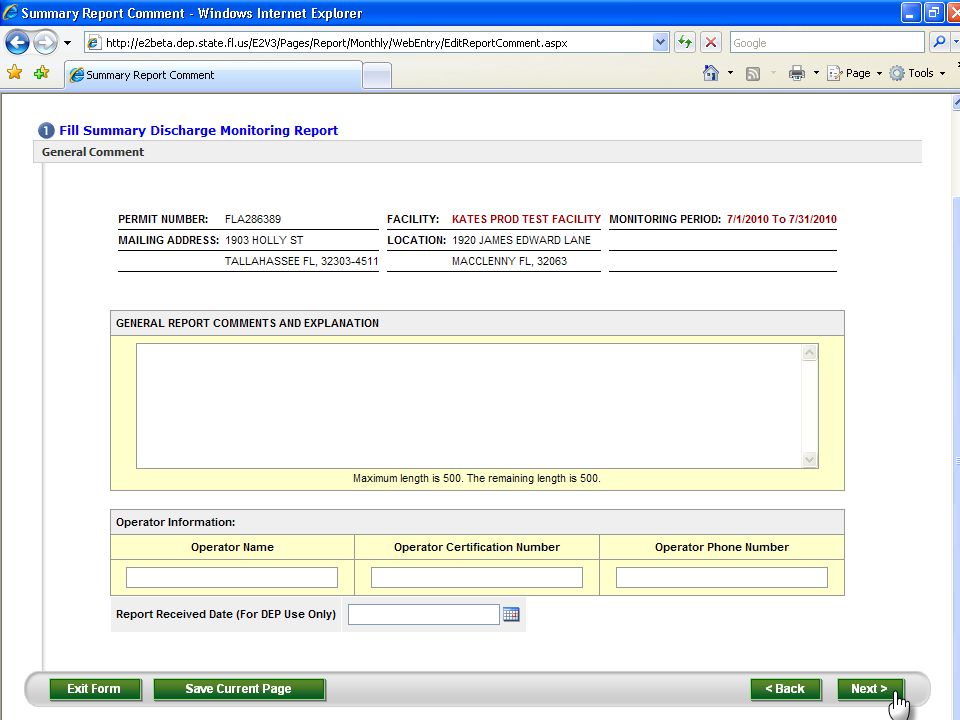
For General Report Comments and Explanation, & Operator Information: Enter any applicable information here. The Report Received Date is for DEP internal use only. My received date will be logged by the system after submission is completed. Next.

43
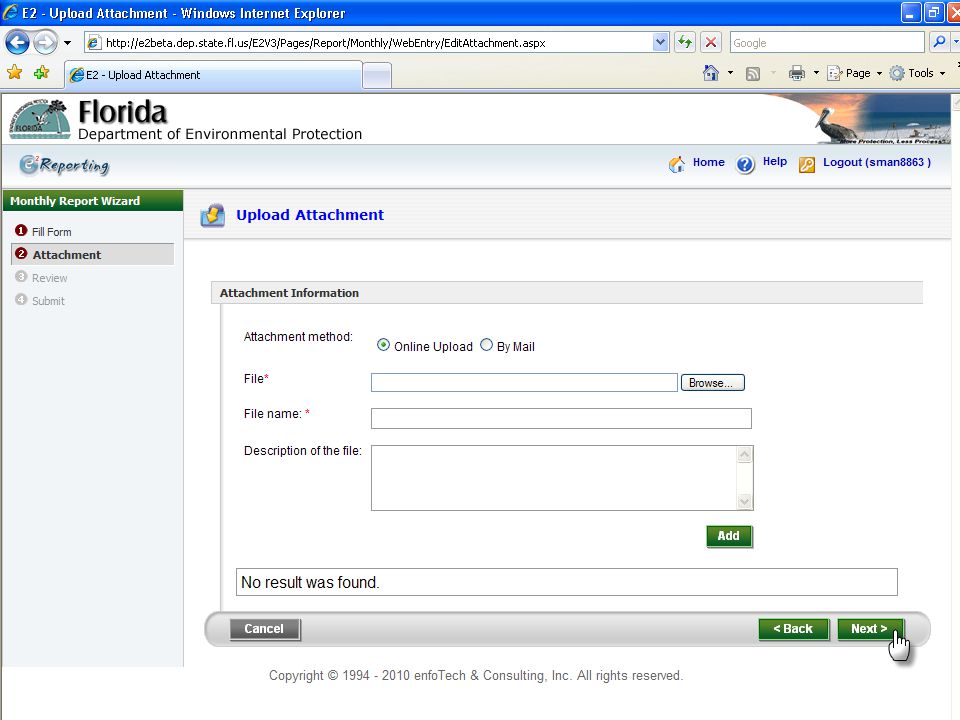
Attachments can be included with the report, such as a lab reports or other documents, just click ‘Browse’ to find the file on your system, enter its name, add a description if you wish, and click ‘Add’ to include it with your submission. Click Next.

44
It is important to review the DMR
It is important to review the DMR. I need to make sure I am submitting for the correct facility, report frequency, and report period. As an option, I can click ‘view form’ to review my DMR. Also, the eDMR system will check if all the data is valid, and show all the files attached. When there are data errors such as blank fields or incorrect characters, the ‘Next’ button is grayed out until corrections are made, as shown here. Under the Data Validation Summary, I click the ‘Here’ link to make corrections.

45
It brings me back to the entry form
It brings me back to the entry form. I click the parameter with the red indicator.

46
I accidentally entered a slash instead of an 8 on my keypad.

47
Now that it is fixed. Click ‘Next’ and return to the review screen.

50
If everything looks good with no errors. Click Next.

51
Now I’m ready to submit my DMR
Now I’m ready to submit my DMR. Only certifiers may submit a DMR by entering their PIN and answering a randomly generated security question.

52
After completing all fields, Click ‘Submit’.

53
After submitting the DMR, it brings me to a submission receipt
After submitting the DMR, it brings me to a submission receipt. A confirmation message will be sent to the address the eDMR system has on file.

54
We will run through the submittal process again, but this time use the copy and paste feature.
Click ‘Create a New Report’ on the left.

56
I’ll search for Kate’s Prod Test Facility for 08/01/2010 to 08/31/2010

57
I have already clicked Excel and downloaded a spreadsheet template
I have already clicked Excel and downloaded a spreadsheet template. The Excel and XML templates are convenient for facilities because they can keep an electronic copy on their computers, and enter data onto Excel without the internet.

58
Like the manual data entry form, the Excel spreadsheet has asterisks to prevent data entry in the wrong places. Here, I have entered my data earlier, and I’m ready to submit my data.

59
Back on the eDMR system, I click ‘Online Entry’

60
This time, choose ‘Copy and Paste Report’, then click continue.

61
This brings me to the copy and paste box, which is located below the data entry form.

62
Returning back to the excel sheet
Returning back to the excel sheet. I will highlight only the result data, and copy using the hotkey Ctrl-C.

63
Return to eDMR, click inside the Copy-n-paste box and paste the copied data using the hotkey Ctrl-V. Then click ‘update data’.

64
This will populate the form as if I had entered it by hand.

66
As an attachment, I can include the Excel sheet but it is not required.

67
Again review the DMR.

68
I’ll enter my PIN and answer the security question to submit the DMR.

69
Once I have made some submissions, I can view and print DMRs.
I click the Submittals/Resubmittals tab on the left.

70
Here, you can search for submissions, and if you need to make changes or corrections to one of your submissions, you can do that too.

71
I will search for Kate’s Prod Test Facility and a report due date range from 07/01/2010 to 09/01/2010. Then click ‘Search’.

72
A list of submissions will appear under the search bar.
I find the report I want and click the detail icon on the left. I’ll choose the report for June 2010.

73
This brings me to a report summary
This brings me to a report summary. On the top right, I can choose to make a resubmittal and view attachments. Also on the center of the screen, I can view a printable DMR, and download DMRs in XML or Excel format. For this demonstration, I’ll view a DMR by clicking ‘View Report’

74
A pop-up window will appear with a printable DMR
A pop-up window will appear with a printable DMR. Click File Print preview

75
Let’s maximize the window, then choose Landscape orientation.

76
Then Print.

77
That wraps up our presentation.

78
For additional information, please contact us:
Florida Department of Environmental Protection Wastewater Compliance Evaluation Section 2600 Blair Stone Road, MS 3550 (850)
")
Similar presentations


 359-1633 www.sos.ms.gov.>")
 Enhancements Wastewater Compliance Evaluation Section.>")
>")

 - Registration and Services.>")


 Professional Engineer Submittal Instructions.>")

 Version 2.04.0.0. Employee Self Service access from any computer view their elected withholding, earnings summary, check.>")

