Download presentation
Presentation is loading. Please wait.

1
NS 的 网络功能实体结构及类结构 任三阳

2
把 N 门时髦的技术挂在嘴边不如 将一门过时的技术记在心里。 ——BBS A poor framework is much better than nothing. ——kkzhou

3
outline 1 预修知识 2 一个最简单的 ns 仿真的启动过程 3Ns 的网络实体结构和类结构

4
1 预修知识 C++ 、 Tcl 、 OTcl 的语法 –http://if.ustc.edu.cn/~xbzhou/blog/archives/tcl_cn/l-tcl/index.html –http://if.ustc.edu.cn/~xbzhou/blog/archives/otcl-doc/index.htmlhttp://if.ustc.edu.cn/~xbzhou/blog/archives/otcl-doc/index.html – 《 ns 与网络模拟》 面向对象的思想:虚拟函数,动态创建机 制 Ns 的安装和简单仿真操作 ( 论坛上有 ) Ns 的开发工具: gdb 和 tcldebug( 非常简单 ) Ns 的分裂对象模型和 tclcl( 非常重要而且很 难,主要原理是动态创建机制 ) 要学透,注意区分类 和对象,发现好多问 题都是因为 OTcl 理解 不透造成的。
 Ns 的开发工具: gdb 和 tcldebug( 非常简单 ) Ns 的分裂对象模型和 tclcl( 非常重要而且很 难,主要原理是动态创建机制 ) 要学透,注意区分类 和对象,发现好多问 题都是因为 OTcl 理解 不透造成的。")
5
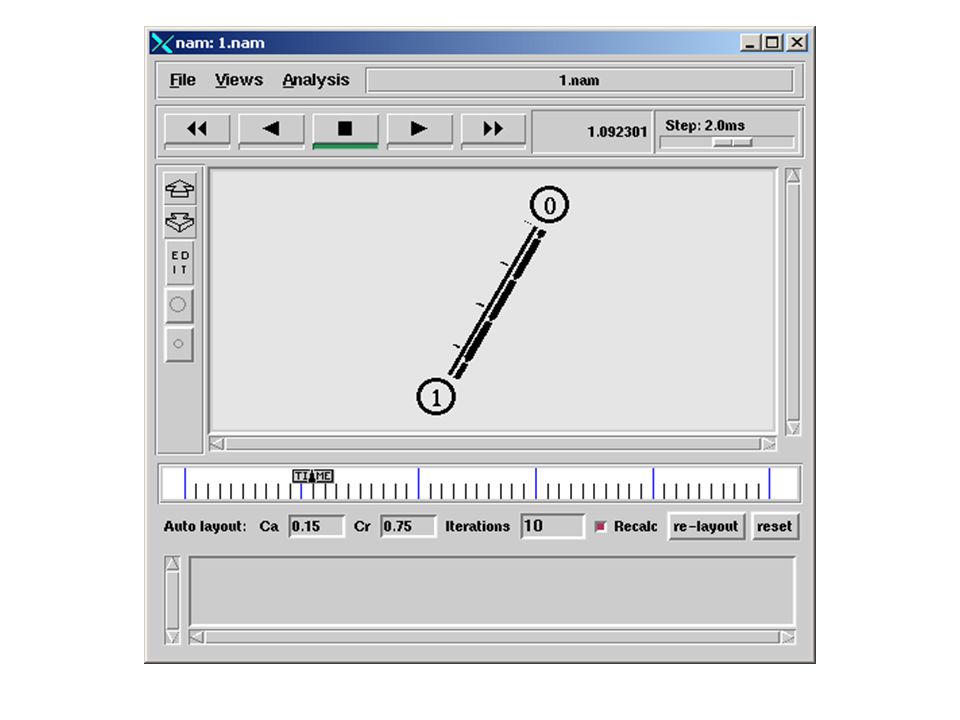
一个仿真例子的操作过程 1. 写场景 tcl 脚本,temp.tcl 2. 运行 ns temp.tcl 3. 察看仿真过程,是否有错或者是否与预想 中的大致相似 nam tmp.nam 4. 分析仿真数据 tmp.tr ,可以用各种工具 set ns [new Simulator] set tracefd [ open tmp.tr w] set namfd [open tmp.nam w] $ns trace-all $tracefd $ns namtrace-all $namfd set n0 [$ns node] set n1 [$ns node] $ns duplex-link $n0 $n1 1Mb 10ms DropTail set tcp [new Agent/TCP] set snk [new Agent/TCPSink] $ns attach-agent $n0 $tcp $ns attach-agent $n1 $snk set ftp [new Application/FTP] $ftp attach-agent $tcp $ns connect $tcp $snk $ns at 0.1 "$ftp start" $ns at 5.0 “exit 0" $ns run

6
例子的仿真结果 + 0.29792 0 1 tcp 1040 ------- 0 0.0 1.0 7 14 - 0.29792 0 1 tcp 1040 ------- 0 0.0 1.0 7 14 + 0.29792 0 1 tcp 1040 ------- 0 0.0 1.0 8 15 r 0.30624 1 0 ack 40 ------- 0 1.0 0.0 4 11 + 0.30624 0 1 tcp 1040 ------- 0 0.0 1.0 9 16 tmp.tr 文件内容节选 V -t * -v 1.0a5 -a 0 A -t * -n 1 -p 0 -o 0xffffffff -c 31 -a 1 A -t * -h 1 -m 2147483647 -s 0 n -t * -a 0 -s 0 -S UP -v circle -c black -i black n -t * -a 1 -s 1 -S UP -v circle -c black -i black l -t * -s 0 -d 1 -S UP -r 1000000 -D 0.029999999999999999 -c black + -t 0.1 -s 0 -d 1 -p tcp -e 40 -c 0 -i 0 -a 0 -x {0.0 1.0 0 ------- null} - -t 0.1 -s 0 -d 1 -p tcp -e 40 -c 0 -i 0 -a 0 -x {0.0 1.0 0 ------- null} h -t 0.1 -s 0 -d 1 -p tcp -e 40 -c 0 -i 0 -a 0 -x {0.0 1.0 -1 ------- null} r -t 0.13032 -s 0 -d 1 -p tcp -e 40 -c 0 -i 0 -a 0 -x {0.0 1.0 0 ------- null} + -t 0.13032 -s 1 -d 0 -p ack -e 40 -c 0 -i 1 -a 0 -x {1.0 0.0 0 ------- null} tmp.nam 文件内容节选

8
2 一个最简单的 ns 脚本的启动过程 set ns [new Simulator] set n0 [$ns node] set n1 [$ns node] $ns duplex-link $n0 $n1 1Mb 10ms DropTail set tcp [new Agent/TCP] set snk [new Agent/TCPSink] $ns attach-agent $n0 $tcp $ns attach-agent $n1 $snk set ftp [new Application/FTP] $ftp attach-agent $tcp $ns connect $tcp $snk proc finish {} { exit 0 } $ns at 0.1 "$ftp start" $ns at 5.0 "finish" $ns run
![2 一个最简单的 ns 脚本的启动过程 set ns [new Simulator] set n0 [$ns node] set n1 [$ns node] $ns duplex-link $n0 $n1 1Mb 10ms DropTail set tcp [new Agent/TCP] set snk [new Agent/TCPSink] $ns attach-agent $n0 $tcp $ns attach-agent $n1 $snk set ftp [new Application/FTP] $ftp attach-agent $tcp $ns connect $tcp $snk proc finish {} { exit 0 } $ns at 0.1 $ftp start $ns at 5.0 finish $ns run](http://images.slideplayer.com/8/2367316/slides/slide_8.jpg "2 一个最简单的 ns 脚本的启动过程 set ns [new Simulator] set n0 [$ns node] set n1 [$ns node] $ns duplex-link $n0 $n1 1Mb 10ms DropTail set tcp [new Agent/TCP] set snk [new Agent/TCPSink] $ns attach-agent $n0 $tcp $ns attach-agent $n1 $snk set ftp [new Application/FTP] $ftp attach-agent $tcp $ns connect $tcp $snk proc finish {} { exit 0 } $ns at 0.1 $ftp start $ns at 5.0 finish $ns run")
9
启动过程 0 当命令行运行 ns ,会创建 3 个对象 _o1, _o2, _o3 _o1 和 _o2 是 RNG , _o3 是 Import (tclcl/tcl- import.tcl) simulator:~/ins/ns-2.28/idcus$ ns % set a [new Application/FTP] _o4 % _o1 info class RNG % _o2 info class RNG % _o3 info class Import % _o4 info class Application/FTP
![启动过程 0 当命令行运行 ns ,会创建 3 个对象 _o1, _o2, _o3 _o1 和 _o2 是 RNG , _o3 是 Import (tclcl/tcl- import.tcl) simulator:~/ins/ns-2.28/idcus$ ns % set a [new Application/FTP] _o4 % _o1 info class RNG % _o2 info class RNG % _o3 info class Import % _o4 info class Application/FTP](http://images.slideplayer.com/8/2367316/slides/slide_9.jpg "启动过程 0 当命令行运行 ns ,会创建 3 个对象 _o1, _o2, _o3 _o1 和 _o2 是 RNG , _o3 是 Import (tclcl/tcl- import.tcl) simulator:~/ins/ns-2.28/idcus$ ns % set a [new Application/FTP] _o4 % _o1 info class RNG % _o2 info class RNG % _o3 info class Import % _o4 info class Application/FTP")
10
启动过程 1 set ns [new Simulator]
![启动过程 1 set ns [new Simulator]](http://images.slideplayer.com/8/2367316/slides/slide_10.jpg "启动过程 1 set ns [new Simulator]")
11
#tclcl/tcl-object.tcl proc new { className args } { set o [SplitObject getid] if [catch "$className create $o $args" msg] { if [string match "__FAILED_SHADOW_OBJECT_" $msg] { # # The shadow object failed to be allocated. # delete $o return "" } global errorInfo error "class $className: constructor failed: $msg" $errorInfo } return $o } “Simulator create 4” 该操作创建一个 Simulator 对象,并 调用它的 init 函数进 行初始化
![#tclcl/tcl-object.tcl proc new { className args } { set o [SplitObject getid] if [catch $className create $o $args msg] { if [string match __FAILED_SHADOW_OBJECT_ $msg] { # # The shadow object failed to be allocated.](http://images.slideplayer.com/8/2367316/slides/slide_11.jpg "# delete $o return } global errorInfo error class $className: constructor failed: $msg $errorInfo } return $o } Simulator create 4 该操作创建一个 Simulator 对象,并 调用它的 init 函数进 行初始化.")
12
启动过程 1 Simulator instproc init args {…} #tcl/lib/ns-lib.tcl Simulator instproc init args { …… $self create_packetformat $self use-scheduler Calendar $self set nullAgent_ [new Agent/Null] $self set-address-format def if {[lindex $args 0] == "-multicast"} { $self multicast $args } eval $self next $args } 这个还未找到代码位置 ( 找 到了 ) ,可以猜想是创建数 据包的头标对应的数据结 构,创建对象 _o5 ,类型 为 PacketHeaderManager 创建对象 _o6 ,类型为 Scheduler/Calender ,一个非常 重要的类,单线程的 ns 能模拟 多节点的网络,就是通过它来 调度。但是用起来简单,只需 要知道 “ 我的一个事件,给定一 个时间,交给它,到时候它就 会处理 ” 就行了 创建对象 _o7 ,类型为 Agent/Null ,一个黑洞
![启动过程 1 Simulator instproc init args {…} #tcl/lib/ns-lib.tcl Simulator instproc init args { …… $self create_packetformat $self use-scheduler Calendar $self set nullAgent_ [new Agent/Null] $self set-address-format def if {[lindex $args 0] == -multicast } { $self multicast $args } eval $self next $args } 这个还未找到代码位置 ( 找 到了 ) ,可以猜想是创建数 据包的头标对应的数据结 构,创建对象 _o5 ,类型 为 PacketHeaderManager 创建对象 _o6 ,类型为 Scheduler/Calender ,一个非常 重要的类,单线程的 ns 能模拟 多节点的网络,就是通过它来 调度。但是用起来简单,只需 要知道 我的一个事件,给定一 个时间,交给它,到时候它就 会处理 就行了 创建对象 _o7 ,类型为 Agent/Null ,一个黑洞](http://images.slideplayer.com/8/2367316/slides/slide_12.jpg "启动过程 1 Simulator instproc init args {…} #tcl/lib/ns-lib.tcl Simulator instproc init args { …… $self create_packetformat $self use-scheduler Calendar $self set nullAgent_ [new Agent/Null] $self set-address-format def if {[lindex $args 0] == -multicast } { $self multicast $args } eval $self next $args } 这个还未找到代码位置 ( 找 到了 ) ,可以猜想是创建数 据包的头标对应的数据结 构,创建对象 _o5 ,类型 为 PacketHeaderManager 创建对象 _o6 ,类型为 Scheduler/Calender ,一个非常 重要的类,单线程的 ns 能模拟 多节点的网络,就是通过它来 调度。但是用起来简单,只需 要知道 我的一个事件,给定一 个时间,交给它,到时候它就 会处理 就行了 创建对象 _o7 ,类型为 Agent/Null ,一个黑洞")
13
#tcl/lib/ns-lib.tcl Simulator instproc use-scheduler type { $self instvar scheduler_ if [info exists scheduler_] { if { [$scheduler_ info class] == "Scheduler/$type" } { return } else { delete $scheduler_ } set scheduler_ [new Scheduler/$type] $scheduler_ now }
![#tcl/lib/ns-lib.tcl Simulator instproc use-scheduler type { $self instvar scheduler_ if [info exists scheduler_] { if { [$scheduler_ info class] == Scheduler/$type } { return } else { delete $scheduler_ } set scheduler_ [new Scheduler/$type] $scheduler_ now }](http://images.slideplayer.com/8/2367316/slides/slide_13.jpg "#tcl/lib/ns-lib.tcl Simulator instproc use-scheduler type { $self instvar scheduler_ if [info exists scheduler_] { if { [$scheduler_ info class] == Scheduler/$type } { return } else { delete $scheduler_ } set scheduler_ [new Scheduler/$type] $scheduler_ now }")
14
dbg1.8> _o4 info class Simulator dbg1.9> _o5 info class PacketHeaderManager dbg1.10> _o6 info class Scheduler/Calendar dbg1.11> _o7 info class Agent/Null dbg1.12> _o8 info class AllocAddrBits dbg1.13> _o9 info class AllocAddr dbg1.14> _o10 info class Address dbg1.15> _o11 info class invalid command name "_o11" while executing "_o11 info class" dbg1.16> 目前为止已经产 生了 10 个对象了

15
启动过程 2 ☆ set n0 [$ns node] set n1 [$ns node]
![启动过程 2 ☆ set n0 [$ns node] set n1 [$ns node]](http://images.slideplayer.com/8/2367316/slides/slide_15.jpg "启动过程 2 ☆ set n0 [$ns node] set n1 [$ns node]")
16
#tcl/lib/ns-lib.tcl Simulator instproc node args { $self instvar Node_ routingAgent_ wiredRouting_ satNodeType_ …… # Enable-mcast is now done automatically inside Node::init{} # # XXX node_factory_ is deprecated, HOWEVER, since it's still used by # mobile IP, algorithmic routing, manual routing, and backward # compability tests of hierarchical routing, we should keep it around # before all related code are wiped out. set node [eval new [Simulator set node_factory_] $args] set Node_([$node id]) $node #add to simulator's nodelist in C++ space $self add-node $node [$node id] #set the nodeid in c++ Node - ratul $node nodeid [$node id] $node set ns_ $self $self check-node-num return $node } 代码没有找到。 这一步的所有对象都 由这个命令创建 ( 找到 了,其实就是 new Node) 在 c++ 的 Simulator 对象中 加入该 node 对象
 $node #add to simulator s nodelist in C++ space $self add-node $node [$node id] #set the nodeid in c++ Node - ratul $node nodeid [$node id] $node set ns_ $self $self check-node-num return $node } 代码没有找到。 这一步的所有对象都 由这个命令创建 ( 找到 了,其实就是 new Node) 在 c++ 的 Simulator 对象中 加入该 node 对象.")
17
new Node 之后,会调用 Node 类的 init 函数 #tcl/lib/ns-node.tcl if {[llength $args] != 0} { set address_ [lindex $args 0] } else { set address_ $id_ } $self cmd addr $address_; $self mk-default-classifier 显式调用 command 方 法的一个例子。介绍一 下 command 函数 Node instproc mk-default-classifier {} { Node instvar module_list_ # At minimum we should enable base module foreach modname [Node set module_list_] { $self register-module [new RtModule/$modname] } Node instproc register-module { mod } { $self instvar reg_module_ $mod register $self set reg_module_([$mod module-name]) $mod } module_list_ 是 Node 的 变量!只有 Base 一个 值
![new Node 之后,会调用 Node 类的 init 函数 #tcl/lib/ns-node.tcl if {[llength $args] != 0} { set address_ [lindex $args 0] } else { set address_ $id_ } $self cmd addr $address_; $self mk-default-classifier 显式调用 command 方 法的一个例子。介绍一 下 command 函数 Node instproc mk-default-classifier {} { Node instvar module_list_ # At minimum we should enable base module foreach modname [Node set module_list_] { $self register-module [new RtModule/$modname] } Node instproc register-module { mod } { $self instvar reg_module_ $mod register $self set reg_module_([$mod module-name]) $mod } module_list_ 是 Node 的 变量!只有 Base 一个 值](http://images.slideplayer.com/8/2367316/slides/slide_17.jpg "new Node 之后,会调用 Node 类的 init 函数 #tcl/lib/ns-node.tcl if {[llength $args] != 0} { set address_ [lindex $args 0] } else { set address_ $id_ } $self cmd addr $address_; $self mk-default-classifier 显式调用 command 方 法的一个例子。介绍一 下 command 函数 Node instproc mk-default-classifier {} { Node instvar module_list_ # At minimum we should enable base module foreach modname [Node set module_list_] { $self register-module [new RtModule/$modname] } Node instproc register-module { mod } { $self instvar reg_module_ $mod register $self set reg_module_([$mod module-name]) $mod } module_list_ 是 Node 的 变量!只有 Base 一个 值")
18
RtModule/Base instproc register { node } { $self next $node $self instvar classifier_ set classifier_ [new Classifier/Hash/Dest 32] $classifier_ set mask_ [AddrParams NodeMask 1] $classifier_ set shift_ [AddrParams NodeShift 1] # XXX Base should ALWAYS be the first module to be installed. $node install-entry $self $classifier_ } 每一个 RtModule/xxx 在 register 函数中都 会 new 一个 classifier
![RtModule/Base instproc register { node } { $self next $node $self instvar classifier_ set classifier_ [new Classifier/Hash/Dest 32] $classifier_ set mask_ [AddrParams NodeMask 1] $classifier_ set shift_ [AddrParams NodeShift 1] # XXX Base should ALWAYS be the first module to be installed.](http://images.slideplayer.com/8/2367316/slides/slide_18.jpg "$node install-entry $self $classifier_ } 每一个 RtModule/xxx 在 register 函数中都 会 new 一个 classifier.")
19
Node instproc install-entry { module clsfr {hook ""} } { $self instvar classifier_ mod_assoc_ hook_assoc_ if [info exists classifier_] { if [info exists mod_assoc_($classifier_)] { $self unregister-module $mod_assoc_($classifier_) unset mod_assoc_($classifier_) } # Connect the new classifier to the existing classifier chain, # if there is any. if [info exists hook_assoc_($classifier_)] { if { $hook == "target" } { $clsfr target $hook_assoc($classifier_) } elseif { $hook != "" } { $clsfr install $hook $hook_assoc_($classifier_) } set hook_assoc_($clsfr) $hook_assoc_($classifier_) unset hook_assoc_($classifier_) } set mod_assoc_($clsfr) $module set classifier_ $clsfr } 保存最后一 次调用时的 clsfr module 列表, 以 classifier 为 索引 classifier 列表, 以 classifier 为索 引
![Node instproc install-entry { module clsfr {hook } } { $self instvar classifier_ mod_assoc_ hook_assoc_ if [info exists classifier_] { if [info exists mod_assoc_($classifier_)] { $self unregister-module $mod_assoc_($classifier_) unset mod_assoc_($classifier_) } # Connect the new classifier to the existing classifier chain, # if there is any.](http://images.slideplayer.com/8/2367316/slides/slide_19.jpg "if [info exists hook_assoc_($classifier_)] { if { $hook == target } { $clsfr target $hook_assoc($classifier_) } elseif { $hook != } { $clsfr install $hook $hook_assoc_($classifier_) } set hook_assoc_($clsfr) $hook_assoc_($classifier_) unset hook_assoc_($classifier_) } set mod_assoc_($clsfr) $module set classifier_ $clsfr } 保存最后一 次调用时的 clsfr module 列表, 以 classifier 为 索引 classifier 列表, 以 classifier 为索 引.")
20
RtModule instproc register { node } { # Attach to node and register routing notifications $self attach-node $node $node route-notify $self $node port-notify $self } 进入到 rtmodule 的 c++ 代码中,把该节 点的指针交给 rtmodule 的一个变量 Node instproc route-notify { module } { $self instvar rtnotif_ if {$rtnotif_ == ""} { set rtnotif_ $module } else { $rtnotif_ route-notify $module } $module cmd route-notify $self } RtModule instproc route-notify { module } { $self instvar next_rtm_ if {$next_rtm_ == ""} { set next_rtm_ $module } else { $next_rtm_ route-notify $module } 把 rtmoudule 构成链表

21
Node instproc port-notify { module } { $self instvar ptnotif_ lappend ptnotif_ $module } Node RtModule/Base Classifier/Hash/Dest mod_assoc_(_o13)=_o12 classifier_ entry_ 红色是 Node 的 变量 表示对象之间的联系纽带数据包的传输
=_o12 classifier_ entry_ 红色是 Node 的 变量 表示对象之间的联系纽带数据包的传输")
22
dbg1.23> set n1 [$ns node] _o11 dbg1.24> _o11 info class Node dbg1.25> _o12 info class RtModule/Base dbg1.26> _o13 info class Classifier/Hash/Dest dbg1.28> set n2 [$ns node] _o14 dbg1.29> _o14 info class Node dbg1.30> _o15 info class RtModule/Base dbg1.31> _o16 info class Classifier/Hash/Dest dbg1.32> _o17 info class invalid command name "_o17" while executing "_o17 info class" dbg1.33> 路由模块,如果要加入策略路 由的话,或者自己开发路由协 议,需要自己开发这个模块。 其实该模块的功能是计算路由, 而执行路由是由 Classifier 进行 的 路由的执行
![dbg1.23> set n1 [$ns node] _o11 dbg1.24> _o11 info class Node dbg1.25> _o12 info class RtModule/Base dbg1.26> _o13 info class Classifier/Hash/Dest dbg1.28> set n2 [$ns node] _o14 dbg1.29> _o14 info class Node dbg1.30> _o15 info class RtModule/Base dbg1.31> _o16 info class Classifier/Hash/Dest dbg1.32> _o17 info class invalid command name _o17 while executing _o17 info class dbg1.33> 路由模块,如果要加入策略路 由的话,或者自己开发路由协 议,需要自己开发这个模块。 其实该模块的功能是计算路由, 而执行路由是由 Classifier 进行 的 路由的执行](http://images.slideplayer.com/8/2367316/slides/slide_22.jpg "dbg1.23> set n1 [$ns node] _o11 dbg1.24> _o11 info class Node dbg1.25> _o12 info class RtModule/Base dbg1.26> _o13 info class Classifier/Hash/Dest dbg1.28> set n2 [$ns node] _o14 dbg1.29> _o14 info class Node dbg1.30> _o15 info class RtModule/Base dbg1.31> _o16 info class Classifier/Hash/Dest dbg1.32> _o17 info class invalid command name _o17 while executing _o17 info class dbg1.33> 路由模块,如果要加入策略路 由的话,或者自己开发路由协 议,需要自己开发这个模块。 其实该模块的功能是计算路由, 而执行路由是由 Classifier 进行 的 路由的执行")
23
启动过程 3 ☆ $ns duplex-link $n0 $n1 1Mb 10ms DropTail #tcl/lib/ns-lib.tcl Simulator instproc duplex-link { n1 n2 bw delay type args } { $self instvar link_ set i1 [$n1 id] set i2 [$n2 id] if [info exists link_($i1:$i2)] { $self remove-nam-linkconfig $i1 $i2 } eval $self simplex-link $n1 $n2 $bw $delay $type $args eval $self simplex-link $n2 $n1 $bw $delay $type $args # Modified by GFR for nix-vector routing if { [Simulator set nix-routing] } { # Inform nodes of neighbors $n1 set-neighbor [$n2 id] $n2 set-neighbor [$n1 id] }
![启动过程 3 ☆ $ns duplex-link $n0 $n1 1Mb 10ms DropTail #tcl/lib/ns-lib.tcl Simulator instproc duplex-link { n1 n2 bw delay type args } { $self instvar link_ set i1 [$n1 id] set i2 [$n2 id] if [info exists link_($i1:$i2)] { $self remove-nam-linkconfig $i1 $i2 } eval $self simplex-link $n1 $n2 $bw $delay $type $args eval $self simplex-link $n2 $n1 $bw $delay $type $args # Modified by GFR for nix-vector routing if { [Simulator set nix-routing] } { # Inform nodes of neighbors $n1 set-neighbor [$n2 id] $n2 set-neighbor [$n1 id] }](http://images.slideplayer.com/8/2367316/slides/slide_23.jpg "启动过程 3 ☆ $ns duplex-link $n0 $n1 1Mb 10ms DropTail #tcl/lib/ns-lib.tcl Simulator instproc duplex-link { n1 n2 bw delay type args } { $self instvar link_ set i1 [$n1 id] set i2 [$n2 id] if [info exists link_($i1:$i2)] { $self remove-nam-linkconfig $i1 $i2 } eval $self simplex-link $n1 $n2 $bw $delay $type $args eval $self simplex-link $n2 $n1 $bw $delay $type $args # Modified by GFR for nix-vector routing if { [Simulator set nix-routing] } { # Inform nodes of neighbors $n1 set-neighbor [$n2 id] $n2 set-neighbor [$n1 id] }")
24
dbg1.33> $ns duplex-link $n1 $n2 1Mb 10ms DropTail dbg1.34> _o17 info class Queue/DropTail dbg1.35> _o18 info class SimpleLink dbg1.36> _o19 info class Connector dbg1.37> _o20 info class Connector dbg1.38> _o21 info class DelayLink dbg1.39> _o22 info class TTLChecker dbg1.40> _o23 info class Queue/DropTail

25
dbg1.41> _o24 info class SimpleLink dbg1.42> _o25 info class Connector dbg1.43> _o26 info class Connector dbg1.44> _o27 info class DelayLink dbg1.45> _o27 info class DelayLink dbg1.46> _o28 info class TTLChecker dbg1.47> _o29 info class invalid command name "_o29" while executing "_o29 info class" dbg1.48>

26
启动过程 4 set tcp [new Agent/TCP] set snk [new Agent/TCPSink] 在 tcl/lib/ns-agent.tcl 中 Agent/TCP instproc init {} { eval $self next set ns [Simulator instance] $ns create-eventtrace Event $self } Class Agent/Null -superclass Agent Agent/Null instproc init args { eval $self next $args }
![启动过程 4 set tcp [new Agent/TCP] set snk [new Agent/TCPSink] 在 tcl/lib/ns-agent.tcl 中 Agent/TCP instproc init {} { eval $self next set ns [Simulator instance] $ns create-eventtrace Event $self } Class Agent/Null -superclass Agent Agent/Null instproc init args { eval $self next $args }](http://images.slideplayer.com/8/2367316/slides/slide_26.jpg "启动过程 4 set tcp [new Agent/TCP] set snk [new Agent/TCPSink] 在 tcl/lib/ns-agent.tcl 中 Agent/TCP instproc init {} { eval $self next set ns [Simulator instance] $ns create-eventtrace Event $self } Class Agent/Null -superclass Agent Agent/Null instproc init args { eval $self next $args }")
27
dbg1.55> set tcp [new Agent/TCP] _o29 dbg1.56> _o29 info class Agent/TCP dbg1.57> _o30 info class invalid command name "_o30" while executing "_o30 info class" dbg1.58> set nul [new Agent/TCPSink] _o30 dbg1.59> _o30 info class Agent/TCPSink dbg1.60> _o31 info class invalid command name "_o31" while executing "_o31 info class" dbg1.61>
![dbg1.55> set tcp [new Agent/TCP] _o29 dbg1.56> _o29 info class Agent/TCP dbg1.57> _o30 info class invalid command name _o30 while executing _o30 info class dbg1.58> set nul [new Agent/TCPSink] _o30 dbg1.59> _o30 info class Agent/TCPSink dbg1.60> _o31 info class invalid command name _o31 while executing _o31 info class dbg1.61>](http://images.slideplayer.com/8/2367316/slides/slide_27.jpg "dbg1.55> set tcp [new Agent/TCP] _o29 dbg1.56> _o29 info class Agent/TCP dbg1.57> _o30 info class invalid command name _o30 while executing _o30 info class dbg1.58> set nul [new Agent/TCPSink] _o30 dbg1.59> _o30 info class Agent/TCPSink dbg1.60> _o31 info class invalid command name _o31 while executing _o31 info class dbg1.61>")
28
启动过程 5 set ftp [new Application/FTP] 没有相关代码,说明都使用默认情况:简单 new 一个对象而已 dbg1.61> set ftp [new Application/FTP] _o31 dbg1.62> _o31 info class Application/FTP dbg1.63> _o32 info class invalid command name "_o32" while executing "_o32 info class" dbg1.64>
![启动过程 5 set ftp [new Application/FTP] 没有相关代码,说明都使用默认情况:简单 new 一个对象而已 dbg1.61> set ftp [new Application/FTP] _o31 dbg1.62> _o31 info class Application/FTP dbg1.63> _o32 info class invalid command name _o32 while executing _o32 info class dbg1.64>](http://images.slideplayer.com/8/2367316/slides/slide_28.jpg "启动过程 5 set ftp [new Application/FTP] 没有相关代码,说明都使用默认情况:简单 new 一个对象而已 dbg1.61> set ftp [new Application/FTP] _o31 dbg1.62> _o31 info class Application/FTP dbg1.63> _o32 info class invalid command name _o32 while executing _o32 info class dbg1.64>")
29
启动过程 6 ☆ $ns attach-agent $n0 $tcp $ns attach-agent $n1 $snk 这一步非常重要,也非常复杂。因为这一步完成 了 – 路由模块的加载 –Agent 和 node 的连接 #tcl/lib/ns-lib.tcl Simulator instproc attach-agent { node agent } { $node attach $agent …… } % _o33 info class Classifier/Port % _o32 info class Classifier/Port % _o34 info class invalid command name "_o34" 这两步创建了 两个对象

30
#tcl/lib/ns-node.tcl Node instproc attach { agent { port "" } } { $self instvar agents_ address_ dmux_ lappend agents_ $agent $agent set node_ $self $agent set agent_addr_ [AddrParams addr2id $address_] if { $dmux_ == “” } {# 会进入这里,因为还没有给 dmux 赋过值 # Use the default mask_ and port_ values set dmux_ [new Classifier/Port] # point the node's routing entry to itself # at the port demuxer (if there is one) $self add-route $address_ $dmux_# 把到自己的路由加入进去 } if { $port == “” } {# 会进入,因为一般不指定端口 set port [$dmux_ alloc-port [[Simulator instance] nullagent]] } $agent set agent_port_ $port $self add-target $agent $port } 把该 agent 加到 node 的 agent 列表 插叙: Ns 的 IP 地址 >> //classifier/classifier.cc if (strcmp(argv[1],"alloc-port") == 0) { int slot; NsObject* nullagent = (NsObject*)TclObject::lookup(argv[2]); slot = getnxt(nullagent); tcl.resultf("%u",slot); return(TCL_OK); } 就像维护序列号 一样,分配的 port 都是在它的 port 的 基础上加 1 不清楚具体操作 Node instproc add-target { agent port } { $self instvar ptnotif_ foreach m [$self set ptnotif_] { $m attach $agent $port } Ptnodif_ 是路由模块组成 的数组。这里通过 attach 把 agent 加入到每个路由模 块的路由表。是否应该是 dmux_ 的映射表? RtModule instproc attach { agent port } { $agent target [[$self node] entry] [[$self node] demux] install $port $agent }
![#tcl/lib/ns-node.tcl Node instproc attach { agent { port } } { $self instvar agents_ address_ dmux_ lappend agents_ $agent $agent set node_ $self $agent set agent_addr_ [AddrParams addr2id $address_] if { $dmux_ == } {# 会进入这里,因为还没有给 dmux 赋过值 # Use the default mask_ and port_ values set dmux_ [new Classifier/Port] # point the node s routing entry to itself # at the port demuxer (if there is one) $self add-route $address_ $dmux_# 把到自己的路由加入进去 } if { $port == } {# 会进入,因为一般不指定端口 set port [$dmux_ alloc-port [[Simulator instance] nullagent]] } $agent set agent_port_ $port $self add-target $agent $port } 把该 agent 加到 node 的 agent 列表 插叙: Ns 的 IP 地址 >> //classifier/classifier.cc if (strcmp(argv[1], alloc-port ) == 0) { int slot; NsObject* nullagent = (NsObject*)TclObject::lookup(argv[2]); slot = getnxt(nullagent); tcl.resultf( %u ,slot); return(TCL_OK); } 就像维护序列号 一样,分配的 port 都是在它的 port 的 基础上加 1 不清楚具体操作 Node instproc add-target { agent port } { $self instvar ptnotif_ foreach m [$self set ptnotif_] { $m attach $agent $port } Ptnodif_ 是路由模块组成 的数组。这里通过 attach 把 agent 加入到每个路由模 块的路由表。是否应该是 dmux_ 的映射表? RtModule instproc attach { agent port } { $agent target [[$self node] entry] [[$self node] demux] install $port $agent }](http://images.slideplayer.com/8/2367316/slides/slide_30.jpg "#tcl/lib/ns-node.tcl Node instproc attach { agent { port } } { $self instvar agents_ address_ dmux_ lappend agents_ $agent $agent set node_ $self $agent set agent_addr_ [AddrParams addr2id $address_] if { $dmux_ == } {# 会进入这里,因为还没有给 dmux 赋过值 # Use the default mask_ and port_ values set dmux_ [new Classifier/Port] # point the node s routing entry to itself # at the port demuxer (if there is one) $self add-route $address_ $dmux_# 把到自己的路由加入进去 } if { $port == } {# 会进入,因为一般不指定端口 set port [$dmux_ alloc-port [[Simulator instance] nullagent]] } $agent set agent_port_ $port $self add-target $agent $port } 把该 agent 加到 node 的 agent 列表 插叙: Ns 的 IP 地址 >> //classifier/classifier.cc if (strcmp(argv[1], alloc-port ) == 0) { int slot; NsObject* nullagent = (NsObject*)TclObject::lookup(argv[2]); slot = getnxt(nullagent); tcl.resultf( %u ,slot); return(TCL_OK); } 就像维护序列号 一样,分配的 port 都是在它的 port 的 基础上加 1 不清楚具体操作 Node instproc add-target { agent port } { $self instvar ptnotif_ foreach m [$self set ptnotif_] { $m attach $agent $port } Ptnodif_ 是路由模块组成 的数组。这里通过 attach 把 agent 加入到每个路由模 块的路由表。是否应该是 dmux_ 的映射表? RtModule instproc attach { agent port } { $agent target [[$self node] entry] [[$self node] demux] install $port $agent }")
31
RtModule instproc add-route { dst target } { $self instvar next_rtm_ [$self set classifier_] install $dst $target if {$next_rtm_ != ""} { $next_rtm_ add-route $dst $target }} Node instproc add-route { dst target } { $self instvar rtnotif_ if {$rtnotif_ != ""} { $rtnotif_ add-route $dst $target } $self incr-rtgtable-size } Classifier instproc install {slot val} { $self set slots_($slot) $val $self cmd install $slot $val } 进入 classifier 的 c++ 代码 有两个变量要引起注意: rtnotif_ 和前面提到的 ptnotif_ ;我觉得 rtnotif_ 是路由模块, ptnotif_ 是端口映射模块。有相关函数 ( 类似 route- notify 函数 )port-notify ,但没有看到调用的地方 ( 在 RtModule 的 register 函数中调用了,也就是 说在路由模块既负责寻路又负责端口的对应, 后者只是一个虚名,还是由 Classifier/Port 自 己完成的 ) 。 xxx-notify 函数就是把 路由模块对象加入到 相应的数组中,即 ptnotif_ 和 rtnotif_
![RtModule instproc add-route { dst target } { $self instvar next_rtm_ [$self set classifier_] install $dst $target if {$next_rtm_ != } { $next_rtm_ add-route $dst $target }} Node instproc add-route { dst target } { $self instvar rtnotif_ if {$rtnotif_ != } { $rtnotif_ add-route $dst $target } $self incr-rtgtable-size } Classifier instproc install {slot val} { $self set slots_($slot) $val $self cmd install $slot $val } 进入 classifier 的 c++ 代码 有两个变量要引起注意: rtnotif_ 和前面提到的 ptnotif_ ;我觉得 rtnotif_ 是路由模块, ptnotif_ 是端口映射模块。有相关函数 ( 类似 route- notify 函数 )port-notify ,但没有看到调用的地方 ( 在 RtModule 的 register 函数中调用了,也就是 说在路由模块既负责寻路又负责端口的对应, 后者只是一个虚名,还是由 Classifier/Port 自 己完成的 ) 。 xxx-notify 函数就是把 路由模块对象加入到 相应的数组中,即 ptnotif_ 和 rtnotif_](http://images.slideplayer.com/8/2367316/slides/slide_31.jpg "RtModule instproc add-route { dst target } { $self instvar next_rtm_ [$self set classifier_] install $dst $target if {$next_rtm_ != } { $next_rtm_ add-route $dst $target }} Node instproc add-route { dst target } { $self instvar rtnotif_ if {$rtnotif_ != } { $rtnotif_ add-route $dst $target } $self incr-rtgtable-size } Classifier instproc install {slot val} { $self set slots_($slot) $val $self cmd install $slot $val } 进入 classifier 的 c++ 代码 有两个变量要引起注意: rtnotif_ 和前面提到的 ptnotif_ ;我觉得 rtnotif_ 是路由模块, ptnotif_ 是端口映射模块。有相关函数 ( 类似 route- notify 函数 )port-notify ,但没有看到调用的地方 ( 在 RtModule 的 register 函数中调用了,也就是 说在路由模块既负责寻路又负责端口的对应, 后者只是一个虚名,还是由 Classifier/Port 自 己完成的 ) 。 xxx-notify 函数就是把 路由模块对象加入到 相应的数组中,即 ptnotif_ 和 rtnotif_")
32
Node RtModule/Base Classifier/Hash/Dest mod_assoc_(classifier_) classifier_ entry_ 红色是 Node 的 变量 表示对象之间的联系纽带数据包的传输 Classifier/Port dmux_ Agent
 classifier_ entry_ 红色是 Node 的 变量 表示对象之间的联系纽带数据包的传输 Classifier/Port dmux_ Agent")
33
启动过程 7 $ftp attach-agent $tcp 很简单,不创建对象,直接进入 c++ 代码 把 ftp 和 tcp 连接起来 – 把 c++ 的 tcp 对象的 app_ 变量赋为 ftp 的 c++ 对象 – 把 c++ 的 ftp 对象的 agent_ 变量赋为 tcp 的 c++ 对 象

34
启动过程 8 $ns connect $tcp $snk 不创建对象 Simulator instproc connect {src dst} { $self simplex-connect $src $dst $self simplex-connect $dst $src return $src } % $ns connect $tcp $snk _o29 % _o29 info class Agent/TCP Simulator instproc simplex-connect { src dst } { $src set dst_addr_ [$dst set agent_addr_] $src set dst_port_ [$dst set agent_port_] return $src }
![启动过程 8 $ns connect $tcp $snk 不创建对象 Simulator instproc connect {src dst} { $self simplex-connect $src $dst $self simplex-connect $dst $src return $src } % $ns connect $tcp $snk _o29 % _o29 info class Agent/TCP Simulator instproc simplex-connect { src dst } { $src set dst_addr_ [$dst set agent_addr_] $src set dst_port_ [$dst set agent_port_] return $src }](http://images.slideplayer.com/8/2367316/slides/slide_34.jpg "启动过程 8 $ns connect $tcp $snk 不创建对象 Simulator instproc connect {src dst} { $self simplex-connect $src $dst $self simplex-connect $dst $src return $src } % $ns connect $tcp $snk _o29 % _o29 info class Agent/TCP Simulator instproc simplex-connect { src dst } { $src set dst_addr_ [$dst set agent_addr_] $src set dst_port_ [$dst set agent_port_] return $src }")
35
启动过程 9 $ns at 0.1 "$ftp start“ $ns at 5.0 “exit 0“ $ns run Simulator instproc at args { $self instvar scheduler_ return [eval $scheduler_ at $args] } % $ns at 0.1 "$ftp start" 1 % % $ns at 10.0 "exit 0" 2 % 进入 scheduler.cc
![启动过程 9 $ns at 0.1 $ftp start $ns at 5.0 exit 0 $ns run Simulator instproc at args { $self instvar scheduler_ return [eval $scheduler_ at $args] } % $ns at 0.1 $ftp start 1 % % $ns at 10.0 exit 0 2 % 进入 scheduler.cc](http://images.slideplayer.com/8/2367316/slides/slide_35.jpg "启动过程 9 $ns at 0.1 $ftp start $ns at 5.0 exit 0 $ns run Simulator instproc at args { $self instvar scheduler_ return [eval $scheduler_ at $args] } % $ns at 0.1 $ftp start 1 % % $ns at 10.0 exit 0 2 % 进入 scheduler.cc")
36
_o1 _o3 _o2 _o4 _o5 _o6 _o7 _o8 _o9 _o10 _o11 _o14 _o12 _o13 _o15 _o16 _o17_o18 _o19_o20 _o21_o22 RNG Import Simulator PacketHeaderManager Scheduler/Calender Agent/Null AllocAddrBits AllocAddr Address Node RtModule/Base Classifier/Hash/Dest Node Classifier/Hash/Dest RtModule/Base _o28 _o27 _o26_o25 _o24_o23 Queue/DropTail Connector SimpleLink DelayLink TTL_Checker Connector Queue/DropTail Connector SimpleLink DelayLink TTL_Checker Connector _o29_o31 _o30 Agent/TCPApplication/FTP Agent/TCPSink _o32 Classifier/Port _o33 Classifier/Port

37
Agent/TCP Agent SplitObject TclObject Agent TcpAgent Agent/TCP 的实例 new Agent/TCP 全局函数 new{} 对应类的 create{} ,分 配内存。该函数不可 见,是二进制的 对应类的 init{} 基类的 init{} ,最终调用 SplitObject 的 init{} $self create-shadow $args ,进入 c++ 代码. 。 TclClass 虚函数 TclClass::create 对应 c++ 对象自己 的 create 函数 TcpAgent 的实例

38
TclObject NsObject Agent RoutLogicParentNode Node Connector TcpAgent LinkDelay Classifier Queue DestHashClassifier AddressClassifierPortClassifier HashClassifier REDDropTail Process Application Application/FTP 每个 c++ 类都对应一个 OTcl 类。 并且 OTcl 还为一些联系紧密的 c++ 类构造一个 OTcl 类 ( 那些显式 出现了 Class xxx –superclass xxx) ,例如 Link 只有 OTcl 类, 因为太简单
 ,例如 Link 只有 OTcl 类, 因为太简单")
Similar presentations

![首 页 首 页 上一页 下一页 本讲内容 投影法概述三视图形成及其投影规律平面立体三视图、尺寸标注 本讲内容 复习: P25~P31 、 P84~P85 作业: P7, P8, P14[2-32(2) A3 (1:1)]](/12/3353742/big_thumb.jpg "首 页 首 页 上一页 下一页 本讲内容 投影法概述三视图形成及其投影规律平面立体三视图、尺寸标注 本讲内容 复习: P25~P31 、 P84~P85 作业: P7, P8, P14[2-32(2) A3 (1:1)]>")


。 新成立的项目公司,要先入库,再报报表。>")


 节目录 3.1 二维随机变量的概率分布 3.2 边缘分布 3.4 随机变量的独立性 第三章 随机向量及其分布 3.3 条件分布.>")


 陈辉宏. 一. 概述 信息时代的来临, 各门学科的研究方法都 有了新的发展. 计算机的介入, 为分析化学的进展提供了 一种更方便的研究方法.>")


 离散数学. 最后,我们构造能识别 A 的 Kleene 闭包 A* 的自动机 M A* =(S A* , I , f A* , s A* , F A* ) , 令 S A* 包括所有的 S A 的状态以及一个 附加的状态 s.>")


 林佳宁 (PB03203124) 指导老师 : 秦敢 指导老师 : 秦敢.>")
,n ∈ N +, 所以,数列 {x n } 的极限为 a, 就是 当自变量 n.>")
 离散数学. 第八章 格与布尔代数 §8.1 引 言 在第一章中我们介绍了关于集 合的理论。如果将 ρ ( S )看做 是集合 S 的所有子集组成的集合, 于是, ρ ( S )中两个集合的并 集 A ∪ B ,两个集合的交集.>")
