Download presentation
Presentation is loading. Please wait.

1
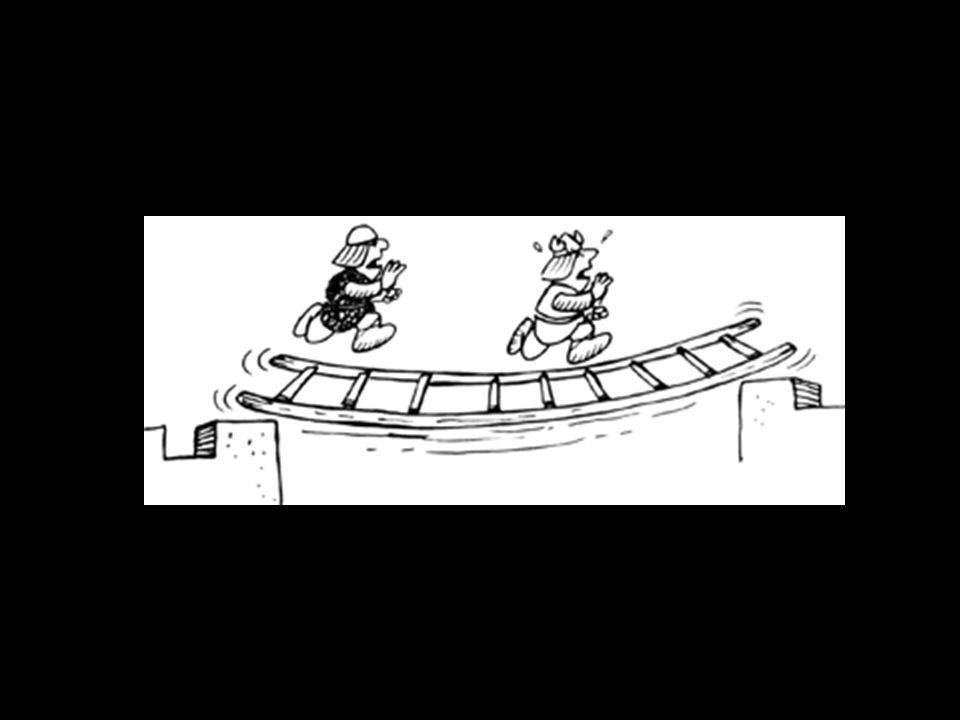
Firefighter III Ladders Lt. Rick Decorie

2
Objectives Identify the materials used in ladder construction
Identify the load capacities established by NFPA 1932 and NFPA 1914 for ground and aerial ladders Identify the procedures for the annual service test of ground ladders Expound on NFPA standards a little later

3
Materials Used in Ladder Construction
Metal – heat treated aluminum alloy Wood 1. Beams – straight grained Douglas Fir 2. Rungs - Hickory Fiberglass 1. Beams – fiberglass 2. Rungs - metal The most prevalent, due to its good strength-to-weight characteristics and relative low cost, is aluminum. The next most common is wood. The newest and least common material is fiberglass.

4
Load Capacities Load is the total weight on ladder including personnel and equipment Maximum capacities 1. Folding & pompier ladders – 300 pounds 2. Single & roof ladders – 750 pounds 3. Extension & pole ladders – 750 pounds 4. Combination ladder – 750 pounds 5. Aerial ladder – manufacturer’s specs

5
NFPA Standards 1932: Standard on Use, Maintenance and Service Testing of Fire Department Ground Ladders 1914: Standard for Testing Fire Department Aerial Devices Expound on NFPA standards NFPA 1932 specifies requirements for the use, maintenance, inspection, and service testing of fire department ground ladders. NFPA 1914 applies to the inspection and testing of all fire apparatus that are equipped with an aerial ladder, an elevating platform, or a water tower.

6
Annual Service Test All ladders except folding 1. Horizontal bending
a. Rest ladder on supports b. Test load centered over center of ladder c. Add preload weights slowly d. Allow load to sit one minute, then remove

7
Annual Service Test e. Measure and record distance from each side rail to ground f. Apply the test load of 500 pounds (400 pounds pre-1984) g. Allow load to sit five minutes, then remove h. Metal & fiberglass ladders should be measured after load has been removed

8
Annual Service Test i. Difference should not be greater than:
1) 25 feet or less - .5 inch 2) 26 to 34 feet – 1 inch 3) 35 feet and up – 1.5 inches j. Wooden ladders should not show any signs of failure
 25 feet or less - .5 inch. 2) 26 to 34 feet – 1 inch. 3) 35 feet and up – 1.5 inches. j. Wooden ladders should not show any signs of failure.")
9
Annual Service Test 2. Roof ladder hook test
a. Hang ladder over edge of a wall so it is hanging by its hooks b. Secure the top of the ladder to wall c. Using correct size webbing, suspend test weight of 1,000 pounds from ladder for one minute d. Remove test weights and inspect hooks for damage

10
Annual Service Test 3. Extension ladder hardware test
a. Position ladder against a wall at degree angle with at least one rung extended b. Using correct size webbing, suspend test weight of 1,000 pounds from ladder for one minute c. Remove test weights and inspect the ladder hardware for damage

11
Annual Service Test Strength test for folding ladders
1. Rest ladder on supports 2. Test load centered over center of ladder 3. Add preload weights slowly

12
Annual Service Test 4. Allow load to sit for one minute, then remove
5. Measure & record distance from each side rail to ground 6. Apply test load of 225 pounds

13
Annual Service Test 7. Allow load to sit five minutes and then remove
8. Metal & fiberglass ladders should be measured after load has been removed 9. Wooden ladders should not show any signs of failure

14
Annual Service Test

15
Summary Learned the materials used in ladder construction
Learned the load capacities as established by NFPA for ground and aerial ladders Learned the procedures for the annual service test of ground ladders

16
Where to Get More Information
FDIC, Fire Service Institute Duo-Safety Ladder Corporation Alco-Lite Aluminum Ladder Company Can click on web sites if hooked up to the Internet.

17
Dome (Auditorium) Raise
 Raise")
18
Objectives Demonstrate the Dome/auditorium raise

19
Dome (Auditorium) Raise
Ladder is flat on floor (fly up and slightly extended) Extend ropes from tip of each beam Pass loop in rope over top of beam, down around rungs around beam to outside Pass loop over tip of the beam E. Repeat steps C & D for other beam
 Extend ropes from tip of each beam. Pass loop in rope over top of beam, down around rungs around beam to outside. Pass loop over tip of the beam. E. Repeat steps C & D for other beam.")
20
Dome (Auditorium) Raise
F. Four firefighters are positioned near end of each guy line G. Pass rope around behind the body at the rump H. Raise ladder vertical by normal means I. The fly is extended to the desired height J. When desired height is reached, dogs are locked in

21
Dome (Auditorium) Raise
K. Tension is maintained by the firefighters on the guy lines

22
From the collection of the Aurora Regional Fire Museum

23
Hotel (Factory) Raise
 Raise")
24
Objectives Demonstrate the Hotel/factory raise

25
Hotel (Factory) Raise Place ladder on ground at right angle to building Extend the fly one rung and attach guy rope to each beam Pole ladder is raised using a four person raise As ladder comes to vertical, firefighters on guy ropes stabilize the ladder E. Firefighters on stay poles remain at 90 degrees to building

26
Hotel (Factory) Raise The ladder is lowered against the building
G. Firefighters on the stay poles hold the ladder against the building while firefighters on the guy ropes prevent lateral movement

27
Obstructed Raises

28
Objectives Demonstrate Obstructed raises

29
Two-Firefighter Single Ladder Obstructed Raise
1. Assists placing ladder on ground 90 degrees to the building 2. Kneels beside the tip facing the building 3. Lifts ladder and pivots underneath it 4. When pivot is complete the arms are fully extended 5. Remains stationary and passes beams upward as ladder is advanced

30
Two-Firefighter Single Ladder Obstructed Raise
B. Firefighter #2 1. Assists placing ladder on ground 90 degrees to the building 2. Heels the ladder 3. After ladder is raised shifts to one side and crouches to grasp the second rung from butt end 4. Pulls butt end along ground while walking towards building

31
Two-Firefighter Single Ladder Obstructed Raise
5. Maintains downward pressure on the butt to keep it from kicking up 6. Stops pushing when proper climbing angle is reached

32
Three-Firefighter Single Ladder Obstructed Raise
1. Assists placing ladder on ground 90 degrees to the building 2. Kneels beside the tip facing the building 3. Lifts ladder and pivots underneath it, each grabbing a beam with both hands 4. When pivot is complete their arms are fully extended 5. Remains stationary and passes beams upward as ladder is advanced

33
Three-Firefighter Single Ladder Obstructed Raise
B. Firefighter #3 1. Assists placing ladder on ground 90 degrees to the building 2. Heels the ladder 3. After ladder is raised shifts to one side and crouches to grasp the second rung from butt end 4. Pulls butt end along ground while walking towards building

34
Three-Firefighter Single Ladder Obstructed Raise
5. Maintains downward pressure on the butt to keep it from kicking up 6. Stops pushing when proper climbing angle is reached

35
Alternate Three-Firefighter Single Ladder Raise
1. Assists placing ladder on ground 90 degrees to the building 2. Stands beside each beam several rungs from the butt and facing it 3. Both kneel and grasp the same rung

36
Alternate Three-Firefighter Single Ladder Raise
4. They stand lifting the ladder and pivoting underneath the beam and place them on their shoulders with their free hands on the beams 5. As the firefighter at the heel pulls downward they allow their hands and shoulders to act as a fulcrum 6. When butt is waist high they step forward

37
Alternate Three-Firefighter Single Ladder Raise
7. When the butt is proper distance from the building they stop 8. They place the tip against the building

38
Alternate Three-Firefighter Single Ladder Raise
B. Firefighter #3 1. Assists placing ladder on ground 90 degrees to the building 2. Stands facing the butt end 3. As the ladder raises, reaches up and grasps the butt end pulling it down 4. When butt end is waist high steps forward

39
Alternate Three-Firefighter Single Ladder Raise
5. Continues to push down on the butt as the ladder approaches the building 6. When the butt reaches the proper distance stops and places the butt on the ground

40
Ladder as a Hinge

41
Objectives Demonstrate the following special use of ground ladders: Hinge for lowering victims

42
Ladder as a Hinge for Lowering Victims
A. Firefighter #1 (ground) 1. Position ladder at correct climbing angle 2. Move butt of the ladder inward against the wall 3. Begin walking the ladder down hand over hand on the rungs
 1. Position ladder at correct climbing angle. 2. Move butt of the ladder inward against the wall. 3. Begin walking the ladder down hand over hand on the rungs.")
43
Ladder as a Hinge for Lowering Victims
4. When the tip of the ladder is reached the top rung is grasped and tip lowered to the ground 5. The stokes basket is then untied

44
Ladder as a Hinge for Lowering Victims
B. Firefighter #2 (anchor) 1. Assist in securing victim in stokes basket 2. While two firefighters balance the stokes, the foot of the stokes is lashed to the top rung of the ladder
 1. Assist in securing victim in stokes basket. 2. While two firefighters balance the stokes, the foot of the stokes is lashed to the top rung of the ladder.")
45
Ladder as a Hinge for Lowering Victims
3. Attach a life line to the head of the stokes 4. Take the working end of the rope and assume an anchoring stance

46
Ladder as a Hinge for Lowering Victims
C. Firefighters #3 & #4 (assistants) 1. Assists in securing victim in stokes basket 2. Balance the stokes while the foot is lashed and life line attached
 1. Assists in securing victim in stokes basket. 2. Balance the stokes while the foot is lashed and life line attached.")
47
Ladder as a Hinge for Lowering Victims
3. Move the stokes over the edge of the roof with the anchoring firefighter feeding rope 4. Once rope clears building assist on the anchor rope until stokes is on the ground

48
Bridging Operations

49
Objectives Demonstrate the following special use of ground ladders: Bridging operations

50
Bridging Using the Three-Firefighter Shoulder Carry Method
A. Firefighters #1 & #2 1. Assist in placing the ladder on a flat surface 2. Assume a position six rungs from the butt one on each side 3. Kneel and grasp the rung with palms forward

51
Bridging Using the Three-Firefighter Shoulder Carry Method
4. Pick up the ladder together 5. Pivot under the ladder placing the beams on shoulder 6. Move forward to extend the ladder over the open space

52
Bridging Using the Three-Firefighter Shoulder Carry Method
B. Firefighter #3 1. Assume a position at the butt and grasp the bottom rung 2. Pick up the ladder together 3. Move forward to extend the ladder over the open space

54
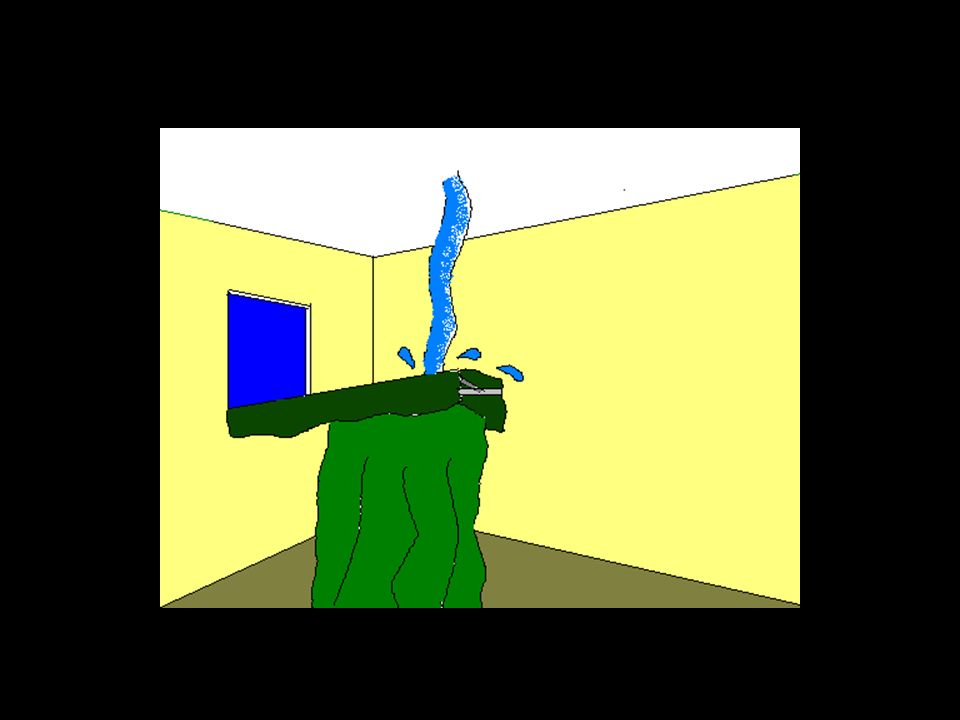
Making a Water Chute

55
Objectives Demonstrate salvage and overhaul operations

56
Making a Water Chute with a Tarp and a Ladder
Roll the edges of a salvage cover until the cover will lay between the beams of the ladder Place the salvage cover on the ladder with the rolls under the cover unless the ladder has high beams C. Position the ladder where needed

58
Making a Catch Basin

59
Objectives Demonstrate the special use of fire department ground ladders: Pumping operations

60
Making a Catch Basin Place two ladders on their beams
Lash the tips together Place a pike pole across the heels of the ladder Spread the heels of the ladders apart to form a triangle E. Lash the pike pole to the heel of the ladders

61
Making a Catch Basin F. Place a salvage cover inside the triangle formed with the ladders and pike pole

62
Cleaning Ground Ladders

63
Objectives Demonstrate the procedure for cleaning ladders

64
Cleaning Ground Ladders
Remove dirt with a brush and running water Use solvent cleaners to remove any oily or greasy residues according to manufacturer’s recommendations Rinse the ladder Wipe it dry E. Note any defects Mild soap and water works on all kinds of ladders

65
Cleaning Ground Ladders

66
Inspection and Maintenance

67
Objectives Demonstrate inspection and maintenance procedures for different types of ground and aerial ladders

68
Inspection and Maintenance
A. Metal 1. Starting at one end of the ladder check the rungs for tightness 2. Check the bolts, rivets or welds around the rungs for looseness 3. Check the beams, trusses and truss blocks for evidence of compression failure

69
Inspection and Maintenance
4. Check the heat indicator label for color change 5. Check the ladder hardware for signs of damage 6. For extension ladders, check halyard

70
Inspection and Maintenance
7. Check all braces, slides, stops, and rivets for damage 8. Check and lubricate all locks, pulleys, and other movable parts 9. Legibly mark any defects found Lubricate with candle wax or paraffin wax Clean and wax every six months

71
Inspection and Maintenance

72
Inspection and Maintenance
B. Wood 1. Starting at one end of the ladder check the rungs for tightness 2. Check the rungs at the point they come in contact with the locks for any damage 3. Check the beams and trusses for compression failure and/or cracks and splinters

73
Inspection and Maintenance
4. Check for signs of dry rot or attack from fungus 5. Check for any areas where the varnish has been worn or scratched, and apply varnish 6. Check the ladder hardware for signs of damage

74
Inspection and Maintenance
7. For extension ladders, check halyard 8. Check all braces, slides, and stops for damage 9. Check and lubricate all locks, pulleys and other movable parts 10. Legibly mark any defects found

75
Inspection and Maintenance
C. Fiberglass 1. Starting at one end of the ladder check the rungs for tightness 2. Check the beams, trusses and truss blocks for evidence of cracks, chips or other flaws 3. Check the heat indicator label for color change

76
Inspection and Maintenance
4. Check the ladder hardware for signs of damage 5. For extension ladders, check halyard 6. Check all braces, slides, stops, and rivets for damage

77
Inspection and Maintenance
7. Check and lubricate al locks, pulleys and other movable parts 8. Legibly mark any defects found

78
Sample Ladder Inspection Log
Other Information Sample Ladder Inspection Log Pass out sample ladder inspection log and explain

79
“Let’s do ladders!”

Similar presentations


. You.>")
. You.>")


.>")
 Break glass with a hand tool. Break a window with a ladder. Break windows on upper floors using the.>")


