Download presentation
Presentation is loading. Please wait.

2
User interface Adobe video and audio applications provide a consistent, customizable workspace. Although each application has its own set of panels (such as Project and Timeline), you move and group panels in the same way across products. The main window of a program is the application window. Panels are organized in this window in an arrangement called a workspace. The default workspace contains groups of panels as well as panels that stand alone. You customize a workspace by arranging panels in the layout that best suits your working style. As you rearrange panels, the other panels resize automatically to fit the window. You can create and save several custom workspaces for different tasksfor example, one for editing and one for previewing.
, you move and group panels in the same way across products. The main window of a program is the application window. Panels are organized in this window in an arrangement called a workspace. The default workspace contains groups of panels as well as panels that stand alone. You customize a workspace by arranging panels in the layout that best suits your working style. As you rearrange panels, the other panels resize automatically to fit the window. You can create and save several custom workspaces for different tasksfor example, one for editing and one for previewing..")
3
Application window Grouped panels Individual panel A B C C - B - A-

4
Choose a workspace Open the project you want to work on, choose Window > Workspace, and select the desired workspace. Dock, group, or float panels

5
Open, close, and scroll to panels To open or close a panel, choose it from the Window menu. To close a panel or window, click its Close button. To see all the panel tabs in a narrow panel group, drag the horizontal scroll bar.

6
Start or open a project

7
import video and audio Using the Media Browser you can import files from computer sources in any of the leading media formats. Each file you capture or import automatically becomes a clip in the Project panel. File --- Import ---Browse –select the video or audio

8
Assemble and refine a sequence Using the Source Monitor, you can view clips, set edit points, and mark other important frames before adding clips to a sequence. For convenience, you can break a master clip into any number of sub clips, each with its own In and Out points.

9
You add clips to a sequence in a Timeline panel by dragging or by using controls in the Source Monitor. You can automatically assemble clips into a sequence that reflects their order in the Project panel. You can view the edited sequence in the Program Monitor.

10
Creating subclips A subclip is a section of a source clip that you want to edit and manage separately in your project. You can use subclips to organize long media files.You work with subclips in a Timeline panel as you do with master clips. Trimming and editing a subclip is constrained by its start and end points. However, you can set new In and Out points for a subclip, as long as they fall between the original In and Out points you set for the subclip when you create it from the master clip.

11
Create a subclip from the Project panel You can create a subclip from source clips or other subclips that are made up from a single media file. Double-click a clip in the Project panel to open it in the Source Monitor. Set In points and Out points in the Source Monitor To set an In Point or Out point in the Source Monitor, do any of the following: To mark an In point, drag the playhead to the frame you want. Then click the Set In Point button. To mark an Out point, drag the playhead to the frame you want. Then click the Set Out Point button.

12
Adding clips to sequences You can add clips to a sequence in the following ways:Drag the clip from the Project panel or Source Monitor to a Timeline panel or the Program Monitor. Use the Insert and Overlay buttons in the Source Monitor to add clips to a Timeline panel. Or use the keyboard shortcuts associated with those buttons. Automatically assemble a sequence from the Project panel. An overlay edit adds a clip by replacing any frames already in a sequence starting from the edit point and extending for the length of the clip. Overlay is the default method when dragging a clip to a sequence or when rearranging clips in a sequence.Adding a

13
Cont…

14
Drag video only or audio only to a sequence To perform an overlay edit, drag the clip from the Source Monitor or Project panel to an appropriate track in a Timeline panel at the point you want the clip to start. The destination area is highlighted, and the pointer appears with the Overlay icon In the Source Monitor, do one of the following: To drag all audio and video tracks of the clip, drag from anywhere inside the main viewing area. To drag only the video track of the clip, drag from the Drag Video Only icon. To drag only the audio tracks, first target in the Timeline panel the tracks you want to receive the clip audio tracks. Then map the audio tracks you want to use to the target audio tracks. Then, drag from the Drag Audio Only icon Note (if you want to separate between video and audio (right click – unlink)
.")
15
Remove source clip In point or Out point Double-click a source clip in a Project panel to open it in the Source Monitor. Choose Marker > Clear Clip Marker and then choose an option to clear the In point, the Out point, or both.

16
Snap clips To make it easier to align clips with one another or with particular points in time, you can activate the snap feature. With Snap on, when you move a clip, it automatically aligns with, or snaps to, the edge of another clip. Enable and disable the snap feature At the upper left of a Timeline panel under the Sequence tab, click the Snap button to select it. Click it again to deselect it.

17
Creating titles Do one of the following: Choose File > New > Title. Choose Title > New Title and then choose a title type. In the Project panel, press the New Item button and choose Title. Specify a name for the title and click OK. Use the text and shape tools to create a new file or to customize a template. Close the Titler or save the project to save the title.

18
Create a title based on the current title In the Titler, open or select the title on which you want to base a new title. In the Title Quick Properties panel, click New Title Based On Current Title. In the New Title dialog box, enter a name for the new title and click OK. Make any changes to the new title. Close the Titler or save the project to save the title.

19
Creating titles from templates

20
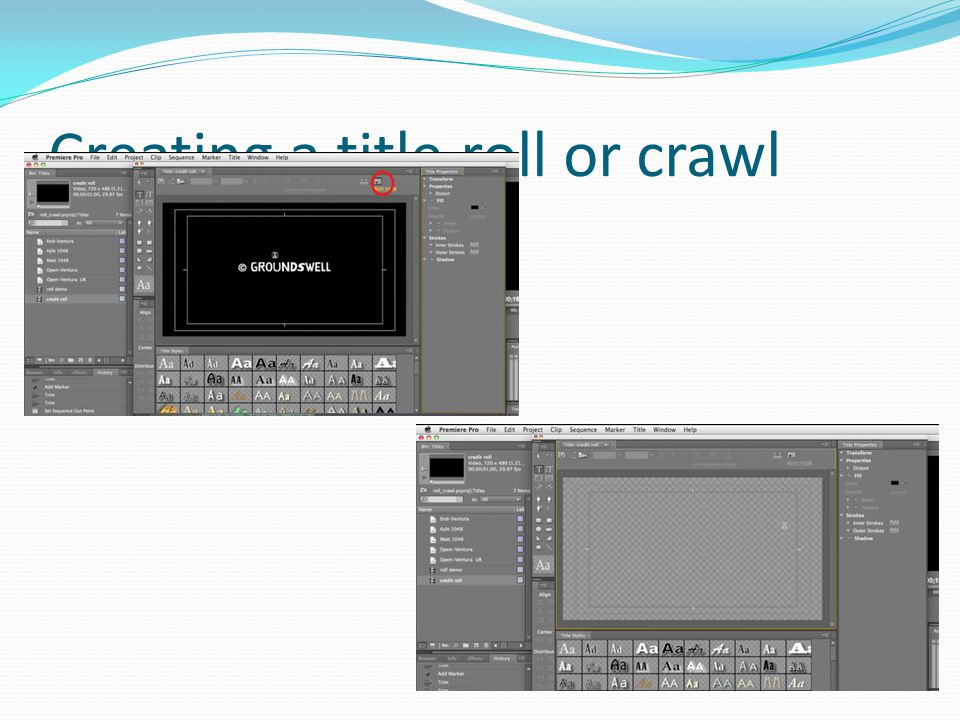
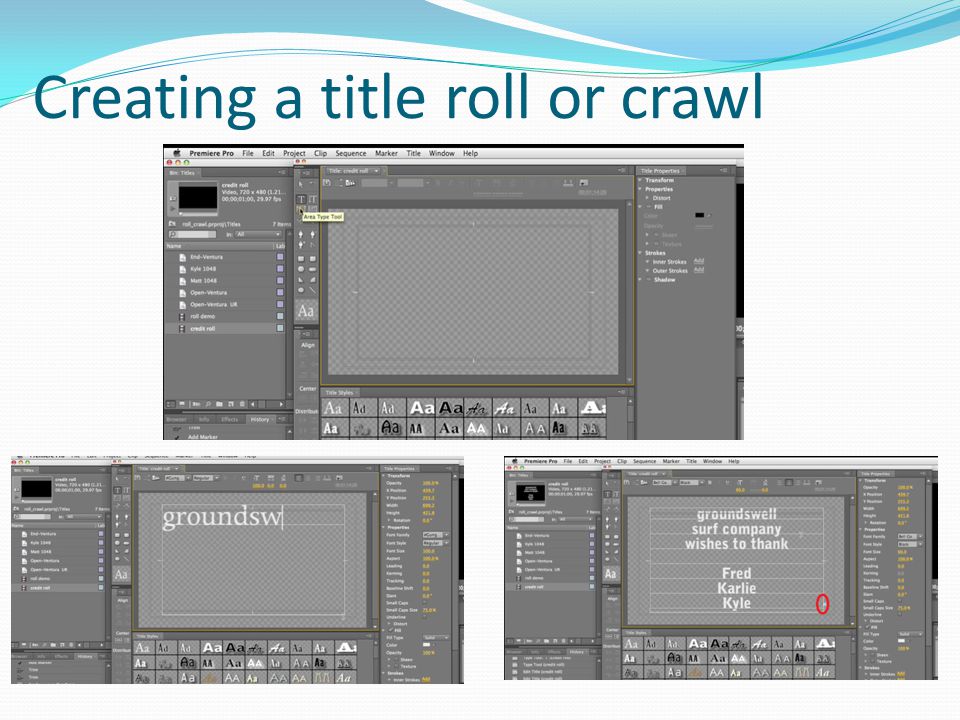
Creating a title roll or crawl

23
Adding Transitions

24
Adding Effects

26
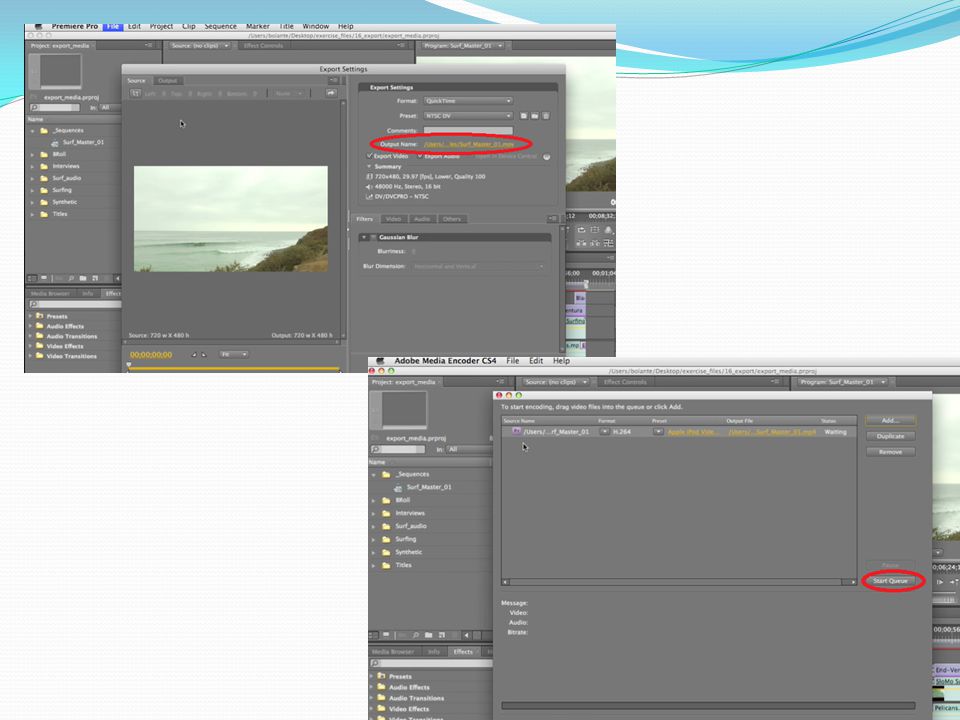
Exporting to various formats using Adobe Media Encoder

Similar presentations


 with Excel>")


 Rutgers University>")


