Download presentation
Presentation is loading. Please wait.

1
HTM Shop Skills: Troubleshooting & Repair © D. J. McMahon 2014 rev 150114

3
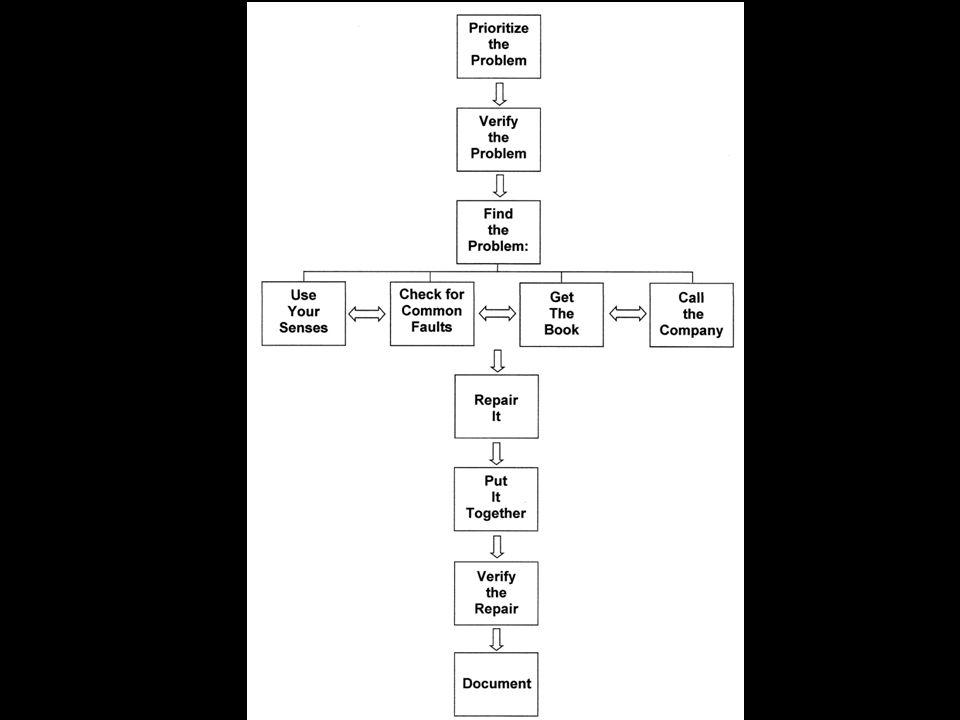
1: Prioritize the Problem Is there a more important repair or issue that requires your attention ? - If there are two repairs that “can’t wait”, you or your manager will have to decide. Is there a backup piece of equipment that can replace this unit to maintain the flow of patient care ? - Do you need a loaner? Loaners could be from another hospital, from the vendor, or the manufacturer.

4
2: Verify the Problem Who says there’s a problem? - Verify the problem for yourself. - Encourage users to report issues with a form, or at least with a contact name & number. Whenever possible, ask the actual user about what he saw, or did, when the problem occurred. - What they were doing, what they observed, other devices in use locally, etc. - Diplomatically discuss user errors or misunderstandings about the device.

5
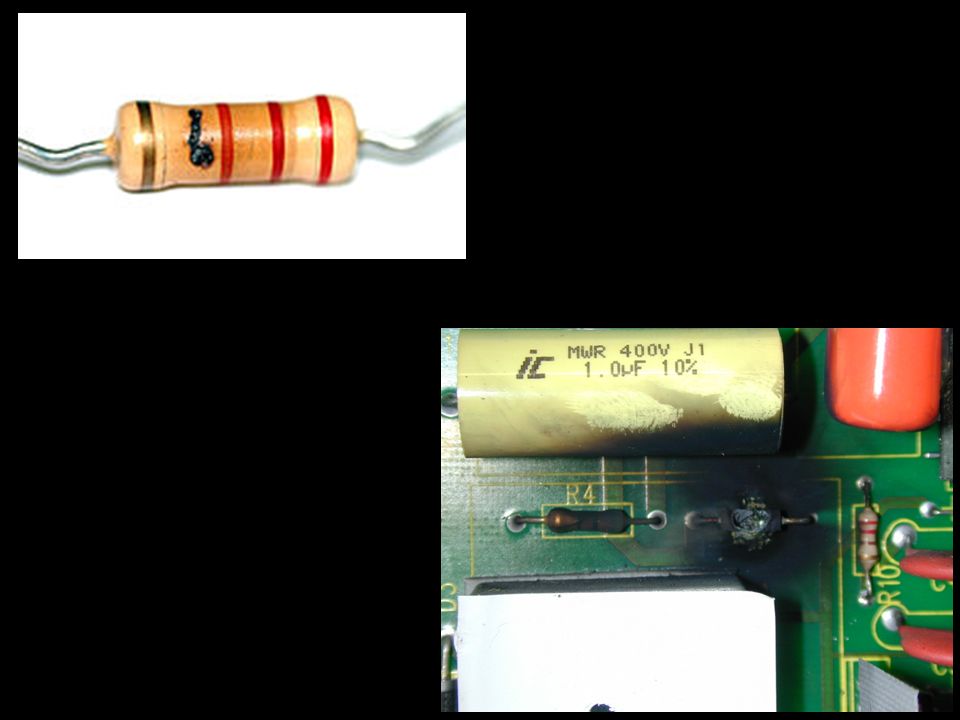
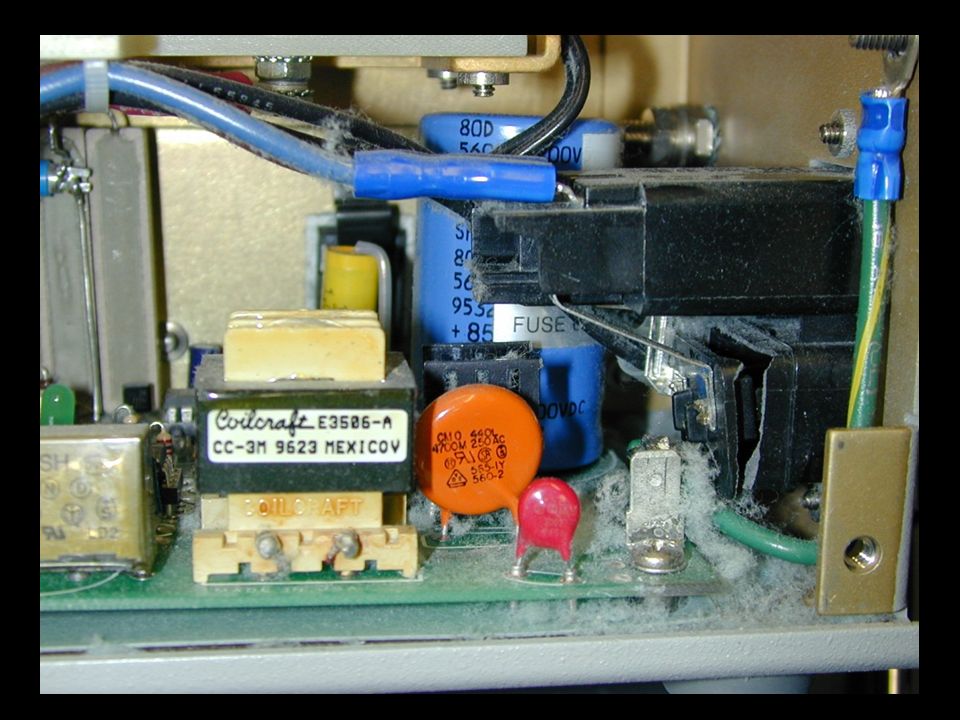
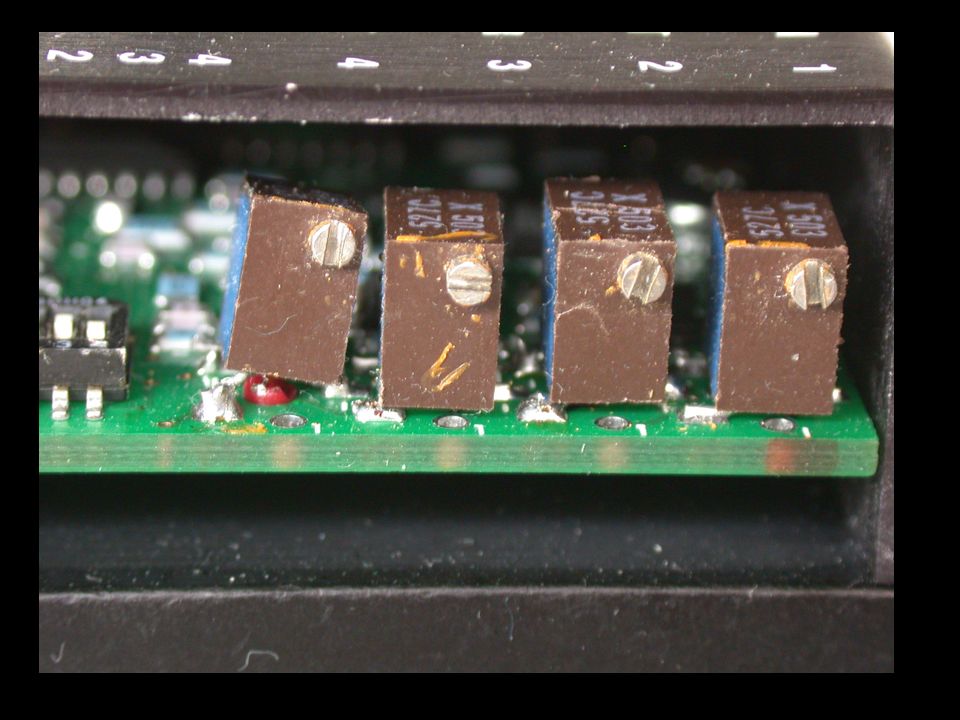
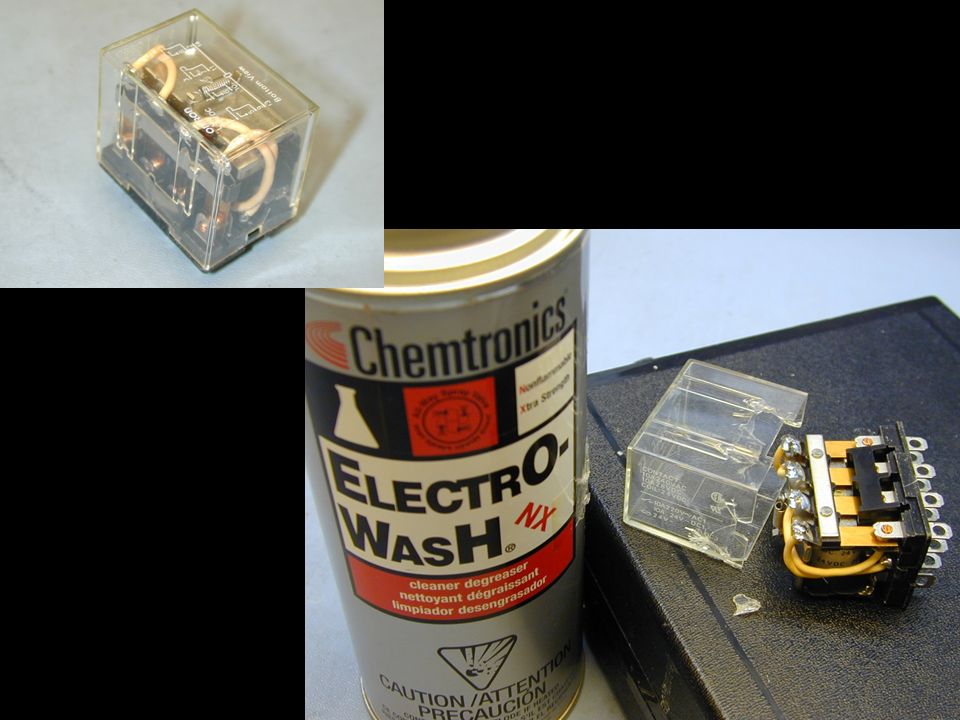
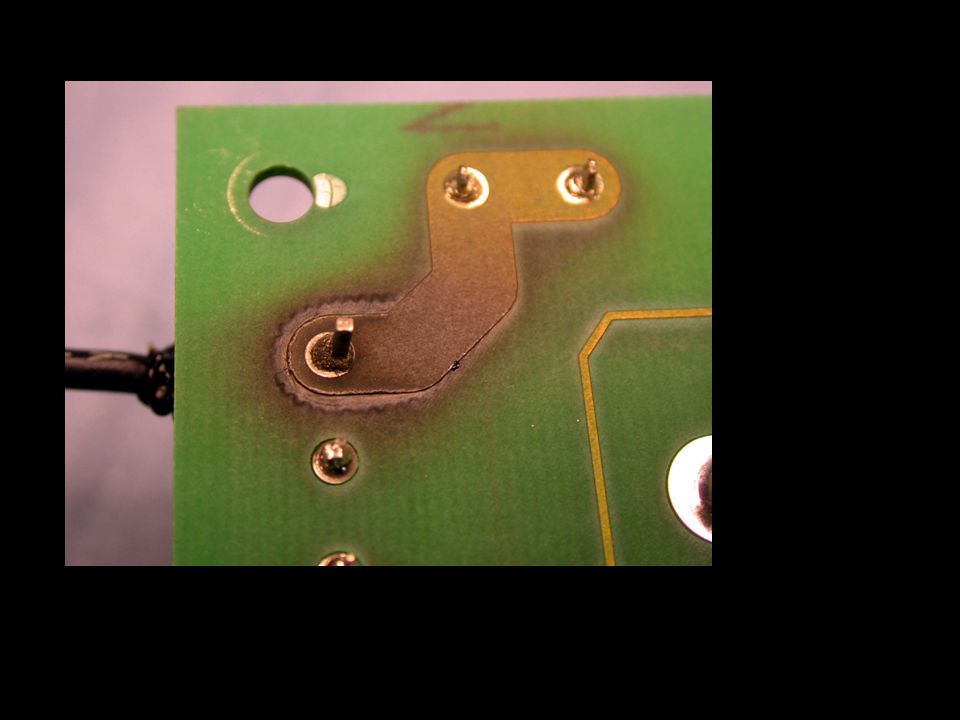
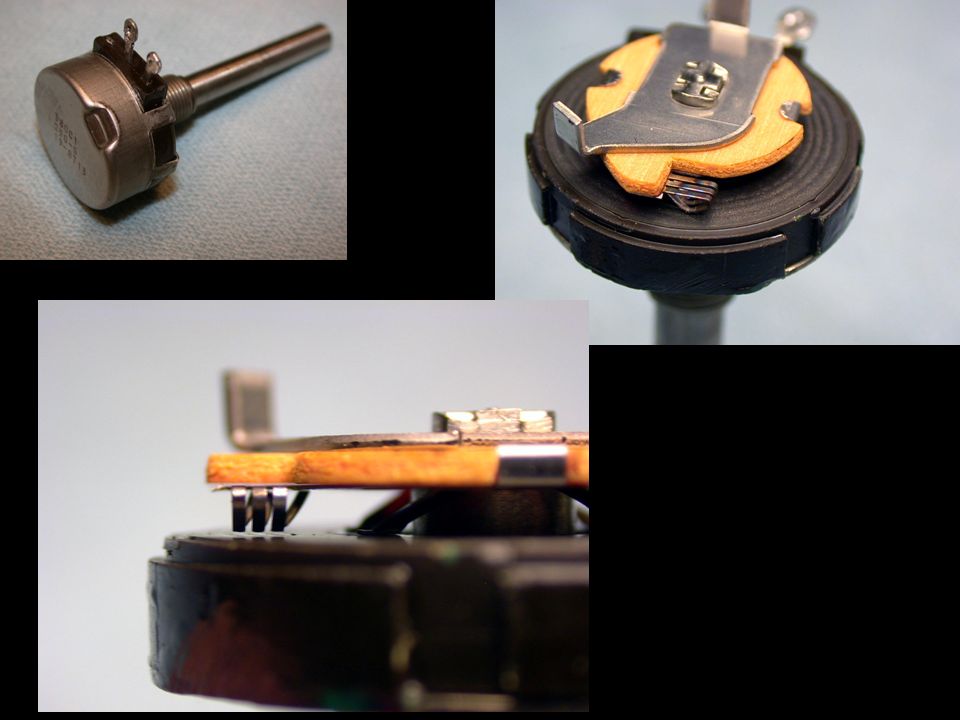
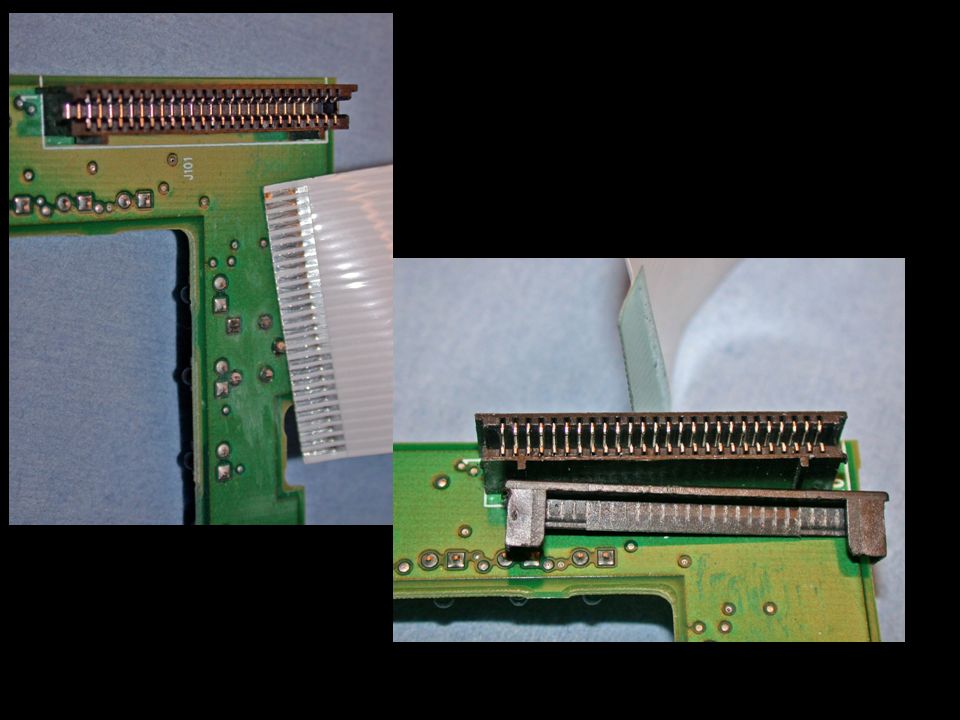
3: Find the Problem Use four of your five senses: > Look for obvious or subtle clues: burned components, misaligned connectors, cracked traces, pinched wiring, etc. > Listen for oscillations, relays or solenoids not clicking, pumps not running, gas leaks at tubing connectors, etc. > Smell for hot components, gases, fluids, etc. > Feel suspect components for loose or broken mountings, wetness, excessive heat, etc. - Chips may be warm, but shouldn’t be too hot to touch.

14
Be especially suspicious of the interface between the device and the patient: - ECG electrodes, leads, & cables - SpO2 sensors, cables - NIBP cuffs, hoses, and their connectors - IBP cables and disposables - Temperature sensors and cables

15
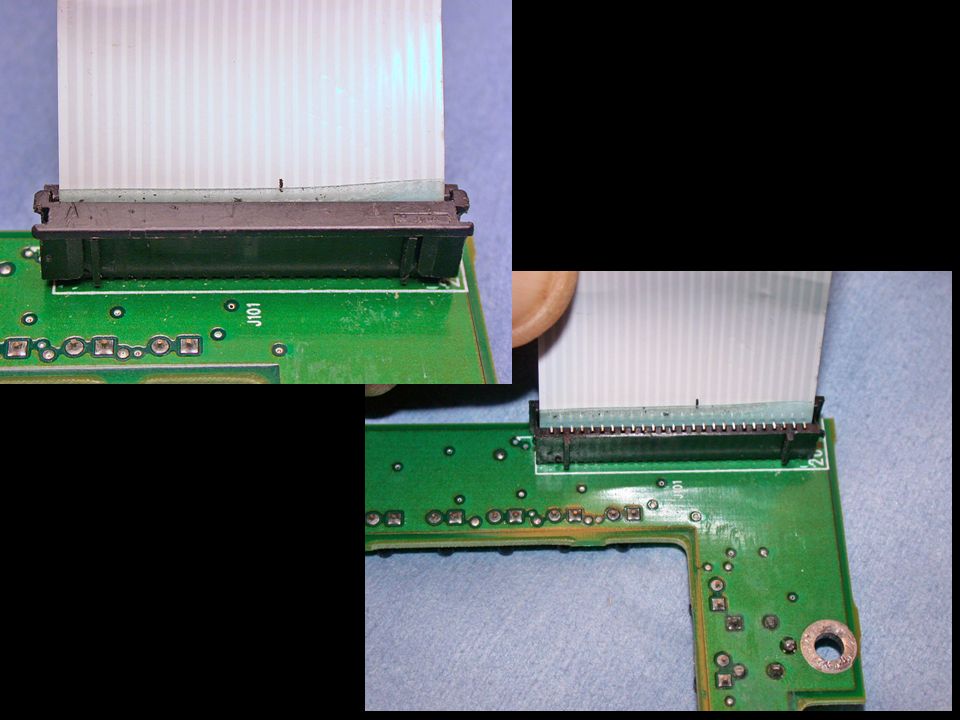
Check for the most common faults: - Lack of AC Power: receptacle, power plug, power cord, fuse or breaker - Lack of DC Power: batteries, battery fuse, AC power supply, AC/DC adapter - Thermal Issues: dead fans, open thermal switches, occluded filters - Connectivity Issues: cable connectors, ribbon cables, edge connectors, headers - Dirt and oxidation: very big contributors to connectivity problems

16
Get the Book: Are you familiar with the device? Had any factory training? Do you know how the device should work? -Is there a block diagram? -Schematics? -Troubleshooting table? -Error code list?

17
Call the Company: - Some manufacturers have great tech support, and some don’t. - When calling, have all pertinent information ready. - your account number, model, serial number, s/w version, what you’ve found, etc. - The company’s field service engineer may be more helpful, and more available. - The CE department at a nearby facility may be a resource.

18
The “linear” approach to troubleshooting: Take measurements at each stage until a fault is found. Assumes that we suspect a specific module or subassembly.

19
The Half-Step Method – Divide the device into two halves. Test for voltages or signals. If the expected signal is found divide the area into halves again, and continue checking signals until you’ve lost an expected signal, and isolate the bad stage.

20
The Half-Step Method –

21
- assumes at least minimal understanding of the device - is best when there is a traceable signal - having a service manual is obviously ideal, or at least a block diagram or schematic of the device - with no supporting documentation, examine thoroughly and use intuition and common sense.

22
Typically, repairs involve replacement of boards, sub-assemblies, or entire modules. If you can make a repair at the component level, be certain that the component is the final fault, and that you’re making an exact replacement. Be sure about your dep’t policy. 4: Repair the Problem

23
5: Put it Together As you disassemble: - Keep all hardware and parts in a logical order at your bench. - Tag wires if necessary to remind yourself where they connect. - Don’t trust your memory. Make notes. Take photos. As you reassemble: - See the service manual for any specifics about reassembly. - Be sure that machine screws are replaced correctly by length. - They may be the right thread, but the wrong length.

24
6: Verify the Repair Confirm that you’ve corrected the original failure, AND that the unit is back to full function. - The unit should meet factory specs. - Sometimes correcting one problem creates another. Perform an electrical safety check, as needed. Ask yourself: “Would you want this device used on yourself ?”

25
7: Document the Repair Use your department’s forms or computerized maintenance management software (CMMS) to document your work. - CMMS’s also serve as inventory and purchasing systems. - Any repair documentation is later ‘discoverable’ in a legal action.

26
Don’t go it alone…

Similar presentations


 Heating and Cooling operation Personal.>")


/40GXC(Q) Service Training Sizes 18 and 24K.>")


