Download presentation
Presentation is loading. Please wait.

1
PhotoStory3 Novice User Tutorial Follow the steps in this tutorial to create a basic slideshow with eight images with an audio track and export it to the Windows Media Player format. Click hypertext links to view relevant screenshots. Click the screenshots once to return to the last slide viewed and continue in the tutorial.

2
Getting started Click the PhotoStory3 icon in the start menu or double click the desktop icon to open the program. start menu desktop icon start menu desktop icon

3
Create a new file Verify that the ‘Begin a new story’ radio button is selected and click the ‘next’ button in the lower right of the screen. ‘Begin a new story’ ‘next’ button ‘Begin a new story’ ‘next’ button

4
Import pictures step 1 Click the ‘import pictures’ button on the next screen and browse to the directory where your images are stored. ‘import pictures’‘import pictures’

5
Import pictures step 2 Select multiple images Select multiple images by holding down the ‘contol’ button on your keyboard while clicking the filename or thumbnail icon of the desired images. Choose at least eight images and click ‘ok’. click ‘ok’. Select multiple images click ‘ok’.

6
Arrange your Pictures Adjust the order Adjust the order pictures will appear in your slide show by clicking and dragging the image thumbnail icons in the timeline viewer at the bottom of the screen until the desired order is reached. timeline viewer Adjust the order timeline viewer

7
Add background music 1 Click the ‘next’ button three times to arrive at the ‘add background music’ page. Click the ‘select music’ button. This will open a file browser where you can select a music file of your choice. ‘add background music’ page‘select music’ button. select a music file ‘add background music’ page‘select music’ button. select a music file

8
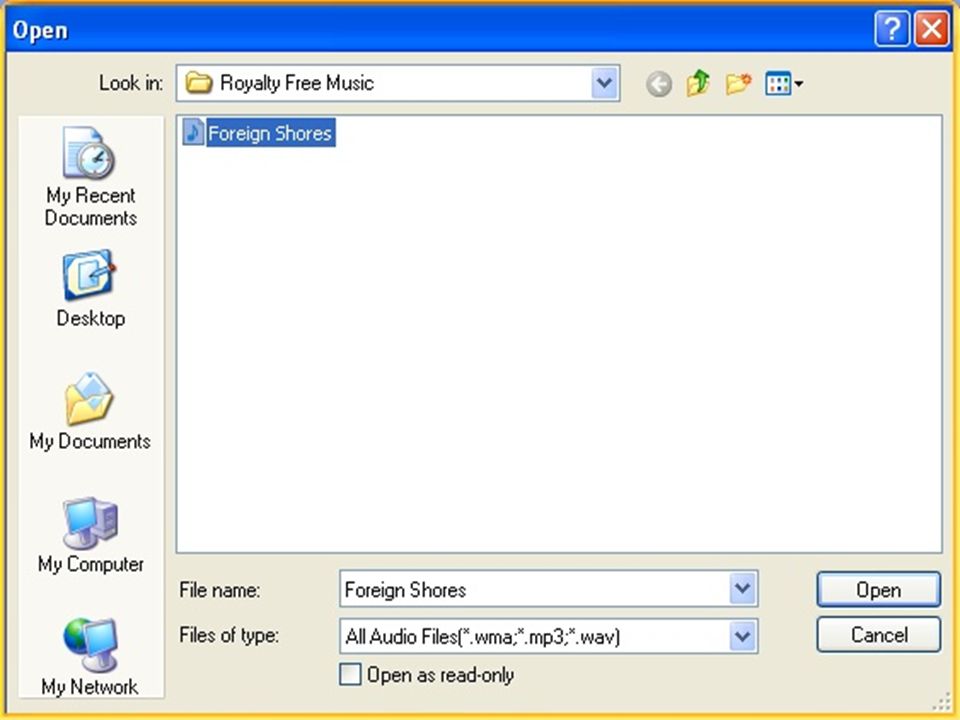
Add background music 2 Select the music file Select the music file of your choice and click ‘open’. You will return to the ‘add background music’ screen where you can preview the music by clicking the ‘preview’ button and adjust the volume by moving the slider to the desired level. ‘add background music’ ‘preview’ button moving the slider Select the music file ‘add background music’ ‘preview’ button moving the slider

9
Save your story step 1 Click the ‘next’ button to move to the ‘save your story’ screen’. Be sure the first option (save your story for playback on your computer) is selected. You should specify the location and file name of your story by clicking the ‘browse’ button. ‘save your story’ screen’.(save your story for playback on your computer) ‘browse’ button‘save your story’ screen’.(save your story for playback on your computer) ‘browse’ button
 is selected. You should specify the location and file name of your story by clicking the ‘browse’ button. ‘save your story’ screen’.(save your story for playback on your computer) ‘browse’ button‘save your story’ screen’.(save your story for playback on your computer) ‘browse’ button.")
10
Completing your story Click the ‘next’ button to build your PhotoStory and export it as a windows media player file with the extension.wmv. You may view your story by clicking the link or you can click the ‘exit’ button to exit the program. build your PhotoStory view your story ‘exit’ button build your PhotoStory view your story ‘exit’ button

11
Congratulations! You have successfully created a basic slide show of eight images and a sound track exported to the Windows Media Player format using PhotoStory.

Similar presentations


 Rick Budding Waterloo Region District School Board Rick Budding.>")

 1. Before you start your project, you need: Completed project storyboard. Files with images, sound, or video already saved.>")

