Download presentation
Presentation is loading. Please wait.

1
Information Security 493

2
Lab 10.1: Look for Security Events within Windows XP Logging is automatically enabled for many items on a workstation, but the log entries are only meaningful if examined. To view the security events logged on a workstation, follow these steps:

3
Conti… 1. Choose Start Run eventvwr.msc 2. Within the left frame, click Security. All logged security events appear. To gather more information on any logged entry, double-click it. 5. Exit the Event Viewer.

6
Lab 10.2: SpiceWorks (Assets Listing) SpiceWorks is the complete network management & monitoring, helpdesk, PC inventory & software reporting solution to manage Everything IT in small and medium businesses. In this exercise you will learn how to use this program to do an inventory on your network, and be able to list your assets. To do so, follow these steps: (Make sure to follow steps one-by-one don’t go quickly clicking on next).
..")
7
Cont… After installing “SpiceWork”, click on its icon to run it. Create your account by filling out your details. And click next. Click on ‘Start with inventory’.

8
Cont… Click ‘Scan my entire network’. Under “Does the account you are logged into right now have remote administration privileges to Windows computers on the network?” click on “NO”, and enter the user name and password given by the instructor.

9
Conti… Click on next, and then click on ‘Start’. Scan will take time depending on the size of the network, might take up to 15 minute. (Meanwhile, you can do exercise 10.3 and comeback when scan is over).
..")
10
Conti… Once scan is completed. In the left box click on “Network Map”. How your network look like. Change the view of the network by clicking on “Arrange”; try the Tree, Hierarchy, and Radial layout. From the left box click on “inventory”, see how many workstations, Serves, and other hardware and software you have.

11
Spice Work

12
Assets in Spice Work

13
Network topology in Spice Work.

14
Lab 10.3: Compare Your System to a Security Template You must be logged in as a member of the Administrators group (or as Administrator) to be able to make this change. To do so, follow these steps: 1. Choose Start Run. 2. Type mmc and press Enter. This command opens a console window.

15
Conti… 3. Choose File and then Add/Remove Snap-In. beneath Add/Remove Snap-In, click Add, and a list of available add- ins appears. 4. Choose Security Configuration and Analysis and click Add. 5. Click Close. 6. Click OK.

16
Conti… 7. Right-click Security Configuration and Analysis and choose Open Database. 8. Type in the name of a database you want to create (such as test) and click Open. 9. At the prompt to import a template, select ‘hisecws’ and click Open.
 and click Open. 9. At the prompt to import a template, select ‘hisecws’ and click Open..")
17
Conti… 10. Right-click Security Configuration and Analysis and choose Analyze Computer Now. 11. At the prompt for an error log file path, click OK to keep the default.

18
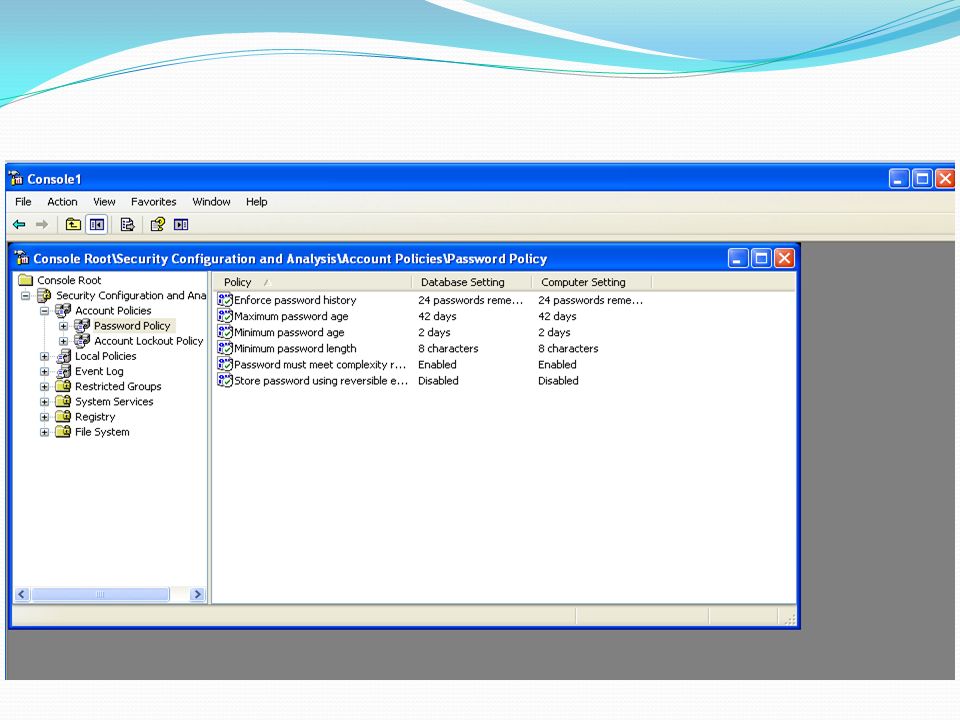
Conti… 12. Expand Security Configuration and Analysis and then Password Policy. A red circle should appear beside Minimum Password Age (and likely others), showing that the computer is not configured as the template is. 13. To make all settings in the template apply, right- click Security Configuration and Analysis and choose Configure Computer Now.
, showing that the computer is not configured as the template is. 13. To make all settings in the template apply, right- click Security Configuration and Analysis and choose Configure Computer Now..")
19
Conti… 14. Repeat the analysis step, and all settings should now equal those in the template.

22
Lab 10.4: Zenmap Zenmap is the official Nmap Security Scanner GUI, which makes Nmap easy for beginners to use. Zenmap is used to gather information about scanned IP or range of IPs. Zenamp can be helpful in Security Auditing, Finding any “unwanted” people using your network, creating simple visual diagrams of your network, and more. In this exercise you will be learning how to use Zenmap to scan a network and gather information. Follow these steps:

23
Start Zenmap, by clicking on the icon on your desktop. In the ‘Target’ field write down your IP address leaving the last number ‘0’, and then after your IP address directly write ‘/24’. (i.e. if your IP address is 10.131.55.10, you should write 10.131.55.0/24). You can find down your IP address from the CMD (ask your instructor).
. You can find down your IP address from the CMD (ask your instructor)..")
24
Leave the ‘profile’ option on ‘intense scan’. And make sure the button ‘Hosts’ is clicked.

25
Conti… Click on scan. The left panel will show PCs found in your network and there operating systems. The right panel will show information about the scanned PCs. Search through data and find open ports on other PCs.

27
Tutorial Delivered By : Maqsood Mahmud Researcher/TA, Center of Excellence in Information Assurance, College of Computer and Information Sciences (CCIS), King Saud University, Riyadh, Kingdom of Saudi Arabia. Cell: +966-544062273 Office: +966-1-4697350 Fax: +966-1-4675423 E-mail : information493@gmail.com Web: http://faculty.ksu.edu.sa/maqsood

Similar presentations


 © Abdou Illia, Spring 2007.>")


