Download presentation
Presentation is loading. Please wait.

1
Web Foundations MONDAY, NOVEMBER 18, 2013 LECTURE 30: DREAMWEAVER: GETTING STARTED, INTERFACE, TAG SELECTORS, LOCAL SITE, REMOTE SITE, SYNCHRONIZATION

2
Recommended Tool: Komodo Edit

3
Recommended Tool (Free!) ActiveState's Komodo Edit Komodo Edit is a free lean editor with a sleek interface. You'll enjoy excellent coding in many web languages, including HTML, CSS, JavaScript, Python, PHP, Ruby, and Perl. It features: Auto-Complete and Call Tips Syntax Highlighting and Checking Variable Highlighting Soft Characters and Matching Braces Split View Editing http://www.activestate.com/komodo-edit Interface Customization Extensions and Add-Ons 3 rd Party Library Support Column and Block Editing Snippets and Macros

4
Dreamweaver: Getting Started

5
Dreamweaver Start Screen

9
Templates create a page that can be used as a template for similar pages throughout your site, and allows only selected sections of that page to be editable. In order to use a template, you first have to create a project site, then call your template file from there when creating new pages from the template.

12
For this walkthrough, we're going to select Blank Page > HTML > and DocType HTML 5, then Create

13
Design View

14
Code View

15
Split View

16
Live View

17
Dreamweaver: Interface

19
Dreamweaver: Workspaces

22
Dreamweaver: Custom Workspace

23
You can get rid of Panels that you might use infrequently by closing them, either by right- clicking on the panel name and selecting close, or by dragging it out in your workspace and closing it by selecting the close 'x' in the upper right-hand corner

24
Since you can get rid of Panels that you might use infrequently by closing them, you can also get them back when needed by selecting them from the menu bar under the Window menu element

25
After you're done customizing your workspace, you can save it by selecting the Workspace drop-down (in my case 'Designer') and selecting New Workspace, then giving it a name (in my case, 'Craig 1')
 and selecting New Workspace, then giving it a name (in my case, Craig 1 )")
26
After saving, my custom workspace becomes an option from the dropdown Workspace menu. I can still select other workspaces when needed, but my custom workspace can be selected again when I want to return to it.

27
Dreamweaver: Tag Selector

28
http://faculty.cascadia.edu/cduckett/foundations/test/tag_selector_demo.html

29
Dreamweaver: Defining a Local Site

31
Give your site a name, then point to the local folder where the site is being housed, then Save.

32
Once the local site is populated into Dreamweaver, the files in that site can now be viewed and accessed through the Files panel.

33
Dreamweaver: Getting Organized with the Files Panel

34
The Files panel will display the name of your site folder and also show you that you are working on the local site ("local view"). What ever changes you make in the Files panel are done in your local folder, and vice versa. For instance, if you delete a file from the Files panel, it is deleted from your folder. On the flip side of this, if you had a new file to your site folder, then it will show up in the Files panel. The Files panel is simply a mirror of your local site folder.

35
By right-clicking on the green site folder in the Files panel, you can create new files, new folders, etc. You can also drag and drop the files in the Files panel inside the File panel, or you can do that locally within the local site file itself.

36
Dreamweaver: Setting the Remote Site Info

46
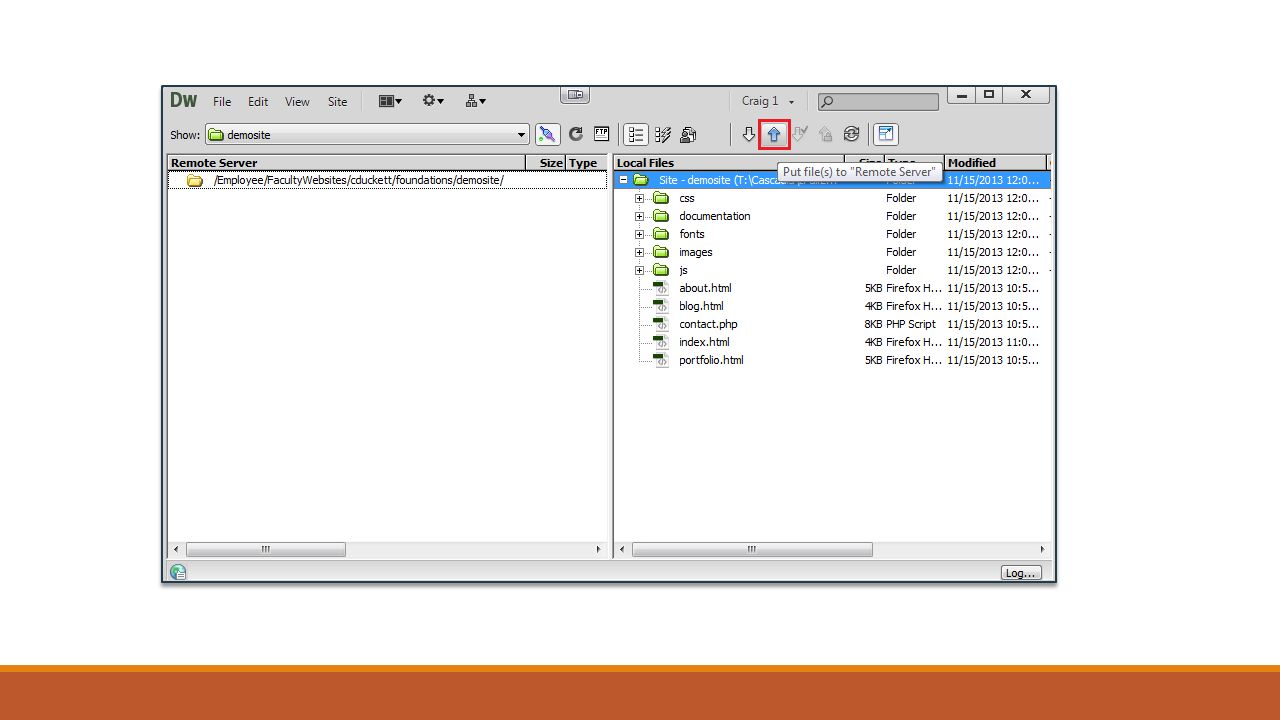
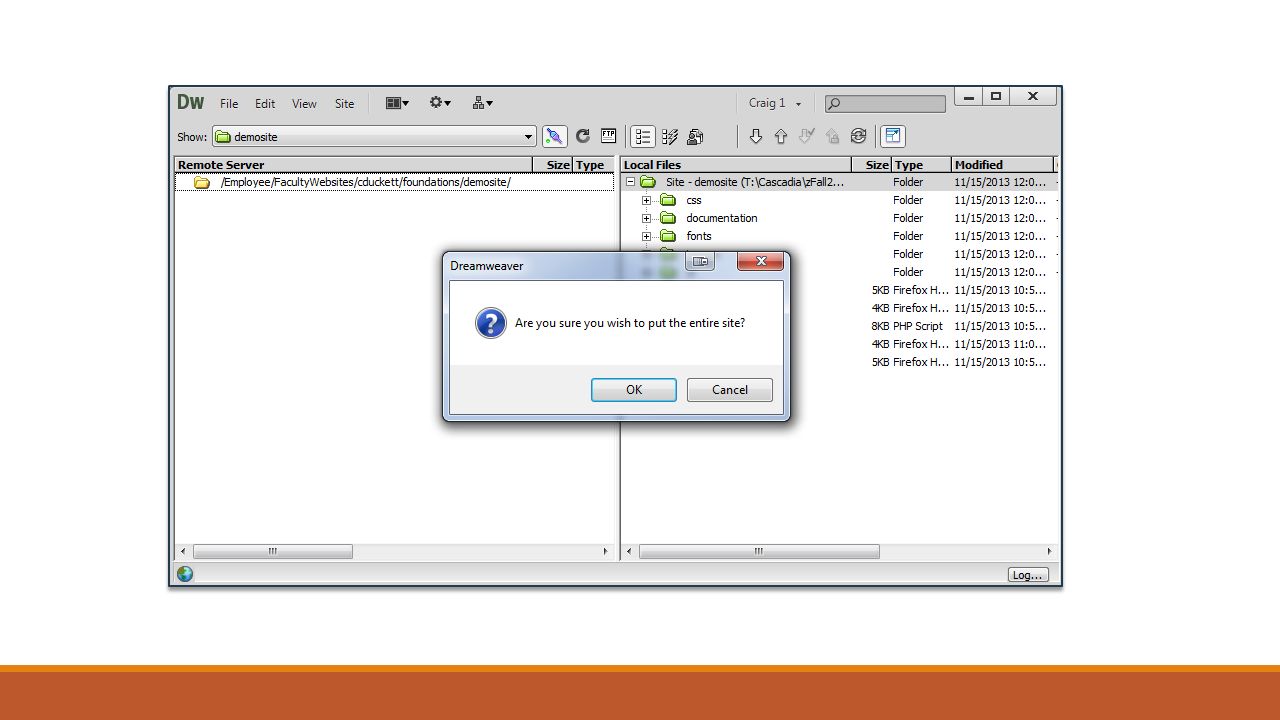
Dreamweaver: Uploading to the Remote Site

50
http://faculty.cascadia.edu/cduckett/foundations/demosite/

54
Dreamweaver: Synchronizing Local & Remote Sites

55
The Synchronize button will allow you to compare your local files with your remote files.

56
To synchronize, click the Synchronize button, then select the type of schronization you'd like, either synchronizing only a selected file (or files) or the entire site. You can also select you you want the synchronization to go, from local to remote, or from remote to local, or a combination of both making sure both sites have all the newest files.

57
You can preview you synchronization to determine whether you even need to do it. If all the files on your local and remote sites compare to be the same, then you will be given a no synchronization is necessary popup.

58
If your synchronization preview does the comparison and finds a file (or files) not on one of the sites, it will queue that files for you and then you can transfer it as pertinent. Synchronization comes in real handy if you've made a lot of changes in several files and/or in multiple directories, and you might otherwise forgot a file or two that needs to be uploaded. Synchronization will find all the changed files for you, allowing you to upload them all with one click of the button

59
Tomorrow: The Modify Menu, and the Properties Panel

Similar presentations