Download presentation
Presentation is loading. Please wait.

1
Lesson 18 – INSTALLING AND SETTING UP WINDOWS 2000 SERVER

2
Understanding Windows 2000 versions. Preparing for installation. Installing Windows 2000 server. Configuring a server client. OVERVIEW

3
Windows 2000 Professional. Windows 2000 Server Standard Edition. Windows 2000 Advanced Server. Windows 2000 Datacenter Server. UNDERSTANDING WINDOWS 2000 VERSIONS

4
Desktop version Minimum 64MB RAM Maximum 4GB RAM Windows 2000 Professional

5
One/two processors Works with Windows 2000 server Plug-n-Play (PnP) devices Windows 2000 Professional
 devices Windows 2000 Professional")
6
Includes Windows NT’s features. Mobile computers. Power management. Windows 2000 Professional

7
Mainstream server version. Includes Active Directory power. Microsoft Management Console (MMC). Windows 2000 Server Standard Edition
. Windows 2000 Server Standard Edition.")
8
Windows Terminal Services. Internet and web services. RAS and VPN services. Windows 2000 Server Standard Edition

9
Transaction and messaging services. Up to 4 processors. Latest Network protocols. Windows 2000 Server Standard Edition

10
Mid-range offering of Windows 2000 server products. Up to 8GB RAM. Windows 2000 Advanced Server

11
Network load balancing Windows 2000 clustering Up to 8 processors Windows 2000 Advanced Server

12
Large databases. Heavy demands. Includes features of other versions of Windows 2000 Server. Windows 2000 Datacenter Server

13
Up to 64GB RAM. Up to 32 processors. Improved clustering. Windows 2000 Datacenter Server

14
Preparation stage: Certified server hardware. Properly configured server. Pre-installation testing on server hardware. PREPARING FOR INSTALLATION

15
Preparation stage: Hardware survey. Windows 2000 server installation. Backup system. Preparing for installation

16
Checking hardware compatibility. Checking hardware configuration. Testing server hardware. Surveying the server. Making pre-installation decisions. Backup before upgrading. Preparing for installation

17
Microsoft’s Hardware Compatibility List (HCL): Hardware components Testing status Checking hardware compatibility
: Hardware components Testing status Checking hardware compatibility")
18
Minimum hardware configuration: One 133MHz Pentium class processor or greater. 256MB RAM. Checking hardware configuration

19
Minimum hardware configuration: 1GB free disk space for installation. CD-ROM/Network connection. Checking hardware configuration

20
Configuring a server: PIII processor 700MHz or greater 256MB RAM SCSI disk subsystem Formula for disk space is 850MB + (RAM in MB * 2) Checking hardware configuration
 Checking hardware configuration")
21
Test focus: Processor(s) System board components RAM Disk surfaces Testing server hardware
 System board components RAM Disk surfaces Testing server hardware")
22
Plug-n-Play (PnP): Not all are PnP configurable. Can conflict with other devices. Specific device drivers may not configure properly. Surveying the server

23
Resources: IRQ channel DMA channel Memory I/O addresses Surveying the server

24
Choices: Upgrade/ Install FAT/ NTFS Domain controller/ Member server/ Stand-alone server Per seat/ Per server Making pre-installation decisions

25
Modes: Domain controllers Member servers Stand-alone server Making pre-installation decisions

26
Fully backup server prior to installation. 2 full (identical) backups. Backup before upgrading
 backups. Backup before upgrading")
27
Methods: Configure server computer to boot from Windows 2000 Server CD-ROM. Begin installation while running Windows NT Server. Begin installation while running Windows 95/98. INSTALLING WINDOWS 2000 SERVER

28
Methods: Prepare boot disks and use them to begin installation. Install from Network installation point. Installing Windows 2000 Server

29
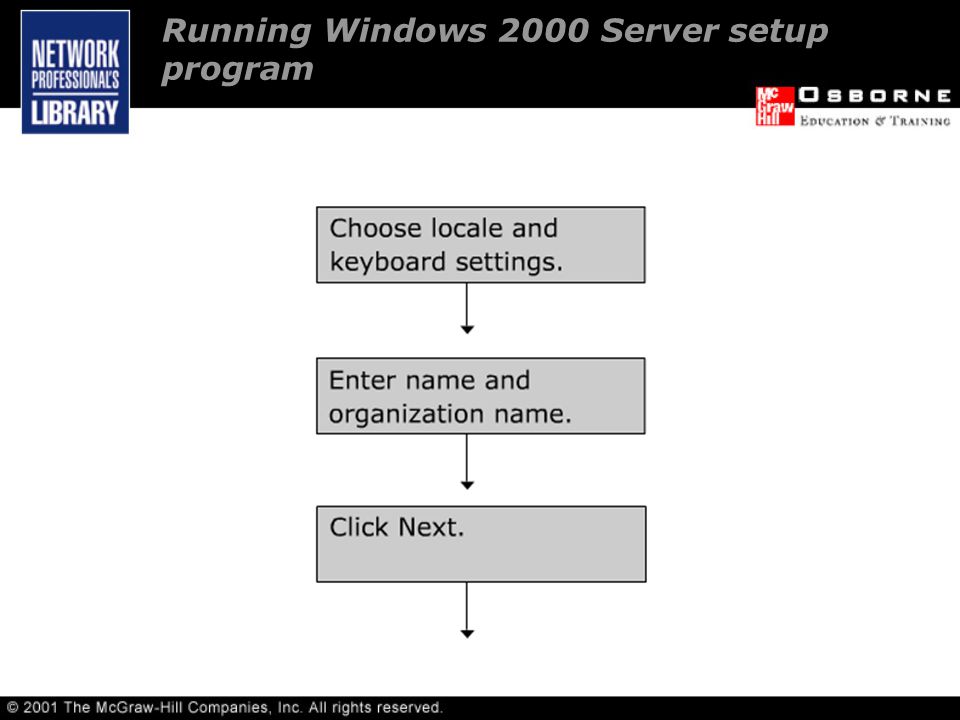
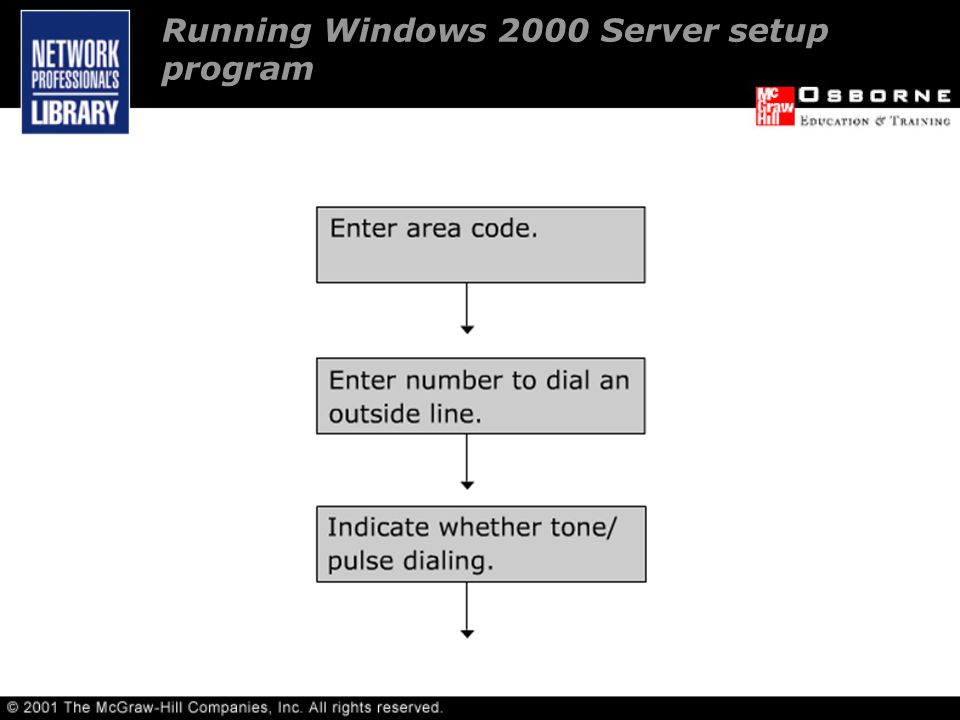
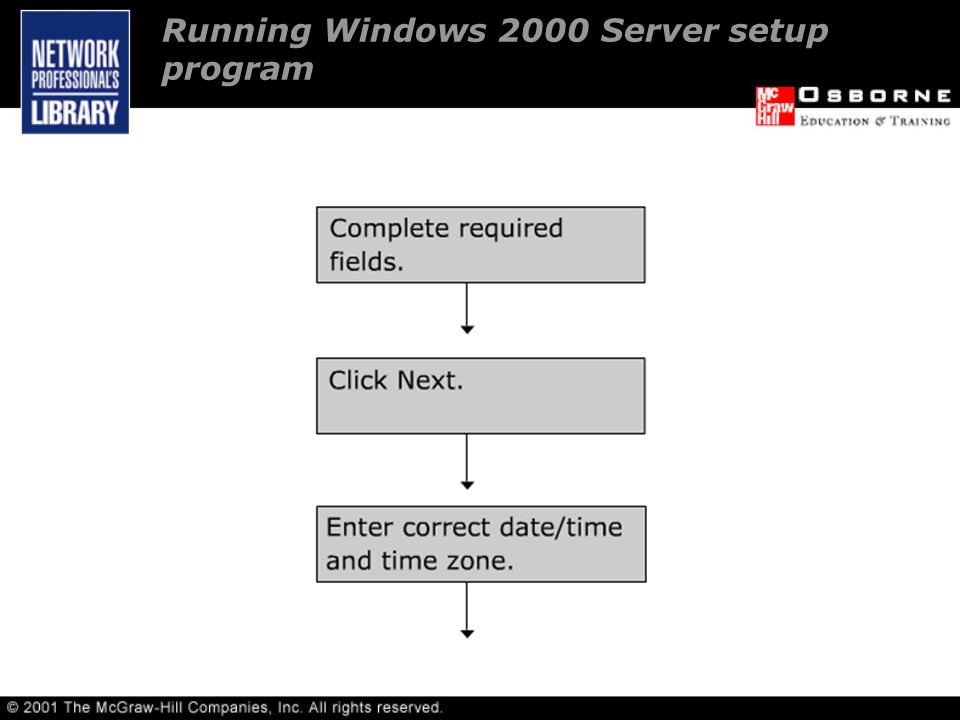
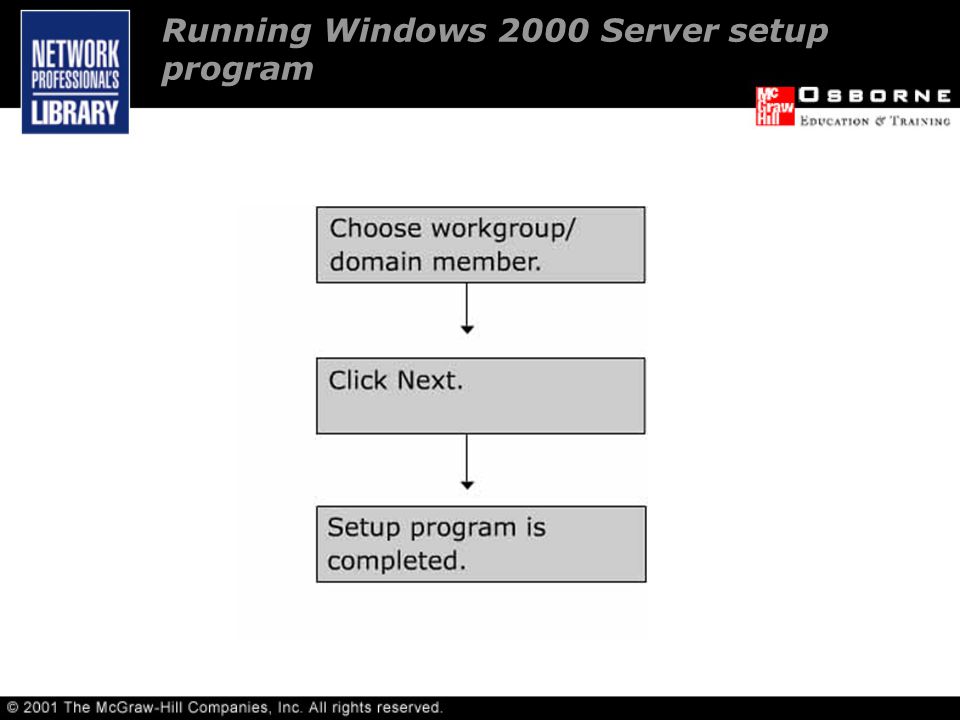
Running Windows 2000 Server setup program. Completing Windows 2000 Server setup. Installing Windows 2000 Server

30
Running Windows 2000 Server setup program

45
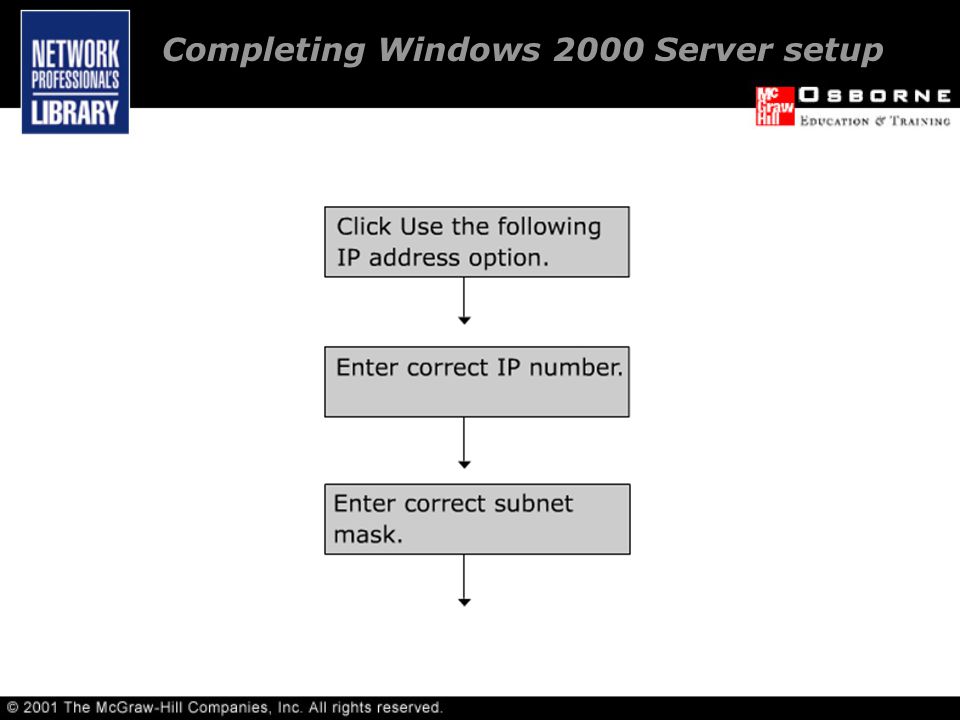
Completing Windows 2000 Server setup

46
Windows 2000 Server Configuration program

47
Completing Windows 2000 Server setup

48
Confirmation of core Network services installation

49
Completing Windows 2000 Server setup

51
Local Area Connection Properties dialog box

52
Completing Windows 2000 Server setup

54
Internet Protocol (TCP/IP) Properties dialog box
 Properties dialog box")
55
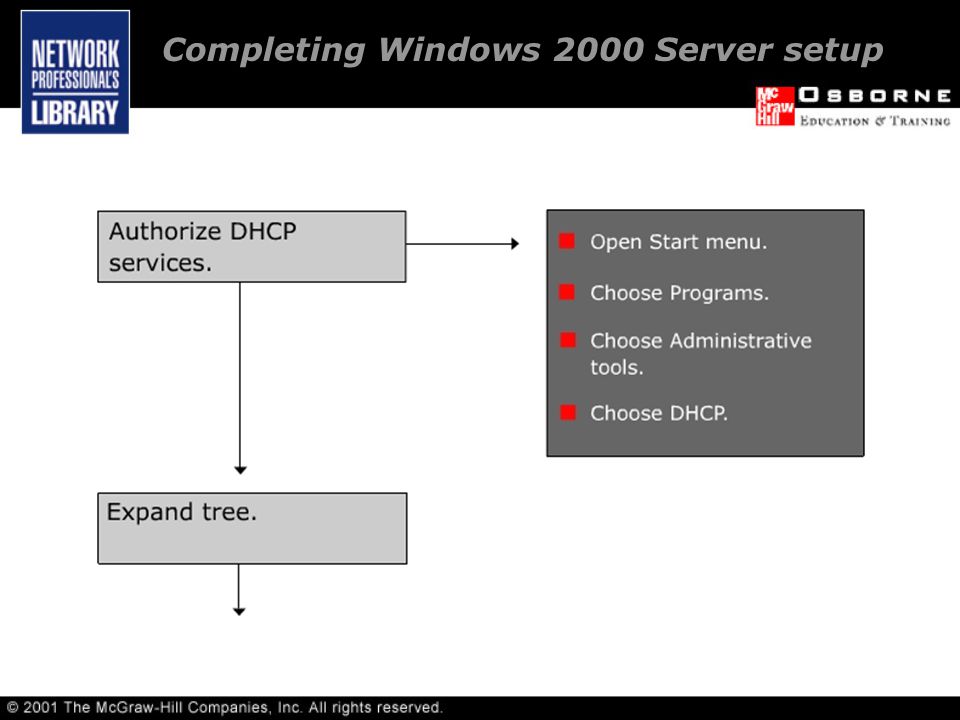
Completing Windows 2000 Server setup

57
DHCP Manager program

58
Completing Windows 2000 Server setup

60
CONFIGURING A SERVER CLIENT Creating a user account. Creating a shared folder. Setting up a Windows 9x client to access the server. Testing the client connection.

61
Creating a user account Steps: Open Start menu. Choose Programs. Choose Administrative tools. Select Active directory users and computers.

62
Creating a user account Active Directory Users and Computers

63
Creating a user account To add user: Right-click server. Choose New. Choose User.

64
Creating a user account Create New Object (User) dialog box
 dialog box")
65
Creating a user account To add user: Enter user’s first and last name. Enter logon name in User logon name field. Click Next. Enter starting password.

66
Creating a user account To add user: Click Next. Click Finish.

67
Creating a shared folder To share a folder: Create a normal folder. Right-click folder. Choose Sharing.

68
Creating a shared folder Sharing tab of folder’s Properties dialog box

69
Creating a shared folder To share a folder: Click Share this folder option. Review share name. Click OK.

70
Setting up a Windows 9x client to access the server

72
Steps: Open Network object in Control Panel. Click Add. Choose Client in Select Network Component dialog box. Click Add. Choose Microsoft from manufacturers list. Choose Client for Microsoft Networks.

73
Setting up a Windows 9x client to access the server Choosing to install Client for Microsoft Networks

74
Setting up a Windows 9x client to access the server Steps: Click OK. Select Client for Microsoft Networks. Click Properties.

75
Setting up a Windows 9x client to access the server Network Properties dialog box

76
Setting up a Windows 9x client to access the server Steps: Select Log Onto Windows NT Domain checkbox. Enter domain name. Click OK.

77
Testing the client connection Log in to domain: Enter user account name. Enter domain name. Enter password.

78
SUMMARY Understanding Windows 2000 versions: Windows 2000 Professional Windows 2000 Server Standard Edition Windows 2000 Advanced Server Windows 2000 Datacenter Server

79
Summary Preparing for installation: Checking hardware compatibility. Checking hardware configuration. Testing server hardware. Survey the server. Making preinstallation decisions. Backup before upgrading.

80
Summary Installing Windows 2000 server: Running Windows 2000 Server setup program. Completing Windows 2000 Server setup.

81
Summary Configuring a server client: Creating a user account. Creating a shared folder. Setting up a Windows 9x client to access the server. Testing the client connection.

Similar presentations


 or faster processor (Pentium central processing unit recommended). 16 megabytes (MB) of memory (24 MB recommended).>")


. PYP002 Preparatory Computer ScienceWindows Operating System2 Objectives Develop a good understanding of 1. The.>")


