Download presentation
Presentation is loading. Please wait.

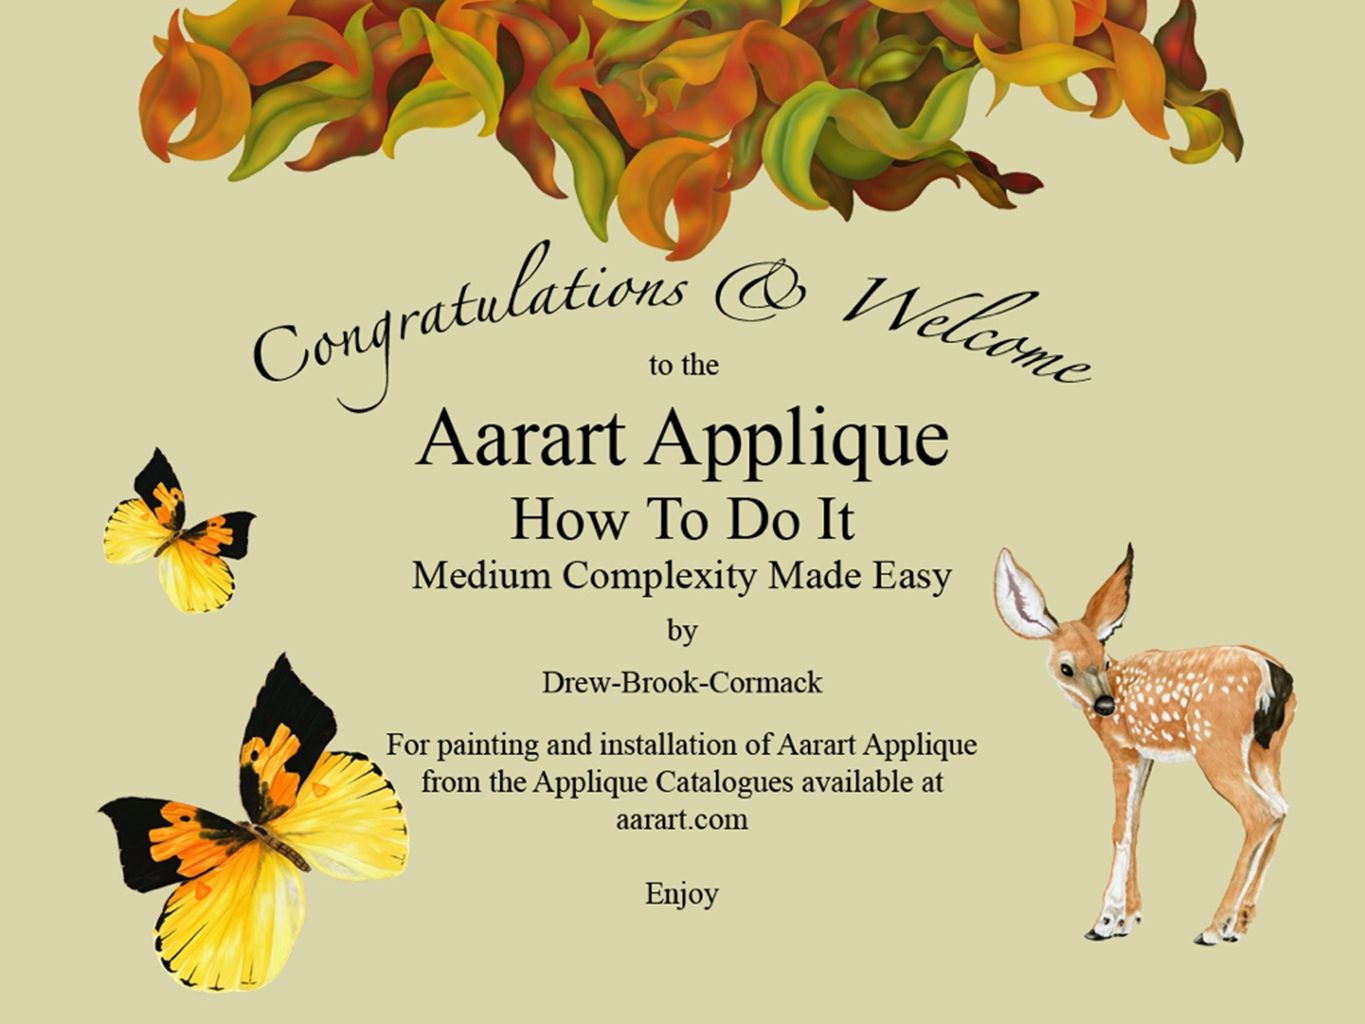
2
How To Do It An Introduction To This Guide With Many Life Saving Tips And Pointers. This installation guide is used with the spray technique for under painting. Anyone who has downloaded our Aarart Applique Catalogues may have discovered that many of our applique aar a tad on the large size and thought “Aar they joking? Have I got enough friends? How am I supposed to know exactly where to put the first applique up before I know where the others go? And don’t even mention the background painting! I suddenly feel dizzy.” Quite the conundrums. Or arr they. First of all, we should consider any under or surround painting you may wish to do. There aar many options to choose from and each has it’s strong and weak points that you should investigate and practice. Here aar some samples; brush, sponge, daub and smudging that can create wonderfully subtle cloud, vegetation or water textures. They aar used only to paint around the applique however so do not use these techniques under where the applique will go because of that texture. Try not to touch or pile up your paint against the applique as it may effect the adhesive. Spray under painting will give you a wonderful mist, fog or cloud effect and can be used under the applique. After curing that is. Careful masking of the applique may allow for tweaking after instillation. Blending the techniques can give you the best of both.

3
Next, you should remember the gorgeous composition you created using the Aarart Catalogues and frantically try to remember where you put the ruddy thing. Whether you used the print, cut and paste system or created a digital file with layers (you did save the layers, didn’t you?), you have a record and the plan. Having saved the layers allows you to project and easily place each applique in order from back (rear most) to front (top). To scale yet. Suddenly not such a waste of time, eh? Rather a good idea, in fact. So let us investigate our under painting and installation options, starting with the very best. You can create a file that can be used with a digital projector (begged, borrowed or rented). You may need one that will do large projections. Now you have a projected virtual creation as reference for the instillation of your applique that will also allow you to madly under paint (spray) your wall/ceiling and let it cure while our printers print and cut your applique. It’s almost like the whole thing was planned. A white wall/ceiling is great for corner to corner murals but if you wish to paint a vignette on a coloured surface you will need to apply a shaped white under paint and then start applying your lightest highlight colour and proceed to the darker values. Adjustments can usually be made after installing each applique but if not, the applique aar remountable. Also remember that nothing about this project involves exacting measurements so adjust to suit.
, you have a record and the plan. Having saved the layers allows you to project and easily place each applique in order from back (rear most) to front (top). To scale yet. Suddenly not such a waste of time, eh. Rather a good idea, in fact. So let us investigate our under painting and installation options, starting with the very best. You can create a file that can be used with a digital projector (begged, borrowed or rented). You may need one that will do large projections. Now you have a projected virtual creation as reference for the instillation of your applique that will also allow you to madly under paint (spray) your wall/ceiling and let it cure while our printers print and cut your applique. It’s almost like the whole thing was planned. A white wall/ceiling is great for corner to corner murals but if you wish to paint a vignette on a coloured surface you will need to apply a shaped white under paint and then start applying your lightest highlight colour and proceed to the darker values. Adjustments can usually be made after installing each applique but if not, the applique aar remountable. Also remember that nothing about this project involves exacting measurements so adjust to suit..")
4
Now for the hardest possible way to do it. Hair loss is almost guarantied. This technique works best with brush, sponge, daub and smudge painting after installing the applique. Rather than removing the backing from your applique and having everything go sideways from there, let us suggest tape. Yep, low tech does it. Now please, please understand that we aar not talking about the pull-a-locomotive or suspend-an-automobile sort, or even duct tape. And definitely not the rip-the-flesh-from-your-body type either. Let’s focus on a mild mannered tape used by painters. Removable painter’s tape, in fact. Now that your applique has arrived, you aar ready to start. Do any necessary measuring to check on your eye-balling and use only as much tape as necessary to put up the main focus of your creation. This is your gauge point from which you can start with the applique that is underneath all the rest and work up from there. Remove your main focus, or anything else, when necessary and put it back, if necessary, as you go. A well ordered, step by step approach is the safest bet and least likely to lead to hair loss, or worse. With any of these techniques it is helpful to include chocolate, for it’s calming effects. As to whatever else you and your friends may enjoy during and after your mounting party, enjoy! This installation guide is used with the spray technique for under painting. aarart.com

6
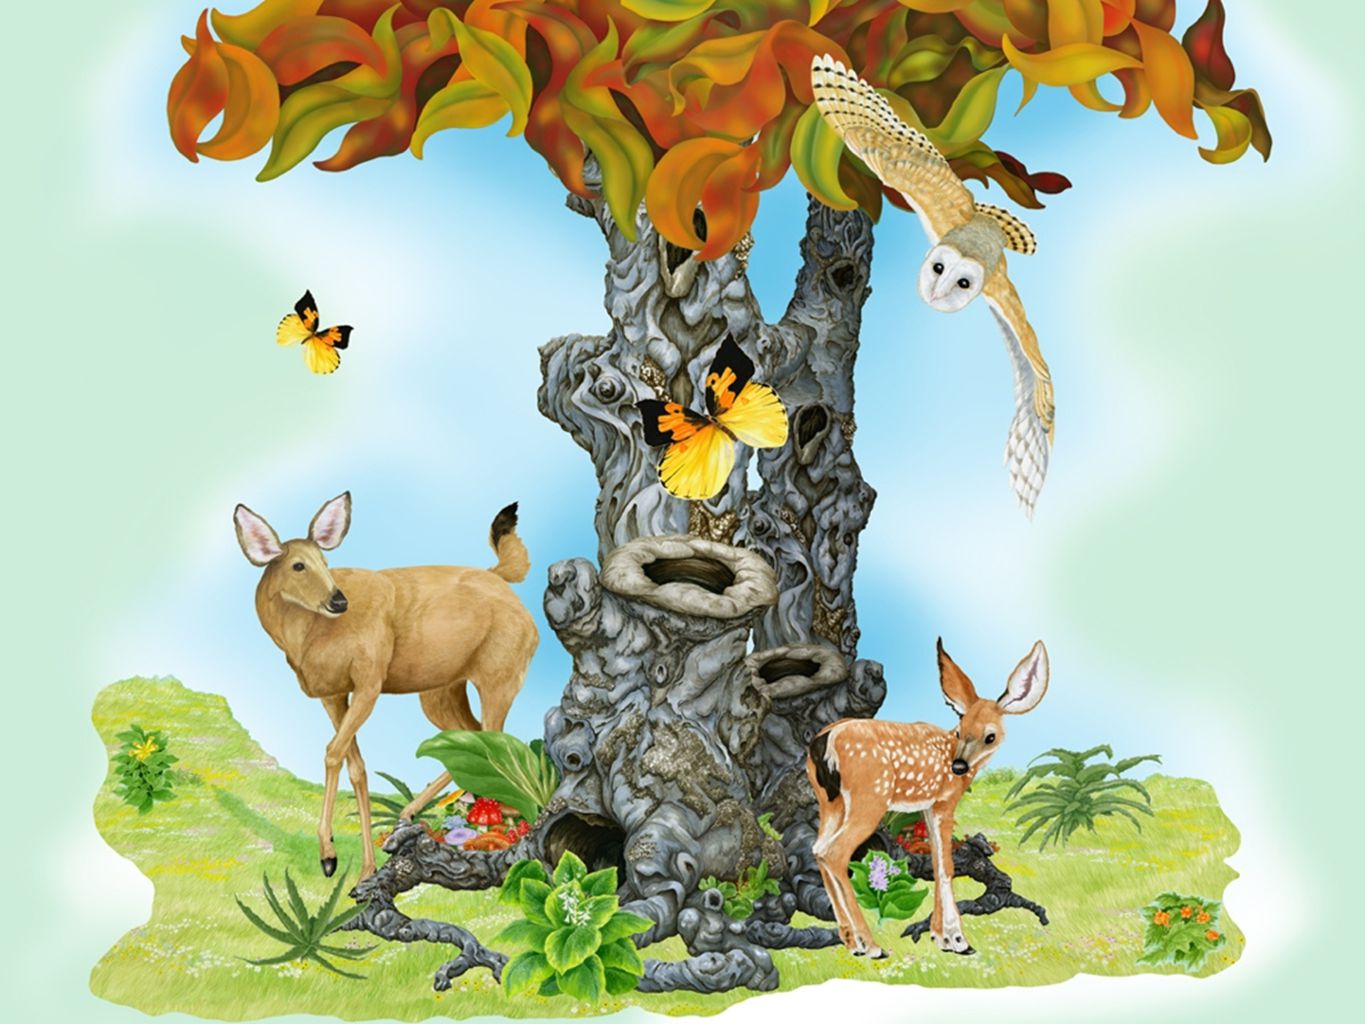
You will not be using a layered projection with this guide but instead be working on a full image. On the preceding page is a view of the completed vignette being installed in this How To Do It. The next page is the same vignette as a projection you will be working over. From here, you can decide on the final background shape you want your applique to sit on and start by spraying the white under paint. By turning off the projection you can check your shape, edges and coverage as well as make any touchups you need, as seen on the following page. You will need to turn the projector on to proceed, as seen on the page following.

10
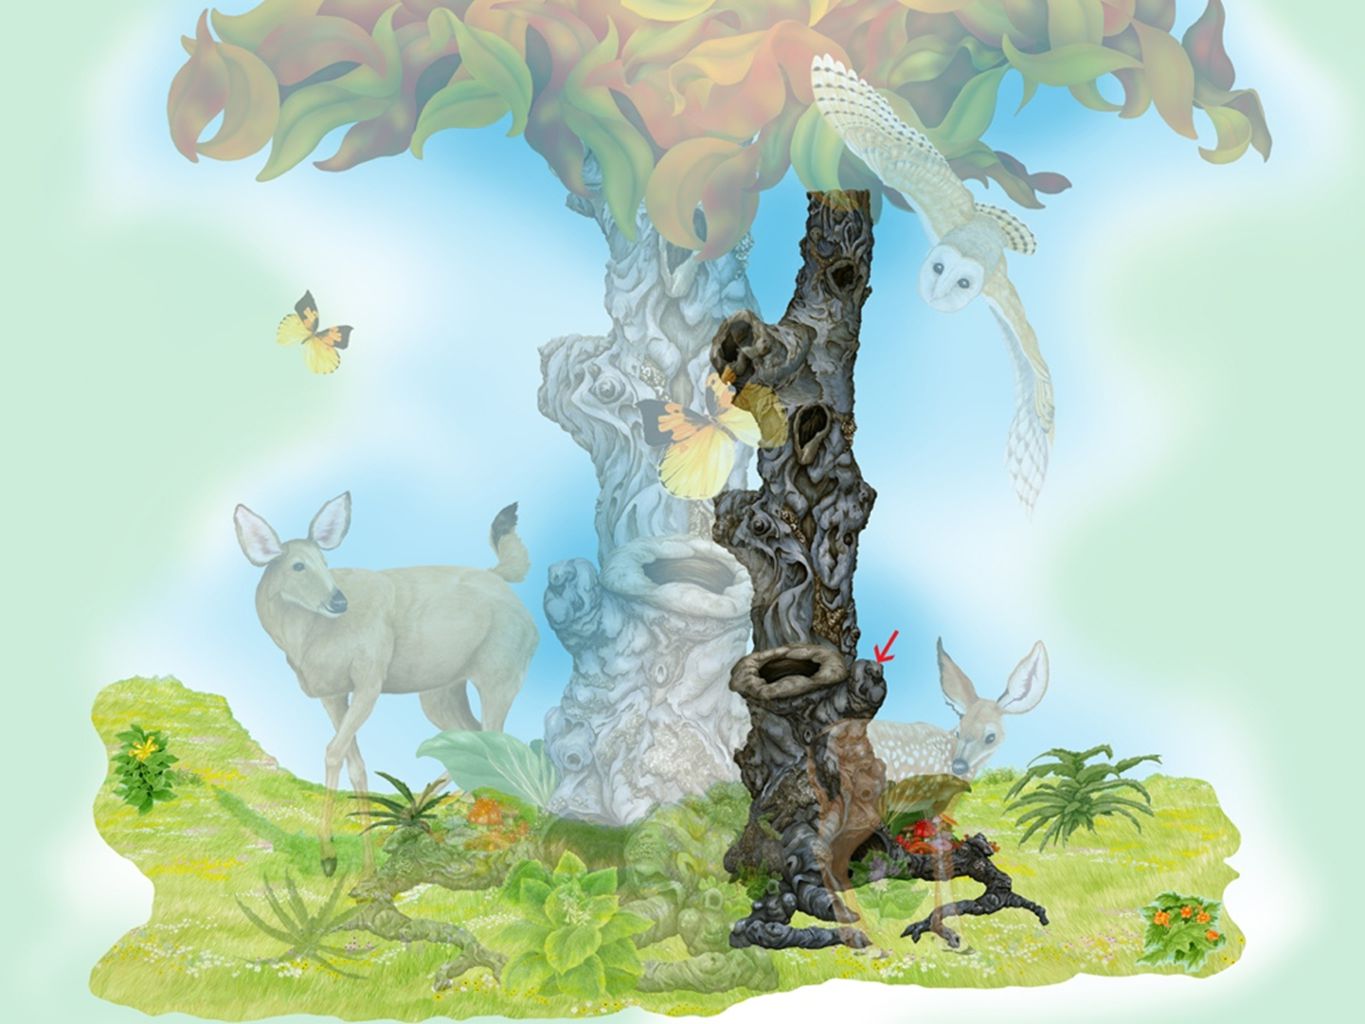
With the projector on, you can now spray on any highlight colours you would like to use. If you wish to use a different painting technique for the highlight colours, you will have to do so after you have installed all your applique. By turning off the projection you can check your shapes, edges and coverage as well as make any touchups you need, as seen on the following page. When you have finished with your under painting you will need to allow the paint to cure as you wait for the delivery of you applique.

12
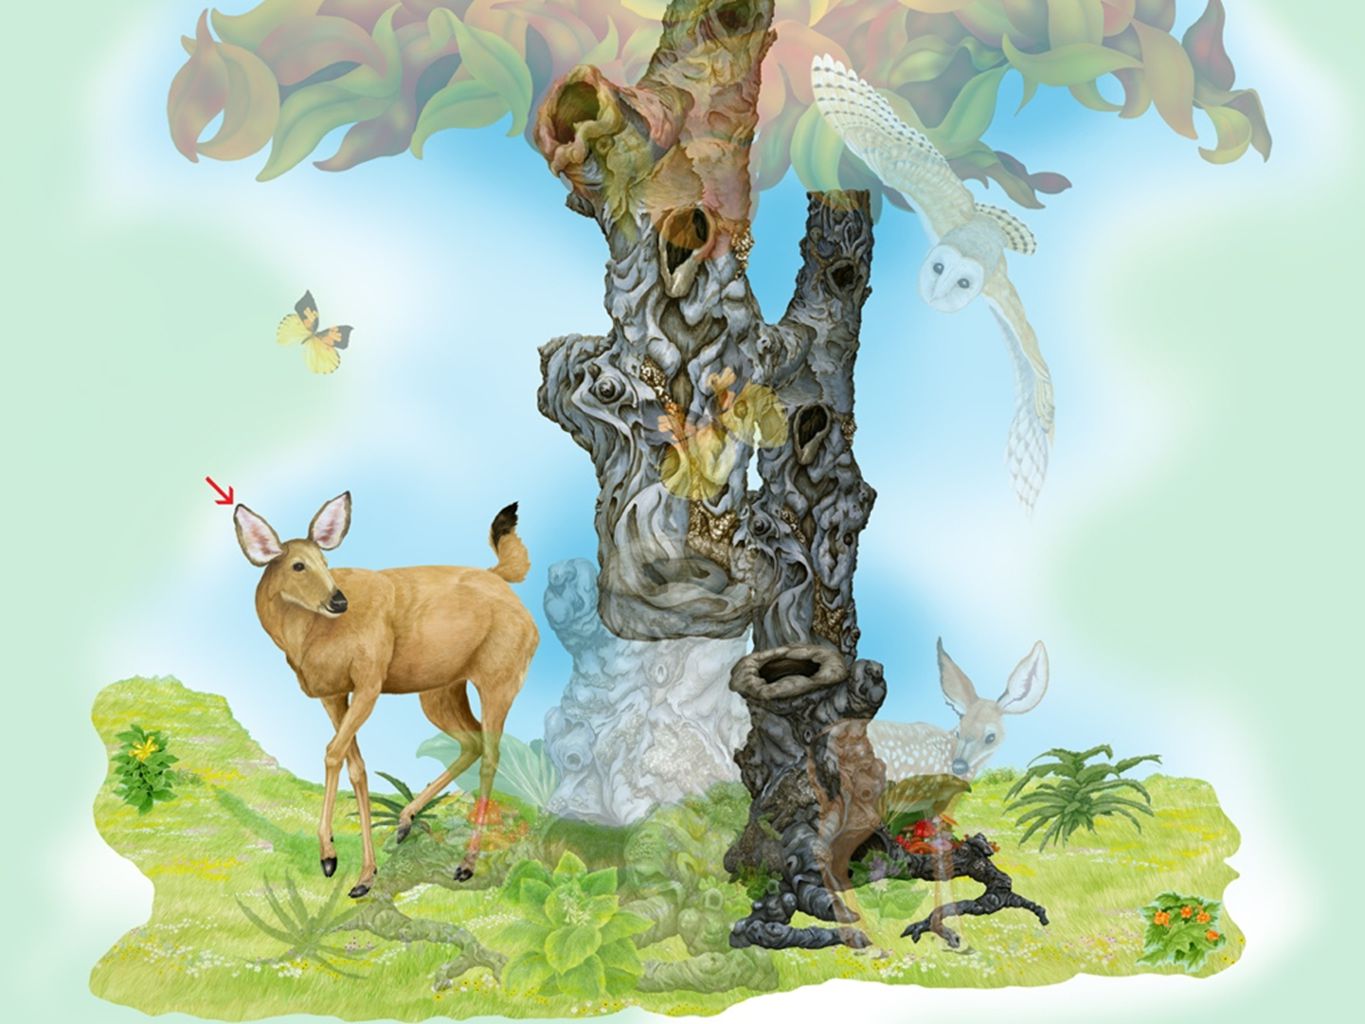
Your applique has finally arrived, you need to set up your projector and realign it with your under painting. Now you are ready to start installing your applique! Everything sits on the foreground grass applique so it is rear most and must go on first as seen on the following page with a red arrow. Turning off your projector allows you to see your first effort as in the page after. Now you can turn your projector back on and proceed with your installation.

15
On the following pages the red arrows will indicate each new installation. Be sure to count them. Add four background plants as on the following page. Next page. Add the dark tree trunk (Knarley Blue). Next page. Add the dark stump (Knarley Blue) over the grass and the dark tree trunk. Next page. Add the larger tree trunk over the dark tree trunk. Next page. Add the deer (Tanya) over the plant and grass foreground. Next page. Turn off the projector to check on your progress and then turn it back on.
. Next page. Add the dark stump (Knarley Blue) over the grass and the dark tree trunk. Next page. Add the larger tree trunk over the dark tree trunk. Next page. Add the deer (Tanya) over the plant and grass foreground. Next page. Turn off the projector to check on your progress and then turn it back on..")
22
This is when you will see one of the best examples of how important correct overlapping is for your overall effect. On the next page you add the large stump over the grass foreground and plant, the dark tree trunk, the dark stump, the larger tree trunk and the deer. Next page. Add the three remaining plants. Next page. Add two of the foliage applique and the fawn (Pylsbury). Next page. Add the remaining foliage applique. Next page. Add the barn owl (Bailey) and the two butterflies (Sundog). Next page. Turn off the projector and critique your efforts. Congratulations! You have your bragging rights! Do not forget to include a comforting beverage! All the very best from Aarart Applique.
. Next page. Add the remaining foliage applique. Next page. Add the barn owl (Bailey) and the two butterflies (Sundog). Next page. Turn off the projector and critique your efforts. Congratulations. You have your bragging rights. Do not forget to include a comforting beverage. All the very best from Aarart Applique..")
Similar presentations