Download presentation
Presentation is loading. Please wait.

1
Electronics Computer Club “the geek club” Where you will learn and have fun building interesting electronic gadgets (automation – controllers – robots). Dr. Hwang

2
Index 7-Segment Display Analog Input Output (PWM) Arduino Programming Bluetooth Breadboard Integrated Circuit (IC) EEPROM High Power ( 120 V AC) LED 8 x 8 dot matrix Blinking Fading Flashing Las Vegas Lights RGB Light Sensor Input Liquid-Crystal Display (LCD) Motion Sensor Motor DC Servo Stepper Object Sensor Photo Resistor Potentiometer Push Button Input Real-Time Clock Relay Resistor Color Code Internal pull-up/down SD Card Reader Sound Transistor High Power Ultrasonic Distance Sensor
 Arduino Programming Bluetooth Breadboard Integrated Circuit (IC) EEPROM High Power ( 120 V AC) LED 8 x 8 dot matrix Blinking Fading Flashing Las Vegas Lights RGB Light Sensor Input Liquid-Crystal Display (LCD) Motion Sensor Motor DC Servo Stepper Object Sensor Photo Resistor Potentiometer Push Button Input Real-Time Clock Relay Resistor Color Code Internal pull-up/down SD Card Reader Sound Transistor High Power Ultrasonic Distance Sensor")
3
Goal You will learn enough of the basics to be able to explore and create your own fascinating electronic gadgets to control your world... and may be even the worlds of others...

4
Simple Projects for Starters We’ll start off with the basics: Power supply Turning LED lights on and off Simple switches

5
Fun Projects for Intermediates Building on the basics: Las Vegas lights Light sensors 7 -segment LED displays Controlling motors Playing music

6
Advanced Projects Whatever you like to control… Ultrasonic distance sensor Temperature sensor Liquid Crystal Displays (LCD) Servo motors Stepper motors Real-time clock (RTC) Bluetooth
 Servo motors Stepper motors Real-time clock (RTC) Bluetooth")
7
Why do this? Why am I doing this? I am not getting paid for doing this It is just my hobby and passion

8
Smile Picture Time

9
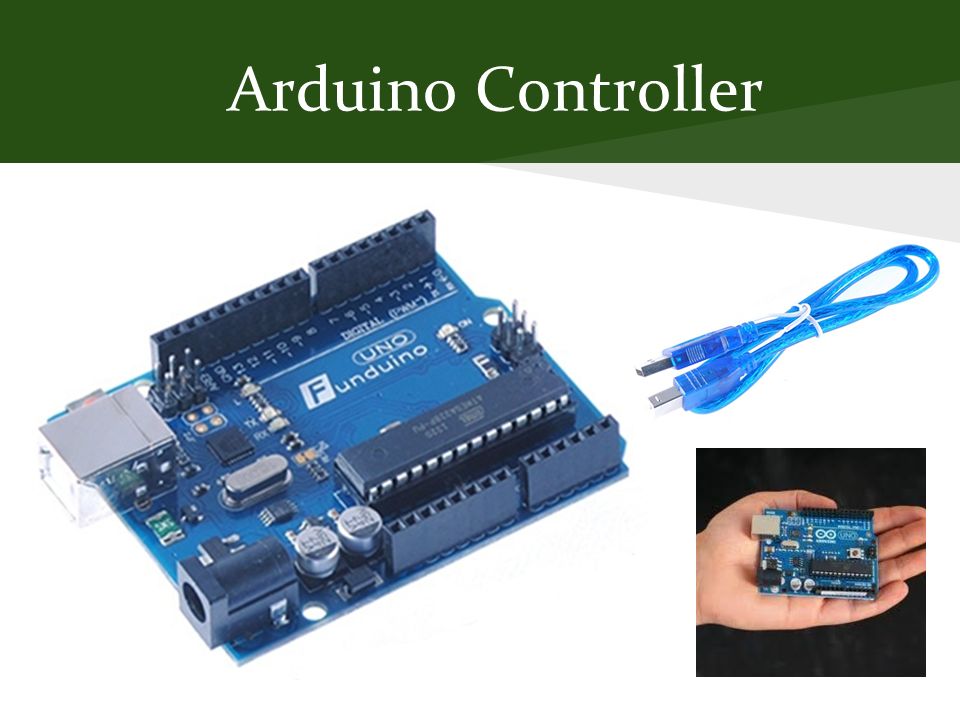
Arduino Controller

11
Arduino Details Model: Arduino Uno CPU: ATmega 328 Operating/Input Voltage: 5 V/ 7-12 V CPU Speed: 16 MHz Analog In/Out: 6 / 0 Digital IO/PWM: 14 / 6 EEPROM: 1 KB SRAM: 2 KB Flash: 32 KB UART: 1

12
Setup Need to install the Arduino development software so that you can teach the Arduino what to do. You can use either a PC or a Mac: Download for PCPC (http://faculty.lasierra.edu/~ehwang/electronics/arduino-1.0.5-windows.zip)http://faculty.lasierra.edu/~ehwang/electronics/arduino-1.0.5-windows.zip Download for MacMac (http://faculty.lasierra.edu/~ehwang/electronics/arduino-1.0.5-macosx.zip)http://faculty.lasierra.edu/~ehwang/electronics/arduino-1.0.5-macosx.zip

13
Installing Program for Windows After downloading… Unzip the downloaded folder You will get a folder called arduino- 1.0.5 Copy this arduino- 1.0.5 folder to the Programs Files directory in the C drive You will see the Arduino program icon inside this arduino- 1.0.5 folder Double-click the Arduino program icon to run the program

14
Installing Driver for Windows You need to install the driver for the Arduino board the first time you use it Plug in your Arduino board using the USB cable Right-click on My Computer Select Properties from the drop-down menu Click on Device Manager

15
Installing Driver for Windows Right-click on the Unknown device with the yellow exclamation mark Select Update Driver Software Select Browse my computer for driver software

16
Installing Driver for Windows Browse to the arduino- 1.0.5 folder Select the drivers folder that is inside this folder Click Next Click Install when asked whether you want to install the software

17
Installing Driver for Windows You should now see the Arduino Uno listed in the Device Manager window Remember the COM Port number listed next to it My example is COM 3

18
Com Port Setup You need to select the correct Com Port the first time you use it Select Tools from the Arduino program menu Then select Serial Port Then select the Com Port that you noted down from the last slide (Another way to find the correct Com Port is to disconnect the Arduino board and then connect it again. The Com Port that disappears and shows up again is the correct one to use)
.")
19
Arduino Programmer Double-Click on the Arduino icon to start the program if it is not already running For the lab computers, it’s in Start | All Programs | Applications

20
Teaching The Arduino To create a new program… Select File from the Arduino Program menu Then select Examples Then select Basics Then select BareMinimum

21
Teaching The Arduino You will see this empty template Code that you put inside the setup() routine is executed only once on startup Code that you put inside the loop() routine is executed repeatedly forever
 routine is executed only once on startup Code that you put inside the loop() routine is executed repeatedly forever")
22
Teaching The Arduino There is a light (LED) on the Arduino board that is connected to pin 13 The pinMode command tells the Arduino that you will be controlling pin 13 for OUTPUT
 on the Arduino board that is connected to pin 13 The pinMode command tells the Arduino that you will be controlling pin 13 for OUTPUT")
23
Teaching The Arduino The digitalWrite command sends a HIGH signal to pin 13. HIGH turns the LED on

24
Teaching The Arduino Press the upload button - to upload the program to the Arduino After uploading, the Arduino will automatically run the program Notice the LED is turned on

25
Teaching The Arduino Add a second digitalWrite command to send a LOW signal to pin 13. LOW turns the LED off

26
Teaching The Arduino Press the upload button - to run the program again with the changes What happened?

27
Teaching The Arduino Need to add a delay command after each digitalWrite to make the Arduino wait a bit The number in the delay command is the number of milliseconds

28
Teaching The Arduino Press the upload button - to run the program again with the changes The LED will now turn on for 1 second and then off for another second

29
Blinking LED Experiment 1 Modify the code so that it will turn on the LED for 2 seconds and turn off the LED for ½ a second

30
Blinking LED Experiment 1 Press the upload button - to run the program again with the changes Did it work?

31
Blinking LED Experiment 2 Modify the code so that the LED blinks like your heart beat

32
Blinking LED Experiment 2 Modify the code so that the LED blinks like your heart beat

33
Controlling an External LED We will connect an external LED to pin 3 Parts needed: A LED A resistor (brown-green-brown) A breadboard
 A breadboard")
34
Light-Emitting Diode (LED) Long leg is positiveShort leg is negative Symbol
 Long leg is positiveShort leg is negative Symbol")
35
How To Blow Up a LED To turn on a LED, you need to connect power to it: The positive (long) leg to 5 V The negative (short) leg to ground (GND) Don’t do it!
 leg to 5 V The negative (short) leg to ground (GND) Don’t do it!")
36
How NOT To Blow Up a LED If too much current (power) goes through a LED, you will blow up the LED right away So if you don’t want to blow up your LED, you’ll need to reduce the current by using a resistor
 goes through a LED, you will blow up the LED right away So if you don’t want to blow up your LED, you’ll need to reduce the current by using a resistor")
37
Resistors Resistors are used to reduce the amount of current that flows through a circuit Picture Symbol

38
Breadboard Allows you to easily connect components together

39
Breadboard Horizontal holes in Section 1 are connected together. Usually used for + 5 V Horizontal holes in Section 4 are connected together. Usually used for GND

40
Breadboard Vertical holes in Section 3 are connected together Vertical holes in Section 2 are connected together

41
Power FROM the Arduino The Arduino board has a built-in 5 V power supply The pin labeled 5 V is positive + The pins labeled GND are –

42
Controlling an External LED Connect the + end (long leg) of the LED to Digital pin 3 Connect the – end (short leg) of the LED to a 150Ω (brown-green-brown) resistor Connect the other end of the resistor to GND
 of the LED to Digital pin 3 Connect the – end (short leg) of the LED to a 150Ω (brown-green-brown) resistor Connect the other end of the resistor to GND")
43
Controlling an External LED Modify your code to control pin 3 instead of pin 13 Upload and run your code

44
Blinking LED Experiment 1 Connect your LED to pin 7 instead of pin 3 Modify your code to tell the Arduino that you want to control the LED that is connected to pin 7 Run the program to see that you still get the same result Notice that there are three places in the code where the number 3 has to be changed to the number 7

45
Blinking LED Experiment 2 Instead of putting the number 7 in several lines, you can define a variable (led) and assign the value 7 to it Now you just use the variable led instead of the number 7
 and assign the value 7 to it Now you just use the variable led instead of the number 7")
46
How To Blow Up a LED To turn on a LED you need to have power connected to it: The + from the power to the + of the LED The – from the power to the – of the LED Don’t do it!

47
How NOT To Blow Up a LED If too much current (power) goes through a LED, you will blow up the LED right away So if you don’t want to blow up your LED, you’ll need to reduce the current by using a resistor
 goes through a LED, you will blow up the LED right away So if you don’t want to blow up your LED, you’ll need to reduce the current by using a resistor")
48
Resistors Resistors are used to reduce the amount of current that flows through a circuit Picture Symbol

49
Power FROM the Arduino The Arduino board has a built-in 5 V voltage regulator The pin labeled 5 V is + The pins labeled GND are –

50
Let there be Light! Picture Schematic Make sure you have the LED polarity connected correctly the long leg is + (orange-orange-brown)
.")
51
And there is no Light (: If your LED did not light up then you probably reversed the two legs of the LED Reversing the LED legs will not destroy the LED. It just won’t light up. If your LED lights up, reverse the legs to see that it won’t light up Try it now

52
Connection Example CorrectWrong

53
Resistor Experiment Replace the 150 (brown-green-brown) resistor with another resistor. What happens to the LED? Try different resistor values and notice the intensity of the LED. Always use at least a 150 resistor, otherwise your LED will be destroyed!

54
Resistor Color Code

55
Let there be Light! You can put the resistor at the + side of the circuit and get the same result So it’s OK as long as you have a resistor in series with the LED

56
Question What’s the resulting difference between these two circuits?

57
Question What happens if you connected this circuit?

58
Question What’s the resulting difference between these two circuits? * K = 1000

59
Question What happens if you connected this circuit?

60
Question What happens if you connected this circuit? This is a short circuit – never do this!

61
Two LEDs Connect two LEDs to the Arduino board One on pin 2 and the second on pin 3 Make sure you use a resistor

62
Two LEDs Modify the code to turn on and off both LEDs at the same time

63
Two Flashing LEDs Modify the code to turn on one LED at a time The net effect is that you’ll see the two LEDs flash back and forth

64
Don’t Be Afraid! Of making a wrong connection. Most of the time we’ll be working with low voltages, i.e. less than 12 V DC. So... You are not going to hurt yourself You are not going to blow up your house The worse that can happen is you destroy some components

65
Danger – 120 V AC - Danger The only thing that can kill you is if you are not careful when you play with 120 V AC i.e. electricity from a wall plug. If you connect a piece of wire between the two holes in the wall plug, you will be dead before you finish reading this sentence. So don’t do it!

66
Don’t Do It! I don’t mean that you cannot play with 120V AC - you can, but be very VERY careful What I mean is don’t connect a piece of wire between the two holes in a wall plug

67
Kit Parts List 1 Arduino Uno R3 controller board 1 USB cable 1 breadboard 5 LEDs (red, yellow, green, blue, white) 1 7-segment LED display 9 resistors (150 5, 330, 1K, 4.7K, 22K) 1 push button 1 potentiometer (10K) 1 photocell 1 buzzer 11 wires assorted colors
 1 7-segment LED display 9 resistors (150 5, 330, 1K, 4.7K, 22K) 1 push button 1 potentiometer (10K) 1 photocell 1 buzzer 11 wires assorted colors")
68
Tools Breadboard and Wires

69
Tools Multimeter AnalogDigital

70
Components Resistors Capacitors Transistors Diode Potentiometer

71
Components Light Emitting Diodes (LEDs) 7-segment display
 7-segment display")
72
Components Push Buttons and Switches

73
Components Relays

74
Components Integrated Circuits (ICs) “Chips”
 Chips")
75
Electrical Power All electronic circuits require electrical power to operate Digital circuits typically require a 5 V DC power source Like a battery, a DC power source will always have a positive (+) end and a negative (–) end Symbolor
 end and a negative (–) end Symbolor")
76
Power Supply Power adapters have different voltages and current ratings Need one with 9 V DC and at least 0.5 A ( 500 mA) 9 V batteries can also be used for small circuits requiring low power
 9 V batteries can also be used for small circuits requiring low power")
77
Power Supply The plug – is usually referred to as “ground” or GND Make sure you connect the + and – correctly This is one main cause of destroying your circuit. Symbol

78
Voltage Regulator Use a voltage regulator to convert from 9 V DC down to 5 V DC Part number: 7805

79
Voltage Regulator Connections

80
Electrical Power To turn on any electronic device, you need to connect to both the + and the – ends of the power source Use wires to connect between the power source and your device One main cause of destroying your circuit is reversing the + and the – ends

81
Power TO the Arduino You can either plug in a 9 V adapter or a USB cable from a computer to the Arduino to provide power to the Arduino USB 9 V adapter

82
Power FROM the Arduino The Arduino board has a built-in 5 V voltage regulator The pin labeled 5 V is + The pins labeled GND are –

83
Power FROM the Arduino The convention is to use red for positive and black for negative Connect a red wire from the 5 V pin to the top row on the breadboard Connect a black wire from the GND pin to the bottom row on the breadboard

84
Potentiometer A potentiometer is simply a variable resistor, i.e., a resistor whose value can be changed by turning a knob PictureSymbol

85
Potentiometer Experiment Add a potentiometer (in series) to your LED connection
 to your LED connection")
86
Potentiometer Experiment Turn the potentiometer and notice the brightness of the LED

87
Photoresistor A photoresistor or photocell is a resistor whose resistance decreases with increasing light intensity Picture Symbol

88
Photoresistor Experiment Add a photoresistor (in series) to your LED connection
 to your LED connection")
89
Photoresistor Experiment Change the amount of light shining on the photoresistor and notice the brightness of the LED You may remove the resistor if the LED is really dim

90
Push Buttons A push button is an on-off switch. Press to turn on. Release to turn off. (There are some push buttons that work the opposite, i.e. press to turn off and release to turn on)
.")
91
Push Buttons Be careful with the orientation of the 4 legs Legs 1 and 3 are always connected Legs 2 and 4 are always connected Legs 1 and 2 are connected only when you press the button Legs 3 and 4 are connected only when you press the button 2 1 4 3

92
Push Button Experiment Add a push button (in series) to your LED connection Use legs 1 and 2 of the push button
 to your LED connection Use legs 1 and 2 of the push button")
93
Push Button Experiment Push the button to turn on the LED Release the button to turn off the LED If the LED is always on, then you have used the wrong legs of the push button. Turn it around and try again

94
Blinking LED How do we make the LED blink? You can manually do that by pressing the button to turn it on, then release the button to turn it off, then on again, then off, on, off, on, off, etc. But that’s boring! And your finger will get very tire very soon We’ll teach the Arduino to do that for us

95
Connection Connect the + end of the LED to Digital pin 2 Connect the – end of the LED to a resistor and then to GND

96
To Turn On A LED BeforeAfter

97
To Turn On A LED To turn on the LED, pin 2 must output 5 V To turn off the LED, pin 2 must not output a voltage, i.e. be at GND In digital circuits, we often use “ 1 ” or “HIGH” to mean 5 V and “ 0 ” or “LOW” for GND

98
Mini Las Vegas Lights Connect 5 LEDs to the Arduino. Use digital pins 2 to 6 Use a 150 Ω resistor for all the LEDs Modify the code to make the 5 LEDs come on one at a time in sequence

99
Mini Las Vegas Lights int led_1 = 2; int led_2 = 3; int led_3 = 4; int led_4 = 5; int led_5 = 6; void setup() { pinMode(led_1, OUTPUT); pinMode(led_2, OUTPUT); pinMode(led_3, OUTPUT); pinMode(led_4, OUTPUT); pinMode(led_5, OUTPUT); } void loop() { digitalWrite(led_1, HIGH); digitalWrite(led_2, LOW); digitalWrite(led_3, LOW); digitalWrite(led_4, LOW); digitalWrite(led_5, LOW); delay(1000); digitalWrite(led_1, LOW); digitalWrite(led_2, HIGH); digitalWrite(led_3, LOW); digitalWrite(led_4, LOW); digitalWrite(led_5, LOW); delay(1000); digitalWrite(led_1, LOW); digitalWrite(led_2, LOW); digitalWrite(led_3, HIGH); digitalWrite(led_4, LOW); digitalWrite(led_5, LOW); delay(1000); digitalWrite(led_1, LOW); digitalWrite(led_2, LOW); digitalWrite(led_3, LOW); digitalWrite(led_4, HIGH); digitalWrite(led_5, LOW); delay(1000); digitalWrite(led_1, LOW); digitalWrite(led_2, LOW); digitalWrite(led_3, LOW); digitalWrite(led_4, LOW); digitalWrite(led_5, HIGH); delay(1000); }
 { pinMode(led_1, OUTPUT); pinMode(led_2, OUTPUT); pinMode(led_3, OUTPUT); pinMode(led_4, OUTPUT); pinMode(led_5, OUTPUT); } void loop() { digitalWrite(led_1, HIGH); digitalWrite(led_2, LOW); digitalWrite(led_3, LOW); digitalWrite(led_4, LOW); digitalWrite(led_5, LOW); delay(1000); digitalWrite(led_1, LOW); digitalWrite(led_2, HIGH); digitalWrite(led_3, LOW); digitalWrite(led_4, LOW); digitalWrite(led_5, LOW); delay(1000); digitalWrite(led_1, LOW); digitalWrite(led_2, LOW); digitalWrite(led_3, HIGH); digitalWrite(led_4, LOW); digitalWrite(led_5, LOW); delay(1000); digitalWrite(led_1, LOW); digitalWrite(led_2, LOW); digitalWrite(led_3, LOW); digitalWrite(led_4, HIGH); digitalWrite(led_5, LOW); delay(1000); digitalWrite(led_1, LOW); digitalWrite(led_2, LOW); digitalWrite(led_3, LOW); digitalWrite(led_4, LOW); digitalWrite(led_5, HIGH); delay(1000); }")
100
Play Sound A buzzer or speaker converts electricity to sound Connect the – terminal on the speaker to GND Connect the + terminal on the speaker topin 8 of the Arduino

101
Play Sound Use the tone command to play a note Use the noTone command to not play a note

102
Play Sound From the Arduino menu, select: File, then Examples, then Digital, then ToneMelody You will see this code Run the program and you should hear something

103
Louder Sound In order to get more volume, you’ll need to use a transistor to amplify the sound to make it louder Part number for this NPN transistor : 2N3904

104
Louder Sound Connect the transistor to the speaker as shown Be careful to get the orientation correct

105
Christmas Song & Lights

106
Counting 1 – 2 – 3

107
Counting from 0 to 9 using a 7 -segment LED display A 7 -segment LED display is just seven separate LEDs packaged together The LEDs are placed in a figure 8 pattern The ten digits ( 0 to 9 ) can be formed by turning on different LEDs
 can be formed by turning on different LEDs")
108
Counting 1 – 2 – 3 Common Cathode means the negative end for the seven LEDs are connected together

109
Counting 1 – 2 – 3 Part name: Common Cathode 7 -segment Display g – 1 f – 2 GND – 3 e – 4 d – 5 10 – a 9 – b 8 – GND 7 – c 6 – DP

110
Counting 1 – 2 – 3 To show the digit 0, you need to turn on segments a, b, c, d, e and f, and turn off segment g To show the digit 1, you need to turn on segments b and c, and turn off the rest To show the digit 2, you need to turn on segments a, b, d, e and g, and turn off the rest Etc.

111
Counting 1 – 2 – 3 Make the following connections between the 7 -segment display and the Arduino 7 -segment pins 1 2 3 4 5 6 7 9 10 Arduino pins 1 2 GND 4 5 6 7 9 10

112
Turn on Segments B and C int segB = 9 ; int segC = 7 ; void setup() { pinMode(segB, OUTPUT); pinMode(segC, OUTPUT); } void loop() { digitalWrite(segB, HIGH); digitalWrite(segC, HIGH); }
 { pinMode(segB, OUTPUT); pinMode(segC, OUTPUT); } void loop() { digitalWrite(segB, HIGH); digitalWrite(segC, HIGH); }")
113
Counting 1 – 2 – 3 // define where the 7 LEDs // are connected int segA = 10 ; int segB = 9 ; int segC = 7 ; int segD = 5 ; int segE = 4 ; int segF = 2 ; int segG = 1 ; int segDP = 6 ; void setup() { pinMode(segA, OUTPUT); pinMode(segB, OUTPUT); pinMode(segC, OUTPUT); pinMode(segD, OUTPUT); pinMode(segE, OUTPUT); pinMode(segF, OUTPUT); pinMode(segG, OUTPUT); pinMode(segDP, OUTPUT); }
 { pinMode(segA, OUTPUT); pinMode(segB, OUTPUT); pinMode(segC, OUTPUT); pinMode(segD, OUTPUT); pinMode(segE, OUTPUT); pinMode(segF, OUTPUT); pinMode(segG, OUTPUT); pinMode(segDP, OUTPUT); }")
114
Counting 1 – 2 – 3 void loop() { // code to display the digit 0 digitalWrite(segA, HIGH); digitalWrite(segB, HIGH); digitalWrite(segC, HIGH); digitalWrite(segD, HIGH); digitalWrite(segE, HIGH); digitalWrite(segF, HIGH); digitalWrite(segG, LOW); digitalWrite(segDP, LOW); delay( 1000 ); // code to display the digit 1 digitalWrite(segA, LOW); digitalWrite(segB, HIGH); digitalWrite(segC, HIGH); digitalWrite(segD, LOW); digitalWrite(segE, LOW); digitalWrite(segF, LOW); digitalWrite(segG, LOW); digitalWrite(segDP, LOW); delay( 1000 ); … etc. }

115
Fading Light You can control the brightness of a LED by specifying how much power to provide to it This is done by using an analog signal instead of a digital signal

116
Digital vs Analog Signals A digital signal has only two values: high or low High means full power (i.e. 5 V) Low means no power (i.e. 0 V) A LED is on if you give it 5 V A LED is off if you give it 0 V An analog signal can be any value between 0 V and 5 V So you can adjust the brightness of the LED by giving it any value in between, say 3.2 V
 Low means no power (i.e. 0 V) A LED is on if you give it 5 V A LED is off if you give it 0 V An analog signal can be any value between 0 V and 5 V So you can adjust the brightness of the LED by giving it any value in between, say 3.2 V.")
117
Fading Light The analog output pins on the Arduino board are labeled with a ~ symbol They are pins 3, 5, 6, 9, 10 and 11

118
Pulse Width Modulation (PWM) To be precised, the Arduino Uno board does not have true analog outputs It uses a method called Pulse Width Modulation (PWM) to produce a similar effect as an analog signal PWM turns on and off a digital signal at different frequencies
 To be precised, the Arduino Uno board does not have true analog outputs It uses a method called Pulse Width Modulation (PWM) to produce a similar effect as an analog signal PWM turns on and off a digital signal at different frequencies")
119
Fading Light Connect a LED to pin 3 Remember what you need to do? The long leg ( + ) of the LED to pin 3 The short leg ( - ) of the LED to a resistor The other end of the resistor to GND
 of the LED to pin 3 The short leg ( - ) of the LED to a resistor The other end of the resistor to GND.")
120
Fading Light Now type in this program and run it Change the fadeValue from 7 to some other number between 0 and 255 What do you notice?

121
Fading Light Use the for loop command to tell the computer to automatically change the fadeValue

122
Fading Light Use two for loops to make the LED fade in and out The first for loop makes the LED fade in The second for loop makes the LED fade out

123
RGB LED A RGB LED is a LED with three individual color (red, green, blue) LEDs built in. By controlling the brightness of each individual LED you can get any color you want Common negative Red positive Green positive Blue positive

124
RGB LED The negative connection for the three LEDs are connected in common. Connect the positive end of each LED to a 150 resistor Connect the other end of the resistor to the Arduino digital pins 9, 10 and 11

125
RGB LED int redPin = 11; int greenPin = 10; int bluePin = 9; void setup() { pinMode(redPin, OUTPUT); pinMode(greenPin, OUTPUT); pinMode(bluePin, OUTPUT); // purple analogWrite(redPin, 80); analogWrite(greenPin, 0); analogWrite(bluePin, 80); } Use the analogWrite command to control the brightness of each LED
 { pinMode(redPin, OUTPUT); pinMode(greenPin, OUTPUT); pinMode(bluePin, OUTPUT); // purple analogWrite(redPin, 80); analogWrite(greenPin, 0); analogWrite(bluePin, 80); } Use the analogWrite command to control the brightness of each LED")
126
RGB LED int redPin = 11; int greenPin = 10; int bluePin = 9; void setup() { pinMode(redPin, OUTPUT); pinMode(greenPin, OUTPUT); pinMode(bluePin, OUTPUT); } void loop() { setColor(255, 0, 0); // red delay(1000); setColor(0, 255, 0); // green delay(1000); setColor(0, 0, 255); // blue delay(1000); setColor(255, 255, 0); // yellow delay(1000); setColor(80, 0, 80); // purple delay(1000); setColor(0, 255, 255); // aqua delay(1000); } void setColor(int red, int green, int blue) { analogWrite(redPin, red); analogWrite(greenPin, green); analogWrite(bluePin, blue); }
 { pinMode(redPin, OUTPUT); pinMode(greenPin, OUTPUT); pinMode(bluePin, OUTPUT); } void loop() { setColor(255, 0, 0); // red delay(1000); setColor(0, 255, 0); // green delay(1000); setColor(0, 0, 255); // blue delay(1000); setColor(255, 255, 0); // yellow delay(1000); setColor(80, 0, 80); // purple delay(1000); setColor(0, 255, 255); // aqua delay(1000); } void setColor(int red, int green, int blue) { analogWrite(redPin, red); analogWrite(greenPin, green); analogWrite(bluePin, blue); }")
127
Button Input Use legs 1 and 2 of the push button

128
Button Input digitalRead The state of the button (push or not push) is saved in the variable buttonState This value is printed out on the monitor Click the icon to open up the monitor
 is saved in the variable buttonState This value is printed out on the monitor Click the icon to open up the monitor")
129
Button Input Experiment 1 Modify the code so that the LED that is connected to pin 13 on the Arduino is turned on when the button is pressed int pushButton = 2; int led = 13; void setup() { pinMode(pushButton, INPUT); pinMode(led, OUTPUT); } void loop() { int buttonState = digitalRead(pushButton); if (buttonState == 1) { digitalWrite(led, HIGH); } else { digitalWrite(led, LOW); } delay(1); // for stability }
 { pinMode(pushButton, INPUT); pinMode(led, OUTPUT); } void loop() { int buttonState = digitalRead(pushButton); if (buttonState == 1) { digitalWrite(led, HIGH); } else { digitalWrite(led, LOW); } delay(1); // for stability }")
130
Button Input Experiment 2 Add a push button to the Blinking LED circuit Modify the code so that the LED blinks only when the button is pressed

131
Button Input Experiment 3 Add a push button to the Las Vegas Lights circuit Modify the code so that the lights flash only when the button is pressed

132
Button Input Experiment 4 Add a push button to the Counting 1-2-3 circuit Modify the code so that it counts only when the button is pressed

133
Internal Resistor Recall that in order for the push button to work you need to have a resistor There is a built-in resistor for each digital pin

134
Internal Resistor The OUTPUT pinMode is like having a resistor connected to gnd – but use for input The push button needs to connect to + 5 V LED turns on when button is pressed void setup() { pinMode(2, OUTPUT); // for input pinMode(13, OUTPUT); } void loop() { int value = digitalRead(2); digitalWrite(13, value); }
 { pinMode(2, OUTPUT); // for input pinMode(13, OUTPUT); } void loop() { int value = digitalRead(2); digitalWrite(13, value); }")
135
Internal Resistor The INPUT_PULLUP pinMode is like having a resistor connected to + 5 V The push button needs to connect to gnd LED turns off when button is pressed void setup() { pinMode(2, INPUT_PULLUP); // pull-up pinMode(13, OUTPUT); } void loop() { int value = digitalRead(2); digitalWrite(13, value); }
 { pinMode(2, INPUT_PULLUP); // pull-up pinMode(13, OUTPUT); } void loop() { int value = digitalRead(2); digitalWrite(13, value); }")
136
Analog Input The analog input pins on the Arduino board are labeled A 0 to A 5 Connect this circuit

137
Analog Input Use the analogRead command to read an analog signal Use Serial.println to print a value to the Serial Monitor

138
Analog Input Experiment Modify the code so that the LED will turn on when it is dark, and turn off when it is light Hint: Note the minimum and maximum values of the sensor, then use the IF command to test whether it is light or dark like this: if (sensorValue < 500) { digitalWrite(led, HIGH); } else { digitalWrite(led, LOW); }
 { digitalWrite(led, HIGH); } else { digitalWrite(led, LOW); }")
139
Light Sensor The brighter the light, the faster the LEDs will flash

140
Light Sensor Code

141
High Power To turn on high power devices such as 120 VAC (DANGER) lights, motors, and other 120 VAC equipment Need to use a relay because the Arduino (or any other controller circuits) do not have that much driving power
 lights, motors, and other 120 VAC equipment Need to use a relay because the Arduino (or any other controller circuits) do not have that much driving power")
142
Relay coil common NCNO Part name: DPDT relay

143
Relay You should hear the switch click To test it out: Connect one end of the coil to +5V and the other end to Gnd

144
Relay To test it out: Connect the common contact to + 5 V Connect the NO contact to the positive end of an LED through a resistor and then to Gnd

145
Transistor A transistor is used to boost up the power to turn on the relay Part number for this NPN transistor : 2N3904

146
Transistor There are two general types of transistors NPN and PNP

147
NPN Transistor A positive at B will turn on the transistor allowing the negative to flow from E to C Part Number: 2N3904

148
PNP Transistor A negative at B will turn on the transistor allowing the positive to flow from E to C Part Number: 2N3906

149
More Powerful Transistor There might be times when you need an even more powerful transistor Darlington Transistors General purpose Can handle up to: Part Number: TIP120,121,122 (NPN) TIP125,126,127 (PNP) 60,80,100 V 5 Amp 65 Watt
 TIP125,126,127 (PNP) 60,80,100 V 5 Amp 65 Watt")
150
More Powerful Transistor Connection for TIP 120 (NPN)
")
151
Diode A diode has low (ideally zero) resistance to current flow in one direction, and high (ideally infinite) resistance in the other. Part number: 1N4148

152
Diode LED turned onLED turned off

153
Diode

154
High Power Connection

155
Why the Diode? When a voltage is applied to a coil it creates a magnetic field. When the voltage is removed the magnetic field collapses and creates a reverse polarity voltage and can be many times the value of the original applied voltage. This transient voltage pulse can damage other components in the circuit. Having a reversed biased diode across the coil allows the diode to conduct for reverse polarity voltages and creates a 'short circuit' across the coil that allows the pulse to be dissipated in the resistance of the coil wiring.

156
EEPROM EEPROM is a type of memory that will remember its content even when there is no power (like your thumb drive) The Arduino has a built-in EEPROM with a 1024 byte capacity
 The Arduino has a built-in EEPROM with a 1024 byte capacity")
157
EEPROM To Write to the EEPROM

158
EEPROM To Read from the EEPROM

159
End End of the basic introductory tutorials

160
Servo Motor Servo motor can only turn half a circle Connect the following: brown wire to GND red wire to 5 V yellow wire to pin 9

161
Servo Motor From the Arduino menu, select: File, then Examples, then Servo, then Sweep Run the program to see the motor move

162
Stepper Motor Unipolar stepper motor turns only one step at a time in either direction depending on the control Need a ULN 2003 Darlington driver chip

163
Stepper Motor Four-wire control Advantage – current is off when motor is off; motor will not get hot

164
Stepper Motor Four-wire control void setup() { pinMode(8, OUTPUT); pinMode(9, OUTPUT); pinMode(10, OUTPUT); pinMode(11, OUTPUT); } void loop() { for(int i=0; i<512; i++){ // clockwise motor(1,1,0,0); motor(0,1,1,0); motor(0,0,1,1); motor(1,0,0,1); } delay(1000); for(int i=0; i<512; i++){ // counter clockwise motor(1,0,0,1); motor(0,0,1,1); motor(0,1,1,0); motor(1,1,0,0); } delay(1000); } void motor(int orange, int yellow, int pink, int blue) { // each call will rotate the motor one step digitalWrite(8, orange); digitalWrite(9, yellow); digitalWrite(10, pink); digitalWrite(11, blue); delay(2); }
 { pinMode(8, OUTPUT); pinMode(9, OUTPUT); pinMode(10, OUTPUT); pinMode(11, OUTPUT); } void loop() { for(int i=0; i<512; i++){ // clockwise motor(1,1,0,0); motor(0,1,1,0); motor(0,0,1,1); motor(1,0,0,1); } delay(1000); for(int i=0; i<512; i++){ // counter clockwise motor(1,0,0,1); motor(0,0,1,1); motor(0,1,1,0); motor(1,1,0,0); } delay(1000); } void motor(int orange, int yellow, int pink, int blue) { // each call will rotate the motor one step digitalWrite(8, orange); digitalWrite(9, yellow); digitalWrite(10, pink); digitalWrite(11, blue); delay(2); }")
165
Stepper Motor Two-wire control Disadvantage – current is always on even when motor is off; motor will get hot

166
Stepper Motor Two-wire control void setup() { pinMode(8, OUTPUT); pinMode(9, OUTPUT); } void loop() { for(int i=0; i<512; i++){ // clockwise motor(1,1); // 1,1,0,0 motor(0,1); // 0,1,1,0 motor(0,0); // 0,0,1,1 motor(1,0); // 1,0,0,1 } delay(1000); for(int i=0; i<512; i++){ // counter clockwise motor(1,0); // 1,0,0,1 motor(0,0); // 0,0,1,1 motor(0,1); // 0,1,1,0 motor(1,1); // 1,1,0,0 } delay(1000); } void motor(int orange, int yellow) { // pink is always the inverse of orange // blue is always the inverse of yellow digitalWrite(8, orange); digitalWrite(9, yellow); delay(2); }
 { pinMode(8, OUTPUT); pinMode(9, OUTPUT); } void loop() { for(int i=0; i<512; i++){ // clockwise motor(1,1); // 1,1,0,0 motor(0,1); // 0,1,1,0 motor(0,0); // 0,0,1,1 motor(1,0); // 1,0,0,1 } delay(1000); for(int i=0; i<512; i++){ // counter clockwise motor(1,0); // 1,0,0,1 motor(0,0); // 0,0,1,1 motor(0,1); // 0,1,1,0 motor(1,1); // 1,1,0,0 } delay(1000); } void motor(int orange, int yellow) { // pink is always the inverse of orange // blue is always the inverse of yellow digitalWrite(8, orange); digitalWrite(9, yellow); delay(2); }")
167
DC Motor DC motor turns continuously in either direction depending on the polarity of the wires Need a L 293D H-Bridge driver chip to control the direction and speed of the turning

168
DC Motor L 293D IC L 293D H-Bridge IC1 – Enable pin for motor 1 2 & 7 – Control for motor 1 3 & 6 – Output to motor 1 9 – Enable pin for motor 2 10 & 15 – Control for motor 2 11 & 14 – Output to motor 2 4, 5, 12 & 13 – Gnd 8 – +9-12 V supply for motor 16 - +5 V supply for IC

169
DC Motor Control Logic L 293D Control logic EnableInput 1 Input 2 Motor 0××stop 100 101turn clockwise 110turn anti-clockwise 111stop

170
DC Motor Connections ArduinoL 293D Description 111Enable 102Input 1 97Input 2 3 & 6motor wires 4Ground 8+5V or +9V 16+5V

171
DC Motor Connections

172
DC Motor Code int enablePin = 11; // enable pin int in1Pin = 10; // input 1 int in2Pin = 9; // input 2 int switchPin = 7; // switch to control direction int potPin = A0; // potentiometer to control speed void setup() { pinMode(enablePin, OUTPUT); pinMode(in1Pin, OUTPUT); pinMode(in2Pin, OUTPUT); pinMode(switchPin, INPUT_PULLUP); } void loop() { int speed = analogRead(potPin) / 4; boolean direction = digitalRead(switchPin); analogWrite(enablePin, speed); // turn on motor digitalWrite(in1Pin, direction); // set direction digitalWrite(in2Pin, !direction); }
 { pinMode(enablePin, OUTPUT); pinMode(in1Pin, OUTPUT); pinMode(in2Pin, OUTPUT); pinMode(switchPin, INPUT_PULLUP); } void loop() { int speed = analogRead(potPin) / 4; boolean direction = digitalRead(switchPin); analogWrite(enablePin, speed); // turn on motor digitalWrite(in1Pin, direction); // set direction digitalWrite(in2Pin, !direction); }")
173
Liquid-Crystal Display (LCD) A LCD is used to display characters There are different sizes Most common is the 2 row x 16 column
 A LCD is used to display characters There are different sizes Most common is the 2 row x 16 column")
174
Liquid-Crystal Display (LCD)
")
175
LCDconnect toArduino Vss pin 1 Gnd Vcc pin 2 + 5 V Vo pin 3 middle pin of potentiometer RS pin 4 digital pin 12 R/W pin 5 Gnd E(Enable) pin 6 digital pin 11 D 4 pin 11 digital pin 5 D 5 pin 12 digital pin 4 D 6 pin 13 digital pin 3 D 7 pin 14 digital pin 2 Backlight + pin 15 to + 5 V with resistor (optional) Backlight GND pin 16 (optional) Two ends of potentiometer to + 5 V and ground
 pin 6 digital pin 11 D 4 pin 11 digital pin 5 D 5 pin 12 digital pin 4 D 6 pin 13 digital pin 3 D 7 pin 14 digital pin 2 Backlight + pin 15 to + 5 V with resistor (optional) Backlight GND pin 16 (optional) Two ends of potentiometer to + 5 V and ground")
176
Liquid-Crystal Display (LCD) From the Arduino menu, select: File, then Examples, then LiquidCrystal, then HelloWorld Run the program to see the words “Hello World” Adjust brightness
 From the Arduino menu, select: File, then Examples, then LiquidCrystal, then HelloWorld Run the program to see the words Hello World Adjust brightness")
177
Object Sensor The object sensor detects whether there is an object in front of it The maximum sensor distance is about 6 inches Connect the following: Vcc to 5 V GND to GND Out to pin 2 Part number: IR obstacle avoidance

178
Object Sensor The output signal Out is low when there is an object in front of the sensor, otherwise it is high.

179
Ultrasonic Distance Sensor The ultrasonic distance sensor measures the distance to an object by bouncing off sound wave from the object and measuring the time that it takes for the sound wave to travel to the object and back. Connect the following: Vcc to 5 V Trig to pin 7 Echo to pin 8 GND to GND Part number: HC-SR 04

180
Ultrasonic Distance Sensor Code

181
The motion sensor senses the movement of an object such as a person. Motion Sensor Connect the following: Vcc to 5 V Out to pin 3 GND to GND Part number: HC-SR 501

182
Motion Sensor Code

183
You can adjust the detection sensitivity You can adjust the time delay Motion Sensor Adjustments Time delay adjustment Sensitivity adjustment

184
To control more LEDs Need MAX 7219 IC Can control: –eight 7-segment common-cathode LED or –8 × 8 dot matrix Need LedControl.h library More Lights

185
Connections: DIN to Arduino pin 12 LOAD to Arduino pin 11 CLK to Arduino pin 10 Resistor 10kΩ between ISET and V+ Capacitor 0.1μF (104) between V+ and GND DIG 0-7 and Seg A-G V+ GND More Lights
 between V+ and GND DIG 0-7 and Seg A-G V+ GND More Lights")
186
#include "LedControl.h" // MAX7219 connections int DIN = 12; int LOAD = 11; int CLK = 10; int NO = 1; // number of MAX7219 devices connected LedControl lc=LedControl(DIN,CLK,LOAD,NO); void setup() { // the first parameter is the address of the MAX7219 chip in the daisy chain lc.shutdown(0,false); // The MAX7219 is in power-saving mode on startup lc.setIntensity(0,8); // set the brightness //setDigit(int addr, int digit, byte value, boolean dp) lc.setDigit(0,0,8,false); lc.setChar(0,3,'E',false); } More Lights
; void setup() { // the first parameter is the address of the MAX7219 chip in the daisy chain lc.shutdown(0,false); // The MAX7219 is in power-saving mode on startup lc.setIntensity(0,8); // set the brightness //setDigit(int addr, int digit, byte value, boolean dp) lc.setDigit(0,0,8,false); lc.setChar(0,3, E ,false); } More Lights")
187
Integrated Circuit An integrated circuit (IC) also known as a “chip” is a component with a complex digital circuit inside There are many different ICs with different kinds of circuits For example, the Intel Pentium CPU is a chip, and memory chips
 also known as a chip is a component with a complex digital circuit inside There are many different ICs with different kinds of circuits For example, the Intel Pentium CPU is a chip, and memory chips")
188
NAND Gate IC The NAND logic gate is one of the main building blocks for all digital circuits ABY 001 011 101 110 Operation (Truth) Table Part number: 74HC00 In digital circuits 0= GND and 1=+5 V Symbol InputsOutput
 Table Part number: 74HC00 In digital circuits 0= GND and 1=+5 V Symbol InputsOutput")
189
NAND Gate IC The 74HC00 IC has four 2 -input NAND gates inside

190
NAND Gate IC Connections: pin 14 to +5V pin 7 to Gnd pin 11 to a resistor resitor to positive end of LED negative end of LED to Gnd Connect pins 12 and 13 to either + 5 or Gnd Observe the LED 1 = on and 0 = off Your result should match the NAND gate truth table

191
A Simple Memory Element The SR Latch SRQ previous Q 00 1 01 1 10 0 1100 1111

192
A Simple Memory Element The SR Latch SRQ previous Q 00 1 01 1 10 0 1100 1111

193
Other Interfacing Components Temperature sensor Pressure sensor Real-time clock Bluetooth Internet SD card MP 3 player Wi-Fi GPS 8x8 dot matrix LED display Touch screen

194
Reference For Programming Language –Select Help from the menu –Select Reference For Arduino –Browse to www.Arduino.ccwww.Arduino.cc

195
Index 7-Segment Display Analog Input Output (PWM) Arduino Programming Bluetooth Breadboard Integrated Circuit (IC) EEPROM High Power ( 120 V AC) LED 8 x 8 dot matrix Blinking Fading Flashing Las Vegas Lights RGB Light Sensor Input Liquid-Crystal Display (LCD) Motion Sensor Motor DC Servo Stepper Object Sensor Photo Resistor Potentiometer Push Button Input Real-Time Clock Relay Resistor Color Code Internal pull-up/down SD Card Reader Sound Transistor High Power Ultrasonic Distance Sensor
 Arduino Programming Bluetooth Breadboard Integrated Circuit (IC) EEPROM High Power ( 120 V AC) LED 8 x 8 dot matrix Blinking Fading Flashing Las Vegas Lights RGB Light Sensor Input Liquid-Crystal Display (LCD) Motion Sensor Motor DC Servo Stepper Object Sensor Photo Resistor Potentiometer Push Button Input Real-Time Clock Relay Resistor Color Code Internal pull-up/down SD Card Reader Sound Transistor High Power Ultrasonic Distance Sensor")
Similar presentations