Download presentation
Presentation is loading. Please wait.

1
Repair, relining and rebasing
Dr. Amal Fathy Kaddah Professor of Prosthodontic, Faculty of Oral &Dental Medicine, Cairo University

2
First Steps In Making A Denture
Primary impression Diagnostic cast Custom tray Final impression Master cast

3
Impression Techniques
Primary impressions Conventional techniques Template techniques Definitive impressions I- Conventional techniques II- Selective pressure techniques III- Functional techniques IV- Reline and rebase techniques (including secondary template impressions).
.")
4
Complete Dentures

5
Repair of Complete Dentures

6
during function dropped on hard
Dentures may fracture during function dropped on hard surface Key of repair = accurate reassembling & alignment of the broken parts in their original position.

7
Classification of fractured dentures
I) According to location of fracture Midline fracture Any part fracture
 According to location of fracture. Midline fracture Any part fracture.")
8
II) According to extent of fracture
Without broken or missing part &/or teeth With broken or missing part &/or teeth

9
III) According to timing of fracture
Early fracture Delayed fracture IV) According to cause of fracture Operator Patient
 According to cause of fracture. Operator Patient.")
10
(mainly in maxillary dentures)
Midline fracture (mainly in maxillary dentures) Causes: 1) No or insufficient relief in the midline. (M.P.R.) (Early fracture) 2) Ridge resorption with loss of relief effect. (Delayed fracture)
 Causes: 1) No or insufficient relief in the midline. (M.P.R.) (Early fracture) 2) Ridge resorption with loss of relief effect. (Delayed fracture)")
11
Procedures for repair of midline fracture:
Broken parts are assembled & fixed together with sticky wax on the polished surface. Assembled parts may be strengthened with burs or plastic sticks.

12
Procedures for repair of midline fracture:
Any undercut on the fitting surface is blocked out with wax or clay. The fitting surface is painted with separating medium.

13
Stone plaster is poured into the fitting surface
Stone plaster is poured into the fitting surface. After stone setting, the denture is removed from the cast and cleaned from any traces of sticky wax. Fractured edges are reduced, widened (8-10 mm) along the fracture line and beveled towards the polished surface to increase bonding surface area. Dove tail cuts may be made to strengthen the repair joint.
 along the fracture line and beveled towards the polished surface to increase bonding surface area. Dove tail cuts may be made to strengthen the repair joint.")
14
The cast is painted with separating medium and the denture is secured to the cast with rubber bands.
Self cure A.R. is applied to the modified fracture area until the area is overfilled. N.B. An alternate method is to wax and contour the fracture line to the desired form using base plate wax, followed by flasking, wax elimination, packing with self cure A.R. and placing in the flask under press for 2 hrs. Deflasking, finishing and polishing is then done in the usual manner.

15
Relief of the median palatine raphea.
Reline if needed. Remake in some cases.

16
Any part fracture Main cause is falling on the ground or the sink during cleaning. Types: I- Fracture with no missing part Repaired as mentioned.

17
II- Fracture with missing or lost part
Procedures: An impression is made with the denture placed in patient mouth. After pouring the cast, either self cure A.R. is applied to replace the missing part, or wax is added and carved to resemble the broken denture part, followed by flasking, packing, curing, finishing & polishing.

18
III- Fracture with broken or missing teeth
Procedures: Fractured teeth are cut away with burs. On the lingual side, enough acrylic is removed and dove tailed. Teeth of same size, shape & shade are positioned in proper alignment and waxed with base plate wax.

19
A plaster index (key) is made to record & secure the position of waxed teeth.
Teeth to be repaired are removed together with all wax around them. Teeth are then put back exactly in their original position aided by plaster key. Self cure acrylic resin is added from the lingual side until repair area is over built. It is then covered with tin foil. After curing, the index is removed and the denture is finished and polished.

20
Relining of Complete Dentures
Def: Resurfacing or correction of denture adaptation to underlying tissues by the addition of a new resin material to its fitting surface without changing its occlusal relation. Addition of Material to the tissue side of a denture to improve its adaptation to the supporting mucosa.

21
Reline Indications Loss of retention Instability Food under denture
Whenever the denture loses or has poor adaptation to the underlying tissues, while all other factors as occlusion, esthetics, centric relation, V.D.O. and denture base material are satisfactory. Loss of retention Instability Food under denture Abused mucosa

22
Reline: General Considerations
Optimal tissue health Reasonable CR/CO Adequate vertical dimension Adequate peripheral extensions

23
Procedures: Patient is instructed to leave his denture out of his mouth at least 48 hrs to allow for recovery of tissues and reduce irritation caused by ill-fitted denture. Denture preparation: Any undercuts are removed from the denture base. Peripheral extensions are checked and adjusted. Borders are reduced and squared to provide a definite edge for addition of new resin material.

24
A hole is made in the palatal surface to allow escape of excess impression material. Slight reduction in the fitting surface may be done to create some space for the impression material. Border tracing & new impressions are made under centric occlusion to maintain occlusal relationship. The denture with impression material is boxed and poured into stone.

25
. The denture is flasked, and the old resin material is thoroughly cleaned and roughened.

26
. New acrylic resin material is packed, and the denture is cured in pressure curing unit containing water at 45°c for 20 min. to prevent porosity of new resin material and warpage of the old resin material (release of internal stresses). . Finishing and polishing is done in the usual manner.

27
N.B. When both upper and lower dentures need relining, lower denture should be completed first. The upper may be relined against a stable lower denture. The denture should be clinically remounted to perfect the occlusion.

28
Evaluate Dentures

29
Is Reline necessary???? If after modifications, the “fit and bite” seem improved, let the patient try the denture for one week…if there is no improvement, then reline.

30
Is reline Necessary? Overextension Irritation of Peripheral Borders

31
Is reline Necessary? Overextended borders Borders corrected

32
Is reline necessary? Error in CO on one side, will break the seal on the opposite side

33
Is reline necessary? Correct eccentric excursions

34
Diagnosis-Occlusal disharmony
Loss of stability and retention Irritation and inflammation on one side Teeth stained on one side

35
Reline Contraindications
Worn out dentures Vertical dimension loss greater than 7 mm Significant mucosal inflammation Poor denture esthetics Denture related speech problems

36
Contraindications Severe tooth wear
Severe vertical overlap with tooth wear (posterior tooth concept) Severe occlusal wear (CD evaluation)
 Severe occlusal wear (CD evaluation)")
37
Pre-requisites for relining
Recognition of abused tissues, with superimposed candidiasis.

38
Initiate Tissue Recovery Program
Intermittent hot and cold rinses Massage tissues Relieve pressure areas Correct faulty occlusions and denture borders Minimize stress by Soft diet Removal of denture at night Use tissue conditioners

39
Complete Denture Exam Healthy Tissues!!

40
CUD Reline 2. Indicate amount of peripheral reduction required
1. Check extensions 3. Border Reduction 4. Tissue Conditioner preparation: Peripheral reduction + Tissue surface

41
CUD Reline 5. Border Molding Completed
6. Palatal surface vented after B. M. 7. Seat denture until wash comes through vents 8. Final Impression

42
CUD Reline Incorrect seating. Improper plane of orientation:
Not contacting teeth Excess material No vents Place ZnO wash Have patient close in CR.

43
CUD Reline Trim excess wax beyond anterior line
ZnO wash. Posterior palatal seal area using impression wax Reline final impression

44
Final Impression with PVS
Final Impression with Rubber base

45
post palatal seal combination
Identify in impression, before pouring it up. Identify on impression so technician can scribe the seal

46
CLD Reline Complete Denture method-ZnO Border molding completed
Rubber Base Reline

47
Reline Roughened border to blend new acrylic with old. Won’t show finishing line After processing: Note junction line Relined cast: Do not separate

48
Reline Trimmed and polished

49
Delivery of Reline Examine: Peripheral extensions

50
Delivery of Reline Pressure Indicator Paste (PIP)
Ask the patient to bite on cotton rolls for 5 min.

51
LABORATORY REMOUNTING

56
CLINICAL REMOUNTING

61
Perfection of occlusion

62
Rebasing of Complete Dentures
Def: It is a process of readaptation of a denture to the underlying tissues by replacing the denture base material with a new one without changing its occlusal relation. Indications: When the existing denture base is unsatisfactory e.g. stained, crazed or porous.

63
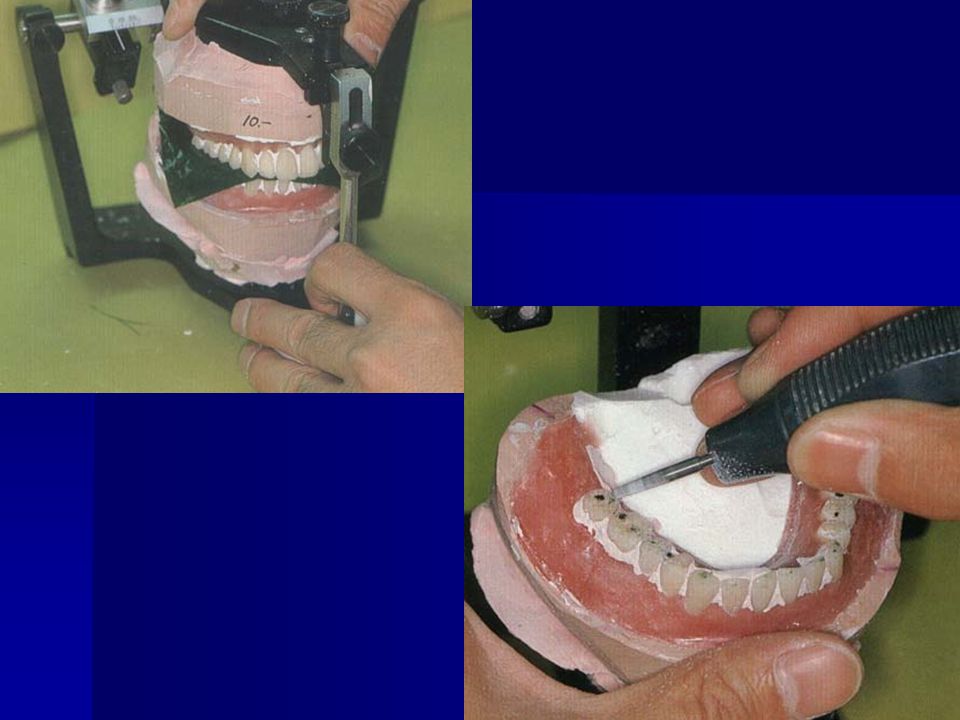
Procedures: An impression is made with the denture and a cast is obtained. An occlusal and incisal index of the teeth is made in plaster using Hooper duplicator The posts of the lower part of the duplicator are seated in the upper part to maintain the relationship of the casts to the plaster index.

64
The denture with the impression material are removed from the cast.
Artificial plastic teeth are sectioned from the denture and all base material around the teeth is removed. (porcelain teeth are removed by flaming) Teeth are placed and held in position in the index using sticky wax on the labial and buccal surface. A layer of base plate wax is placed over the ridge of the cast.
 Teeth are placed and held in position in the index using sticky wax on the labial and buccal surface. A layer of base plate wax is placed over the ridge of the cast.")
65
The upper part of the duplicator is closed and denture teeth are waxed to the proper thickness and contour to the cast. The cast is removed, flasked and processed in the usual manner. After deflasking, the cast is reattached to the upper part of the duplicator to adjust any occlusal errors. Occlusion of rebased denture is further perfected by clinical remount.

66
THANK YOU

Similar presentations


>")


