Download presentation
Presentation is loading. Please wait.

1
CAUSES, PRACTICES & EFFECTS OF WAR
WORLD WAR 1 CAUSES, PRACTICES & EFFECTS OF WAR

2
The World before World War I
The War was also known as THE FIRST WORLD WAR, THE GREAT WAR and famously “ THE WAR TO END ALL WARS” It was a global military conflict that took place mainly in Europe between 1914 & 1918. It was a total War which left great devastation, millions dead and shaped the modern world. World War I created a decisive break with the old world order that had emerged after the Napoleonic Wars , which was modified by the mid-19th century’s nationalistic revolutions. The results of World War I would be important factors in the development of world war II; 21 years later.

3
Long-term Causes: Why did the war break out?
Napoleon Bonaparte and the Rise of Nationalist Sentiment Colonial Expansion Anglo-German Naval Race Tension in the Balkans Ascension of Kaiser Wilhelm II Web of alliances

4
Serb Nationalism: Napoleon Bonaparte and the Rise of Nationalist Sentiment
Nationalism means being a strong supporter of the rights and interests of one's country. The Congress of Vienna, held after Napoleon's exile to Elba, aimed to sort out problems in Europe. Delegates from Britain, Austria, Prussia and Russia (the winning allies) decided upon a new Europe that left both Germany and Italy as divided states. Strong nationalist elements led to the Re-unification of Italy in 1861 and Germany in 1871. The settlement at the end of the Franco-Prussian war left France angry at the loss of Alsace-Lorraine to Germany and keen to regain their lost territory. Large areas of both Austria-Hungary and Serbia were home to differing nationalist groups, all of whom wanted freedom from the states in which they lived.
 decided upon a new Europe that left both Germany and Italy as divided states. Strong nationalist elements led to the Re-unification of Italy in 1861 and Germany in The settlement at the end of the Franco-Prussian war left France angry at the loss of Alsace-Lorraine to Germany and keen to regain their lost territory. Large areas of both Austria-Hungary and Serbia were home to differing nationalist groups, all of whom wanted freedom from the states in which they lived.")
5
The French Revolution resulted in chaos and the ascent of Napoleon to power. Napoleon's armies marched all over Europe, bringing not only French control, but French ideas. The rise of ideas of nationalism, devotion and love for one's common people and ethnicity, increased in popularity during the Napoleonic Wars. Napoleon encouraged the spread of nationalism, which he saw in his troops, to better the French war machine. The French people began to feel pride in their culture and ethnicity. The world watched nationalism for the first time and saw the power the French gained from it. Following the Napoleonic Wars, all of Europe was sharing these ideas

7
Europe in 1914 By 1914 Europe was divided as a continent in power struggling forces for the top place in the world economic market. At the start of the Great War in 1914, Germany was a relatively young power, only coming into existence following a series of wars in Germany's Chancellor, Otto von Bismarck, had shepherd the country into the 20th century with the adage that Germany must always be in a majority of three in any dispute among the five great European powers. His aim was to maintain peaceful ties with Russian. When Kaiser Wilhelm II came to power, he quickly retired Bismarck, and upset the Chancellor's delicate balance of power by refusing to renew Germany's friendship with Russia. Germany soon found itself in a minority of two. Its only European ally was the weakest of the European powers, Austria-Hungary.

8
Otto Van Bismark His Strategies towards building a better Germany.

9
Kaiser Wilhelm II

10
Imperialism and Colonial Expansion
Imperialism is when a country takes over new lands or countries and makes them subject to their rule. By 1900 the British Empire extended over five continents and France had control of large areas of Africa. With the rise of industrialism countries needed new markets. The amount of lands 'owned' by Britain and France increased the rivalry with Germany who had entered the scramble to acquire colonies late and only had small areas of Africa. Note the contrast in the map below.

11
Imperialist rivalry had grown more intense with the "new imperialism" of the late 19th and early 20th cent. The great powers had come into conflict over spheres of influence in China and over territories in Africa, and the Easter question , created by the decline of the Ottoman Empire, had produced several disturbing controversies. Particularly unsettling was the policy of Germany. It embarked late but aggressively on colonial expansion under Emperor William II came into conflict with France over Morocco , and seemed to threaten Great Britain by its rapid naval expansion.

13
Militarism Militarism means that the army and military forces are given a high profile by the government. The growing European divide had led to an arms race (competition between nations to have the most powerful weapons) between the main countries. The armies of both France and Germany had more than doubled between 1870 and 1914 and there was fierce competition between Britain and Germany for mastery of the seas. The British had introduced the 'Dreadnought', an effective battleship, in The Germans soon followed suit introducing their own battleships. The German, Von Schlieffen also drew up a plan of action that involved attacking France through Belgium if Russia made an attack on Germany. The map below shows how the plan was to work.
 between the main countries. The armies of both France and Germany had more than doubled between 1870 and 1914 and there was fierce competition between Britain and Germany for mastery of the seas. The British had introduced the Dreadnought , an effective battleship, in The Germans soon followed suit introducing their own battleships. The German, Von Schlieffen also drew up a plan of action that involved attacking France through Belgium if Russia made an attack on Germany. The map below shows how the plan was to work.")
14
Alliances An alliance is an agreement made between two or more countries to give each other help if it is needed. When an alliance is signed, those countries become known as Allies. A number of alliances had been signed by countries between the years 1879 and These were important because they meant that some countries had no option but to declare war if one of their allies. declared war first

15
1879 The Dual Alliance Germany and Austria-Hungary made an alliance to protect themselves from Russia 1881 Austro-Serbian Alliance Austria-Hungary made an alliance with Serbia to stop Russia gaining control of Serbia 1882 The Triple Alliance Germany and Austria- Hungary made an alliance with Italy to stop Italy from taking sides with Russia 1914 Triple Entente (no separate peace) Britain, Russia and France agreed not to sign for peace separately. 1894 Franco-Russian Alliance Russia formed an alliance with France to protect herself against Germany and Austria-Hungary 1907 Triple Entente This was made between Russia, France and Britain to counter the increasing threat from Germany. 1907 Anglo-Russian Entente This was an agreement between Britain and Russia 1904 Entente Cordiale This was an agreement, but not a formal alliance, between France and Britain.
 Britain, Russia and France agreed not to sign for peace separately Franco-Russian Alliance Russia formed an alliance with France to protect herself against Germany and Austria-Hungary Triple Entente This was made between Russia, France and Britain to counter the increasing threat from Germany Anglo-Russian Entente This was an agreement between Britain and Russia Entente Cordiale This was an agreement, but not a formal alliance, between France and Britain.")
16
Formation of the Triple Alliance
In 1879 Germany and Austria- Hungray agreed to form a Dual Alliance. This became the Triple Alliance when in 1882 it was expanded to include Italy, The three countries agreed to support each other if attacked by either France or Russia. It was renewed at five-yearly intervals. The formation of the Triple Entente in 1907 by Britain, France and Russia reinforced the need for the alliance.

18
Formation of the Triple Entente
In 1882 Germany, Austria Hungary and Italy formed the Triple Alliance. The three countries agreed to support each other if attacked by either France or Russia. France felt threatened by this alliance. Britain was also concerned by the growth in the Germany Navy and in 1904 the two countries signed the Entente Cordiale (friendly understanding). The objective of the alliance was to encourage co-operation against the perceived threat of Germany. Three years later, Russia who feared the growth in the Germany Army, joined Britain & France to form the Triple Entente. The Russian government was also concerned about the possibility of Austria Hungary increasing the size of its empire. It therefore made promises to help Serbia if it was attacked by members of the Triple Alliance
. The objective of the alliance was to encourage co-operation against the perceived threat of Germany. Three years later, Russia who feared the growth in the Germany Army, joined Britain & France to form the Triple Entente. The Russian government was also concerned about the possibility of Austria Hungary increasing the size of its empire. It therefore made promises to help Serbia if it was attacked by members of the Triple Alliance.")
19
Arms races The naval arms race that developed between Britain and Germany was intensified by the 1906 launch of HMS Dreadnought, a revolutionary warship that rendered all previous battleships obsolete. (Britain maintained a large lead over Germany in all categories of warship.) It has pointed out that both nations believed in thesis that command of the sea was vital to a great nation. Davis Stephoson described the armaments race as "a self-reinforcing cycle of heightened military preparedness", while other Historians, viewed the shipbuilding rivalry as part of a general movement towards war. However, Niall Fergueson argues that Britain’s ability to maintain an overall advantage signifies that change within this realm was insignificant and therefore not a factor in the movement towards war..
 It has pointed out that both nations believed in thesis that command of the sea was vital to a great nation. Davis Stephoson described the armaments race as a self-reinforcing cycle of heightened military preparedness , while other Historians, viewed the shipbuilding rivalry as part of a general movement towards war. However, Niall Fergueson argues that Britain’s ability to maintain an overall advantage signifies that change within this realm was insignificant and therefore not a factor in the movement towards war..")
20
The naval strength of the powers in 1914
Country Personnel Large Naval Vessels Tonnage Russia 54,000 4 328,000 France 68,000 10 731,000 Britain 209,000 29 2,205,000 TOTAL 331,000 43 3,264,000 Germany 79,000 17 1,019,000 Austria-Hungary 16,000 3 249,000 95,000 20 1,268,000 Source: Ferguson 1999 p 85

21
Crisis Moroccan Crisis
In 1904 Morocco had been given to France by Britain, but the Moroccans wanted their independence. In 1905, Germany announced her support for Moroccan independence. War was narrowly avoided by a conference which allowed France to retain possession of Morocco. However, in 1911, the Germans were again protesting against French possession of Morocco. Britain supported France and Germany was persuaded to back down for part of French Congo.

22
Bosnian Crisis In 1908, Austria-Hungary took over the former Turkish province of Bosnia. This angered Serbians who felt the province should be theirs. Serbia threatened Austria-Hungary with war, Russia, allied to Serbia, mobilised its forces. Germany, allied to Austria-Hungary mobilised its forces and prepared to threaten Russia. War was avoided when Russia backed down. There was, however, war in the Balkans between 1911 and 1912 when the Balkan states drove Turkey out of the area. The states then fought each other over which area should belong to which state. Austria-Hungary then intervened and forced Serbia to give up some of its acquisitions. Tension between Serbia and Austria-Hungary was high.

23
The Black Hand In May 1911, ten men in Serbia formed the Black Hand Secret Society. Early members included Colonel Dragutin Dimitrijevic, the chief of the Intelligence Department of the Serbian General Staff, Major Voja Tankosic and Milan Ciganovic. The main objective of the Black Hand was the creation, by means of violence, of a Greater Serbia. Its stated aim was: "To realize the national ideal, the unification of all Serbs. This organisation prefers terrorist action to cultural activities; it will therefore remain secret."

25
By 1914 there were around 2,500 members of the Black Hand
By 1914 there were around 2,500 members of the Black Hand. The group was mainly made up of junior army officers but also included lawyers, journalists and university professors. Three senior members of the Black Hand group, Dragutin Dimitrijevic, Milan Ciganovic, and Major Voja Tankosic, decided that Archduke Franz Ferdinand should be assassinated. Dimitrijevic was concerned about the heir to the Austro-Hungarian throne, Ferdinand's plans to grant concessions to the South Slavs. Dimitrijevic feared that if this happened, an independent Serbian state would be more difficult to achieve.

26
The People chosen for the task
Gavrilo Princip, Nedjelko Cabrinovic and Trifko Grabez from Serbia to assassinate him.

27
QUESTIONS What is meant by the term alliance?
Which countries were allied by the Triple Alliance? Which countries were allied by the Triple Entente? Why was Germany annoyed by Imperialism? Which armies had increased in size between 1870 and 1914? Describe the Schlieffen Plan. Why were the two crises important factors?

28
Which countries were bound to each other by which alliance?
How did imperialism contribute towards Germany’s increasing anger with Britain and France? Why was nationalism an important factor? Describe the part played by Germany in increasing European militarism. What links were there between the two crises and: Alliances Imperialism Militarism Nationalism

29
The Background to the Assasination
Archduke Franz-Ferdinand of Austria-Hungary wanted to marry the beautiful Countess Sophie von Chotkowa und Wognin (Sophie Chotek). Emperor Franz Josef forbade the marriage; Franz Ferdinand was heir of a noble royal family. He was supposed to marry royalty. Sophie was only a commoner. The two eloped and married secretly, anyway, on 28 June 1900. Then they returned to face the music. Franz Josef ruled that they could not be seen together in public, since an Archduke could not appear with a mere Countess as his consort. She was raised by Franz Josef to Princess of Hohenberg when she married Franz Ferdinand in 1900, and to Duchess of Hohenberg in 1907. But Franz Josef disliked Sophie, and she was continually insulted and slighted in Vienna. Franz Ferdinand was hurt by the ban on public appearances, until he found a loophole: as Field Marshall of the army he could appear with his wife (for a Field Marshall could be seen with a commoner as his consort). It was this that led Franz Ferdinand to go to more and more army reviews, and was to lead to his death.
. Emperor Franz Josef forbade the marriage; Franz Ferdinand was heir of a noble royal family. He was supposed to marry royalty. Sophie was only a commoner. The two eloped and married secretly, anyway, on 28 June Then they returned to face the music. Franz Josef ruled that they could not be seen together in public, since an Archduke could not appear with a mere Countess as his consort. She was raised by Franz Josef to Princess of Hohenberg when she married Franz Ferdinand in 1900, and to Duchess of Hohenberg in But Franz Josef disliked Sophie, and she was continually insulted and slighted in Vienna. Franz Ferdinand was hurt by the ban on public appearances, until he found a loophole: as Field Marshall of the army he could appear with his wife (for a Field Marshall could be seen with a commoner as his consort). It was this that led Franz Ferdinand to go to more and more army reviews, and was to lead to his death.")
32
In 1914, Austria-Hungary was a world power, but its rulers were afraid.
They feared nationalism. Many different races lived in the Austrian Empire; fifteen different languages were spoken within its borders. If nationalism caught on in Austria-Hungary, the Empire would fall apart.

33
The small nation-states in the south-east of Europe (`the Balkans') were very nationalistic. Serbia was the worst. In Serbia, there was a group called Union or Death (nicknamed the `Black Hand'). It was the Balkan equivalent of the IRA. It was dedicated to uniting all Serbs. Many Serbs lived in the Austrian province of Bosnia, and after 1908 the Black Hand waged a terrorist war there, with bombings, shootings and poisonings. The Austrian Army wanted to destroy the Black Hand by attacking Serbia.
. It was the Balkan equivalent of the IRA. It was dedicated to uniting all Serbs. Many Serbs lived in the Austrian province of Bosnia, and after 1908 the Black Hand waged a terrorist war there, with bombings, shootings and poisonings. The Austrian Army wanted to destroy the Black Hand by attacking Serbia.")
34
Assassination at Sarajevo
On 28 June 1914, the Archduke Franz-Ferdinand and his wife visited Sarajevo, the capital of Bosnia, to review these troops. It was a sunny Sunday morning. It was the Archduke's wedding anniversary. But the Archduke could not have chosen a worse day to go to Sarajevo. It was also Serbia's National Day - the anniversary of the battle, in 1389, when Serbia had been conquered by the Turkish Ottoman Empire, yet at which a Serb hero, Milos Obilic, had assassinated the Ottoman Sultan. The day was inextricably linked with Serbian nationalism, and with the assassination of foreign rulers. Waiting for Franz Ferdinand, lined up along the Appel Quay, Sarajevo's main road, were six young men. They were armed with pistols and bombs supplied by the Black Hand. They were going to try to murder Franz Ferdinand

35
Austrian spies in Serbia had reported that there was going to be an assassination attempt. Panic, the Prime Minister of Serbia, had also told the Austrian government that there was going to be trouble. Franz Ferdinand ignored these warnings. Only 120 policeman were on duty in Sarajevo, and they were so excited that they forgot to watch the crowds, and looked at the procession instead. Franz Ferdinand was dressed in the ceremonial uniform of an Austrian cavalry general, with a blue tunic, a high collar with three stars, and a hat adorned with pale-green feathers. He wore black trousers with red stripes down the sides and around his waist a Bauchband, a gold-braided ribbon with tassels.

36
To reach the Town Hall the procession had to drive along the Appel Quay. The six conspirators had posted themselves along the route; the Appel Quay was `a regular avenue of assassins.' As the procession moved along the Appel Quay there were a few shouts of Zivio! ('Long may he live!'). At am, as the procession drew near the Cumuria Bridge.

38
Near the Cumuria bridge:
1st Mehmed Mehmedbasic: told a friend that he could not get a clear opportunity; told Albertini in 1937 that a policeman had approached him just as he was to throw the bomb. 2nd Vaso Cubrilovic: told investigation that felt sorry for the Duchess; told Albertini that he was badly placed. 3rd Nedeljko Cabrinovic: threw a bomb. Wearing a long black coat and a black hat, he asked a policeman to tell him which car the Archduke was in; seconds later he had knocked the cap off a hand grenade against a metal lamp-post and aimed it at the Archduke seated in the open car. Franz Ferdinand later claimed that he had knocked away the bomb with his hand; witnesses at the trial, however, all agreed that the bomb had bounced off the folded-back hood of the Archduke's car. It blew up the car behind, killing two officers and injuring about twenty people. Cabrinovic swallowed poison, but it failed to work. After stopping to see what had happened, Franz Ferdinand's car sped to the Town Hall. 4th (landward side) Cvetko Popovic: told a friend that could not sec which was Franz Ferdinand because he was short-sighted; told the trial the lost his nerve.
 Cvetko Popovic: told a friend that could not sec which was Franz Ferdinand because he was short-sighted; told the trial the lost his nerve.")
39
After attending the official reception at the City Hall, Franz Ferdinand asked about the members of his party that had been wounded by the bomb. When the archduke was told they were badly injured in hospital, he insisted on being taken to see them. A member of the archduke's staff, Baron Morsey, suggested this might be dangerous, but Oskar Potiorek, who was responsible for the safety of the royal party, replied, "Do you think Sarajevo is full of assassins?“ However, Potiorek did accept it would be better if Duchess Sophie remained behind in the City Hall. When Baron Morsey told Sophie about the revised plans, she refused to stay arguing: "As long as the Archduke shows himself in public today I will not leave him." In order to avoid the city centre, General Oskar Potiorek decided that the royal car should travel straight along the Appel Quay to the Sarajevo Hospital. However, Potiorek forgot to tell the driver, Franz Urban, about this decision. On the way to the hospital, Urban took a right turn into Franz Joseph Street.

40
One of the conspirators, Gavrilo Princip, was standing on the corner at the time. Oskar Potiorek immediately realised the driver had taken the wrong route and shouted "What is this? This is the wrong way! We're supposed to take the Appel Quay!". The driver put his foot on the brake, and began to back up. In doing so he moved slowly past the waiting Gavrilo Princip. The assassin stepped forward, drew his gun, and at a distance of about five feet, fired several times into the car. Franz Ferdinand was hit in the neck and Sophie von Chotkovato in the abdomen. Princip's bullet had pierced the archduke's jugular vein but before losing consciousness, he pleaded "Sophie dear! Sophie dear! Don't die! Stay alive for our children!“ Franz Urban drove the royal couple to Konak, the governor's residence, but although both were still alive when they arrived, they died from their wounds soon afterwards.

43
Nedjelko Cabrinovic, statement in court (23rd October, 1914)
We did not hate Austria, but the Austrians had done nothing, since the occupation, to solve the problems that faced Bosnia and Herzegovina. Nine-tenths of our people are farmers who suffer, who live in misery, who have no schools, who are deprived of any culture. We sympathized with them in their distress. We thought that only people of noble character were capable of committing political assassinations. We heard it said that he (Archduke Franz Ferdinand) was an enemy of the Slavs. Nobody directly told us "kill him"; but in this environment, we arrived at the idea ourselves. I would like to add something else. Although Princip is playing the hero, and although we all wanted to appear as heroes, we still have profound regrets. In the first place, we did not know that they late Franz Ferdinand was a father. We were greatly touched by the words he addressed to his wife: "Sophie, stay alive for our children." We are anything you want, except criminals. In my name and in the name of my comrades, I ask the children of the late successor to the throne to forgive us. As for you, punish us according to your understanding. We are not criminals. We are honest people, animated by noble sentiments; we are idealists; we wanted to do good; we have loved our people; and we shall die for our ideals.
 was an enemy of the Slavs. Nobody directly told us kill him ; but in this environment, we arrived at the idea ourselves. I would like to add something else. Although Princip is playing the hero, and although we all wanted to appear as heroes, we still have profound regrets. In the first place, we did not know that they late Franz Ferdinand was a father. We were greatly touched by the words he addressed to his wife: Sophie, stay alive for our children. We are anything you want, except criminals. In my name and in the name of my comrades, I ask the children of the late successor to the throne to forgive us. As for you, punish us according to your understanding. We are not criminals. We are honest people, animated by noble sentiments; we are idealists; we wanted to do good; we have loved our people; and we shall die for our ideals.")
45
July Crisis and the declarations of war
After the assassination of the Arckduke Franz Ferdinand on June 28, Austria-Hungary waited for 3 weeks before deciding on a course of action. This wait was due to a large part of the army being on leave to help in gathering the harvest, which practically denied Austria the possibility of military action at the time. On July 23, assured by unconditional ('carte blanche') support of the Germans should war break out, it sent an ULTIMATUM to Serbia containing many demands, among them that Austrian agents would be allowed to take part in the investigation, and in general holding Serbia responsible for the assassination. The Serbian government accepted all the terms, except that of the participation of the Austrian agents in the inquiry, which it saw as a violation of its sovereignty. Emboldened by last minute Russian support, Serbia rejected the ultimatum. Austria-Hungary, in turn, rejected the Serbian reply on July 26. Breaking diplomatic relations, the Austro-Hungarian Empire declared war on Serbia on July 28, proceeding to bombard Belgrade on July 29. On July 30 Austria-Hungary and Russia both ordered general mobilization of their armies.
 support of the Germans should war break out, it sent an ULTIMATUM to Serbia containing many demands, among them that Austrian agents would be allowed to take part in the investigation, and in general holding Serbia responsible for the assassination. The Serbian government accepted all the terms, except that of the participation of the Austrian agents in the inquiry, which it saw as a violation of its sovereignty. Emboldened by last minute Russian support, Serbia rejected the ultimatum. Austria-Hungary, in turn, rejected the Serbian reply on July 26. Breaking diplomatic relations, the Austro-Hungarian Empire declared war on Serbia on July 28, proceeding to bombard Belgrade on July 29. On July 30 Austria-Hungary and Russia both ordered general mobilization of their armies.")
46
The Germans, having pledged their support to Austria-Hungary, sent Russia an ultimatum to stop mobilization within 12 hours on July 31. On August 1, with the ultimatum expired, the German ambassador to Russia formally declared war. On August 2 Germany occupied Luxembourg, as a preliminary step to the invasion of Belgium and the Schlieffen Plan (i.e. Germany had planned to attack France first according to the plan, and then Russia, which had already gone wrong) the same day yet another ultimatum was delivered to Belgium, requesting free passage for the German army on the way to France. The Belgians refused. At the very last moment, the Kaiser Wilhelm II asked Moltke, the German Chief of General Staff, to cancel the invasion of France in the hope this would keep Britain out of the war. Moltke, horrified by the prospect of the utter ruin of the Schlieffen Plan, refused on the grounds that it would be impossible to change the rail schedule- "once settled, it cannot be altered". On August 3 Germany declared war on France, and on August 4 invaded Belgium. This act, violating Belgian neutrality to which Germany, France, and Britain were all committed to guarantee, gave Britain, which up to that point had yet to choose a side in the conflict, a reason to declare war on Germany on August 4.
 the same day yet another ultimatum was delivered to Belgium, requesting free passage for the German army on the way to France. The Belgians refused. At the very last moment, the Kaiser Wilhelm II asked Moltke, the German Chief of General Staff, to cancel the invasion of France in the hope this would keep Britain out of the war. Moltke, horrified by the prospect of the utter ruin of the Schlieffen Plan, refused on the grounds that it would be impossible to change the rail schedule- once settled, it cannot be altered . On August 3 Germany declared war on France, and on August 4 invaded Belgium. This act, violating Belgian neutrality to which Germany, France, and Britain were all committed to guarantee, gave Britain, which up to that point had yet to choose a side in the conflict, a reason to declare war on Germany on August 4.")
47
Opening hostilities Some of the first hostilities of the war occurred in Africa and in the Pacific Ocean, in the colonies and territories of the European powers. On August 1914 a combined French and British Empire forces invaded the German protectorate of Togoland in West Africa. Shortly thereafter, on August 10, German forces based in South West Africa attacked South Africa, part of the British Empire. Another British Dominion, New Zealand, occupied German Samoa (later Western Samoa) on 30 August; on September 11 the Australian Naval & Military Expeditionary Force landed on the island of Neu Pommern (later New Britain), which formed part of German New Guinea. Within a few months, the Entente forces had driven out or had accepted the surrender of all German forces in the Pacific. Sporadic and fierce fighting, however, continued in Africa for the remainder of the war.
 on 30 August; on September 11 the Australian Naval & Military Expeditionary Force landed on the island of Neu Pommern (later New Britain), which formed part of German New Guinea. Within a few months, the Entente forces had driven out or had accepted the surrender of all German forces in the Pacific. Sporadic and fierce fighting, however, continued in Africa for the remainder of the war.")
48
In Europe, the Central Powers — the German Empire and the Austro-Hungarian Empire - suffered from mutual miscommunication and lack of intelligence regarding the intentions of each other's army. Germany had originally guaranteed to support Austria-Hungary's invasion of Serbia, but practical interpretation of this idea differed. Austro-Hungarian leaders believed Germany would cover her northern flank against Russia. Germany, however, had planned for Austria-Hungary to focus the majority of its troops on Russia while Germany dealt with France on the Western Front. This confusion forced the Austro-Hungarian Army to split its troop concentrations. Somewhat more than half went to fight the Russians on their border, a somewhat smaller force was allocated to invade and conquer Serbia.

50
Serbian Campaign {WWI}
The Serbian army fought a defensive battle against the invading Austrian army (called the Battle of Cer) starting on 12 August. The Serbians occupied defensive positions on the south side of the Drina and Save rivers. Over the next two weeks Austrian attacks were thrown back with heavy losses. This marked the first major Allied victory of the war. Austrian expectations of a swift victory over Serbia were not realized and as a result, Austria had to keep a very sizable force on the Serbian front, weakening their armies which faced Russia.
 starting on 12 August. The Serbians occupied defensive positions on the south side of the Drina and Save rivers. Over the next two weeks Austrian attacks were thrown back with heavy losses. This marked the first major Allied victory of the war. Austrian expectations of a swift victory over Serbia were not realized and as a result, Austria had to keep a very sizable force on the Serbian front, weakening their armies which faced Russia.")
51
The German war plan to deal with the Franco-Russian alliance (called the Schlieffen plan) involved delivering a knock-out blow to the French and then turning to deal with the more slowly mobilized Russian army. Rather than invading eastern France directly, German planners deemed it prudent to attack France from the north. To do so, the German army had to march through Belgium. Germany demanded free passage from the Belgian government, promising to treat Belgium as Germany's firm ally if permission was granted. The Belgian government's refusal to come to terms at zero-hour was an unpleasant surprise but the German army chose to follow through with its plan just the same. After entering Belgian territory, it soon encountered resistance at a fortified Liege. Although the army as a whole continued to make rapid progress into France, it was Britain's decision to declare war on Germany and honor a dated protection pact with Belgium that left the German government in disbelief and seriously hindered the military's plans. Britain sent an army to France (the British Expenitionary Force or BEF) which advanced into Belgium and slowed the Germans. The first British soldier killed in the war was John Parr, on 21st August 1914, near Mons.
 which advanced into Belgium and slowed the Germans. The first British soldier killed in the war was John Parr, on 21st August 1914, near Mons.")
54
The First BATTLE

55
The Battle of Liege, 1914 Something of a moral victory for the Allies as represented by Belgium, the Battle of Liege ran for twelve days from 5-16 August 1914, and resulted in surprisingly heavy losses upon the German invasion force by the numerically heavily outnumbered Belgians. The Battle of Liege signified the first land battle of the war, as the German Second Army crossed the frontier into neutral Belgium (since 1839) so as to attack France from the north. The Schlieffen plan had started. The initial aim of Von Bulow’s Second Army, which comprised 320,000 men, was to seize the city of Liege, gateway to Belgium, which blocked the narrow gap between the 'Limburg appendix' and the Ardennes, the best entrance into Belgium.
 so as to attack France from the north. The Schlieffen plan had started. The initial aim of Von Bulow’s Second Army, which comprised 320,000 men, was to seize the city of Liege, gateway to Belgium, which blocked the narrow gap between the Limburg appendix and the Ardennes, the best entrance into Belgium.")
56
The Schlieffen Plan Germany’s military plan to defeat France and Russia. “Knock out blow” aimed at France first. Avoid French defences by invasion of Belgium. Germans thought Britain would not intervene.

57
Schlieffen Plan Count Alfred von Schlieffen drew up the Schlieffen Plan in 1905 when he was German Chief of Staff. In a general European war, Germany would face France in the west and Russia in the east, and would need to defeat France within six weeks before Russia mobilised her troops. 1. As most of the French army was stationed on the border with Germany, the Schlieffen Plan aimed for the quick defeat of France by invading it through neutral Belgium and moving rapidly on to capture Paris. 2. The Germans did not believe that Britain would go to war over their 1839 treaty with Belgium, which they described as a 'scrap of paper'. 3. Even if Britain did defend Belgium, the Kaiser believed that there was no need to fear the British Expeditionary Force, which he called a 'contemptible little army'. 4. Having defeated France, Germany would then be able to concentrate her efforts on defeating the Russians in the east rather then having to fight on two fronts at once.

59
In 1904 France and Britain signed the Entente Cordiale (friendly understanding). The objective of the alliance was to encourage co-operation against the perceived threat of Germany. Negotiations also began to add Russia to this alliance. As a result of these moves the German military began to fear the possibility of a combined attack from France, Britain and Russia. Alfred von Schlieffen, German Army Chief of Staff, was given instructions to devise a strategy that would be able to counter a joint attack. In December, 1905, he began circulating what later became known as the Schlieffen Plan. Schlieffen argued that if war took place it was vital that France was speedily defeated. If this happened, Britain and Russia would be unwilling to carry on fighting. Schlieffen calculated that it would take Russia six weeks to organize its large army for an attack on Germany. Therefore, it was vitally important to force France to surrender before Russia was ready to use all its forces. Schlieffen's plan involved using 90% of Germany's armed forces to attack France. Fearing the French forts on the border with Germany, Schlieffen suggested a scythe-like attack through Holland, Belgium and Luxembourg. The rest of the German Army would be sent to defensive positions in the east to stop the expected Russian advance.

60
When Helmuth von Moltke replaced Alfred von Schlieffen as German Army Chief of Staff in 1906, he modified the plan by proposing that Holland was not invaded. The main route would now be through the flat plains of Flanders. Moltke argued that Belgium's small army would be unable to stop German forces from quickly entering France. Moltke suggested that 34 divisions should invade Belgium whereas 8 divisions would be enough to stop Russia advancing in the east. On 2nd August 1914, the Schlieffen Plan was put into operation when the German Army invaded Luxembourg and Belgium. However, the Germans were held up by the Belgian Army and were shocked by the Russian Army's advance into East Prussia. The Germans were also surprised by how quickly the British Expeditionary Force reached France and Belgium. On 3rd September, Joseph Joffre, the Commander-in-Chief of the French forces, ordered his men to retreat to a line along the River Seine, south-east of Paris and over 60km south of the Marne. Sir John French, commander of the British Expeditionary Force agreed to join the French in attacking the German forces.

61
On 2nd August 1914, the Schlieffen Plan was put into operation when the German Army invaded Luxembourg and Belgium. However, the Germans were held up by the Belgian Army and were shocked by the Russian Army's advance into East Prussia. The Germans were also surprised by how quickly the British Expeditionary Force reached France and Belgium. On 3rd September, Joseph Joffre, the Commander-in-Chief of the French forces, ordered his men to retreat to a line along the River Seine, south-east of Paris and over 60km south of the Marne. Sir John French, commander of the British Expeditionary Force agreed to join the French in attacking the German forces. The French 6th Army attacked the German Ist Army at the Marne on the morning of 6th September. General Alexander von Kluck wheeled his entire force to meet the attack, opening a 50km gap between his own forces and the German 2nd Army led by General Karl von Bulow. The British forces and the French 5th Army now advanced into the gap that had been created splitting the two German armies.

62
For the next three days the German forces were unable to break through the Allied lines. At one stage the French 6th Army came close to defeat and were only saved by the use of Paris taxis to rush 6,000 reserve troops to the front line. On 9th September, General Helmuth von Moltke, the German Commander in Chief, ordered General Karl von Bulow and General Alexander von Kluck to retreat. The British and French forces were now able to cross the Marne. The Schlieffen Plan had not succeeded. The German hopes of a swift and decisive victory had been frustrated. However, the German Army had not been beaten and its successful retreat and the building of trenches between the North Sea to the Swiss Frontier ended all hope of a short war.

65
What actually happened?
Belgium, Britain and France responded to the launching of the Schlieffen Plan in different ways. The Germans were not expecting any resistance from Belgium, but the Belgian army fought bravely and managed to delay the German advance. Members of the British Expeditionary Force (BEF) arrived to help, and the Germans were held up at Mons. The Belgians later prevented the Germans from taking the French channel ports by flooding their land. Britain declared war on Germany in response to the invasion of Belgium. Although the BEF consisted of only 125, 000 men, they were well trained and equipped, and ready for action within less than one week. Having helped the Belgians hold the Germans up at Mons, the BEF then moved to support the French on the River Marne and prevent the Germans from reaching Paris. Losses were heavy and by December 1914 more than half of the original BEF were dead. France responded quickly to the German attack by launching an invasion of Alsace and Lorraine, but this failed. They then switched troops to the defence of Paris in a desperate attempt to hold the Germans up, which involved transporting troops to the front line in fleets of taxis. The battle at the Marne was a turning-point; with the help of the remaining members of the BEF the German advance was not only halted but the Germans were also pushed back about 35 miles. The British and French then moved to secure the Channel ports.
 arrived to help, and the Germans were held up at Mons. The Belgians later prevented the Germans from taking the French channel ports by flooding their land. Britain declared war on Germany in response to the invasion of Belgium. Although the BEF consisted of only 125, 000 men, they were well trained and equipped, and ready for action within less than one week. Having helped the Belgians hold the Germans up at Mons, the BEF then moved to support the French on the River Marne and prevent the Germans from reaching Paris. Losses were heavy and by December 1914 more than half of the original BEF were dead. France responded quickly to the German attack by launching an invasion of Alsace and Lorraine, but this failed. They then switched troops to the defence of Paris in a desperate attempt to hold the Germans up, which involved transporting troops to the front line in fleets of taxis. The battle at the Marne was a turning-point; with the help of the remaining members of the BEF the German advance was not only halted but the Germans were also pushed back about 35 miles. The British and French then moved to secure the Channel ports.")
66
Why did the Schlieffen Plan fail?
The plan relied upon rapid movement. The resistance of the Belgians and the BEF prevented this. Russia mobilized its troops quicker than expected. Within 10 days the Russians had invaded Germany, which meant that the Germans had to switch troops away from western Europe to hold up the Russian invasion. Both sides now had to secure the land that they held. Trenches were dug and machine-gun posts erected. The first exchanges of the war were over; from now until 1918, neither side would advance more than 10 miles forward nor backwards from the positions they now held The fact that Belgian troops were able to hold up the German advance gave time for the BEF to arrive. Together they were further able to delay the Germans at Mons, and this allowed the French to switch their troops from Alsace-Lorraine to defend Paris.

67
However Liege was defended by a ring of twelve heavily armed forts built on high ground in the 1880s, six on each side of the Meuse River, each 3-5km apart, and some 6-10km from the city itself. The forts contained a total of 400 retractable guns, up to 210mm in size. To some extent these forts offset the relatively small force at Belgian General Leman’s disposal - just 70,000 men. The Germans, under General Emmich with a force of 30,000 men, attacked at night on 5 August, sustaining heavy losses and making little or no progress, much to the surprise of the supremely confident German army. Ludendorfff, rather than continue to attack the forts, called in the use of zeppelins to drop bombs into the city and citadel, and personally led 14th Brigade in between the forts - effectively a gap where the Belgians had intended to build rifle trenches but had not actually done so - into the city, forcing the Belgian garrison there to surrender on 7 August.

73
Nevertheless, the Germans could not hope to continue their advance through Belgium without first capturing the forts. In order to assist with this the Germans introduced a weapon which until that point remained unknown to the Allies, Austrian-built 17-inch howitzers. With the significant aid of the howitzers and the Big Bertha gun (a 420mm siege howitzer) the forts were finally taken on 16 August, General Leman having to be carried unconscious out of the besieged forts. On the following day, 17 August, the German Second Army, together with First and Third Armies, began to implement the next stage of the Schlieffen Plan, embarking upon a wide sweeping wheel movement through Belgium, forcing the Belgian army back to Antwerp. Brussels itself was captured without resistance by General Von Kluck of the First Army on 20 August.
 the forts were finally taken on 16 August, General Leman having to be carried unconscious out of the besieged forts. On the following day, 17 August, the German Second Army, together with First and Third Armies, began to implement the next stage of the Schlieffen Plan, embarking upon a wide sweeping wheel movement through Belgium, forcing the Belgian army back to Antwerp. Brussels itself was captured without resistance by General Von Kluck of the First Army on 20 August.")
76
Battles - The Western Front
The Battle of the Frontiers, 1914 The Battle of the Frontiers comprises five offensives launched under French Commander-in-Chief Joseph Joffre and German Chief of Staff Helmuth von Moltke's initiative during the first month of the war, August 1914. The battles - at Mulhouse, Lorraine, the Ardennes, Charleroi and Mons - were launched more or less simultaneously, and marked the collision of both French and German invasion plans (Plan XVII and the Schlieffen Plan, respectively), each battle impacting the course of others.
, each battle impacting the course of others.")
78
The Battle of Mulhouse: Opened 7 August
The Invasion of Lorraine: Opened 14 August The Battle of the Ardennes: Opened 21 August The Battle of Charleroi: Opened 21 August The Battle of Mons: Opened 23 August Were the other Battles of the Frontiers

79
The Various Battles Of World War I
Battle of Liege, Opened 5 August 1914 Battle of the Frontiers, Opened 5 August 1914 Battle of Mulhouse, Opened 7 August 1914 Battle of Haelen, Opened 12 August 1914 Invasion of Lorraine, Opened 14 August 1914 Battle of the Ardennes, Opened 21 August 1914 Battle of Charleroi, Opened 21 August 1914 Siege of Namur, Opened 21 August 1914 Battle of Mons, Opened 23 August 1914 Capture of Dinant, Opened 23 August 1914 Siege of Maubeuge, Opened 25 August 1914 Destruction of Louvain, Opened 25 August 1914 Battle of Le Cateau, Opened 26 August 1914

80
Battle of Guise, Opened 29 August 1914
First Battle of the Marne, Opened 6 September 1914 First Battle of the Aisne, Opened 12 September 1914 First Battle of Albert, Opened 25 September 1914 Siege of of Antwerp, Opened 28 September 1914 First Battle of Arras, Opened 1 October 1914 First Battle of Ypres, Opened 14 October 1914 First Battle of Ypres (Second Account), Opened 14 October 1914 Battle of the Yser, Opened 18 October 1914 Raid on Scarborough and Hartlepool, Opened 16 Dec 1914 Battle of Givenchy, Opened 18 December 1914 First Battle of Champagne, Opened 20 December 1914 Battle of Neuve-Chapelle, Opened 10 March 1915 Second Battle of Ypres, Opened 22 April 1915 Battle of Festubert, Opened 15 May 1915 Battle of Loos, Opened 25 September 1915 Battle of Verdun, Opened 21 February 1916
, Opened 14 October Battle of the Yser, Opened 18 October Raid on Scarborough and Hartlepool, Opened 16 Dec Battle of Givenchy, Opened 18 December First Battle of Champagne, Opened 20 December Battle of Neuve-Chapelle, Opened 10 March Second Battle of Ypres, Opened 22 April Battle of Festubert, Opened 15 May Battle of Loos, Opened 25 September Battle of Verdun, Opened 21 February")
81
Battles: The Invasion of Lorraine, 1914
One of the Battle of the Frontiers, the Invasion of Lorraine (also known as the Battle of Morhange-Sarrebourg) began with the French First and Second Armies entering the city on 14 August 1914, despite the failure of General Paul Pau’s 8 August offensive at the Battle of Mulhouse, another key target near the Swiss border, with his ‘Army of Alsace’. The French First Army, under General Auguste Dubail, intended to take Sarrebourg, east of Nancy, a strongly defended town, with General Noel dr Castelnau’s Second Army taking Morhange, similarly fortified. The task of defending these towns fell to German Crown Prince Rupprecht, who had overall command of the German Sixth and General Josias von Herringen’s Seventh Army.
 began with the French First and Second Armies entering the city on 14 August 1914, despite the failure of General Paul Pau’s 8 August offensive at the Battle of Mulhouse, another key target near the Swiss border, with his ‘Army of Alsace’. The French First Army, under General Auguste Dubail, intended to take Sarrebourg, east of Nancy, a strongly defended town, with General Noel dr Castelnau’s Second Army taking Morhange, similarly fortified. The task of defending these towns fell to German Crown Prince Rupprecht, who had overall command of the German Sixth and General Josias von Herringen’s Seventh Army.")
82
Rupprecht implemented a strategy of apparently retreating under the force of the French attack, only to bounce back in a fierce, cleverly manoeuvred counter-attack, having lured the French armies into a strong attack upon a heavily defended position. As the French armies advanced they encountered increasingly stern German opposition, including treacherous machine gun fire and heavy artillery. Rupprecht, however, pressed German Army Chief of Staff Helmuth von Moltke to authorise a more aggressive strategy, under which the Germans would mount a counter-attack, the aim being to drive the French back to Nancy. With Moltke’s agreement the offensive was launched on 20 August, whilst de Castelnau’s Second Army battered Morhange. Caught by surprise and without the assistance of an entrenched position, Second Army was forced to fall back, eventually into France itself.

83
This in turn obliged General Dubail to retreat his First Army from Sarrebourg. Despite the German onslaught Ferdinand Foch’s XX Corps managed to defend Nancy itself. Gaps began to appear between the French armies, prompting Commander-in-Chief Joseph Joffre to withdraw the Army of Alsace – a bitter blow given the latter’s recent success in retaking Mulhouse. Eight days after the French offensive had begun, 22 August, both First and Second Armies were back to the fortress zones of Belfort, Epinal and Toul. Diverting from the Schlieffen Plan, Rupprecht’s forces were reinforced preparatory to an attack against the two French armies through the Trouee des Charmes, a natural gap between Epinal and Toul. However the French, through the successful use of Reconnaissance aircraft, were alerted to the German's build-up and so prepared an adequate defence. Attacked therefore on 24 August, German gains were minimal, limited to the acquisition of a small salient into French lines, itself reduced by heavy French counter-attacks on the morning of 25 August.

84
The French line held. Realistically the troops gathered for Rupprecht’s offensive – which comprised 26 divisions of men – would have been put to far greater use at the First Battle of the Marne; however Rupprecht continued fighting until the end of the month, without success. Stalemate and trench warfare ensued.

86
Battles: The First Battle of the Marne, 1914
The First Battle of the Marne was conducted between 6-12 September 1914, with the outcome bringing to an end the war of movement that had dominated the First World War since the beginning of August. Instead, with the German advance brought to a halt, stalemate and trench warfare ensued. Having invaded Belgium and north-eastern France, the German army had reached within 30 miles of Paris. Their progress had been rapid, having successfully beaten back Belgian, French and British forces in advancing deep into north-eastern France. Their advance was in pursuance of the aims of the Schlieffen Plan, whose primary focus was the swift defeat of France in the west before turning attention the Russian forces in the east. As the German armies neared Paris, the French capital prepared itself for a siege. The defending French forces (Fifth and Sixth Armies) - and the British - were at the point of exhaustion, having retreated continuously for days under repeated German attack until, directed by Joseph Joffre, the French Commander-in-Chief, they reached the south of the River Marne.
 - and the British - were at the point of exhaustion, having retreated continuously for days under repeated German attack until, directed by Joseph Joffre, the French Commander-in-Chief, they reached the south of the River Marne.")
87
With victory seemingly near, Alexander von Kluck’s German First Army was instructed to encircle Paris from the east. The French government, similarly expecting the fall of the capital, left Paris for Bordeaux. Joseph Joffre, imperturbable in the face of crisis, resolved on 4 September to launch a counter-offensive strike, under the recommendation of the military governor of Paris, Gallieni, and aided by the British under Sir John French. Joffre authorised General Maunoury’s Sixth Army - comprising 150,000 men - to attack the right flank of the German First Army in an action beginning on the morning of 6 September. In turning to meet the French attack a 30 mile wide gap appeared in the German lines between the First and Second Army, the latter commanded by the cautious General Karl von Bulow.

88
Nevertheless, the German forces were close to achieving a breakthrough against Maunoury's beleaguered forces between 6-8 September, and were only saved on 7 September by the aid of 6,000 French reserve infantry troops ferried from paris in streams of taxies, 600 in all. The following night, on 8 September, the aggressive French commander General Franchet d’Esperey’s Fifth Army launched a surprise attack against the German Second Army, serving to further widen the gap between the German First and Second Armies. D'Espery was a recent appointment, Joffre having given him command of Fifth Army in place of the dismissed General Lanrezac, who was deemed too cautious and wanting in 'offensive spirit'

89
On 9 September the German armies began a retreat ordered by the German Chief of Staff Helmuth von Moltke. Moltke feared an Allied breakthrough, plagued by poor communication from his lines at the Marne. The retreating armies were pursued by the French and British, although the pace of the Allied advance was slow - a mere 12 miles in one day. The German armies ceased their withdrawal after 40 miles at a point north of the River Aisne, where the First and Second Armies dug in, preparing trenches that were to last for several years. In a strategic triumph at the First Battle of the Marne, which ended on 10 September, the French forces - assisted by the British - had succeeded in throwing back the German offensive, recapturing lost ground in the process. More importantly, the battle ended any hopes the Germans had of effectively bringing the war on the Western Front to an early close. Casualties at the battle were heavy. The French incurred 250,000 losses, and it is believed that the Germans suffered similar casualties (no official figures are available). The British recorded 12,733 casualties among the BEF.
. The British recorded 12,733 casualties among the BEF.")
94
Battles: The Siege of Antwerp, 1914

96
Battles: The Siege of Antwerp, 1914
Following the fall of the forts at Liege in Belgium on 16 August 1914, King Albert I ordered a withdrawal of Belgium's remaining 65,000 troops to Antwerp, another fortress city (along with Namur). Together with 80,000 garrison troops, Antwerp's ring of 48 outer and inner forts presented formidable opposition to von Kluck’s German First Army's flank. Von Kluck had chosen to bypass Antwerp in the Germany army's advance through Belgium and into France. Nevertheless, the presence of so many troops at its flank presented a constant threat.
. Together with 80,000 garrison troops, Antwerp s ring of 48 outer and inner forts presented formidable opposition to von Kluck’s German First Army s flank. Von Kluck had chosen to bypass Antwerp in the Germany army s advance through Belgium and into France. Nevertheless, the presence of so many troops at its flank presented a constant threat.")
97
This danger transpired into sorties conducted from the forts on August and 9 September, designed by the Belgians to distract the Germans from their attack upon the British and French at the Battles of Mons and Charleroi. Effective to a degree, von Kluck was obliged to detach four divisions solely to face attacks from Antwerp. Following the attack on 9 September however the German High Command, led by the German Chief of Staff Helmuth von Moltke in Berlin, determined to capture the Antwerp forts. Before this could be done however, action at the Marne distracted all German attention to their advance upon Paris, followed after the Marne action by a retreat to the Aisne. German General von Boseler was given the task of capturing Antwerp. Assigned a force of five divisions of mostly reserve forces and 173 guns, artillery bombardment began firing upon the outer south-east forts on 28 September. As at Liege and at Namur, the use of heavy guns such as the powerful Big Bertha (a 420mm siege howitzer), effectively put the forts out of commission.
, effectively put the forts out of commission.")
98
On 2 October the Germans succeeded in penetrating two of the city's forts. Churchill was sent to Antwerp to provide a first-hand report on the situation there. Leaving London that night he spent three days in trenches and fortifications around the city. He reported to Kitchener on 4 October that Belgian resistance was weakening with morale low. Receiving a request from the Belgian government for more assistance, the British dispatched a further 6,000 Royal Navy troops, 2,000 on 4 October and 4,000 on the following day. The original division of 22,000 troops were also en route for Ostend. Landing at Ostend on 6 October the British naval forces were too late; the Belgian government relocated from Antwerp to Ostend the same day, with the city itself evacuated the following day under heavy artillery bombardment, formerly surrendered by its Military Governor, General Victor Deguise to the Germans on 10 October

100
The division of British troops at Ostend had not in any event moved towards Antwerp upon hearing that the French government had declined to add relieving forces of their own. Nevertheless, British intervention had prolonged the defence of Antwerp for perhaps five days, giving the British valuable time for the deployment of troops in Flanders. German forces continued to occupy Antwerp until its liberation in late 1918. Most Belgian and Allied forces had however managed to escape the city west along the coast, subsequently taking part in the defence at Ypres in mid-October.

101
The Battle of Verdun, 1916 The German siege of Verdun and its ring of forts, which comprised the longest battle of the First World War, has its roots in a letter sent by the German Chief of Staff, Erich von Falkenhavn, to the Kaiser, Wilheim II, on Christmas Day 1915. In his letter to the Kaiser, Falkenhayn argued that the key to winning the war lay not on the Eastern Front, against Russia – whom he believed was on the point of revolution and subsequent withdrawal from the war – but on the Western Front. He reasoned that if France could be defeated in a major set-piece battle Britain would in all likelihood seek terms with Germany, or else be defeated in turn.

103
In his letter to Wilhelm Falkenhayn believed that Britain formed the foundation of the Allied effort ranged against Germany and that she must be removed from the war. To that end he recommended implementation of a policy of unrestricted submarine warfare against merchant shipping, a policy directed squarely at starving Britain. This combined with a knock-out block to France would, he believed, bring about a successful conclusion to hostilities.

104
In so doing he agreed to switch focus from the Eastern Front to the Western Front. This latter strategy was not without its critics: in particular Paul von Hindenburg argued that the opportunity was lost to capture the bulk of the Russian army. Ultimately the failure of Falkenhayn’s recommendations cost him his position. Falkenhayn’s choice of Verdun as the focus of the German offensive was shrewd. Although relegated by France to the status of a minor fortress during the early stages of the war, France having lost faith in the value of fortress defences, Verdun maintained a great psychological hold in the minds of the French people. On a practical level the woods immediately behind Verdun would have proved far easier to defend than the Verdun forts.

105
The last fortress town to fall to the Prussians in the Franco-Prussian war of , Verdun’s fortifications had been significantly boosted in the 1880s to withstand further attacks. In addition its status as an important fortress since Roman times guaranteed recognition of the name ‘Verdun’ to most Frenchmen. In short, it was of greater value symbolically than strategically. Falkenhayn counted upon this.

106
Falkenhayn’s stated aim was to “bleed France white” in its defence of the ancient fortress town. The fact that Verdun formed a French salient into German lines only served to help Falkenhayn, since it meant that it was open to attack from three sides at once. The task of besieging Verdun fell to the German Fifth Army under Crown Prince Wilhelm. He planned to assault the town from both side of the surrounding Meuse River, a plan vetoed by Falkenhayn, who, cautious by nature, feared heavy losses, ordered the attack to be confined to the east bank of the river.

108
In the interim between the planned and actual start date French Commander-in-Chief Joffre received intelligence of the imminent attack, hastily deploying reinforcements to the French Second Army. Meanwhile the fortress commander, Lieutenant Colonel Emile Driant, also a politician and published author, vainly attempted to improve Verdun’s trench systems in time. Driant prepared for the onslaught by posting two battalions, led by himself, at the tip of the Verdun salient on the east bank of the Meuse River. He faced formidable opposition: one million German troops against 200,000 defenders. The attack finally began at 07:15 on 21 February, Crown Prince Wilhelm opening the battle with 1,400 guns packed along the eight-mile front, the guns well served by good nearby railway facilities. 100,000 shells poured into Verdun every hour, Wilhelm’s intention being to kill the majority of the French defenders before the infantry even started their advance into the fortress.

109
It is arguable that had Wilhelm chosen to attack at this point the fortress might still have been taken. Instead, daunted by the apparently formidable defences, Wilhelm chose to renew the bombardment. By the close of the day the German forces had succeeded only in capturing the French front line trenches, much less than planned, although Driant himself had been killed during the battle, and his two battalions demolished. Wilhelm withdrew his forward infantry in preparation for a further artillery bombardment, thus taking the sting out of the momentum that had been generated. More importantly it allowed the French defenders to position themselves such that they were able to enfilade the advancing German troops from across the river. Verdun remained in French hands, although the defensive situation was dire. A message was sent to French headquarters on 23 February reporting that Driant had been lost, as had all company commanders, and that the battalion had been reduced from 600 to around 180 men.

114
The following day, 24 February, German troops succeeded in over-running the French second line of trenches, forcing the defenders to within 8 kilometres of Verdun itself. Nevertheless, two outer forts, Vaux and Douaumont, continued to hold out. A French division sent in piecemeal that same day was dispersed under heavy German artillery fire. The next day Douaumont fell to the 24th Brandenburg Infantry Regiment. The effect on French morale of the loss of Douaumont was marked, both upon the remaining defenders and the reinforcements freshly arrived. Popular French sentiment within the country demanded its recapture: withdrawal from Verdun was therefore politically impossible. The French Commander-in-Chief, Joffre, remained unflappable. He issued a statement noting that any commander who gave ground to the advancing Germans would be court-martialled. He summarily dismissed General Langle de Cary, who was responsible for the defence of Verdun, for deciding to evacuate Woevre plain and the east bank of the Meuse River.

115
Pledging to Joffre, “Ils ne passeront pas
Pledging to Joffre, “Ils ne passeront pas!” – literally “They shall not pass!” – Petain telephoned the commander of the Verdun front line and instructed him to hold fast. In a sense Petain’s appointment could hardly have better-suited Falkenhayn. His stated aim of the campaign was to bleed the French army at Verdun. A quick German victory at Verdun would hardly meet this criteria, whereas Petain’s dogged determination to hold out suited his intentions perfectly. However he could hardly have determined just how effective Petain’s defensive strategies turned out to be. Petain understood that the defence of Verdun would result in many French casualties: the nature of the terrain made this inevitable. However he was determined to inflict the maximum damage to the German invaders in the course of these losses. Hence he effectively re-organised French use of artillery, personally taking commanding of this aspect of the defence.

117
Petain understood that the defence of Verdun would result in many French casualties: the nature of the terrain made this inevitable. However he was determined to inflict the maximum damage to the German invaders in the course of these losses. Hence he effectively re-organised French use of artillery, personally taking commanding of this aspect of the defence. He also took action to ensure that an effective supply route to Verdun was maintained, designating a single artery road leading to a depot 50 miles to the west, Bar-le-Duc, and ensuring constant access by assigning columns of troops whose sole duty it was to maintain clearance of the road and to perform repairs as necessary. The road was christened ‘Voie Sacree’ – the ‘Sacred Road’

118
On 6 March the Germans began a fresh offensive after receiving fresh artillery supplies, at first making great progress until French counter-attacks pushed back the advancing German infantry. For the remainder of the month Wilhelm launched repeated attacks against the French reinforcements constantly pouring into the fortress. Of the 330 infantry regiment of the French army, 259 eventually fought at Verdun. Falkenhayn reluctantly committed another corps of men to an attack up the left bank of the Meuse River towards a small ridge named Le Morte-homme (the ‘Dead Man’), a battle that raged continuously without conclusion. Meanwhile the casualties were mounting rapidly on both sides. The French were certainly losing huge numbers of men, as were their German opposition. By the time the battle ended almost one million casualties had been incurred in roughly equal numbers on either side.
, a battle that raged continuously without conclusion. Meanwhile the casualties were mounting rapidly on both sides. The French were certainly losing huge numbers of men, as were their German opposition. By the time the battle ended almost one million casualties had been incurred in roughly equal numbers on either side.")
119
Meanwhile the casualties were mounting rapidly on both sides
Meanwhile the casualties were mounting rapidly on both sides. The French were certainly losing huge numbers of men, as were their German opposition. By the time the battle ended almost one million casualties had been incurred in roughly equal numbers on either side. April 9 saw the third major German offensive launched, this time on both sides of the salient. Again Petain’s defences held, the attacks and counter-attacks continuing until the close of May, the German forces inching ever closer to the remaining forts. During this period Petain received a promotion and was replaced at Verdun by the aggressive Robert Nivelle.

123
Mort Homme Hill was secured by the Germans on 29 May and finally, on 7 June, Fort Vaux fell.
Situated on the east bank of the Meuse River, the fort had held out against constant bombardment since the start of the battle in February. However, by now out of reserves of water and the fort itself lying in ruins, its French defenders could hold out no longer. With the capture of the fort Wilhelm offered his congratulations to the fort commander, Major Raynal, for holding out so long. Encouraged by the success in capturing Fort Vaux, German troops almost succeeded in breaking through the French line at the close of June and into early July. It was at this stage that the latest form of chemical warfare was unveiled by Germany: phosgene gas, which acted by forming as hydrochloric acid once inhaled into the lungs. Joffre, meanwhile, pressed the British government to stage a major diversionary offensive elsewhere on the Western Front to serve as a drain on German manpower. Originally scheduled for 1 August, the Battle of the Somme was brought forward to 1 July upon the insistence of the French.

124
Petain, against Nivelle’s recommendation, recommended a withdrawal from the western Meuse line. Joffre, however, supported Nivelle in dismissing the suggestion, a decision that was fortunately vindicated by a sudden drain upon German resources as a result of a Russian offensive on the Eastern Front, which meant that fifteen German divisions had to be withdrawn from Verdun to aid in the defence on the east. By this stage the German Chancellor, Theobald von Bethmann-Hollweg, was scathing in his condemnation of Falkenhayn’s lack of success in Verdun, which was proving as costly in terms of manpower to Germany as it was to France. Falkenhayn was consequently dismissed by the Kaiser and dispatched to the Transylvanian Front on 29 August to command Ninth Army. Falkenhayn’s arch critic, Paul von Hindenburg, replaced him as Chief of Staff, buoyed by his successes in the east.

125
A new French commander of the Verdun forts, Third Army’s General Charles Mangin, was also appointed, reporting to Nivelle. Taking the offensive Mangin managed to retake Douaumont on 24 October, followed by Fort Vaux on 2 November. Following a rest pause, Mangin renewed his offensive, retaking ground lost since the start of the German attack. Between December alone, when the battle ended, the French captured 11,000 prisoners and with them 115 heavy guns. Simply put, Hindenburg saw no point in continuing Falkenhayn’s pointless attacks. French casualties during the battle were estimated at 550,000 with German losses set at 434,000, half of the total being fatalities. The only real effect of the battle was the irrevocable wounding of both armies. No tactical or strategic advantage had been gained by either side.

134
The Gallipoli Front

136
Battle At Gallipoli, 1915 By the spring of 1915, combat on the Western Front had sunk into stalemate. Enemy troops stared at each other from a line of opposing trenches that stretched from the English Channel to the Swiss border. Neither opponent could outflank its enemy resulting in costly and unproductive direct attacks on well-fortified defenses. The war of movement that both sides had predicted at the beginning of the conflict had devolved into deadly stagnation.

138
Allied leaders, including Winston Churchill and Lord Kitchener, scoured their maps to find a way around the impasse. The Dardanelles Strait leading from the Mediterranean to Istanbul caught their eye. A successful attack in this area could open a sea lane to the Russians through the Black Sea, provide a base for attacking the Central Powers through what Churchill described as the "soft underbelly of Europe", and divert enemy attention from the Western Front.

140
The Campaign was a fiasco, poorly planned and badly executed
The Campaign was a fiasco, poorly planned and badly executed. It began in February 1915 with an unsuccessful naval attempt to force a passage up the Dardanelles. The flotilla retreated after sustaining heavy damage from Turkish guns lining both shores and from mines strewn across the channel

141
In April, a landing on the Gallipoli Peninsula attempted to secure the shores and silence the Turkish guns. Trouble brewed from the beginning. Amphibious operations were a new and unperfected form of warfare leading to poor communications, troop deployment and supply. The Turks entrenched themselves on the high ground pouring artillery and machine gun fire down upon the hapless Australian, New Zealand, Irish, French and English troops below. The battleground soon resembled that of the Western Front - both sides peering at each other from fortified trenches, forced to spill their precious blood in futile frontal attacks on well defended positions. The stalemate continued through the fall of 1915 until British forces withdrew at the end of the year.

144
Casualties were high - approximately 252,000 or 52% for the British/French while the Ottoman Turks suffered about 300,000 casualties or a rate of 60%. The failed campaign gained little and badly tarnished both Churchill's and Kitchener's reputations.

145
The Value of the Straits
But why attempt the Straits in the first place? The answer lay in the great strategic value control would give the Entente Powers. The Straits linked the Mediterranean Sea with the Sea of Marmora. This not only gave ready access to the Turkish capital Constantinople and much of the Turkish Empire's industrial powerhouse, but also provided a lane to the Black Sea. Just as importantly, if not more so, access to the Sea of Marmora was bound to give Britain and France supply route access to their eastern ally, Russia. Therefore it was quite feasible that should Britain and France gain the Straits they could succeed in not only eliminating Turkey from the war, but in also drawing Greece and Bulgaria into the war against the Central Powers.

149
The Difficulty in Seizing Control
Control of the Dardanelles Straits was therefore a prized ambition of the Entente Powers. As might be expected given the huge tactical and strategic value placed upon the Straits, they were however heavily defended, chiefly by natural geography. To the north they were protected by the Gallipoli Peninsula; to the south by the shore of Ottoman Asia. In addition, fortresses were well positioned on cliff-tops overlooking shipping lanes.

151
Lack of Success on the Western Front
In the meantime both Britain and France were finding news from the campaign on the Western Front sober reading. While much of their time, effort and resources were consumed by the requirements of the struggle in France and Flanders both governments gradually came around to the notion of opening up another front in the Mediterranean, one that offered possibly better prospects of success. In Britain in particular a number of members of the War Cabinet had long favoured decisive action away from the stagnation of the Western Front's lines of trench warfare Churchill took great care in placing such a proposal to the Cabinet. He coerced Admiral Sir Sackville Carden - the commander of British naval forces in the Mediterranean - into sending him a detailed plan for a solely naval attack upon the Straits. Carden obliged but was by no means personally in favour of such an approach

152
Notwithstanding an obvious desire to initiate any plan likely to bring with it a possibility of success, Admiral John FISHER’S silence at the War Cabinet meeting was remarkable. As First Sea Lord his naval force was to take prime responsibility in driving forward Churchill's strategy. Given his later violent objections - which ultimately led to his (and Churchill's) resignation - his lack of objection in January was all the more surprising. It is possible however that he envisaged any eventual attack taking the form of a combined naval/ground troop undertaking.
 resignation - his lack of objection in January was all the more surprising. It is possible however that he envisaged any eventual attack taking the form of a combined naval/ground troop undertaking.")
155
Initial Attacks - 19/25 February 1915
The first attempt upon the 65km-long, 7km-wide Straits was made on 19 February 1915 by a considerable number of combined British and French battleships comprised of the new battleship Queen Elizabeth, 3 battlecruisers, 16 pre-dreadnought (including four French vessels), 4 cruisers, 18 destroyers, 6 submarines, 21 trawlers plus the seaplane carrier Ark Royal. Overseeing the effort was Carden. Pounding the outer fortresses the British and French attack proved ineffective in the face of an efficient Turkish defensive system and poor Allied gunnery, although greater damage was inflicted than the bombarding naval forces realised. A renewed bombardment the following week (following a pause for adverse weather), on 25 February, was similarly unsuccessful. While the outer forts were themselves seized the Allied force could not effective silence the Turkish mobile batteries that poured shellfire from the heights.
, 4 cruisers, 18 destroyers, 6 submarines, 21 trawlers plus the seaplane carrier Ark Royal. Overseeing the effort was Carden. Pounding the outer fortresses the British and French attack proved ineffective in the face of an efficient Turkish defensive system and poor Allied gunnery, although greater damage was inflicted than the bombarding naval forces realised. A renewed bombardment the following week (following a pause for adverse weather), on 25 February, was similarly unsuccessful. While the outer forts were themselves seized the Allied force could not effective silence the Turkish mobile batteries that poured shellfire from the heights.")
160
Failure to Force the Narrows, 18 March 1915
Having paused to consolidate following the clear failure of February's attempts to batter the Turkish protective fortresses, a further naval effort was Briefly launched on 18th march in an attempt to force through The Narrows (so-named because just 1,600 heavily-mined metres separated the shore on either side). Immediately before the attack's launch however Carden collapsed from nervous exhaustion. He was replaced by Sir John de Robeck. The renewed attack proved a heavy failure, chiefly on account of the presence of an unsuspected Turkish minefield
. Immediately before the attack s launch however Carden collapsed from nervous exhaustion. He was replaced by Sir John de Robeck. The renewed attack proved a heavy failure, chiefly on account of the presence of an unsuspected Turkish minefield.")
161
It was increasingly clear that ground support was required
It was increasingly clear that ground support was required. A month's pause in operations was undertaken pending preparations for Allied landings at Helles and Anzac Cove. Some 18,000 French colonial troops were despatched to the region on 10 March - prior to the attempt on The Narrows - and on 12 March Lord Kitchener appointed Ian Hamiliton (a former protégé) as regional Commander-in-Chief responsible henceforth for the success of the expedition, accompanied by a force of 75,000 comprised largely of untested Australian and New Zealand troops
 as regional Commander-in-Chief responsible henceforth for the success of the expedition, accompanied by a force of 75,000 comprised largely of untested Australian and New Zealand troops.")
165
Preparations for a Ground Offensive
Hamilton, unsure of the appropriate strategy, sought advice from de Robeck and agreed on 27 March to a straightforward invasion of the Gallipoli Peninsula. Preparations for the Allied landings were not auspicious, and were distinguished by hesitation, indecision and confusion. Meanwhile Turkish defences were further boosted by the arrival of ground forces around the Straits. As a measure of the extent of German influence over Turkish policy regional command was placed in the hands of Limon von Sanders.

167
Liman brought with him approximately 84,000 troops which he dispersed to strategic locations around Gallipoli. As it transpired however Liman's careful positioning of his men was found wanting once Hamilton actually launched his attack on the southern peninsula: Hamilton chose to attack where the Turkish concentration was as its weakest.

168
Landings at Helles and Anzac Cove, 25 April 1915
The relative weakness of Turkish strength on the southern peninsula the whole operation might well have been thrown back into the sea. As it was heavy casualties were incurred at those locations where Turkish defenders were available in any force. Even so two beachheads were established by Hamilton's force, at Helles on Gallipoli's southernmost tip, and further up the coast near Gaba Tepe - the latter soon to be renamed Anzac Cove in honour of the Australian and New Zealand corps who bore the brunt of operations in the area

169
Landings at Suvla Bay, 6 August 1915
It was clear that operations in Gallipoli were going badly. The newly formed Dardanelles Committee in London met on 7 June to consider what steps next to take. Agreement was reached to send additional forces to Hamilton, greatly reinforcing the Allied presence on the peninsula by some three divisions - a decision made by Kitchener in the face of fierce opposition from hard-pressed commanders on the Western Front. Unfortunately for the Allies their Turkish opponents were bringing forward additional reserves at a greater pace than they themselves could manage, with forces despatched from both Palestine and Caucasian Fronts.

170
Such an injection of additional Allied resources signalled another major offensive. When put into effect on 6th August 1915 it took the form of a three-pronged attack: a diversionary action at Helles; movement northward from Anzac Cove towards Sari Bairs; and the centrepiece of the offensive, a landing in force at Suvla Bay by freshly arrived divisions operating under General Sir Frederick Stopford. The idea was for Stopford's forces to link with the troops at Anzac Cove and make a clean sweep across the Gallipoli peninsula. In the interim Hunter-Weston pressed on with further attacks directed towards Achi Baba in Helles. These were uniformly unsuccessful, maintaining Hunter-Weston's particular record of poor results since arriving on the peninsula.

172
To Hamilton's credit the landings at Suvla Bay achieved total surprise and Stopford made initial progress unopposed. However the wider offensive rapidly lost momentum by 10 August as local command indecision - Stopford was particularly at fault - and lack of firm decision from Hamilton's headquarters took their melancholy toll, although fighting continued at Sari Bair until 12 August.

173
Evacuation The possibility of further reinforcements to the region seemingly ruled out, Hamilton received word on 11 October 1915 of a proposal to evacuate the peninsula. He responded in anger by estimating that casualties of such an evacuation would run at up to 50%: a startlingly high figure. The tide was clearly moving against Hamilton. His belief in what was widely viewed as an unacceptable casualty rate in the event of evacuation resulted in his removal as Commander-in-Chief and recall to London at a meeting of the Dardanelles Committee on 14 October.

174
Hamilton was replaced by Sir Charles Monro
Hamilton was replaced by Sir Charles Monro. Monro lost no time in touring Helles, Suvla Bay and Anzac Cove upon his arrival on the peninsula on 28 October. His recommendation was prompt: evacuation. This did not however meet with Kitchener's approval. He travelled to the region to see the state of affairs for himself. The British government, having prevaricated for several weeks, finally sanctioned an evacuation on 7 December. Unfortunately by this stage a heavy blizzard had set in making such an operation hazardous. Nevertheless the evacuation of 105,000 men and 300 guns from Anzac Cove and Suvla Bay was successfully conducted from December 1915. The evacuation of Helles was conducted - comprising 35,000 men - from late December until 9 January 1916. The evacuation operation was easily the most successful element of the entire campaign, with casualty figures significantly lower than Hamilton had predicted (official figures quote just three casualties). Painstaking efforts had been made to deceive the 100,000 watching Turkish troops into believing that the movement of Allied forces did not constitute a withdrawal.
. Painstaking efforts had been made to deceive the 100,000 watching Turkish troops into believing that the movement of Allied forces did not constitute a withdrawal.")
175
The War in the Air

176
Aircraft technology was little over a decade old when Archduke Franz Ferdinand’s assassination in late June 1914 ultimately resulted in the outbreak of 'The Great War' a month later. Initially deemed of little use to the armed services other than in a reconnaissance role, aircraft development exploded during wartime (all too often literally). For example, France had fewer than 140 aircraft when her war against Germany began; four years later that number had ballooned to approximately 4,500. This section of the website examines the role of the aircraft and associated technologies during the First World War, viewed from all sides. In addition to an exploration of aircraft innovations - such as deflector and interrupter gear - the planes themselves are summarised, from fighter aircraft to bombers to Zeppelins to naval aircraft; and biographies are available for a great many of the war's air aces and commanders.
. For example, France had fewer than 140 aircraft when her war against Germany began; four years later that number had ballooned to approximately 4,500. This section of the website examines the role of the aircraft and associated technologies during the First World War, viewed from all sides. In addition to an exploration of aircraft innovations - such as deflector and interrupter gear - the planes themselves are summarised, from fighter aircraft to bombers to Zeppelins to naval aircraft; and biographies are available for a great many of the war s air aces and commanders.")
177
When war broke out the number of aircraft on all sides and all fronts was very small. France, for example, had less than 140 aircraft at the start of the war. By the end of the war she fielded 4,500 aircraft, more than any other protagonist. While this may seem an impressive increase, it does not give a true indication of the amount of aircraft involved. During the war France produced no less than 68,000 aircraft. 52,000 of them were lost in battle, a horrendous loss rate of 77%. The period between 1914 and 1918 saw not only tremendous production, but also tremendous development in aircraft technology. A typical British aircraft at the outbreak of the war was the general purpose BE2c, with a top speed of 116 km/h (72 mph). Powered by a 90 hp engine, it could remain aloft for over three hours. By the end of the war aircraft were designed for specific tasks. Built for speed and maneuverability, the SE5a fighter of 1917 was powered by a 200 hp engine and had a top speed of 222 km/h (138 mph).
. Powered by a 90 hp engine, it could remain aloft for over three hours. By the end of the war aircraft were designed for specific tasks. Built for speed and maneuverability, the SE5a fighter of 1917 was powered by a 200 hp engine and had a top speed of 222 km/h (138 mph).")
178
Britain's most famous bomber, the Handley-Page O/400, could carry a bomb load of 900kg (2000 lb) at a top speed of 156 km/h (97mph) for flights lasting eight hours. It was powered by two 360 hp engines. Not only did aircraft become faster, more manoeuvrable and more powerful, but a number of technologies that were common at the start of the war had almost disappeared by the end of it. Many of the aircraft in 1914 were of "pusher" layout. This is the same configuration that the Wright brothers used, where the propeller faced backwards and pushed the aircraft forward. The alternative layout, where the propeller faces forwards and pulls the aircraft, was called a "tractor" design. It provided better performance, but in 1914 visibility was deemed more important than speed. World War One marked the end of pusher aircraft.

179
The rapid pace of technological innovation was matched by a rapid change in the uses to which aircraft were put. If in 1914 there were few generals who viewed aircraft as anything more than a tool for observation and reconnaissance (and many of them had great reservation even to that use) by the end of the war both sides were integrating aircraft as a key part of their planned strategies. While the plane did not play the decisive roll that it was to play in later conflicts, the First World War proved their capabilities. It was during this period that the key tasks that aircraft could perform were discovered, experimented with, and refined: observation and reconnaissance, tactical and strategic bombing, ground attack, and naval warfare. With the growing importance and influence of aircraft came the need to control the air, and thus the fighter was born

180
The War in the Air - Bombers

181
Fighter aircraft are the most aggressive aircraft in war, but their role is essentially defensive: to protect ones own airspace, or to protect ones own aircraft when they enter enemy airspace. The aircraft that carry out the offensive policies of a nation are the bombers. Strategic bombing is aimed at reducing an enemy's capacity to make war – targets typically include factories, power stations and dockyards. The Italians and British, and to a lesser extent the French, carried out such bombing campaigns. The Germans attempted to destroy the British capacity to make war by sowing panic and dissent among the civilian population. Strategic bombing calls for long range aircraft, as often the target is well behind enemy lines.

192
Weapons of War However no history of the war would be complete without an overview of the weapons of war, in all their varying forms. Thus this area of the site provides summary information of the tools by which the armies conducted war, and include many of the innovations war always brings to the development of weaponry.

193
Bayonets Veterans of the Great War, when interviewed, tended to play down the impact of the bayonet during the war. Many remarked (partly in jest) that the bayonet was used primarily as a splendid means of toasting bread, and for opening cans, to scrape mud off uniforms, poking a trench brazier or even to assist in the preparation of communal latrines. It therefore begs the question: was the bayonet of any real significance during the war, and if not why was it carried by virtually all infantrymen in all armies (and most especially by the usually technologically advanced German army)?
 that the bayonet was used primarily as a splendid means of toasting bread, and for opening cans, to scrape mud off uniforms, poking a trench brazier or even to assist in the preparation of communal latrines. It therefore begs the question: was the bayonet of any real significance during the war, and if not why was it carried by virtually all infantrymen in all armies (and most especially by the usually technologically advanced German army)")
194
Simple Design

195
The Lusitania The Lusitania sailed on May 1st 1915 from New York bound for Liverpool. The sinking of the Lusitania was thought to have made a major impact on America and World War One, but America did not join the war for another two years. As the Lusitania had sailed from New York, she had on board American civilians and in 1915 America was neutral in WWI. As she left New York, the dock was crowded with news reporters as New York newspapers had carried an advert in them paid for by the German Embassy that any ship that sailed into the "European War Zone" was a potential target for German submarines. Some newspapers printed the warning directly next to Cunard's list of departure dates.

196
Regardless of this, the Cunard liner was packed with passengers
Regardless of this, the Cunard liner was packed with passengers. Many had received an anonymous telegram advising them not to travel but the ship was billed by Cunard as the "fastest and largest steamer now in the Atlantic service" and it was generally believed that the Lusitania had the power to outpace any ship above or below the water. Many of the passengers came to the simple conclusion that a luxury liner simply was not a legitimate target of the Germans as it had no military value. Any passenger who had doubts was given further confidence when many famous and rich people boarded. It was assumed that the likes of multi-millionaire Alfred Vanderbilt and wine merchant George "Champagne King" Kessler and the like would have had access to information from the highest of sources to warn them if danger really did exist.

197
As the 32,000 ton luxury liner left New York, the passengers turned their attention to what the liner had to offer them as fee paying customers. One female passenger said: I don't think we thought of war. It was too beautiful a passage to think of anything like war." The Lusitania crossed the half-way point of her journey at night on May 4th. Around this time, the U-boat U20 appeared off the Irish coast off the Old Head of Kinsdale. U20 was captained by Kapitän-leutnant Schwieger. In all, there were about 15 German U boats in the "European War Zone" - the zone that the Lusitania was about to move into. U20 had left its base at Emden on April 31st 1915. In its journey to the Atlantic it had attacked a Danish merchant ship but let it go once its Danish flag had been spotted.

198
May 6th brought better targets for U20
May 6th brought better targets for U20. Medium-sized liners called the 'Candidate' and the 'Centurion' were both attacked and sunk. Neither sinking led to any casualties - though Schwieger had not given a warning to either ship. At on May 6th, the Lusitania received the first of a number of warnings from the Admiralty about U-boat activity off the south coast of Ireland. The crew went through a number of safety drills and some watertight bulkheads were closed. But the night passed without further incident. The next day, May 7th, the Lusitania came into sight of the Irish coast. The ship's captain, Captain Turner, became concerned as he could see no other ship ahead of him - more especially, he was concerned that he could see no protective naval ships. It was as if all other ships had cleared the waters as a result of the Admiralty's warning.

202
"great confusion on board... they must have lost their heads."
At on May 7th, Turner could see the Old Head of Kinsdale - a well known sighting for any experienced sailor in the region. At around the same time, the Lusitania was spotted by U20. The first torpedo was fired at At 14.10, Schwieger noted in his log: "Shot hits starboard side right behind bridge. An unusually heavy detonation follows with a strong explosion cloud..." Schwieger noted later "great confusion on board... they must have lost their heads."

203
The Lusitanian took just eighteen minutes to sink
The Lusitanian took just eighteen minutes to sink. The speed and the angle of sinking made it extremely difficult to launch the life boats and the first one that did get into the water spilled its occupants into the sea. 1,153 passengers and crew drowned. 128 of them were Americans. There was understandable anger throughout America and Great Britain. But some questions remained unanswered by those who condemned the attack.

207
Why did the liner only take 18 minutes to sink?
The log of U20 stated clearly that the submarine had only fired one torpedo and Schwieger stated that this was the case. His log also noted that the torpedo caused an unusually large explosion. why was a second explosion seen if no second torpedo was fired? This second explosion presumably speeded up the whole process of the Lusitania sinking. with such a high profile ship crossing the Atlantic and after warnings from the Germans and the Admiralty, why were there no British naval boats in the vicinity to protect the Lusitania?

208
It is thought that a second explosion occurred because the Lusitania was carrying something more than a liner should have been carrying. In the hold of the Lusitania were 4,200 cases of small arms ammunition - an insignificant quantity when compared to the millions of bullets being used in each battle on the Western Front. However, by carrying ammunition, the Lusitania was carrying war contraband and she was therefore a legitimate target for the German U boat fleet in the Atlantic. The British propaganda machine went into overdrive condemning the sinking as an act of piracy. The "Times" referred to the sinking by condemning those who doubted German brutality:

209
"the hideous policy of indiscriminate brutality which has placed the German race outside of the pale. The only way to restore peace in the world, and to shatter the brutal menace, is to carry the war throughout the length and breadth of Germany. Unless Berlin is entered, all the blood which has been shed will have flowed in vain"

213
AMERICA'S ENTRY INTO WORLD WAR I
The neutrality of the United States had been seriously imperiled after the sinking of the Lusitania(1915). At the end of 1916, Germany, whose surface fleet had been bottled up since the indecisive battle of Jutland announced that it would begin unrestricted submarine warfare in an effort to break British control of the seas. In protest the United States broke off relations with Germany (Feb., 1917), and on Apr. 6 it entered the war. American participation meant that the Allies now had at their command almost unlimited industrial and manpower resources, which were to be decisive in winning the war. It also served from the start to lift Allied morale, and the insistence of President Woodrow Wilson on a “war to make the world safe for democracy” was to weaken the Central Powers by encouraging revolutionary groups at home.
. At the end of 1916, Germany, whose surface fleet had been bottled up since the indecisive battle of Jutland announced that it would begin unrestricted submarine warfare in an effort to break British control of the seas. In protest the United States broke off relations with Germany (Feb., 1917), and on Apr. 6 it entered the war. American participation meant that the Allies now had at their command almost unlimited industrial and manpower resources, which were to be decisive in winning the war. It also served from the start to lift Allied morale, and the insistence of President Woodrow Wilson on a war to make the world safe for democracy was to weaken the Central Powers by encouraging revolutionary groups at home.")
215
In 1918, an arm of the American government in order to assure continued public support for the war effort published the Official Reasons why American chose to enter the World War. The organization responsible for distributing this information was called the Committee for Public Information which played a number of roles for the American government including serving as a propaganda ministry. Below is a clearly states list of reasons for America declaring war overlain with some florid language of the propagandist. Nevertheless, this clearly summarizes what the citizenry told about why their nation was fighting a war.

216
The renewal by Germany of her submarine warfare.
Imperial Germany was running amuck as an international desperado Prussian Militancy and autocracy let loose in the world disturbed the balance of power and threatened to destroy the international equilibrium. The conflict [had gradually shaped] into a war between the democratic nations on one hand and autocratic on the other. [America's] tradition of isolation had grown out warn and could no longer be maintained in the age of growing interdependency. Because of the menace to the Monroe Doctrine and to [America's] independence.

217
The Big Four Leaders of World War I
The Big Four Leaders gathered at Versailles in January 1919 to write a formal treaty for peace.

218
Woodrow Wilson Woodrow Wilson, the President of the United States at the time of war, represented the United States in Versailles himself. He had a difficult time convincing the other three leaders to accept his idea of peace without victory. Wilson was forced to agree that Germany had caused the war.

219
David Lloyd George David Lloyd George was the British Prime Minister who represented the United Kingdom. During their talks, George put the needs of his own nation first.

220
Vittorio Orlando Vittorio Orlando, the Italian Prime Minister, also put the needs of his nation first during talks.

221
Georges Clemenceau Georges Clemenceau, the French Premier, wanted to make Germany pay for the entire cost of the war since most of the fighting took place on French soil.

222
Peace Treaty Signed at Versailles, 1919
The Parisians had a parade after the signing of the Treaty at Versailles marking the end of World War I. Notice the sign at the top of this photograph that reads: "Vive Wilson."

223
Resources: The First World War Chronology Picture History
Picture History The History of American Wars

224
The Big Four Leaders of World War I
The Big Four Leaders gathered at Versailles in January 1919 to write a formal treaty for peace.

225
Woodrow Wilson Woodrow Wilson, the President of the United States at the time of war, represented the United States in Versailles himself. He had a difficult time convincing the other three leaders to accept his idea of peace without victory. Wilson was forced to agree that Germany had caused the war.

226
David Lloyd George David Lloyd George was the British Prime Minister who represented the United Kingdom. During their talks, George put the needs of his own nation first.

227
Vittorio Orlando Vittorio Orlando, the Italian Prime Minister, also put the needs of his nation first during talks.

228
Georges Clemenceau Georges Clemenceau, the French Premier, wanted to make Germany pay for the entire cost of the war since most of the fighting took place on French soil.

229
Peace Treaty Signed at Versailles, 1919
The Parisians had a parade after the signing of the Treaty at Versailles marking the end of World War I. Notice the sign at the top of this photograph that reads: "Vive Wilson."

230
Resources: The First World War Chronology Picture History
Picture History The History of American Wars

Similar presentations


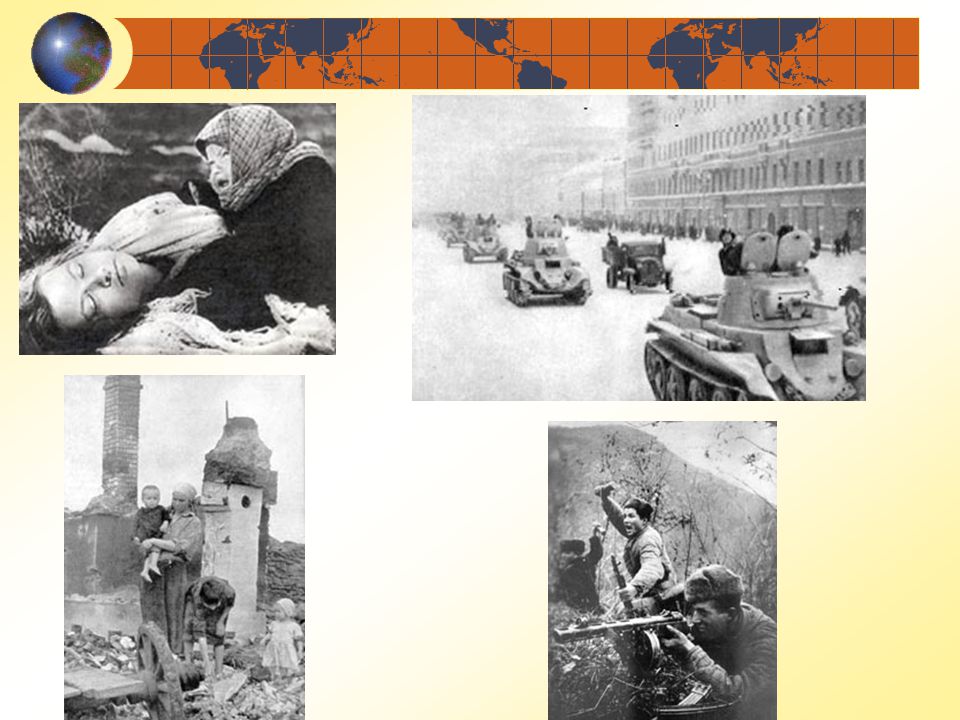


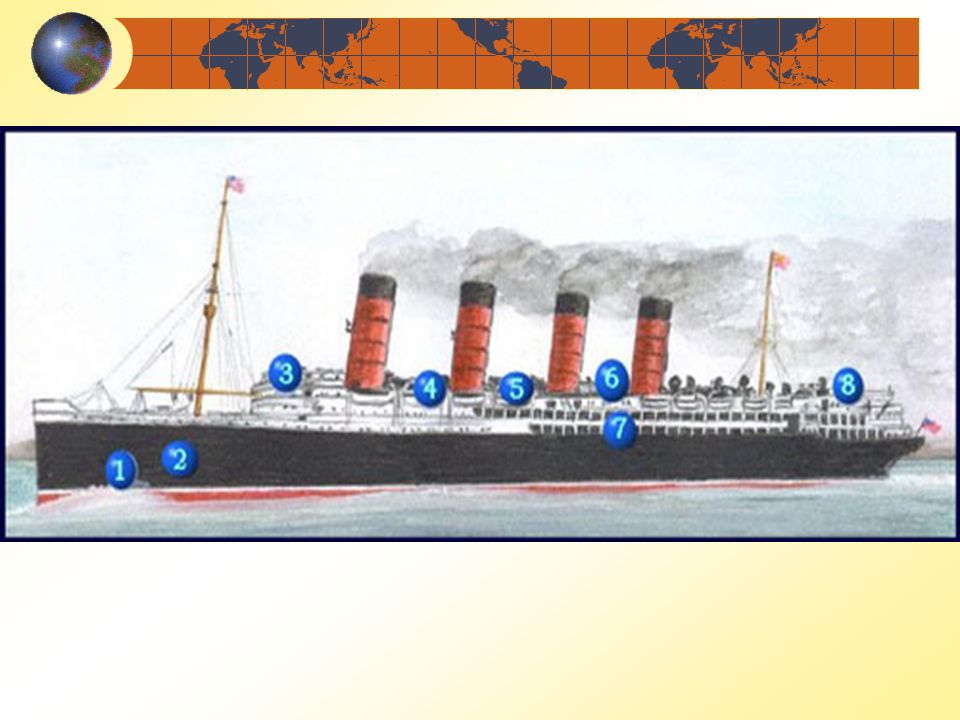


 gained.>")