Download presentation
Presentation is loading. Please wait.

1
Digitarium Mobile Planetarium Assembly and Disassembly Procedures Grunts Bob Law and Ken Mitchell Photos Barbara Mallon Assembled by Ken Mitchell Livermore TOPScience Nov 1, 2008 With Control Box Version 3

2
Transport container with the C/P installed Two Controllers Parts Box Notebook goes here Projector Remote

3
System Components using the Control Box Dome Package Transport Container C/P Unit Auxiliary Lamp Fan Box & Fan Control Box Main Power Input Cable

4
Removing the C/P from the transport container White box contains speakers, pointers, and spare batteries

5
Two people should carry the C/P

6
Pick a good spot to set up the dome IMPORTANT Ensure that the floor is clean and that there is plenty of room on the floor and overhead

7
Remove the dome from the storage bag Remove the Dome from the large blue bag Be sure to replace the straps in the bag and zip it closed.

8
Spreading dome Spread the dome evenly on the floor

9
Ensure the inner liner is straight

10
Attach the center clip (with the yellow tie) to the top of the fan Finding the hook with the yellow tag
 to the top of the fan Finding the hook with the yellow tag")
11
Hook with yellow attaches to top of the fan’s screen.

12
Ensure the inlet tube is completely over the fan’s screen and attach the other two clips Fan Switch

13
Plug the white surge suppressor into a wall plug Control Box and Cables Surge Protector plugs into wall outlet Black cables power the C/P unit Input Power Cable

14
Be sure the ‘KILL’ switch is in the Normal position. The pilot light should be on. Turn ‘Fan Speed’ full CW.

15
Plug the color coded fan and lamp cords into the back of the control box.

16
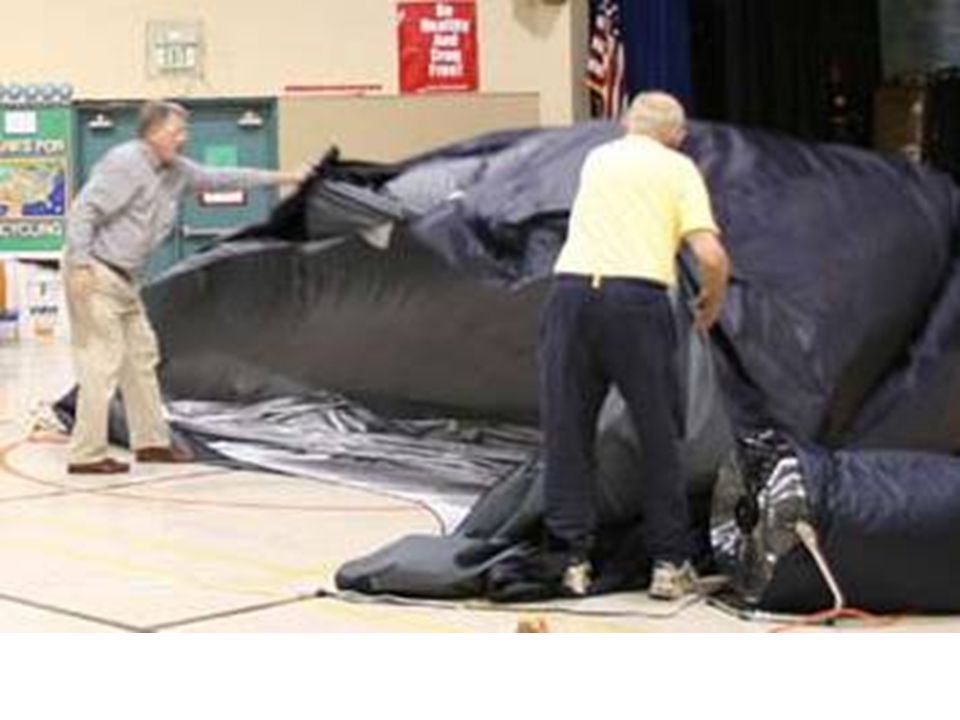
It should now look like this Speaker Power Converter plugs in here Plug the Fan and Auxiliary Lamp into the Control Box. Turn the Fan Switch on to Maximum to start Inflating the Dome.

17
This is the circuit diagram for inflating the dome Diagram of initial setup

18
The dome should start to inflate but be prepared to untangle the inlet tube if necessary

19
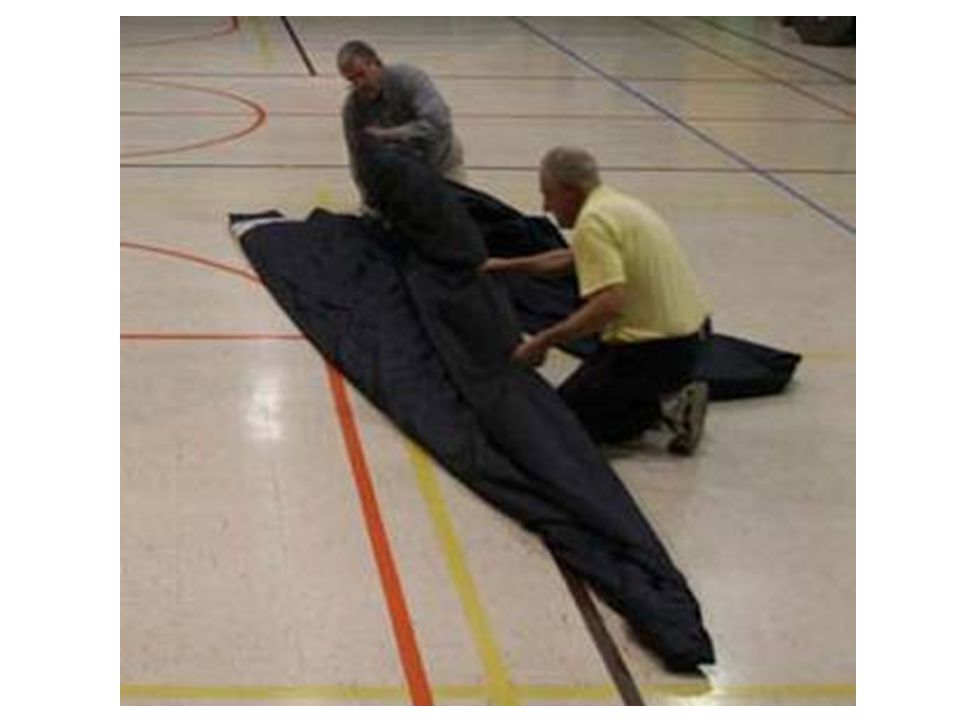
Inspect the dome to ensure even inflation Inspect the Dome to insure the inner and outer shells are snapped together.

20
Important Check that the fan doesn’t contact the dome and interfere with air flow

21
When the Dome is fully inflated, slide the control box and lamp under the side of the dome Be sure to turn the lamp on to full brightness before sliding it inside

22
Three Ways: Carry the C/P into the dome, Slide it under the Dome, or Put it under material before inflating

23
Preparing the C/P Unit This is normally done inside the Dome but is shown outside for clarity

24
Remove the two locking pins by pressing on the release buttons on the top of the “Tee” pin

25
Pull up the top handle to raise the C/P. Reinsert the two pins, using a light to help find the holes. This is easier if done with two people.

26
Orient the C/P so the arrow points toward the dome inlet tube. The expanded metal (air inlet) of the projector should face the air inlet to the Dome. The arrow helps you see to orient the unit properly in the Dome.
 of the projector should face the air inlet to the Dome. The arrow helps you see to orient the unit properly in the Dome..")
27
Attach the lamp to the frame by sliding it into its mating bracket. The lamp is controlled by the dimmer on the Control Box.

28
Connect the color coded power cords from the control box to the computer and projector. Cables from the Control Box plug into the C/P receptacles. The power switch for each is located next to the receptacle. Audio plug-in USB Ports Power input from Control Box Power Switch

29
Slide the Control Box under the upper components to give easy access to the controls. This shows the C/P extended and the Control Box located under the projector.

30
Carefully remove the foam collar and lens cap Remove and replace the lens protector straight up or down without twisting. Ready for the show!

31
Completed wiring looks like this System Assembled for Operation

32
Repackaging for Movement Refer to the User’s Guide for the proper shut down procedure for the C/P Unit to prevent damage to the projector bulb. After the C/P Unit is off and pinned in its lowered position, slide it out under the side of the Dome and stow it in the Transport Box. Be sure to put the weights away before beginning to deflate the Dome.

33
Alternative Take-Down Procedure from Inside To simplify preparing the Dome for folding after it’s down, work from the inside. This is also helpful if you have to package the Dome by yourself. Start with removal of the C/P unit by sliding it out under the side of the Dome to get it out of the way. Put the C/P unit in its transport box. Be sure the weights are put away. Start deflating the Dome from the inside by pulling one side inward about halfway across the base. Then quickly lift the opposite side up and over to complete the procedure. This will collapse the Dome into sort of a large “taco” shape, which is easier to straighten out for folding. This procedure also works best when space is limited as when working on a MPR stage or in a classroom.

34
Collapsing the dome Be sure to grasp the gray inner shell to overturn the Dome Just grabbing the outer shell will not collapse the dome properly Two Person Method of Take-Down

35
When both have hold of the inner liner, lift and walk briskly across the center to deflate the dome Be sure to avoid stepping on the Control Box or Lamp

36
Move Quickly While Gathering Material

39
Turn off the fan. Disconnect all cables. Put the fan in it’s storage box. Put the Control Box, flashlight, weights, and lamp in the red bag.

40
Folding The hardest part—getting the dome ready for storage in the bag Organizing the Dome for folding. Ideally, you want it to be in a form approaching that of a very large taco.

41
Working for a triangular shape for folding

42
Fan tube Zipper door Zipper Door Fan Inlet Tube

43
One person should hold the apex while another folds the sides. If working alone, use the weights to hold the apex in place.

44
Folds are about the length of the storage bag

45
Keep the inlet tube from twisting as you are folding the Dome – See the next slide

46
Prepare the Inlet Tube

47
Laying the fan inlet tube on the fold

49
Folding from the other side

52
Getting the air out of the material Just like rolling up a sleeping bag or tent

53
Almost done

54
Attach Straps

55
Will it fit?

56
Stuff

57
Ahhh, it fits and the zipper closes. DONE!

Similar presentations


>")


 INSTRUCTIONS FOR USE Preventive Medicine Industrial Hygiene Service.>")


