Download presentation
Presentation is loading. Please wait.

1
Gilbert Arizona Higley Stake January 22 nd, 2009 Taught by: Diana Garr, Sandy Leonard & Celestial Williams

2
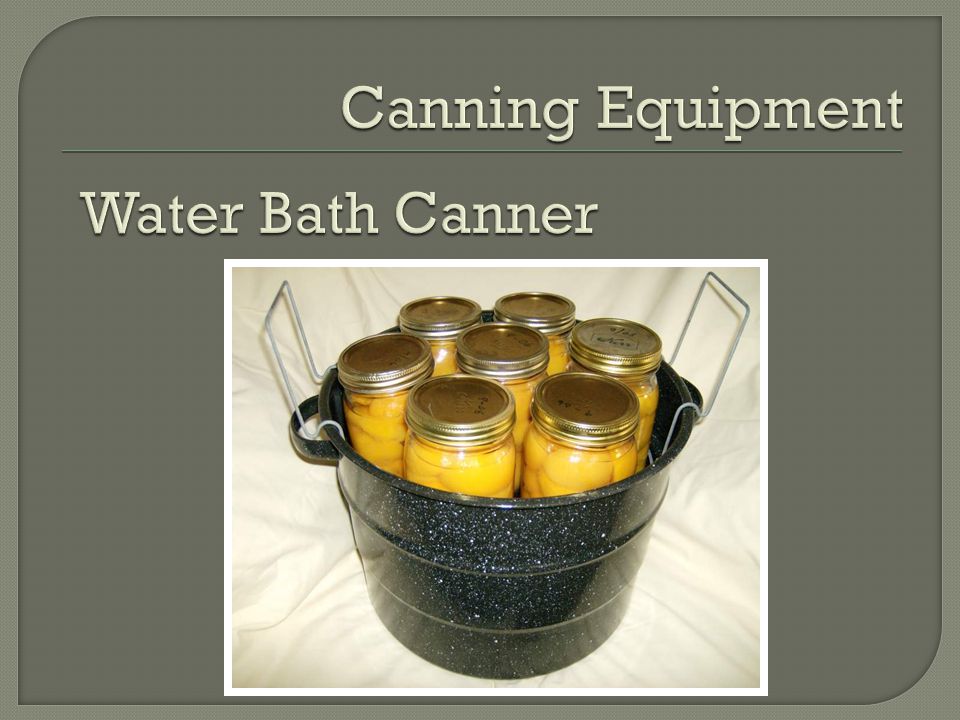
funnel, jar tongs & lid tongs on towel for cooling ½ pint, pint, & quart jars with regular or wide mouths (I prefer the wide mouth jars.) Lids and rings which fit your jars water bath canner for high acidic foods pressure canner for low acidic foods Flame diffuser if using a gas or outdoor stove
 Lids and rings which fit your jars water bath canner for high acidic foods pressure canner for low acidic foods Flame diffuser if using a gas or outdoor stove")
3
Tools ½ pint, pint, and quart jars with lids and rings Flame diffuser Funnel, lid & Jar tongs

5
Pressure cookers do not have a pressure gauge & shouldn’t be used for canning

6
Gasket & Non-Gasket Seals

9
CONTACT the Maricopa Extension Center at 602-470-8086 and choose the option for food. They can tell you more information about your canner’s gauge, test it, or tell you about replacing it.

16
Ground products pack easily and take only a few minutes for preparation. Chunk products take a long time to cut up and take from one to two hours to prepare. Bone in products take the longest time to cut up, but the advantage is they often cost less and you can boil the bones with the meat that remains on them to make a delicious stock for soups.

17
Canning meat will introduce you to some new and unusual odors! Don’t be disturbed. It’s normal for the meat to have a strong odor that may linger in your house for the day.

18
Canned meet looks like something from your high school biology days. Just remind yourself that you are so grateful that the residue remains in your jar not in your arteries. Canned meet looks like something from your high school biology days. Just remind yourself that you are so grateful that the residue remains in your jar not in your arteries.

19
Your product will seal when it is cooling on your counter. It probably will not be sealed when you open the lid. When a jar seals the lid will pull down in the center it will make a ping sound – not to worry – this should be music to your ears because you will know that your jars have successful sealed. When a jar seals the lid will pull down in the center it will make a ping sound – not to worry – this should be music to your ears because you will know that your jars have successful sealed. Test warm jars by pressing in the center of the lid. There should not be any movement. If any jars have not sealed by the time that they are warm to the touch, refrigerate them for use in the next few days.

20
Your product should last about three years, but you will find them so convenient and you will enjoy them so much that you will probably use them in three to six months so be sure to date and rotate them. If you find a jar with a bulged lid or a strong sour smell, throw the contents away. Empty meat jars should be soaked in hot soapy water with a little vinegar added. Scrub with the green scratchy pads to remove the film of fat.

21
Ground product is firmly packed in the jar so you may want to slice it into four sections before you pull it out. You can also remove more fat at this time if you choose to. You can also easily break the quarters with your fingers making the meat into tiny pieces to make your meat go farther.

22
Some liquid may escape your jars and end up in the water in the canner. When jars are cool wipe them off to remove any film. Wash out the canner before beginning a new batch. NEVER put cold jars into hot water. The jars will crack. Your product should be discarded for fear of glass shards being in the product. You will have a huge mess

23
Clean the area in which you will be canning. Place jars and lids in the dishwasher on the “anti-bacteria” setting turn on and hold the jars & lids in the closed dishwasher until you are ready to use them. OR Place rings and lids in a pan with water just covering them and keep on simmer setting You and all “helpers” need to wash your hands before proceeding.

24
Firmly press high acidic product (fruit, salsa etc) into clean dry jars to remove as much air as possible leaving ¾ in head space. Pour water into jar covering product. Run plastic knife around inside of the jar to remove air bubbles. Wipe jar lip with clean wet paper towel. Place rubber side of lid on jar and screw on the ring.

25
Firmly press raw ground beef or turkey into clean dry jars to remove as much air as possible. Pour in water until ground product is nearly covered. Run a plastic knife around the inside edge of the jars to remove more air pockets. Add ¼ tsp salt on top (some people prefer sea salt instead of kosher salt others say not to use iodized salt.)
.")
26
Cut product into bite sized pieces. Firmly press beef or chicken chunks into clean dry jars leaving about ¾ in head space. Pour in water until chunks are nearly covered. Run a plastic knife around the inside edge of the jars to remove more air pockets. Add ¼ tsp salt.

27
Firmly press cooked product such as left over turkey into clean dry jars leaving about 3/4 inch head space. Pour in water until product is nearly covered. Run a plastic knife around the inside edge of the jars to remove more air pockets. Add ¼ tsp salt

28
Wipe lip of jars with clean paper towel to remove meat residue so that the lids will seal. Place warm dry lids, rubber side down, onto the jars. Tighten rings.

29
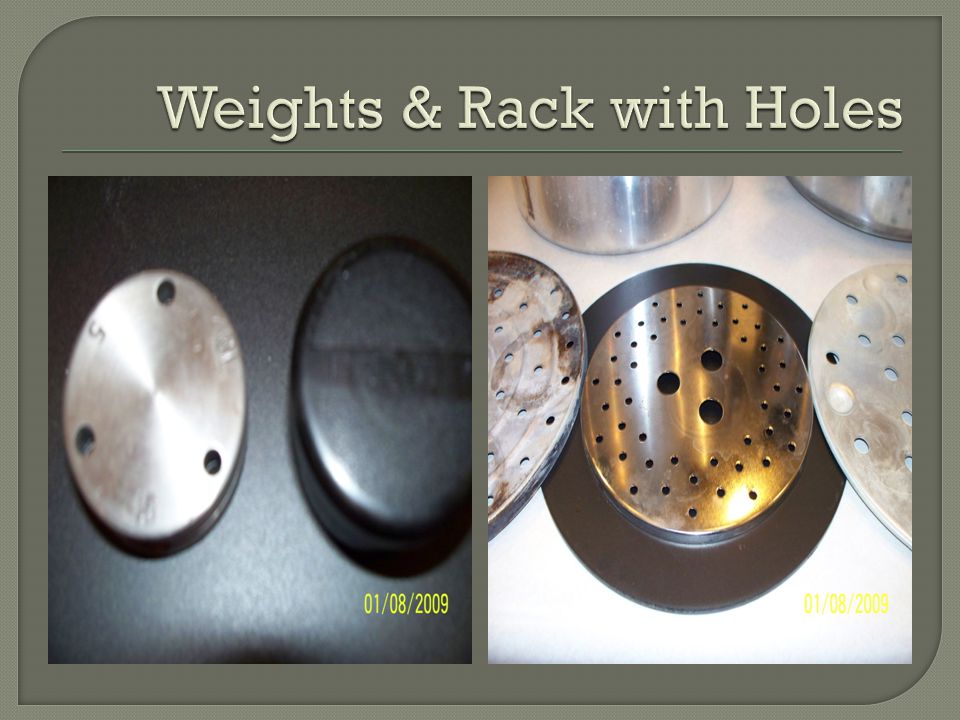
Put small rack with holes on the bottom inside of the canner. Put flame diffuser on the outdoor stove if the canner is more heavy and you have a flat top stove. Put canner on indoor range if the canner is less heavy or you have metal burners. Flame diffusers may also be used on gas ranges. Put jars on the rack arranging them so no jars are touching (7 maximum – large canners will have a second rack with holes and additional jars may be place on that.)
.")
31
Add water to the canner until about the bottom 3-4 inches on the jars are covered. Close the lid tightly. Turn the heat on high and wait for the pressure to rise. (It may take 15 minutes or more to achieve the necessary pressure.) Lower pressure to about medium low, making sure that the necessary pressure is maintained.
 Lower pressure to about medium low, making sure that the necessary pressure is maintained..")
32
Set the timer for the amount of time indicated in your canning book. Process for the designated time. Turn off heat and allow canner to cool until the pressure gauge registers zero.

33
Remove the lid so that any remaining steam will be channeled AWAY from your face.

34
Place a towel on a counter top Grasp jars by the neck with the jar tongs Lift jars out of the canner and place on the towel to cool. (the contents will continue to boil for some time) As the jars cool they will make a ping sound and the lid will pull down tight.
 As the jars cool they will make a ping sound and the lid will pull down tight..")
35
Wipe off jars and write the date on the lids with a Sharpie Pen. If there are any jars that don’t seal put them in the refrigerator for use in the next couple of days. Store inside at room temperature. Enjoy the money and time savings as you use.

37
Cost effective: 1 pound of pinto beans sprouted 3 days = 4 pounds of beans Nutrition: live enzymes, amino acids, vitamins, and minerals Better Digestion: no upset tummys after eating sprouted beans

38
Put 1/4 cup alfalfa seeds in tepid water 12 hours. Pour off water through a strainer or cloth. Rinse the seeds every four hours during the day. Be sure to drain well. In four days, your 2 quart jar will be filled with alfalfa sprouts In four days, your 2 quart jar will be filled with alfalfa sprouts. WHEAT will sprout in 2 days.

39
Do cover seeds with water approximately 12 hours. Do use room temperature water. Do use the best available water. Do drain & rinse the seeds well after the 12 hour soak. Do keep seeds moist for 4 days or less, no longer. (After 4 days, the sprouts turn into plants) Do become familiar with each seed. All have different rules to follow, just like the plants in your garden. Do use healthy, new seeds. Do use a small amount of seeds until you are familiar with what you are doing.
 Do become familiar with each seed. All have different rules to follow, just like the plants in your garden. Do use healthy, new seeds. Do use a small amount of seeds until you are familiar with what you are doing..")
40
Communications Thursday February 26th, 2008

Similar presentations


9 quarts of Applesauce, fresh or canned (See step.>")


 Safety—developing habits to avoid accidents and keep people healthy—Most kitchen.>")

 No direct contact with skin (use tongs, paper towels, gloves etc…>")

