Download presentation
Presentation is loading. Please wait.

1
CREATING USER ACCOUNTS Group accounts simplify administration by organizing user accounts into a single administrative unit. They provide a convenient method of controlling access for several users who will be performing similar tasks. By placing multiple users in a group and assigning rights and/or permissions to the group, you can assign the same abilities and/or restrictions to all the users at the same time. Without groups, you would have to assign user rights and access permissions to the individual users’ accounts. Even if a user account is a member of one or more groups, you can also modify that account individually.

2
Step 1 Create Global Groups Global groups consume from 2K to 4K of memory in the Registry. As a result, you may want to go easy on the number of global groups you create. In a medium-sized network with up to 5,000 users, it’s not uncommon to have 30 to 40 global groups. In larger networks, you may need more.

3
Create a global group called Color Printer Users Start User Manager for Domains from Administrative Tools

4
Notice that the Administrator account in the top frame is highlighted. The user interface for User Manager for Domains has the bad habit of always highlighting the first user, which is usually the Administrator. When you create global groups, you need to make sure that nothing in the top frame is highlighted, including the Administrator account. To remove that selection, click any of the groups listed in the lower half of the screen.

5
From the User menu, select New Global Group to bring up the dialog box

6
Step 2 Create Local Groups To create local groups, follow the same approach. From User Manager for Domains, select New Local Group from the User menu to bring up the dialog box

7
In Figure 4.7, previous slide, we are creating a new local group called Colour Printers. Remember, local groups are used to control resources. As a result, consider creating local groups, such as Colour Printers or Office Applications, whose names indicate the resources that they control.

8
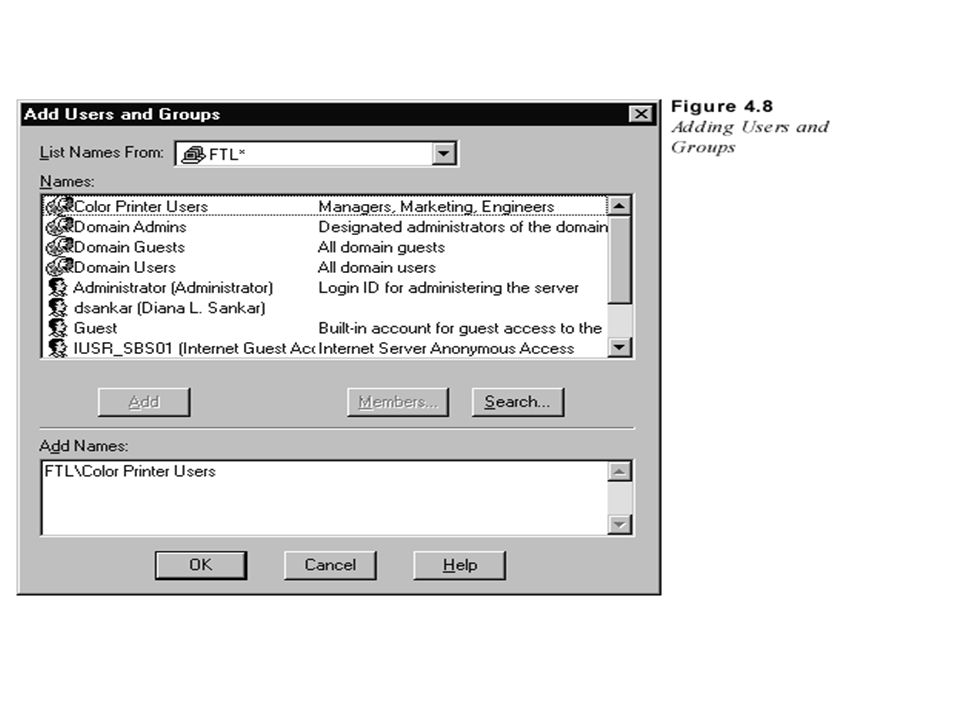
Step 3 Add Global Groups to Local Groups Clicking Add in Figure 4.7 lets us add global groups to the Colour Printers local group. First, the Add Users and Groups dialog box appears. Highlight global groups that you want to add to the local group, then select Add. As you can see in Figure 4.8, the domain’s global group Colour Printer Users has been added to this group.

10
When you finish adding users, click OK. The New Local Group dialog box (Figure 4.9) appears with Colour Printer Users as the only Member
 appears with Colour Printer Users as the only Member.")
11
Don’t add users to a Local Group Note that we did not add any users to this local group. It is a good idea to not add users to local groups if you are implementing NT domains. If you add users to local groups, you must then manage and configure local groups whenever you add new users. Because a local group is visible only on the computer where it is defined, you may end up modifying local groups on various computers constantly. For example, if you have three colour printers on three computers, you end up adding those users in three different local groups so that they can access all three colour printers.

12
Add users to the Global Group Even if you set up new local groups called Colour Printers on different computers, you just need to add the Colour Printer Users global group once to the local group, and you never have to touch it again. With this setup, whenever a new user needs to access a number of similar resources across the network, adding that user to one global group gives the user access across the network.

13
Step 4 Create Template Accounts Because creating a user account is pretty much self-explanatory with the User Manager for Domains, we simply highlight the main issues here. From the User menu, select Add User to bring up the New User dialog box (Figure 4.10). Make sure that this template account is disabled by checking Account Disabled. Also, check “User Must Change Password at Next Logon.” You can set up valid logon hours, the computers that the user is allowed to logon to, dates when the account expires, and dial-in permissions using the four buttons — Hours, Logon To, Account, and Dialin — at the bottom of the dialog box.
. Make sure that this template account is disabled by checking Account Disabled. Also, check User Must Change Password at Next Logon. You can set up valid logon hours, the computers that the user is allowed to logon to, dates when the account expires, and dial-in permissions using the four buttons — Hours, Logon To, Account, and Dialin — at the bottom of the dialog box..")
14
Template for General Users

15
Groups and Profile buttons Clicking Groups brings up the dialog box in Figure 4.11. By default, TemplateUser is set up as a member of Domain Users. To add TemplateUser to the Colour Printer Users global group, double-click the appropriate entry in the pane on the right. You can make TemplateUser a member of as many groups as you want. Remember, though, that even though you can make TemplateUser a member of various local groups, you should resist this temptation.

17
When you click Profiles in Figure 4.10, the User Environment Profile dialog box (Figure 4.12) appears; here you set the user profile, logon scripts, and home directories.
 appears; here you set the user profile, logon scripts, and home directories.")
18
Profiles You may want to fill in the User Environment Profile as shown in Figure 4.12. Here, \\sbs01 is the NetBIOS name of the computer, and the \profiles and \home parts of the paths are the share names. These resources must be created and shared before you can type this part of the path name. When you create an actual user account with this template, the %username% variable will be replaced by the user name during the creation of the user’s home directory inside the \\sbs01\home share.

19
Roaming Profile By specifying a profile available on a shared folder, you create a roaming profile, which gives the user access to more or less the same desktop configuration on different domain members. In other words the user will have the same privileges regardless of where they log on to the domain.

20
The user profile maintains a variety of user preferences Background, screen saver, display properties Start menu configuration Mouse settings Desktop items Personal program groups Explorer settings Taskbar settings Window size Control Panel settings Window position Accessories Help bookmarks Persistent network connections Printer connections

21
Three types of User Profiles Local Profiles — these profiles are created during initial logon. Roaming Profiles — when you create the account, you can create these profiles by specifying a path in User Manager for Domains. Mandatory Profiles — you create these profiles by changing the.dat file name extension to.man (for example, changing Ntuser.dat to Ntuser.man).
..")
22
Step 5 Copy Template Accounts To use the template account to create a user account, you copy the template account. From the User menu in User Manager for Domains, highlight the template account and select Copy to bring up the dialog box shown in Figure 4.13. Here, you add the user name and full name. Everything else is copied from the template. For example, the Profile dialog box for the new user account for Karen Mercer is shown in Figure 4.14. Notice that the %username% variable has been replaced by the user name.

Similar presentations


 © Abdou Illia, Spring 2006.>")


