Download presentation
Presentation is loading. Please wait.

1
Watercolor Effect in Photoshop Tutorial

3
Go to the File, click the Open tab and set your canvas of 1920 X 1200 pixels, in RGB mode.

4
Go to the File and click the Open tab. Select the desired picture youd like to use in your computer files.

5
Copy and paste the image into your canvas. Press Ctrl T to resize or transform your picture and scale it to fit our canvas by holding down the Shift-Key. This keeps the original aspect ratio of the image and it does not look stretched.

7
Adjust Brightness/Contrast and then duplicate the layer.

8
Apply Watercolor filter from filter gallery to the duplicated layer. Name this duplicated layer as Watercolor Filter.

9
Select the original layer and NOT the Watercolor Filter. Go to Image > Adjustments > Threshold. Name this original layer asThreshold Effect.

10
Set the Blending mode to Multiply, and merge both, Watercolor Filter and Threshold Effect layers. So, we now have a Merged Layer. Press Ctrl E to Merge.

11
Download an image with a water color splashes. Like the pictures below:

12
Edit the pictures (erase the background) and cover the face of the first picture with it. After that, set the Blending mode to Multiply, and merge all the water color pictures into one layer.

13
Get to the Merged Layer. Select and copy the image into the layer.

14
Add a Layer Mask to Layer 1. Alt + click on the layer mask, and you will see the canvas is in white.

15
Paste the image here, and Ctrl + I to invert the colors. This way, the layer mask hides the Blacks, and reveals the Whites.

16
Click back onto the layer and we can see our image.

17
Download some picture with paper textures. Like the example below:

18
Set the paper texture in Linear Burn Mode.

19
Clone some areas in the Layer 1 using the Clone Tool. This makes the image look more complete

20
Finally, add some more watercolor splashes and add a fancy text, oriented like what I have in this image. Now you have an abstract watercolor design. You can use your creativity and innovate more on this effect. Hope you had fun in this tutorial!

Similar presentations
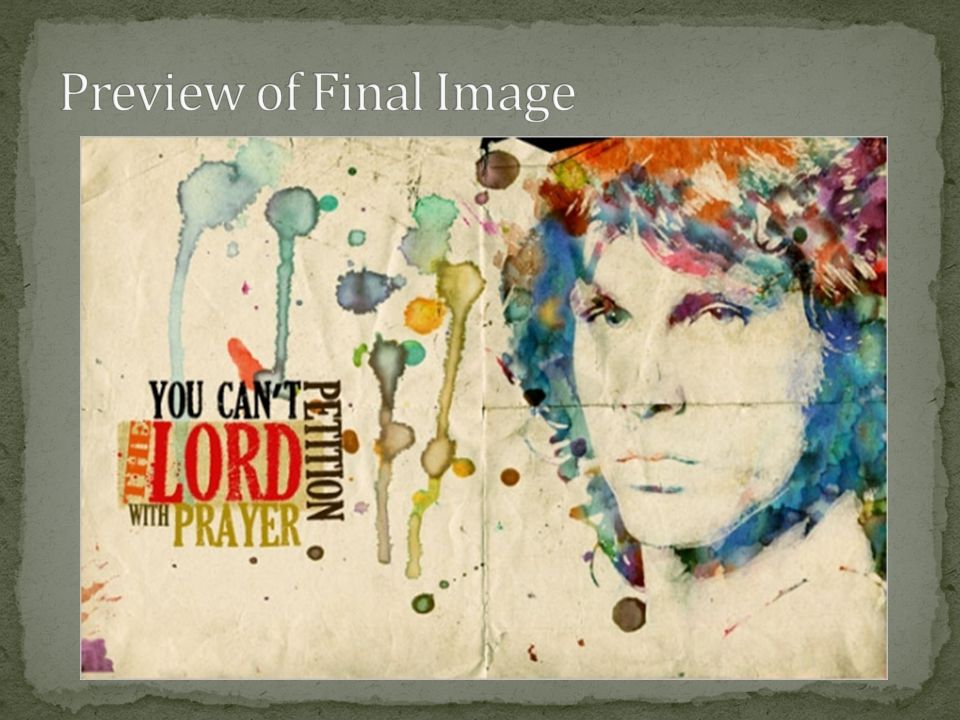


Image > Adjustments > Desaturate to remove color 2)Image > Adjustments > Color Balance 3)Move sliders (adding mostly red and yellow) to.>")