Download presentation
Presentation is loading. Please wait.

1
Microsoft Office 2007-Illustrated Introductory, Windows Vista Edition Windows XP Unit A

2
Microsoft Office 2007-Illustrated Introductory, Windows Vista Edition Objectives Start Windows and view the desktopStart Windows and view the desktop Use the mouseUse the mouse Start a programStart a program Move and resize windowsMove and resize windows Use menus, keyboard shortcuts, and toolbarsUse menus, keyboard shortcuts, and toolbars

3
Objectives Use dialog boxesUse dialog boxes Use scroll barsUse scroll bars Use Windows Help and Support CenterUse Windows Help and Support Center Close a program and shut down WindowsClose a program and shut down Windows Microsoft Office 2007-Illustrated Introductory, Windows Vista Edition

4
Unit Introduction How to start Windows XPHow to start Windows XP Learn how to use the mouse and keyboard to manipulate objects on the screenLearn how to use the mouse and keyboard to manipulate objects on the screen How to use Windows Help and Support CenterHow to use Windows Help and Support Center How to shut down Windows XP.How to shut down Windows XP.

5
Microsoft Office 2007-Illustrated Introductory, Windows Vista Edition Starting Windows and Viewing the Desktop It is important to understand that the desktop allows you easily and seamlessly to access, manage, and share information that is stored on your computer, your network, and the Internet.It is important to understand that the desktop allows you easily and seamlessly to access, manage, and share information that is stored on your computer, your network, and the Internet.

6
Microsoft Office 2007-Illustrated Introductory, Windows Vista Edition

7
Starting Windows and Viewing the Desktop Use the Start button to start programs, open files, and access Windows commands and features.Use the Start button to start programs, open files, and access Windows commands and features. Use the buttons on the Quick Launch toolbar to start Internet-related programs or to quickly display the desktop if you have several windows open.Use the buttons on the Quick Launch toolbar to start Internet-related programs or to quickly display the desktop if you have several windows open. Microsoft Office 2007-Illustrated Introductory, Windows Vista Edition

8
Starting Windows and Viewing the Desktop Icons on the desktop allow you to quickly start programs and manage files.Icons on the desktop allow you to quickly start programs and manage files. The taskbar is at the bottom of the desktop. It contains the Start button and the Quick Launch toolbar. It also includes buttons for the programs currently running on your computer.The taskbar is at the bottom of the desktop. It contains the Start button and the Quick Launch toolbar. It also includes buttons for the programs currently running on your computer.

9
Microsoft Office 2007-Illustrated Introductory, Windows Vista Edition Starting Windows and Viewing the Desktop On the Start menu, notice the arrows that appear next to several categories, including the Programs category. An arrow indicates that pointing to that category will display a submenu.On the Start menu, notice the arrows that appear next to several categories, including the Programs category. An arrow indicates that pointing to that category will display a submenu.

10
Microsoft Office 2007-Illustrated Introductory, Windows Vista Edition UNDERSTANDING OPERATING SYSTEMS Manage the operation of applications by controlling basic input (typing, using the mouse) and output (what you see on the screen, printouts)Manage the operation of applications by controlling basic input (typing, using the mouse) and output (what you see on the screen, printouts) Ensure adequate disk space for the programs that are running and other activities such as printingEnsure adequate disk space for the programs that are running and other activities such as printing Manage storage spaceManage storage space
 and output (what you see on the screen, printouts)Manage the operation of applications by controlling basic input (typing, using the mouse) and output (what you see on the screen, printouts) Ensure adequate disk space for the programs that are running and other activities such as printingEnsure adequate disk space for the programs that are running and other activities such as printing Manage storage spaceManage storage space")
11
Microsoft Office 2007-Illustrated Introductory, Windows Vista Edition UNDERSTANDING OPERATING SYSTEMS Monitor and detect equipment failure (each time the computer is turned on the operating system does a quick, automatic check of each electronic component and displays a message if it detects a problem)Monitor and detect equipment failure (each time the computer is turned on the operating system does a quick, automatic check of each electronic component and displays a message if it detects a problem) Help maintain security of the data on the computer (by requiring a password to access data).Help maintain security of the data on the computer (by requiring a password to access data).
Monitor and detect equipment failure (each time the computer is turned on the operating system does a quick, automatic check of each electronic component and displays a message if it detects a problem) Help maintain security of the data on the computer (by requiring a password to access data).Help maintain security of the data on the computer (by requiring a password to access data).")
12
Using the MouseUsing the Mouse A mouse is a common type of pointing device.A mouse is a common type of pointing device. When you move the mouse, the mouse pointer moves on your screen.When you move the mouse, the mouse pointer moves on your screen. The mouse pointer changes shape to indicate different activities.The mouse pointer changes shape to indicate different activities. Microsoft Office 2007-Illustrated Introductory, Windows Vista Edition

13
Different Techniques for Using A Mouse To point to an item, such as a button, an icon, or a command, move the mouse pointer over it.To point to an item, such as a button, an icon, or a command, move the mouse pointer over it. You sometimes need to point to commands on a menu to open a submenu.You sometimes need to point to commands on a menu to open a submenu. Microsoft Office 2007-Illustrated Introductory, Windows Vista Edition

14
Techniques continued… To click an item, hold the mouse pointer over the item, then press and release the left mouse button.To click an item, hold the mouse pointer over the item, then press and release the left mouse button. You must click buttons or menu commands to perform an action.You must click buttons or menu commands to perform an action. Microsoft Office 2007-Illustrated Introductory, Windows Vista Edition

15
Techniques continued… When you click an item on the desktop, you select it. A selected item is highlighted on the screen.When you click an item on the desktop, you select it. A selected item is highlighted on the screen. Usually you need to select an item before you can perform an action on it.Usually you need to select an item before you can perform an action on it. For example, you need to select text in a document before you can format or delete the text.For example, you need to select text in a document before you can format or delete the text. Microsoft Office 2007-Illustrated Introductory, Windows Vista Edition

16
Techniques continued… To right-click an item, click it using the right mouse button.To right-click an item, click it using the right mouse button. Right-clicking on the desktop opens a shortcut menu.Right-clicking on the desktop opens a shortcut menu. Microsoft Office 2007-Illustrated Introductory, Windows Vista Edition

17
Techniques continued… To double-click an item, click the left mouse button twice quickly.To double-click an item, click the left mouse button twice quickly. You often double-click an item, such as an icon on the desktop, to open that item.You often double-click an item, such as an icon on the desktop, to open that item. For example, if you double-click the Internet Explorer icon on the desktop, Internet Explorer opens.For example, if you double-click the Internet Explorer icon on the desktop, Internet Explorer opens. Microsoft Office 2007-Illustrated Introductory, Windows Vista Edition

18
Techniques continued… To drag an item with the mouse, point to an item, then press and hold the left mouse button while moving the mouse pointer to a new location.To drag an item with the mouse, point to an item, then press and hold the left mouse button while moving the mouse pointer to a new location. You’ll use dragging to select items, such as text in a document, and to resize and move items.You’ll use dragging to select items, such as text in a document, and to resize and move items. Microsoft Office 2007-Illustrated Introductory, Windows Vista Edition

19
Starting a ProgramStarting a Program To start a program, click the Start button, and then click on the program name.To start a program, click the Start button, and then click on the program name. Only your most commonly used programs are listed here.Only your most commonly used programs are listed here. To access the full list of programs available, point to All Programs on the Start menu, then click the program.To access the full list of programs available, point to All Programs on the Start menu, then click the program. Microsoft Office 2007-Illustrated Introductory, Windows Vista Edition

20
Starting a ProgramStarting a Program On the Start menu, notice the arrows that appear next to several categoriesOn the Start menu, notice the arrows that appear next to several categories An arrow indicates that pointing to that category will display a submenuAn arrow indicates that pointing to that category will display a submenu Microsoft Office 2007-Illustrated Introductory, Windows Vista Edition

21
Starting a ProgramStarting a Program You can also use the Start menu to perform other Windows tasksYou can also use the Start menu to perform other Windows tasks Opening Windows HelpOpening Windows Help Changing your Window settings through the Control PanelChanging your Window settings through the Control Panel Shutting down Windows.Shutting down Windows. Microsoft Office 2007-Illustrated Introductory, Windows Vista Edition

22
Starting a ProgramStarting a Program It is important to understand that when you start a program, a program window opens on the screen and a program button appears on the taskbar.It is important to understand that when you start a program, a program window opens on the screen and a program button appears on the taskbar. This program button indicates the open program and its filename.This program button indicates the open program and its filename. Microsoft Office 2007-Illustrated Introductory, Windows Vista Edition

23
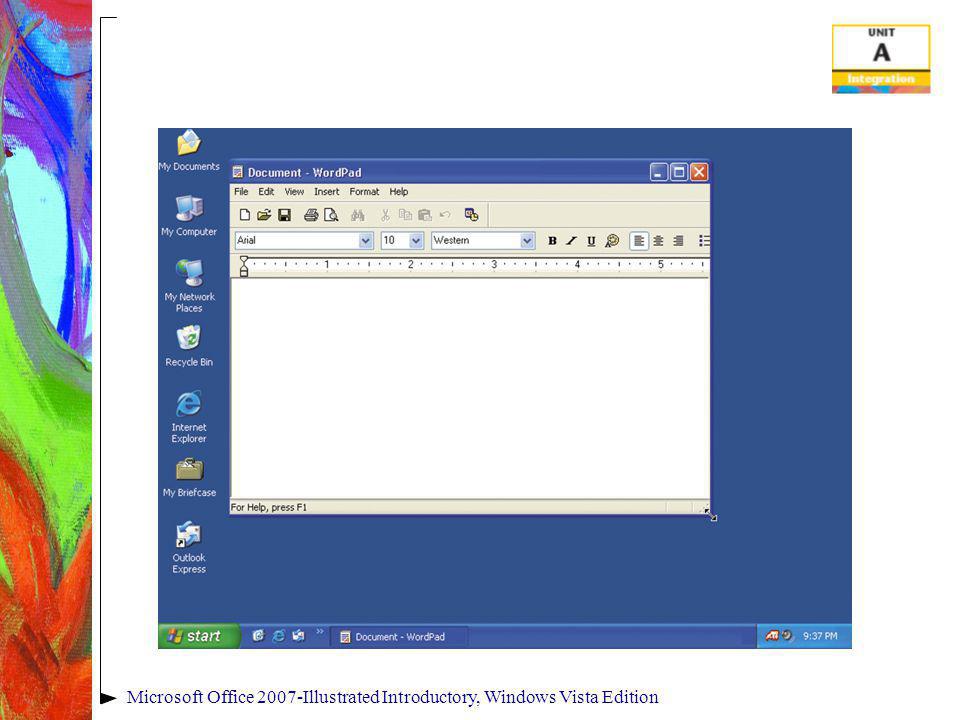
Moving and Resizing WindowsMoving and Resizing Windows One way to resize a window is to use the sizing buttons on the title bar.One way to resize a window is to use the sizing buttons on the title bar. The title bar is located at the top of the window and displays the file name and the program used to create it.The title bar is located at the top of the window and displays the file name and the program used to create it. Microsoft Office 2007-Illustrated Introductory, Windows Vista Edition

25
Moving and Resizing WindowsMoving and Resizing Windows There are four types of sizing buttons:There are four types of sizing buttons: Use the Maximize button to enlarge a window to fill the whole screen.Use the Maximize button to enlarge a window to fill the whole screen. Use the Restore button to return the window to its previous size.Use the Restore button to return the window to its previous size. Use the Minimize button to reduce a window to a program button on the taskbar.Use the Minimize button to reduce a window to a program button on the taskbar. Use the Close button to close a window. If you click the program button, the specific program and file window will either minimize or maximize.Use the Close button to close a window. If you click the program button, the specific program and file window will either minimize or maximize. Microsoft Office 2007-Illustrated Introductory, Windows Vista Edition

26
Moving and Resizing WindowsMoving and Resizing Windows The Maximize and Restore buttons never appear at the same time.The Maximize and Restore buttons never appear at the same time. Most programs will contain two sets of sizing buttons.Most programs will contain two sets of sizing buttons. The file window sizing buttons control the file you have open, but the program window remains open if you only close a file by clicking the file window Close button.The file window sizing buttons control the file you have open, but the program window remains open if you only close a file by clicking the file window Close button. Microsoft Office 2007-Illustrated Introductory, Windows Vista Edition

27
Moving and Resizing WindowsMoving and Resizing Windows Another way to resize a window is to change its height and width by dragging one of its borders or corners.Another way to resize a window is to change its height and width by dragging one of its borders or corners. You can drag any border or corner to change the size and shape of a window.You can drag any border or corner to change the size and shape of a window. Microsoft Office 2007-Illustrated Introductory, Windows Vista Edition

28
Moving and Resizing WindowsMoving and Resizing Windows To move a window, drag its title bar to a new location.To move a window, drag its title bar to a new location. you must first minimize it if it is not already minimized.you must first minimize it if it is not already minimized. Microsoft Office 2007-Illustrated Introductory, Windows Vista Edition

29
Using Menus, Keyboard Shortcuts, and Toolbars You use menus and toolbars to perform most tasks in any Windows program. Each program window includes a menu bar and toolbar buttons.You use menus and toolbars to perform most tasks in any Windows program. Each program window includes a menu bar and toolbar buttons. Microsoft Office 2007-Illustrated Introductory, Windows Vista Edition

30
Using Menus, Keyboard Shortcuts, and Toolbars The menu bar contains the names of menus. When you click a menu name, a menu (or list) of commands opens.The menu bar contains the names of menus. When you click a menu name, a menu (or list) of commands opens. Some commands open submenus, others open dialog boxes, and still others perform the command without offering further choices.Some commands open submenus, others open dialog boxes, and still others perform the command without offering further choices. Microsoft Office 2007-Illustrated Introductory, Windows Vista Edition
 of commands opens.The menu bar contains the names of menus. When you click a menu name, a menu (or list) of commands opens. Some commands open submenus, others open dialog boxes, and still others perform the command without offering further choices.Some commands open submenus, others open dialog boxes, and still others perform the command without offering further choices. Microsoft Office 2007-Illustrated Introductory, Windows Vista Edition.")
31
Using Menus, Keyboard Shortcuts, and Toolbars When you view the list of commands on a menu, you will notice that one letter in each command is underlined.When you view the list of commands on a menu, you will notice that one letter in each command is underlined. If you press the underlined letter, also known as a keyboard navigation indicator, you can also execute the command.If you press the underlined letter, also known as a keyboard navigation indicator, you can also execute the command. This alternative is known as a keyboard shortcut.This alternative is known as a keyboard shortcut. Microsoft Office 2007-Illustrated Introductory, Windows Vista Edition

32
Using Menus, Keyboard Shortcuts, and Toolbars The toolbar contains buttons that you click to perform commands.The toolbar contains buttons that you click to perform commands. When you point to a button on a toolbar, a ScreenTip telling you the name of the button appears.When you point to a button on a toolbar, a ScreenTip telling you the name of the button appears. You can also customize a toolbar by adding buttons to or removing buttons from a toolbar.You can also customize a toolbar by adding buttons to or removing buttons from a toolbar. Microsoft Office 2007-Illustrated Introductory, Windows Vista Edition

33
Using Menus, Keyboard Shortcuts, and Toolbars Some buttons on toolbars have list arrows next to them. These buttons have several choices from which you can choose.Some buttons on toolbars have list arrows next to them. These buttons have several choices from which you can choose. Clicking a button performs the default command choice.Clicking a button performs the default command choice. Clicking a list arrow opens a list of choices related to the command from which you choose.Clicking a list arrow opens a list of choices related to the command from which you choose. Microsoft Office 2007-Illustrated Introductory, Windows Vista Edition

34
Using Dialog BoxesUsing Dialog Boxes Dialog boxes open when you execute a command that requires additional information.Dialog boxes open when you execute a command that requires additional information. For example, when you execute a print command to print a document, a dialog box opens so you can set the number of copies you want to print.For example, when you execute a print command to print a document, a dialog box opens so you can set the number of copies you want to print. Microsoft Office 2007-Illustrated Introductory, Windows Vista Edition

36
Using Dialog BoxesUsing Dialog Boxes Some common dialog box elements include checkboxes, option buttons, text boxes, spin boxes, and list arrows.Some common dialog box elements include checkboxes, option buttons, text boxes, spin boxes, and list arrows. Microsoft Office 2007-Illustrated Introductory, Windows Vista Edition

37
Using Dialog BoxesUsing Dialog Boxes Common dialog box command buttons OK, Cancel, and Apply.Common dialog box command buttons OK, Cancel, and Apply. OK accepts the changes you have made in the dialog box and closes the dialog boxOK accepts the changes you have made in the dialog box and closes the dialog box Cancel cancels the changes and closes the dialog box.Cancel cancels the changes and closes the dialog box. Apply accepts the changes and leaves the dialog box open so you can make other changes.Apply accepts the changes and leaves the dialog box open so you can make other changes. Microsoft Office 2007-Illustrated Introductory, Windows Vista Edition

38
Using Scroll BarsUsing Scroll Bars Scroll bars help you navigate to see information that is not displayed in a window.Scroll bars help you navigate to see information that is not displayed in a window. Scroll boxes only appear when the window is too small to display all the information.Scroll boxes only appear when the window is too small to display all the information. The size of the scroll box indicates how much information is not displayedThe size of the scroll box indicates how much information is not displayed Microsoft Office 2007-Illustrated Introductory, Windows Vista Edition

39
Using Windows Help and Support Center Windows Help and Support Center works like a book stored on your computer, with a table of contents and an index to make finding information you need about commands in Windows XP easier.Windows Help and Support Center works like a book stored on your computer, with a table of contents and an index to make finding information you need about commands in Windows XP easier. Microsoft Office 2007-Illustrated Introductory, Windows Vista Edition

41
Using Windows Help and Support Center Use the Help and Support command on the Start menu to open the Windows Help dialog box.Use the Help and Support command on the Start menu to open the Windows Help dialog box. Or connect to a Microsoft Web site on the Internet for the latest technical support on Windows XP.Or connect to a Microsoft Web site on the Internet for the latest technical support on Windows XP. Many Windows programs contain their own Help systems.Many Windows programs contain their own Help systems. Microsoft Office 2007-Illustrated Introductory, Windows Vista Edition

42
Using Windows Help and Support Center Another Help tool is the context- sensitive help. If you click the Help button in the dialog box, the pointer changes to a Help pointer to click on an item for which you need information. A pop-up window appears which provides an explanation of the item.Another Help tool is the context- sensitive help. If you click the Help button in the dialog box, the pointer changes to a Help pointer to click on an item for which you need information. A pop-up window appears which provides an explanation of the item. Microsoft Office 2007-Illustrated Introductory, Windows Vista Edition

43
Closing a Program and Shutting Down Windows Before closing a program, it is good practice to close all open files.Before closing a program, it is good practice to close all open files. Make sure you save your files before you close them, and before you close the program!Make sure you save your files before you close them, and before you close the program! Microsoft Office 2007-Illustrated Introductory, Windows Vista Edition

44
Closing a Program and Shutting Down Windows You can close a program in two ways:You can close a program in two ways: You can click the Close button on the title bar.You can click the Close button on the title bar. you can use the Close or Exit command on the File menu (if the program includes a File menu).you can use the Close or Exit command on the File menu (if the program includes a File menu). Microsoft Office 2007-Illustrated Introductory, Windows Vista Edition
.you can use the Close or Exit command on the File menu (if the program includes a File menu). Microsoft Office 2007-Illustrated Introductory, Windows Vista Edition.")
45
Closing a Program and Shutting Down Windows It is also important to close all open programs before shutting down Windows.It is also important to close all open programs before shutting down Windows. Use the Turn off computer command on the Start menu.Use the Turn off computer command on the Start menu. You can also choose to Restart the computer, Standby, or Log Off.You can also choose to Restart the computer, Standby, or Log Off. Microsoft Office 2007-Illustrated Introductory, Windows Vista Edition

46
Summary Students should be very comfortable with the different terms used to describe elements they will use often when working with Windows.Students should be very comfortable with the different terms used to describe elements they will use often when working with Windows. Microsoft Office 2007-Illustrated Introductory, Windows Vista Edition

Similar presentations