Download presentation
Presentation is loading. Please wait.

1
Touchsquid Technology Inc. Setting up the TouchSquid Remote App

2
Setting up a new TouchSquid App Before the Remote app can control a Home Theatre System you need to setup your devices and activities. The TS app has been designed to be easy to set up, and many clients will be able to do their own setup without problems. Following is a complete run through of setting up a typical 4 device home theatre.

3
For setup choose the Settings icon. This is the Main App screen. All remote activities start here.

4
You can create a new room profile or edit an existing one.

5
Choose one of several languages. Additional languages will be added in future.

6
Add all the devices in the room first. External IR blasters such as Global Cache are supported for hidden devices. If you have one or more of these touch configure blaster before adding device to be controlled.

7
Choose the type of Device. Unusual devices like blinds and lighting are under Other.

8
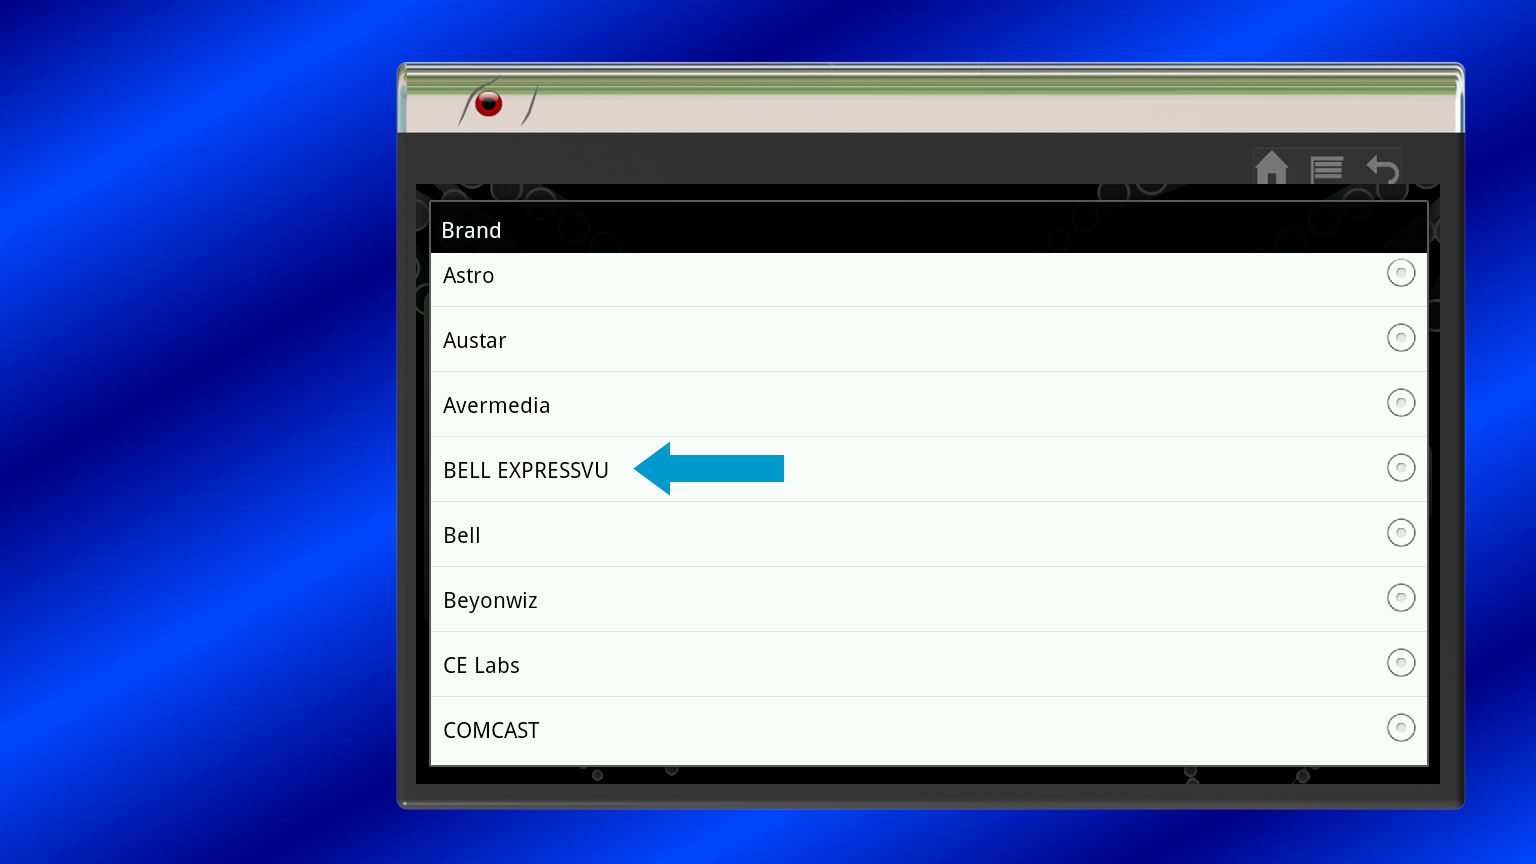
Choose the Brand The brand list is extensive. It is touch and drag scrollable. We choose a Samsung TV.

9
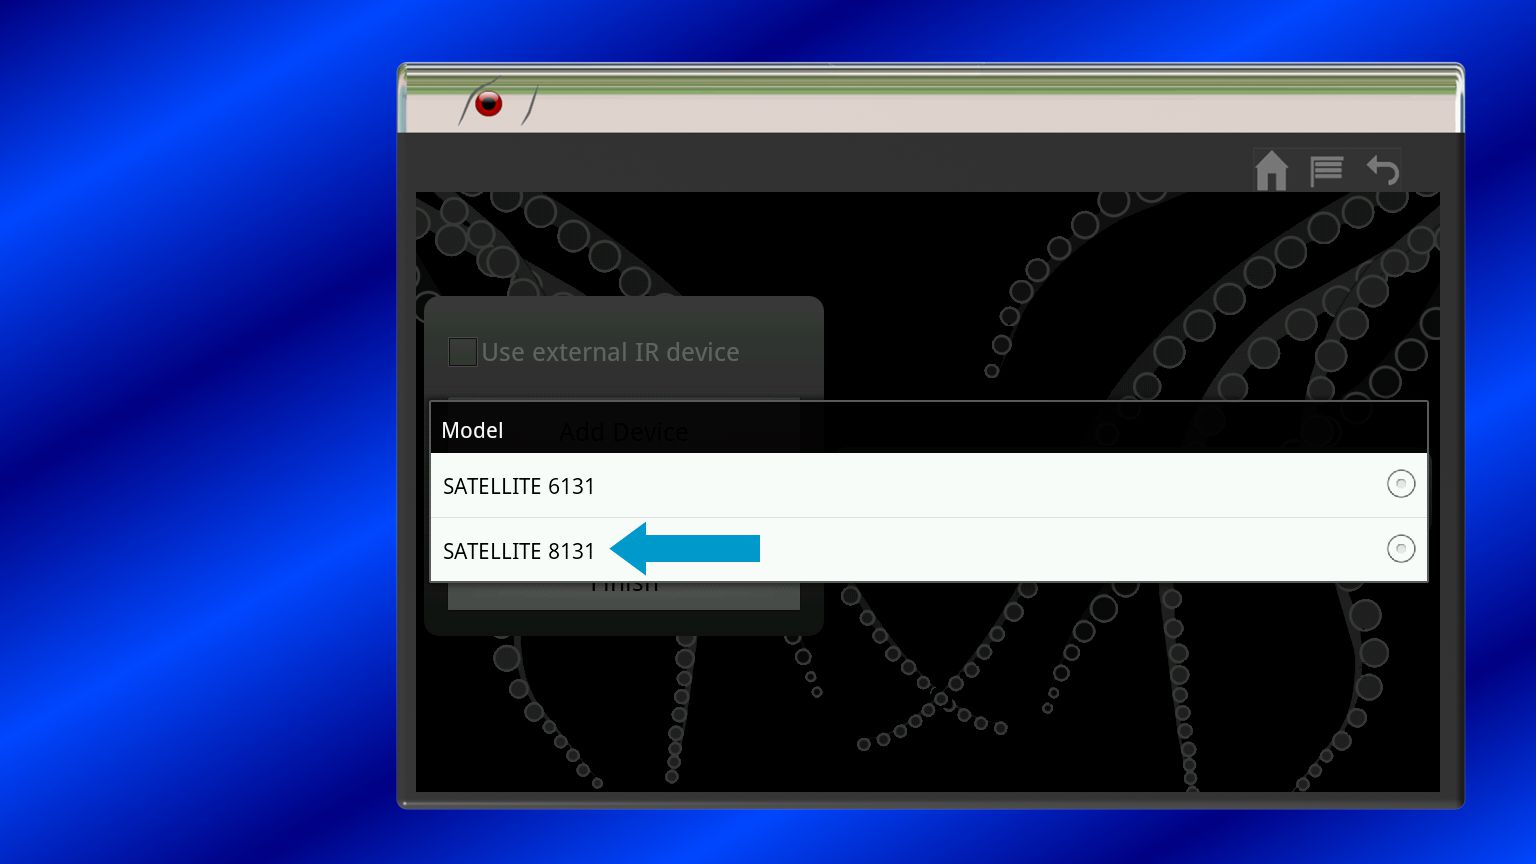
Choose the Model. Specific model numbers are seldom needed as many models use the same codes. If only one code set is available you wont see this screen.

10
Some codesets are large and take a moment to load. Devices already chosen are shown.

14
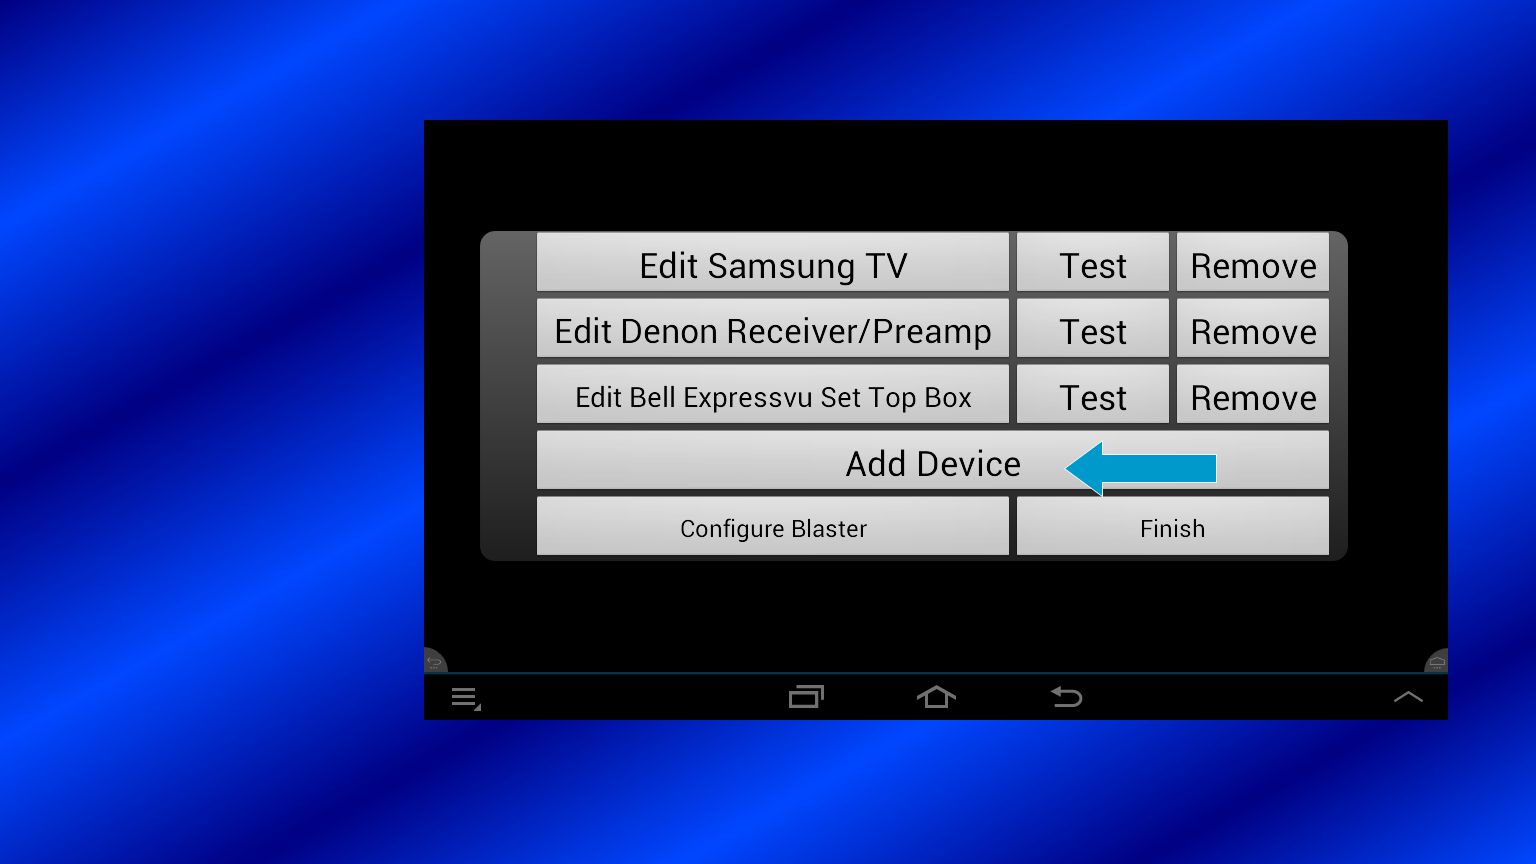
Continue adding devices.

21
All the devices are listed so we can move on to activities.

22
Activities available will vary depending on which devices you have.

23
There are quite a few activity icons choose from. Touch the default icon to see what is available. You can add your own by putting them in the TSR/ActivityIcons folder. Each must have an _up and _dn state.

24
There are quite a few activity icons choose from. You can add your own by putting them in the TSR/ActivityIcons folder. Each must have an _up and _dn state.

25
After you choose an icon, you can label the activity if you wish,

26
Edit or create a label for the activity

27
Enter a name for the activity if you like.

28
The on screen keyboard appears when you touch a text box.

29
This page is complete after you edit the input setting for each device,

30
Select the TV input used in the Watch TV activity.

31
When all the devices are green lighted you are ready to move on. If your cable box has a VOD channel number you can enter it with the VOD button. If it has a VOD command, then just leave it.

32
Set up the Bluray activity.

33
Media Playback includes Bluray, CD, DVD and video tape.

34
Check off the devices used in the activity. The app takes a guess…

35
Continue until all activities are set up. Then save the profile.

36
All done with settings, time to save our work.

37
This unit has a lot of profiles already. There is no limit to the number of profiles you can store. Use a descriptive name.

38
Type a unique name.

39
Saves the profile with the name above.

40
If you have small children or teenagers you might want to protect the profile from changes with a numeric passcode.

41
Time to try it out!

42
Select an activity. The devices will power on and inputs will switch.

43
Changing activities will power off unused devices and power on new ones, then switch inputs.

44
In the event a device does not power on or off, touch the Squid Eye. This is also where you setup or edit custom buttons and Macros.

45
At the top are individual power buttons, and a button for each device which gives access to ALL its functions. Custom buttons are found under Advanced.

46
Security is where you can change or create a passcode. We will make a custom button.

47
All possible buttons are shown. Long touch on the button you wish to configure.

48
This is where we set up a button function or Macro. Touch the button repeatedly to set the color.

49
Select the device to control. Macros can control more than one device.

50
Select the device to control. Macros can control more than one device.

51
Select the device function.

53
Change the Label

54
When you are done editing buttons, touch the Squid Eye.

55
Save your changes.

56
And there is our new button. The app automatically arranges the buttons neatly.

57
Back to watch TV and we can input a channel number.

58
The key pad appears. The Squid Eye allows us to set the delay between channel numbers. If this is too short or too long the device may go to the wrong channel.

59
Timing is set in milliseconds (1000=1 second)
")
60
The E key appends an ENTER command after the channel number. This will speed response on many set top boxes. The command is sent when you touch OK.

61
In this mode commands are sent immediately. This is useful for entering text cell phone style as used in many internet connected TVs.

62
We can have about 40 screens of up to 24 favorites each. Touch the heart button to enter the favorites mode.

63
Long touch on a blank button to add a favorite.

64
A favorite can be a Channel, Website, or command button. Command buttons can have a Macro. Users can add their own button icons. They go in the TSR/user folder.

65
Hundreds of logos for channels and websites are included. More are available from IconHarmony.com which has a special Touchsquid section.

66
Logos are in alphabetical order and are named by network. The list is scrollable with a swipe.

67
When finished touch OK.

68
You can add more favorites with a long touch on a blank space. You can edit or move an existing favorite with a long touch. Touch the heart to return to the main screen.

69
Touch the Power off button to turn off all devices.

70
Lets look at another profile.

71
Choose a profile to load.

72
This one has 7 activities. For the PRO version the maximum is 10.

73
Note custom Page Up and Page Down buttons (+ and -)
")
74
A complete set of favorites

75
More favorites. These are websites.

76
Websites display inside the remote app. Links can be followed.

77
Back and forward buttons and exit at the bottom.

78
Google.

80
If the customer is happy, Touchsquid is happy! Thank you! Our popular forum is at touchsquid.info

Similar presentations


 with Excel>")

 872-3539.>")


