Download presentation
Presentation is loading. Please wait.

1
“Superior Suturing” Suturing Basics Assignment #1

2
Objectives Recognize the proper instruments for suturing.
Become familiar with different types of closure techniques Understanding of two-handed, one-handed, instrument ties

3
Surgical Instruments Tissue Forceps Dressing Forceps Needle Holder
Iris scissors Suture Removal Scissors Hemostats Dissection Scissors

4
Closure Types Primary closure (primary intention)
Wound edges are brought together so that they are adjacent to each other (re-approximated) Examples: well-repaired lacerations, well reduced bone fractures, healing after flap surgery Secondary closure (secondary intention) Wound is left open and closes naturally (granulation) Examples: gingivectomy, gingivoplasty,tooth extraction sockets, poorly reduced fractures Tertiary closure (delayed primary closure) Wound is left open for a number of days and then closed if it is found to be clean Examples: healing of wounds by use of tissue grafts.
 Examples: well-repaired lacerations, well reduced bone fractures, healing after flap surgery. Secondary closure (secondary intention) Wound is left open and closes naturally (granulation) Examples: gingivectomy, gingivoplasty,tooth extraction sockets, poorly reduced fractures. Tertiary closure (delayed primary closure) Wound is left open for a number of days and then closed if it is found to be clean. Examples: healing of wounds by use of tissue grafts.")
5
Basic Laceration Repair
Principles And Techniques

6
Types of Closures Simple interrupted closure – most commonly used, good for shallow wounds without edge tension Continuous closure (running sutures) – good for hemostasis (scalp wounds) and long wounds with minimal tension Locking continuous - useful in wounds under moderate tension or in those requiring additional hemostasis because of oozing from the skin edges Subcuticular – good for cosmetic results Vertical mattress – useful in maximizing wound eversion, reducing dead space, and minimizing tension across the wound Horizontal mattress – good for fragile skin and high tension wounds Percutaneous (deep) closure – good to close dead space and decrease wound tension
 – good for hemostasis (scalp wounds) and long wounds with minimal tension. Locking continuous - useful in wounds under moderate tension or in those requiring additional hemostasis because of oozing from the skin edges. Subcuticular – good for cosmetic results. Vertical mattress – useful in maximizing wound eversion, reducing dead space, and minimizing tension across the wound. Horizontal mattress – good for fragile skin and high tension wounds. Percutaneous (deep) closure – good to close dead space and decrease wound tension.")
7
Simple Interrupted Suturing
Apply the needle to the needle driver Clasp needle 1/2 to 2/3 back from tip Rule of halves: Matches wound edges better; avoids dog ears Vary from rule when too much tension across wound

8
Simple Interrupted Suturing
Rule of halves 1

9
Simple Interrupted Suturing
Rule of halves 3 1 1 2

10
Suturing The needle enters the skin with a 1/4-inch bite from the wound edge at 90 degrees Visualize Erlenmeyer flask Evert wound edges Because scars contract over time

11
Suturing Release the needle from the needle driver, reach into the wound and grasp the needle with the needle driver. Pull it free to give enough suture material to enter the opposite side of the wound. Use the forceps and lightly grasp the skin edge and arc the needle through the opposite edge inside the wound edge taking equal bites. Rotate your wrist to follow the arc of the needle. Principle: minimize trauma to the skin, and don’t bend the needle. Follow the path of least resistance.

12
Suturing Release the needle and grasp the portion of the needle protruding from the skin with the needle driver. Pull the needle through the skin until you have approximately 1 to 1/2-inch suture strand protruding form the bites site. Release the needle from the needle driver and wrap the suture around the needle driver two times.

14
Simple Interrupted Suturing
Grasp the end of the suture material with the needle driver and pull the two lines across the wound site in opposite direction (this is one throw). Do not position the knot directly over the wound edge. Repeat 3-4 throws to ensuring knot security. On each throw reverse the order of wrap. Cut the ends of the suture 1/4-inch from the knot. The remaining sutures are inserted in the same manner
. Do not position the knot directly over the wound edge. Repeat 3-4 throws to ensuring knot security. On each throw reverse the order of wrap. Cut the ends of the suture 1/4-inch from the knot. The remaining sutures are inserted in the same manner.")
15
Simple, Interrupted

16
The trick to an instrument tie
Always place the suture holder parallel to the wound’s direction. Hold the longer side of the suture (with the needle) and wrap OVER the suture holder. With each tie, move your suture-holding hand to the OTHER side. By always wrapping OVER and moving the hand to the OTHER side = square knots!!
 and wrap OVER the suture holder. With each tie, move your suture-holding hand to the OTHER side. By always wrapping OVER and moving the hand to the OTHER side = square knots!!")
17
Two Handed Tie

18
Two Handed Tie

19
One-Hand Tie

20
One-Hand Tie

21
Continuous Locking and Nonlocking Sutures

23
Vertical Mattress Good for everting wound edges
(neck, forehead creases, concave surfaces)
")
25
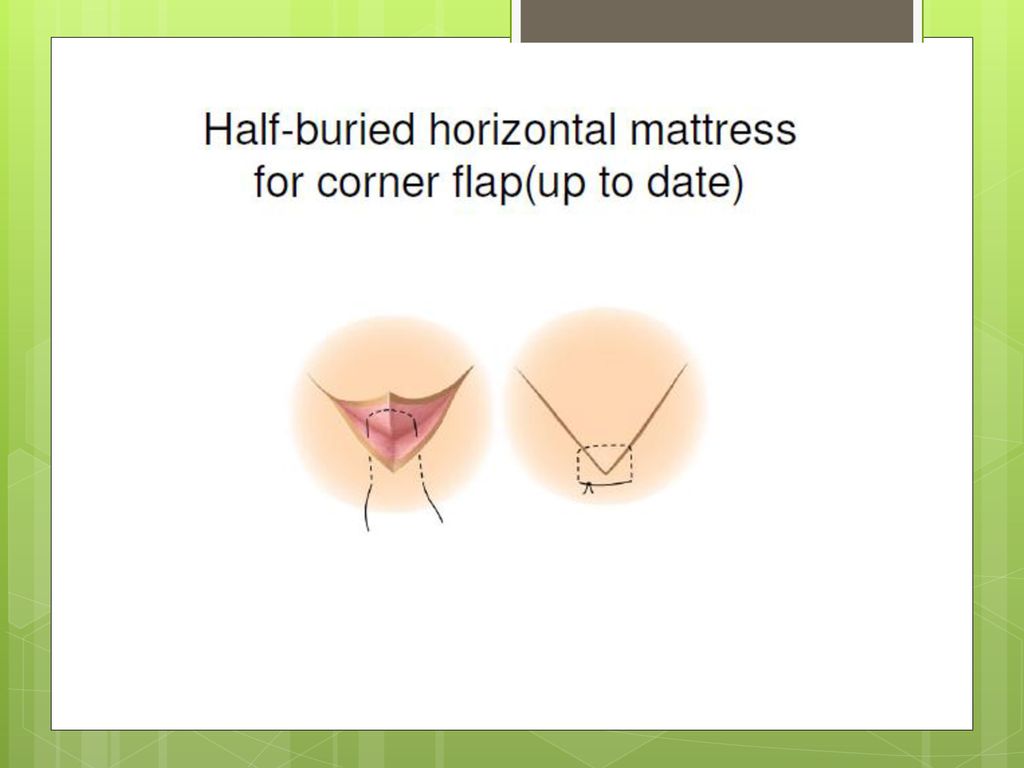
Horizontal Mattress Good for closing wound edges under high tension,
and for hemostasis.

26
Horizontal Mattress

29
Complete Assessment Quiz #1

30
Reference Lianne Beck, MD Assistant Professor
Emory Family Medicine Residency Program June 2014

Similar presentations