Download presentation
Presentation is loading. Please wait.

1
School District U-46 Metadot Portal Training

2
Agenda Intro – Objective Planning Main Page Login Help/Support My Website Enable Editing Edit Your Home Page Text Editor

3
Agenda Links to URL or email Insert Images Create a New Page Properties – Update Style Gizmos Shortcuts Clipboard Image Library Roles and Permissions

4
Plan Ahead Review Web Publishing Procedures – http://www.u-46.org/it/WebPublishingProc.htm Review Other Teacher Sites Think of your 1 st page as your Introduction Then Think of “Who is your Audience”? – Students, Parents, Colleagues? Create “New” pages to Target Content

5
Plan Ahead Organize your resources ahead of time – Resize and Rename Images, Save Files for Attachments, Links to Reference Collect Links – Ex Resource: http://www.internet4classrooms.com/ Collect Clip Art – http://www.awesomeclipartforeducators.com/ – http://school.discoveryeducation.com/clipart/index.html – http://flamingtext.com/ – http://www.teacherfiles.com/clip_art.htm

6
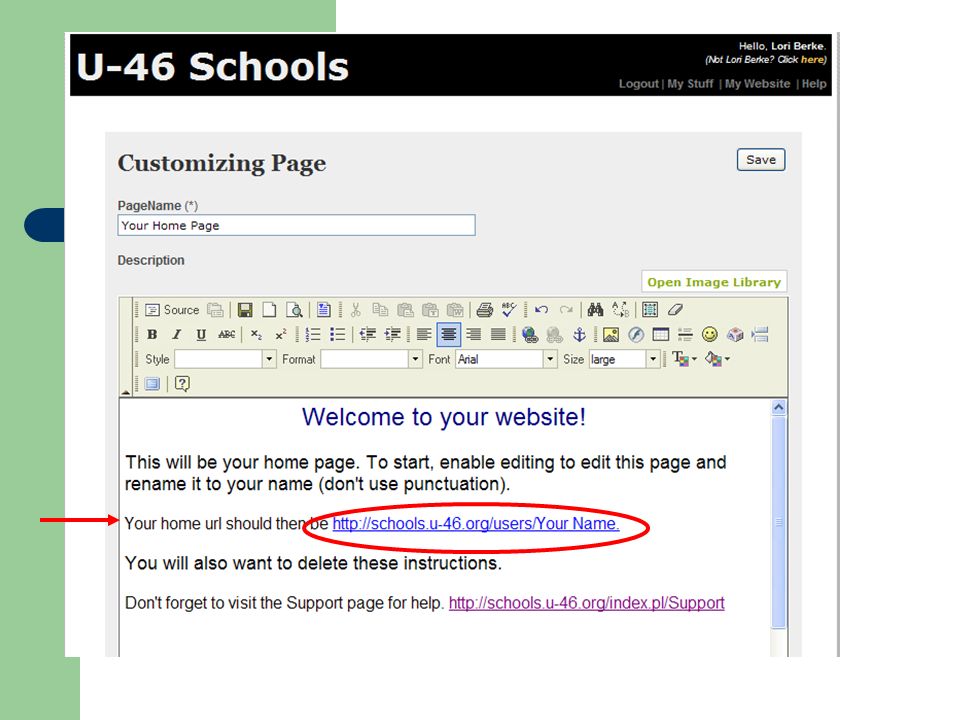
Web Address http://schools.u-46.org (You can access from HOME too!)
")
7
Web Address http://schools.u-46.org Take some time to view your school, other schools, other teacher sites.

8
schools.u-46.org – click Staff Login (upper right)
")
9
Use your Novell username & password to login

10
Login Login using your Novell username and password: FirstLast or E0xxxxx only, with no space in between. (You don’t need the full context or long login.)
.")
11
Once Logged in, Access view changes from Public to Logged In

12
Click Help – in the upper right hand

13
Explore Help/Support (Scroll down to FAQ)
")
14
Useful Terms Web builder bar – Used to add and manage pages, gizmos. Gizmo – A module or feature that carries out a specific function. (i.e. Calendar gizmo, Poll gizmo, Link gizmo) Shortcut – A copy of a gizmo that keeps a reference to the original. Breadcrumbs - Navigational technique displaying all pages leading from the home page to the currently viewed page. Clipboard - A temporary holding area for gizmos and shortcuts.
 Shortcut – A copy of a gizmo that keeps a reference to the original. Breadcrumbs - Navigational technique displaying all pages leading from the home page to the currently viewed page. Clipboard - A temporary holding area for gizmos and shortcuts..")
15
click My Website (upper right)
")
16
First time to My Website

17
Enable Editing

18
Normal vs. Edit Modes Normal mode displays web pages and content like any other web server Edit mode allows an authorized user to add or edit/manage content of the web portal.

19
Web builder bar appears once edit is enabled

20
Click Edit

22
Click Save

23
Click New Page

24
Use the Text Editor to create content on the Page HINT: Shift, Enter to drop one line at a time, instead of two.

25
Bottom of the Text Editor – to Redirect, Hide, Fill in Keywords for Effective Searching

26
Click Create to SAVE

27
Click Edit to go back to make changes

28
To enter a Hyperlink or Email Address 1. Highlight Text 2. Click the Globe/Link Highlight Text, then click

29
Choose Link Type - URL or Email

30
Click Properties

31
Properties – Allows changes to your page layout

32
Properties – Allows you to select a page style to match your building Scroll the drop down menu to select your school.

33
Properties – Is also where you can schedule content

34
Exercise 1 Add a New Page – Add Text to the Page – Change Size, format, color – Add a Link (either URL or email) – Change your Page Style to match your Building
 – Change your Page Style to match your Building")
35
Prepare Your Images Prior to Insert Use Microsoft Picture Manager

36
Size Matters Resize and Rename your pictures 1 st. - You can use Microsoft Office Picture Manager. - Drag and drop to the desktop. - Then Edit Pictures, Compress Pictures.

37
Size Matters - Compress for email or web page. - Save as to your location.

38
Insert/Edit Image from the Text Editor (Acceptable file types -.jpg,.gif and.png)
")
39
Add a gizmo…

40
Add an image item gizmo…

41
Browse for location and create…

42
Gizmo Panel Bar

43
Gizmo Panel

44
Shortcut and Clipboard X Put an “X” in the box that represents the page or the Gizmo that you want to paste or delete

45
Create your own Image Library

46
Exercise 2 Insert a Picture either by using the Insert/Image from the Text Editor or by adding the Image Gizmo Add a Gizmo of your choice Cut-and-paste a gizmo Create a shortcut Move gizmos up and down or change page order

47
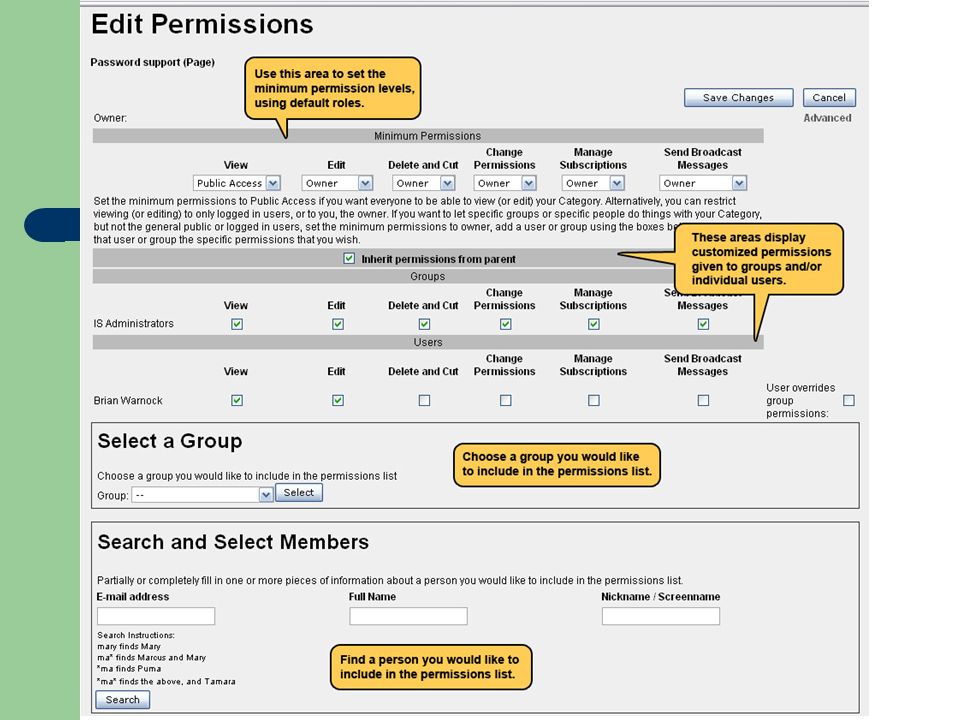
Roles Access Level Description Public accessAnybody in the world; general users Logged InOnly logged in users: U-46 staff OwnerOnly the object’s owner (creator) Site Manager / Admin Only the admin user (Information Services)
 Site Manager / Admin Only the admin user (Information Services)")
48
Permissions Adjusting permission settings for individual pages or objects can be done by clicking on the Permissions ( ) button on the gizmo panel of each individual object. Permissions (view, edit, cut, delete, etc.) can be granted to individual users or to groups of users Permissions can be set for pages, sections of pages, individual gizmos.
 can be granted to individual users or to groups of users Permissions can be set for pages, sections of pages, individual gizmos..")
50
Contact Information LoriBerke@u-46.org x5494

Similar presentations


>")

 FrontPage 2002 Level I (Intro & Training)>")


 Contact Info: twitter:>")


