Download presentation
Presentation is loading. Please wait.

1
OSMOSIS & DIFFUSION LAB Animation from: http://www.lionden.com/cell_animations.htm

2
SAFETY DO NOT EAT OR DRINK ANYTHING IN LAB! IODINE IS POISONOUS WEAR AN APRON! IODINE WILL STAIN YOUR SKIN AND CLOTHING Image from: http://www.llnsciencepark.be/en2/images/caution.jpg

3
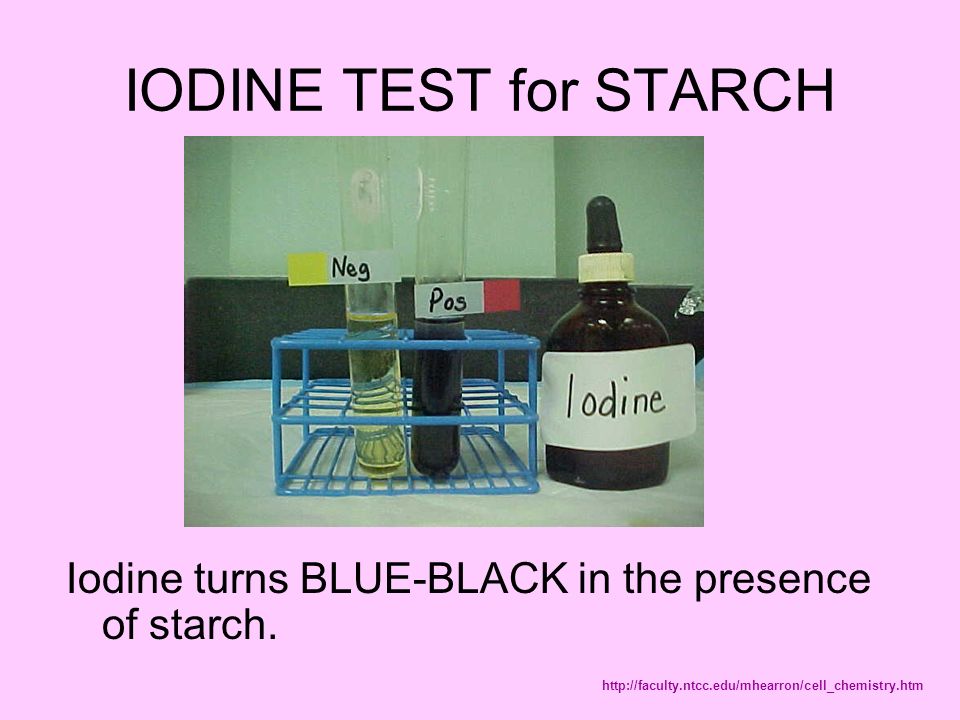
IODINE TEST for STARCH Iodine turns BLUE-BLACK in the presence of starch. http://faculty.ntcc.edu/mhearron/cell_chemistry.htm
4
DIP TEST FOR GLUCOSE If glucose is present strip will turn from YELLOW to ARMY GREEN Image modified from: http://www.freepatentsonline.com/6531322.html

5
STATION #1 1. Fill cup with ¾ full with water 2. Use test strip to TEST FOR GLUCOSE. (Strip will turn from yellow to green if glucose is present) 3. Mark test results in lab packet 4. Go to Station #2 http://www.chemistryland.com/CHM107Lab/Lab5/Soil/Lab5Exp3Soil.html
 3. Mark test results in lab packet 4. Go to Station #2")
6
STATION #2 1.Add 30 drops of IODINE to water in your cup. Be careful! IODINE IS POISONOUS! It will stain your clothes! It will stain your skin! 2. Use a permanent marker to label the level of liquid in the cup. 3. Go to Station #3. Image by Riedell

7
STATION #3 1. Hold membrane bag UNDER RUNNING WATER and rub it with your fingers until it opens. 2. Run water THROUGH the INSIDE of the bag. 3. Tie a KNOT at ONE end of the bag. 4. Go to Station #4. http://www.beartoes.com/images/sink.jpg

8
STATION #4 1. Make sure you have tied a knot in ONE end of the membrane bag. 2. Fill bag with GLUCOSE (use 2 fingers to determine how much to fill it) 3. Pinch end closed to keep from spilling 4. Go to Station #5. Image by Riedell
 3. Pinch end closed to keep from spilling 4. Go to Station #5. Image by Riedell.")
9
STATION #5 Images by Riedell 1. Add STARCH to the membrane bag on top of the glucose (use 2 fingers to determine how much to fill it) 2. Leave a little space at the end and tie a KNOT to seal the bag. 3. Go to Station #6.
 2. Leave a little space at the end and tie a KNOT to seal the bag. 3. Go to Station #6..")
10
STATION #6 1.Take your MEMBRANE BAG to the SINK and RINSE IT ………really, really, really, really, really, really, really, really, (I mean it!) REALLLLLLLLY WELL. 2.Go to Station #7.

11
STATION #7 1. DRY OFF the membrane bag and use a BALANCE to determine its MASS. Write this down in your lab packet Remember which balance you use so you can use the SAME ONE tomorrow!

12
STATION #8 1. Use PERMANENT MARKER to mark level of liquid in your membrane tube. 2. Take cup back to your table. 3. START EXPERIMENT by placing the membrane bag in the cup. 4. WAIT AND WATCH WHAT HAPPENS! Image by Riedell

Similar presentations


 a high concentration of potassium inside the cell? If a cell increases or decreases in volume, what type.>")


