Download presentation
Presentation is loading. Please wait.

1
T. Trimpe 2005 http://sciencespot.net/

2
THE DISCOVERY OF CELLS First Microscopes* *was made by Anton von Leewenhoek. *Leewenhoek became the FIRST person to OBSERVE and DESCRIBE MICROSCOPIC ORGANISMS and LIVING CELLS.

3
English Scientist Robert Hooke In 1665, used microscope to examine a thin slice of cork described it as consisting of "a great many little boxes". They looked like "little boxes" and reminded him of the small rooms in which monks lived, so he called the "Cells".

4
German Botanist Matthias Schleiden In 1838, studied a variety of PLANTS and concluded that all PLANTS "ARE COMPOSED OF CELLS".

5
German Zoologist Theodor Schwann The next year, reported that ANIMALS are also made of CELLS and proposed a cellular basis for all life.

6
German Physician Rudolf Virchow In 1855, induced that "THE ANIMAL ARISES ONLY FROM AN ANIMAL AND THE PLANT ONLY FROM A PLANT" OR " THAT CELLS ONLY COME FROM OTHER CELLS".

7
Cell Theory All living things are compose of cells Cells are the basic units of structure and function in living things New Cells are produced from existing cells

8
Body Tube Nosepiece Objectives Stage Clips Light Ocular lens (Eyepiece) Arm Stage Coarse Adjustment Fine Adjustment Always carry a microscope with one hand holding the arm and one hand under the base. Base Diaphragm

9
EYEPIECE This part allows you to view the image on the stage and contains the ocular lens.

10
NOSEPIECE This part holds the objective lenses and is able to rotate to change magnification.

11
OBJECTIVE LENSES These are found on the nosepiece and range from low to high power.

12
STAGE CLIPS These are used to hold a slide in place on the stage.

13
LIGHT SOURCE Projects light upwards through the diaphragm to allow you to see the specimen

14
ARM This part on the side of the microscope is used to support it when it is carried

15
COARSE ADJUSTMENT KNOB This part moves the stage up and down to help you get the specimen into view.

16
FINE ADJUSTMENT KNOB This part moves the stage slightly to help you sharpen or “fine” tune your view of the specimen.

17
DIAPHRAGM This part of the microscope helps you adjust the amount of light that reaches the specimen

18
BASE The bottom part of the microscope.

19
STAGE Part of the microscope that supports the slide that is being viewed

20
COVER SLIP Name for the small plastic or glass piece that is used to cover a water drop on a slide

21
SLIDE Small glass plate on which specimen are placed for viewing

22
What’s my power? To calculate the power of magnification, multiply the power of the ocular lens by the power of the objective. What are the powers of magnification for each of the objectives we have on our microscopes?

23
Comparing Powers of Magnification We can see better details with higher the powers of magnification, but we cannot see as much of the image. Which of these images would be viewed at a higher power of magnification?

24
Let’s give it a try... 1 – Turn on the microscope and then rotate the nosepiece to click the red-banded objective into place. 2 – Place a slide on the stage and secure it using the stage clips. Use the coarse adjustment knob (large knob) to get it the image into view and then use the fine adjustment knob (small knob) to make it clearer. 4 – When you are done, turn off the microscope and put up the slides you used. 3 – Once you have the image in view, rotate the nosepiece to view it under different powers. Draw what you see on your worksheet! Be careful with the largest objective! Sometimes there is not enough room and you will not be able to use it!
 to get it the image into view and then use the fine adjustment knob (small knob) to make it clearer. 4 – When you are done, turn off the microscope and put up the slides you used. 3 – Once you have the image in view, rotate the nosepiece to view it under different powers. Draw what you see on your worksheet. Be careful with the largest objective. Sometimes there is not enough room and you will not be able to use it!.")
25
How to make a wet-mount slide … 1 – Get a clean slide and coverslip from your teacher. 2 – Place ONE drop of water in the middle of the slide. Don’t use too much or the water will run off the edge and make a mess! 3 – Place the edge of the cover slip on one side of the water drop. You do not need to use the stage clips when viewing wet-mount slides! 5 – Place the slide on the stage and view it first with the red-banded objective. Once you see the image, you can rotate the nosepiece to view the slide with the different objectives. 4 - Slowly lower the cover slip on top of the drop. Cover Slip Lower slowly

39
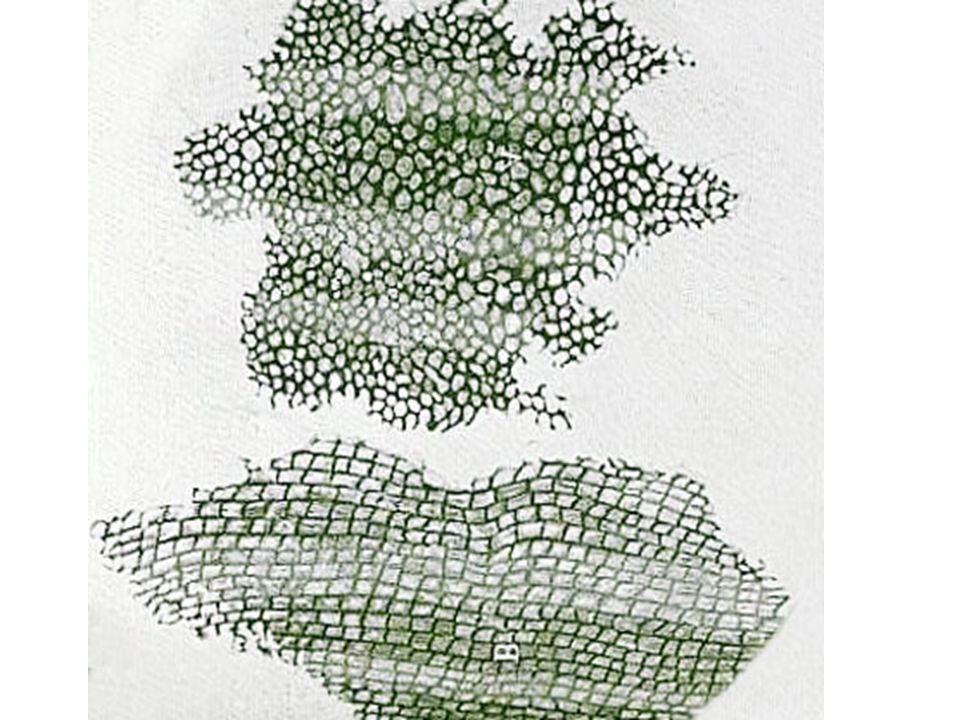
Lots of different shapes and sizes of cells

42
Sizes 5 to 50 micrometers How big is a micrometer? 1m=100cm=1,000,000 micrometers 1 micrometer=.000001m Basically you can’t see it Remember: KHDmDCM..micro..nano..pico

43
Chaos chaos Largest protozoan You can see without microscope 1000 micrometers How many meters is this? –.001 m How many centimeters is this? –0.1 cm

44
2 things in every cell… Surrounded by a barrier, cell membrane At some point in their life they contain…. –DNA

Similar presentations


 Arm Stage Coarse Adjustment Fine Adjustment.>")


 Arm Stage Coarse Adjustment Knob Fine Adjustment Knob Always carry a microscope with one.>")
 Arm Stage Coarse adjustment focus.>")


 Arm Stage Coarse Adjustment Fine Adjustment Always carry a microscope with one.>")

 Arm Stage Coarse Adjustment Fine Adjustment.>")


 Arm Stage Coarse Adjustment Fine Adjustment.>")
 2.Body Tube.>")

 Arm Stage Coarse Adjustment Fine Adjustment.>")