Download presentation
Presentation is loading. Please wait.

1
Android 1: Background Kirk Scott

2
1.1 Buzzwords 1.2 Development Software 1.3 Getting Started 1.4 Preliminaries to Trying to Make It Work the First Time

3
1.5 Creating a New, Example Android Application Project in Eclipse 1.6 Creating a Virtual Device, an Emulator 1.7 Running an App on the Emulator in Eclipse 1.8 Running the Project on an Attached Device Instead of an Emulator

4
1.1 Buzzwords…

5
The Android platform originated in a separate company It was acquired by Google It is supported by the Open Handset Alliance (OHA) From a business perspective, Android is distinguished by the fact that many vendors are cooperating to provide a non-proprietary development environment
 From a business perspective, Android is distinguished by the fact that many vendors are cooperating to provide a non-proprietary development environment")
6
Key components of this successful alliance are: Hardware device manufacturers Mobile service providers Android/Google, which provides the basic software operating and development environments Independent app developers marketing through the app store or other places

7
The platform is based on: A secure operating system, Linux Virtual machines running on top of Linux (known as Dalvik virtual machines) A widely-known object-oriented language, Java A tested software development environment, Eclipse
 A widely-known object-oriented language, Java A tested software development environment, Eclipse")
8
Proprietary vs. non-proprietary Android is based on open source licensing Developers do not have to pay fees to use the development tool kit The do not have to pay fees on the apps developed with it The app developer API includes everything that a “native” programmer would have access to

9
The theory is that there is a large potential market By opening up the environment, you increase the size of the pie for everyone Android is growing from phones to tablets to other devices The growth is being driven by the app market

10
Another useful aspect of the development environment: It comes with an emulator for handheld devices This means that you can initially develop and test code on a PC with the development environment installed You don’t literally have to develop on the handheld device

11
Emulation isn’t the be-all, end-all The emulator is slow The emulator can be problematic The emulator may not fully model the hardware device of interest The reality is that you eventually have to test and finish development on a hardware device if you expect to roll out the app on that device

12
You may have heard of “Ice Cream Sandwich” (ICS) or Jellybean As of the writing of these overheads, these are the most recent versions of the Android SDK It is worthwhile to note that the latest versions essentially merge two strains in Android: Development for cell phones and development for tablets
 or Jellybean As of the writing of these overheads, these are the most recent versions of the Android SDK It is worthwhile to note that the latest versions essentially merge two strains in Android: Development for cell phones and development for tablets")
13
You may also be curious about how versions were named The different versions have been named after sweets in alphabetical order Here are the versions and names 1.5, Cupcake 1.6, Donut 2.0/2.1, Eclair

14
2.2, Froyo 2.3, Gingerbread 3.0, Honecomb 4.0, Ice Cream Sandwich 4.1, Jellybean Note that this list is more than just a historical curiosity As with any growing system, backwards compatibility is an issue, and there are plenty of systems out there using earlier versions

15
1.2 Development Software

16
To start developing for Android you essentially need to download and install two pieces of software: The Java SDK The Android Development Toolkit (ADT) bundle The bundle includes Eclipse It includes Android classes for development It includes the emulator so that you can start to learn development without access to an Android hardware device
 bundle The bundle includes Eclipse It includes Android classes for development It includes the emulator so that you can start to learn development without access to an Android hardware device")
17
As with all growing and changing systems, documenting installation and use is hopeless As soon as you write something down, it’s out of date These overheads are designed for computer literate persons, in other words, computer science students

18
Entry points and some guidance are given Persistence and a willingness to fiddle around are required Experience has shown that most students are actually better at this than the teacher For what it’s worth, these overheads were created after installing Java v. 1.7.0_11 and Android v. 4.2 API level 17

19
Since Java was acquired by Oracle, the entry point for downloading Java is www.oracle.comwww.oracle.com On that Web page there is a link for downloads Under that heading you can find Java for developers Find the right SDK for your system and install it before installing the Android tools

20
The highest level entry point for Android is www.android.com www.android.com On this Web page you’ll find a link for developers or you can go directly to developer.android.com developer.android.com Find the ADT bundle which is right for your system and install it For the time being, just accept the defaults, whatever they might be

21
Virtually anything you might want to know about Android programming can be found at the developer’s Web site The site includes tutorials on app development It includes Java-like documentation of the packages and classes in the Android API It includes detailed technical information

22
The problem is the eternal one: There is too much information The average programmer doesn’t know where to start and can’t distinguish the essential from the interesting or the overwhelming The purpose of this set of overheads and those that may follow is to provide the barest guide to getting started

23
There are two important principles at work here that kitchen-sink Web site and textbook authors seem to be unfamiliar with: 1. There are lots of things that you simply don’t have to be told about at the beginning There may come a time in the future when some overlooked items will be introduced, but until then, ignorance may not be bliss, but it’s necessary

24
2. There are lots of things where you will have to accept that they exist and learn how to use them at a minimal level without having any idea of how they work In other words, at the beginning you will be doing a lot of monkey work just to get the Android machinery to run a painfully simple app For the time being you will have to accept the machinery without explanation

25
1.3 Getting Started

26
The starting point for the following overheads is a successful installation of Java and the ADT bundle on your system Once the ADT is installed, your entry point into Android development will be Eclipse This isn’t really an introduction to Eclipse because I don’t have any pre-existing knowledge of how to use it

27
However, given that Eclipse will be the development environment, it is possible to point out what is included with it when it is installed as part of the ADT bundle There is an Android SDK Manager tool There is an Android Virtual Device Manager tool And there is a DDMS perspective

28
The Android SDK Manager tool is represented in the Eclipse toolbar by a small, green Android icon It looks something like this

29
The Android Virtual Device Manager tool is represented in the Eclipse toolbar by an icon with the Android robot half showing on the screen of a handheld device It’s located next to the Android SDK Manager tool It looks something like this

30
Off to the right on the tool bar there are two buttons One is labeled Java The other is labeled DDMS These are Eclipse perspectives In other words, clicking one of these changes what you are viewing in the Eclipse environment

31
DDMS is Android related It stands for Dalvik Debug Monitor Server At the moment it’s too soon to give much detail about the DDMS perspective except that it should be there after a successful installation As noted earlier, Dalvik is the name of the virtual machine that Android apps run on

32
A screenshot of the Eclipse interface is shown on the following overhead Things come up tiny, but you may just be able to identify the tools and buttons The point is that Android things are included in the toolbar when you successfully install Eclipse as part of the bundle These tools are also available through the menu if the toolbar isn’t showing

34
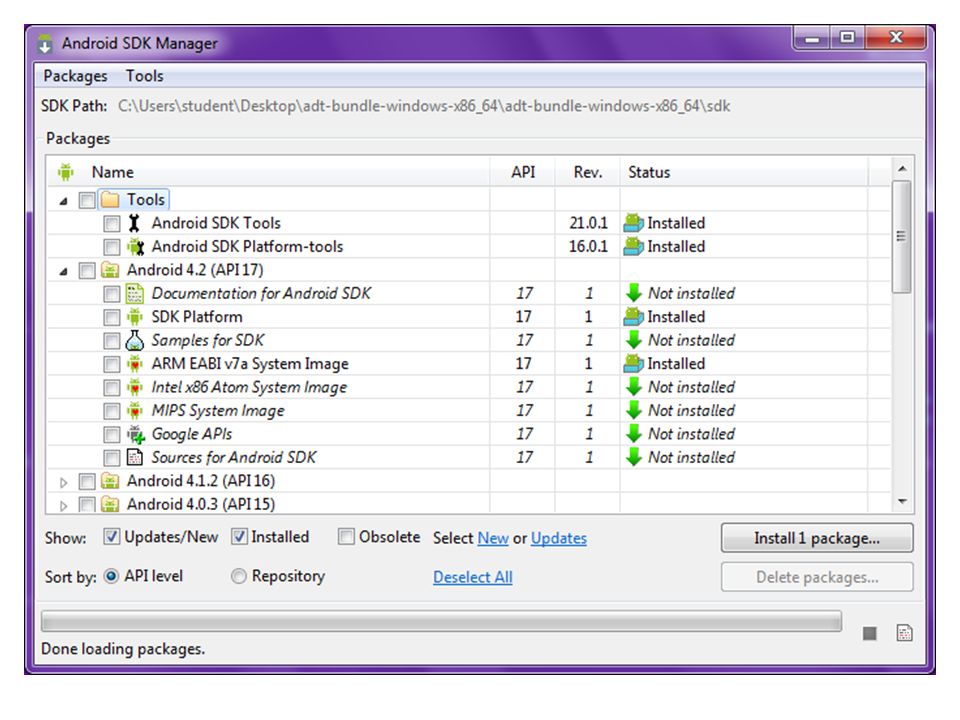
It’s not too soon to say something about the Android SDK Manager and the Android Virtual Device Manager A screenshot of the Android SDK Manager tool is shown on the following overhead The tool allows you to manage and update what is installed on your development machine

36
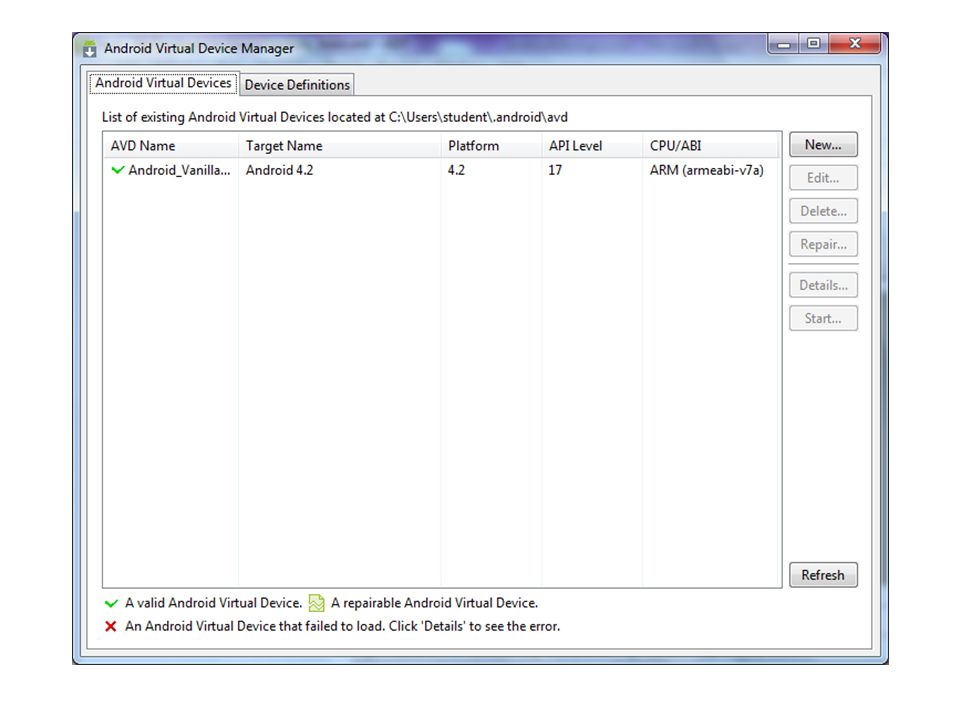
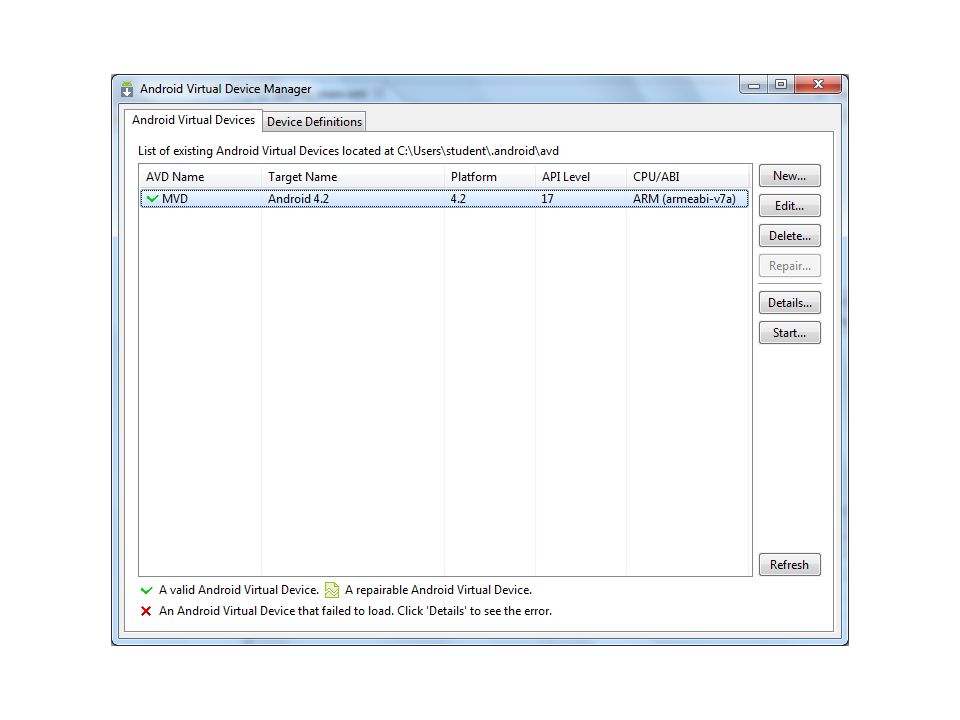
A screenshot of the Android Virtual Device Manager tool is shown on the overhead following the next one At the moment the details are unimportant We will be using the tool soon enough

37
It is presented now because it emphasizes the idea that you can develop on an emulator The “virtual device” manager is that part of the environment which makes it possible to define and manage emulators for the many different kinds of handheld devices there are Even though emulation isn’t perfect, it’s a very helpful part of a development environment that you can try out an application on different devices in this way

39
1.4 Preliminaries to Trying to Make It Work the First Time

40
Preliminary Crying Trying to make things work the first time is where a miracle is supposed to occur It’s not realistic to expect any set of instructions or screen shots to preview exactly what you will have to do to make things happen or to anticipate all of the problems that might occur along the way

41
Your hardware is probably different Your installation of the software may be different I initially had mismatches between 32 bit and 64 bit software for Java and the Android SDK which I had to resolve It is possible that you will be using different versions from what I’ve used

42
I had one completely unexpected problem with no hope of solving it except a random Web search The Web search succeeded I had other problems where there was no apparent solution, and I finally got things to work by restarting, randomly trying different parameters, etc.

43
I initially worked on the initial example app over the course of 24 hours, probably 8-12 actually messing with Android I tried to get the initial example app going about 10 times I literally had success 2 of those times

44
You should be prepared for failure and frustration You will have to be flexible, analytical, and persistent Aside from everything else, you will have to be patient

45
I am pretty sure that most of my problems came from the fact that starting the emulator is painfully slow It is unbelievable how slow this is on an up-to- date, reasonably powerful machine with a reasonable amount of memory The point is that if you try to launch an app on an emulator that hasn’t yet fully started, the app certainly won’t run

46
On the following overheads a general overview is given of what is involved in getting a sample application to work—without even looking at its code, how it works, what Android features it is making use of or depends on This is the initial monkey work mentioned at the beginning of the overheads

47
I will be basing these overheads on the initial example app that is given in the tutorial on the Android developer’s Web site This is a bit of a cop out, but if you discover that something in the overheads doesn’t seem to work, try working looking at the information in the tutorial

48
Workspaces These overheads don’t give any specific information about workspaces However, the Eclipse environment organizes projects and packages in workspaces At some point during installation, set-up, or initial run, you will probably be given the option to either accept a default folder as a workspace or to specify your own

49
Needless to say, this is important for general reasons: It’s handy to know where things are being stored At various points along the way, it will be useful to recall that information

50
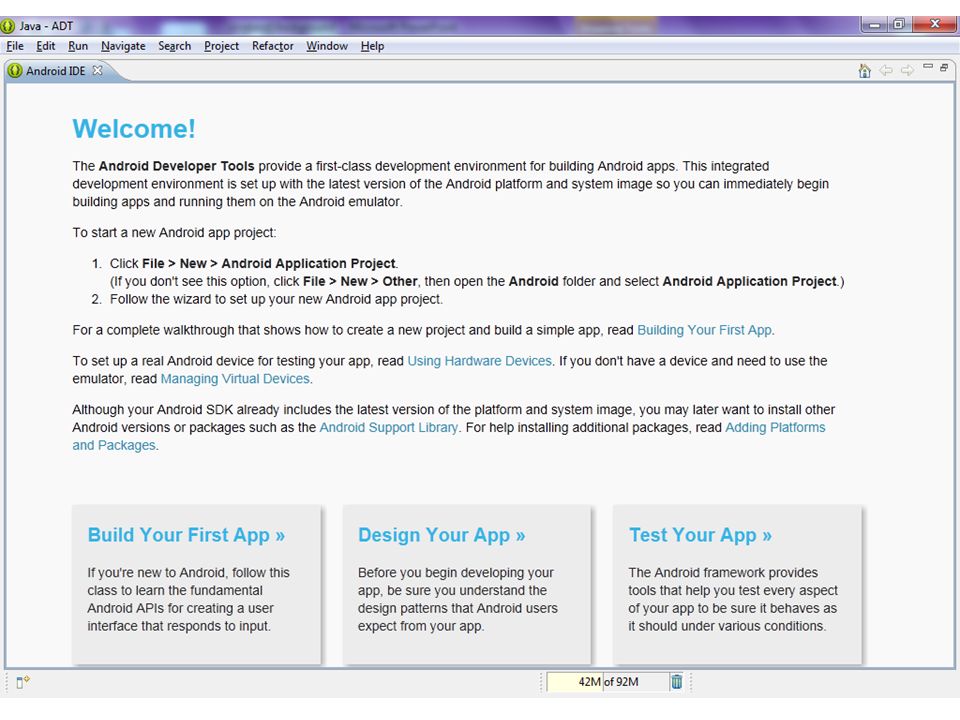
The Android Demos/Tutorials in Eclipse If your installation is like mine, when you start up Eclipse the first screen that will be shown is an entry point into the demos/tutorials This is shown on the following overhead The first step, “Build Your First App” is the stage we’re at This is where to go if you start getting bogged down in these overheads and you want an alternative presentation

52
1.5 Creating a New, Example Android Application Project in Eclipse

53
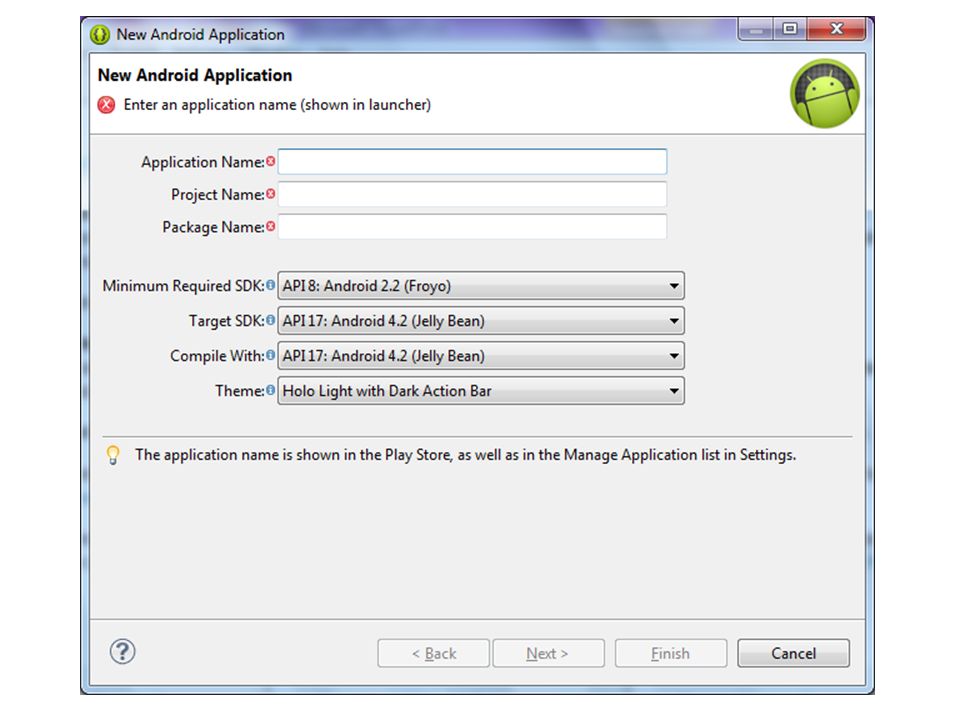
Go to the Eclipse menu which is showing above the Welcome screen Take the option File, New, Android Application Project The result of this is shown in the screenshot on the following overhead

55
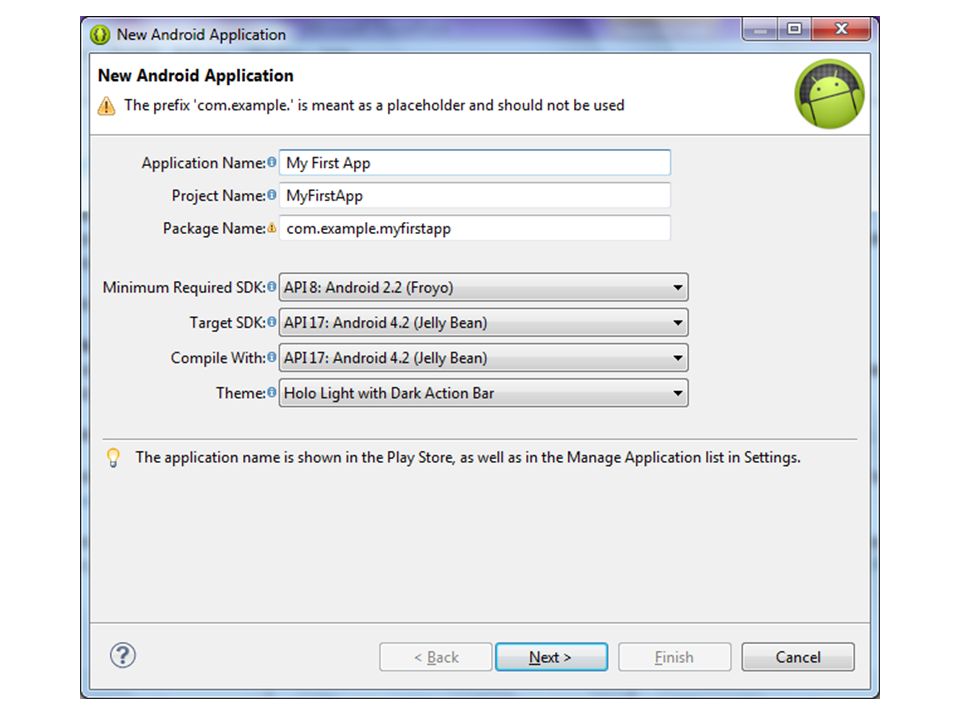
In the first box, type in the following: My First App If Android hasn’t changed or replaced this initial example, the other boxes will auto- complete as shown in the following screenshot (If not, this is the first stage where you will have to go fish)
")
57
If things auto-completed as hoped, then you click the Next > button I will not show the next screenshots for the wizard Just keep on accepting the defaults and taking Next until your reach the Finish option Notice how this is an area where you’re just doing monkey work God knows what all of the options mean at this point

58
Once you click finish “things will happen” They will tend to happen slowly I have a reasonably powerful machine and it takes things a while to happen There is a progress bar at the bottom which gives you some indication of what’s going on

59
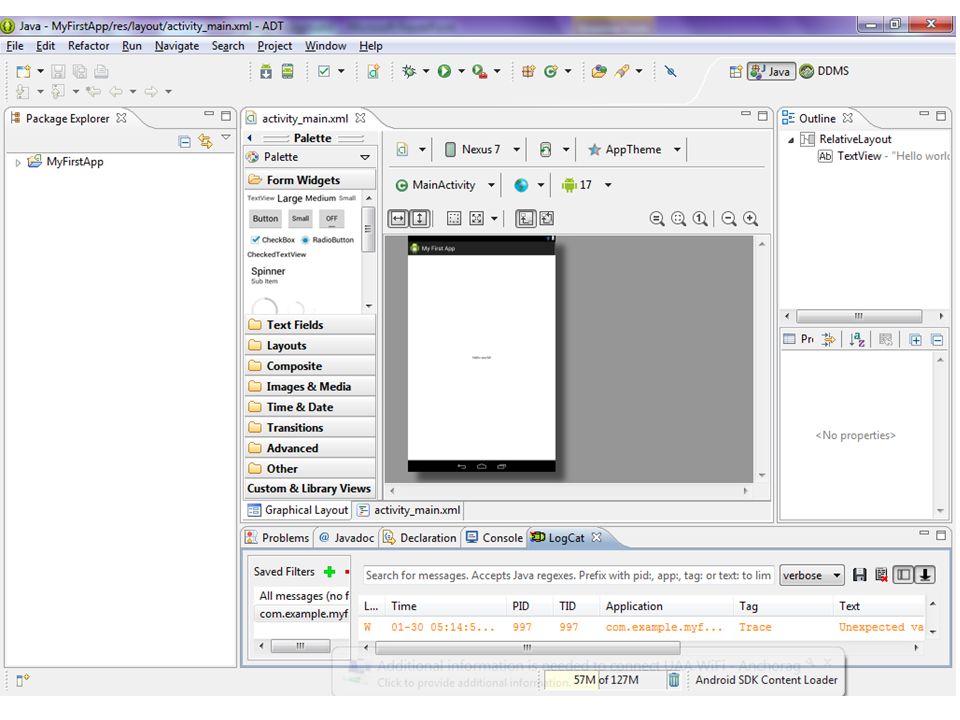
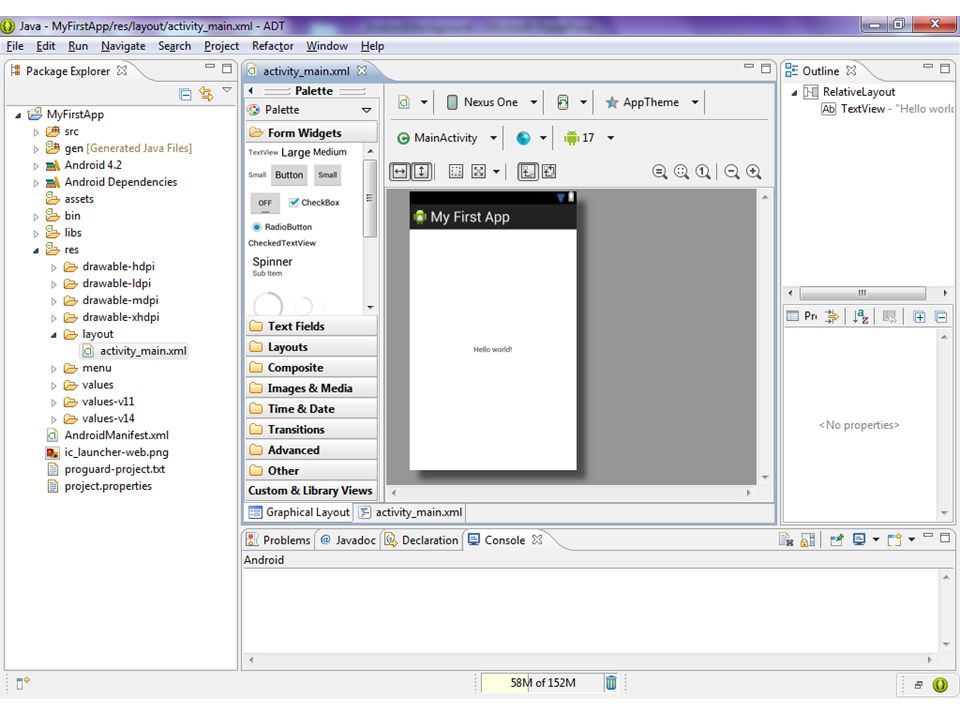
The initial Welcome screen may remain visible If so, it covers up what has happened Minimize anything in the way, and with luck, what you will see in the Eclipse environment will look more or less like the screenshot on the following overhead

61
There are several things to notice in this screenshot The simplest and most reassuring is that if you can actually read the fine print, you will see that My First App is a Hello World app Obviously you’re not looking at code

62
If you look at the name of the file that is being shown by default, you’ll see that it’s an XML file What you’re seeing is a representation of the output of the app On the other hand, also be clear that this is the development environment What you’re seeing is not the emulator

63
Less reassuring is that this screenshot of the editor doesn’t look quite like the one given earlier It doesn’t show the tools mentioned earlier This is an accident, but it’s something that may happen to you The toolbar has simply disappeared You can cause it to appear again or you can access the tools through the menu

64
1.6 Creating a Virtual Device, an Emulator

65
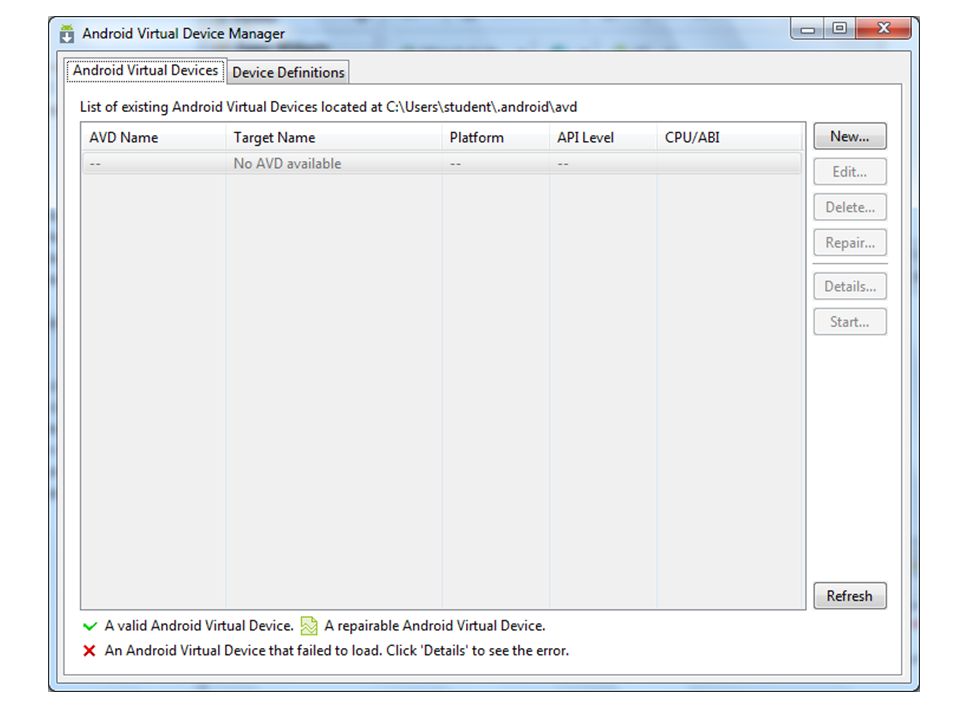
Running the Project on a Virtual Device, an Emulator If you want to run the project using the emulator, you need to use the Android Virtual Device Manager to create a new virtual device If you take the Android Virtual Device Manager tool (or menu option) you should arrive at something similar to the screenshot shown on the following overhead
 you should arrive at something similar to the screenshot shown on the following overhead")
67
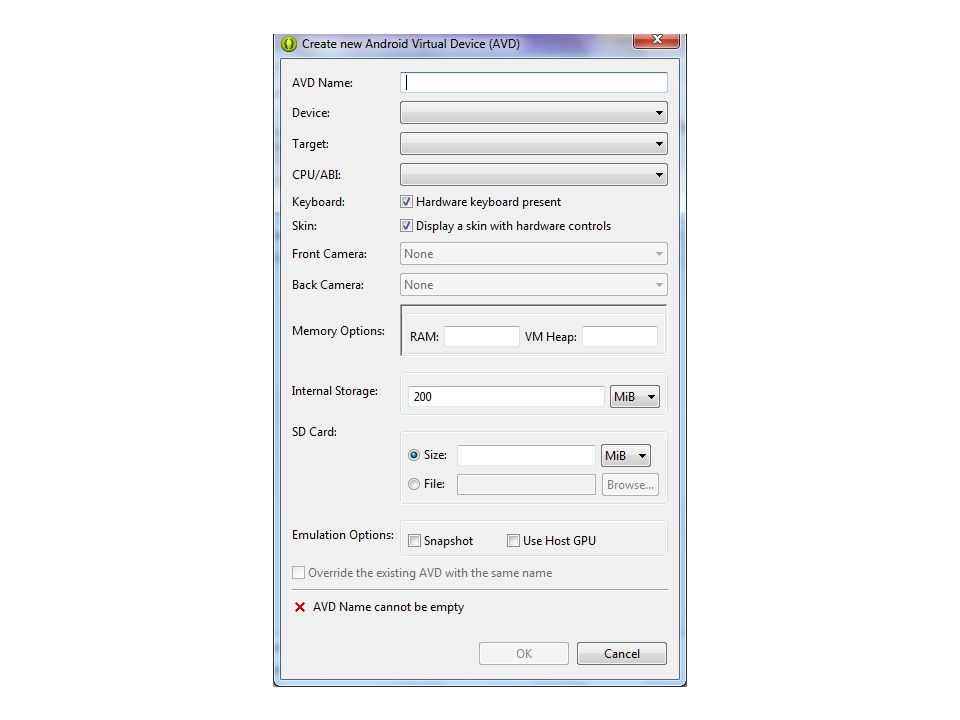
Click the New button to create an Android Virtual Device The window shown in the screenshot on the following overhead comes up

69
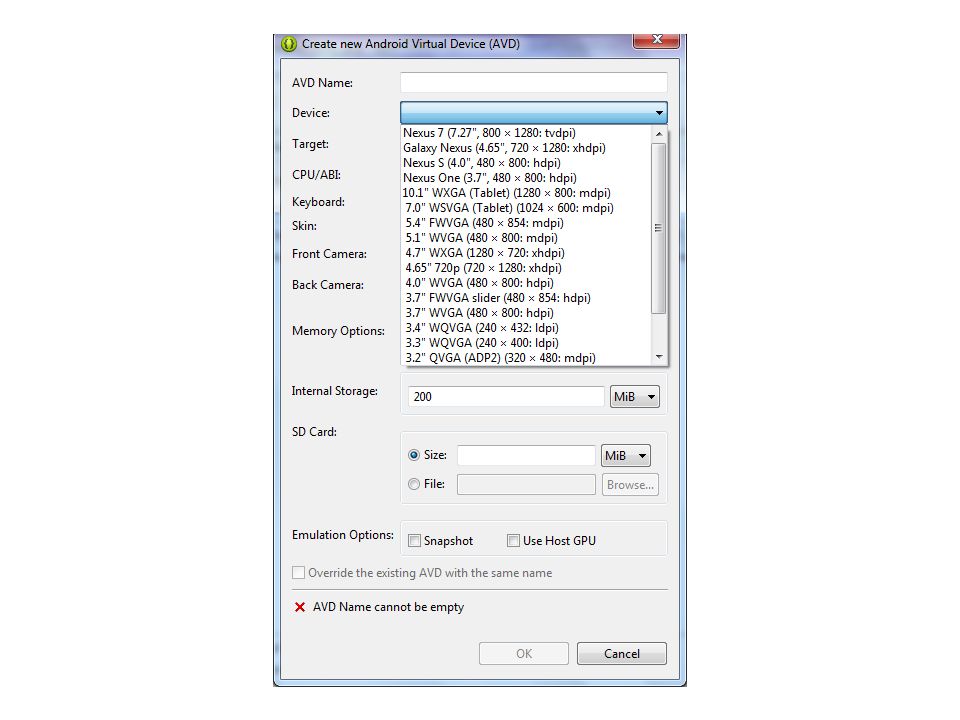
It’s shown on the following overhead with the drop down list for Device expanded

71
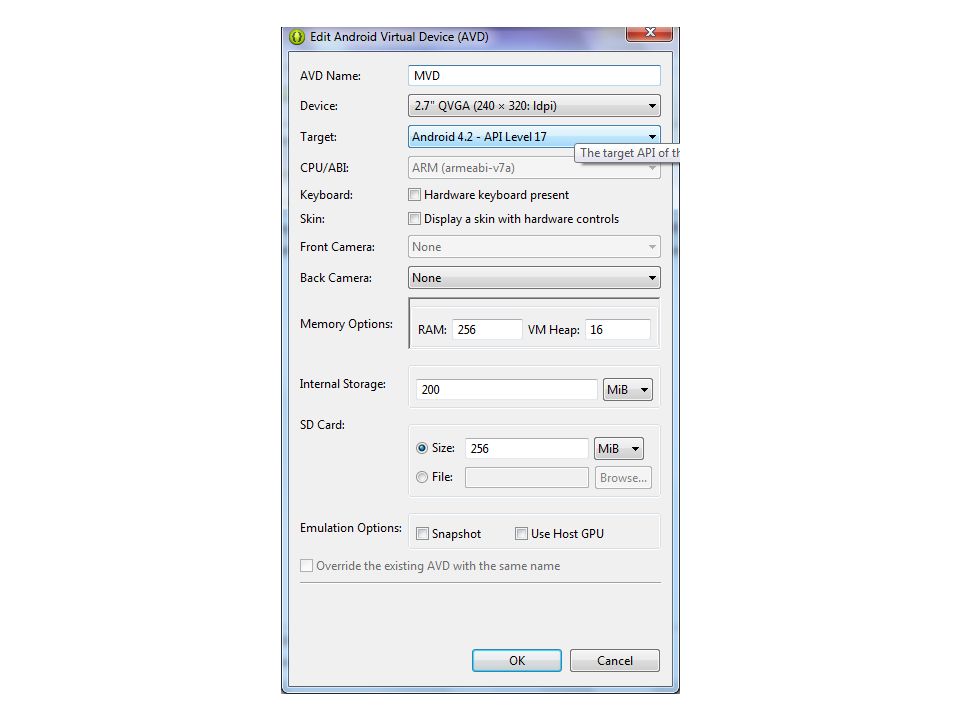
I tried using various devices For initial test purposes I finally settled on the device at the bottom of the list My theory was that the emulators for older, simpler devices might be more stable than emulators for the latest kinds of devices On the following overhead the form is shown filled out with representative values for that simple device

73
Another mystery: Certain reference sources waffle on the desirability of the Snapshot option If you do select Snapshot and then make other changes, you may have troubles later Without Snapshot things might run more slowly, but again, for the first time, try it without Snapshot

74
Warning Here is an example of what can go wrong I also tried doing this with the largest Nexus device, the tablet The memory option defaulted to a RAM value of 1024 I have a relatively recent machine with a fair amount of memory and unremarkable software installed on it Unfortunately, when I continued with that value of 1024, I got a mystery error

75
My Web search informed me that if I change the RAM value to 512, things should be OK For the device I’ve chosen to illustrate with, I took memory size values of 256 These are not large, which may account for the slowness I encountered, but at least they worked

76
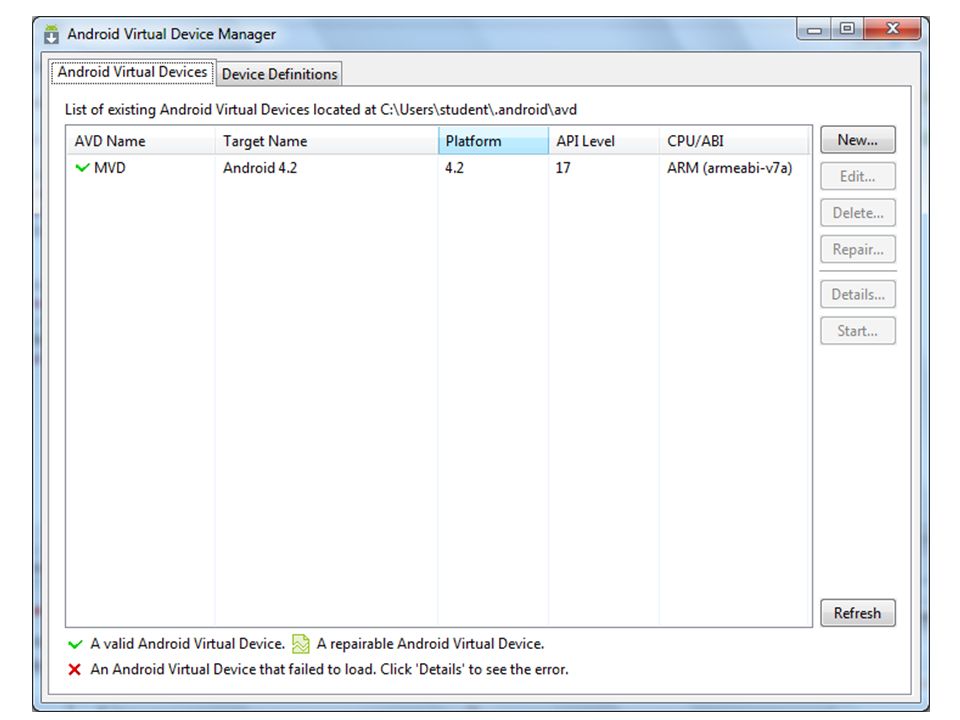
Continuing with Virtual Device Creation Once you’ve got the parameters set, click on OK The system can drag on for a noticeable amount of time creating the virtual device Successful completion is indicated by the appearance of the device in the list as shown in the screenshot on the following overhead

78
There is no final OK step after virtual device creation You’re done—and you have to close this window If you just minimize it, it sits there but is still the active window To go on from here, close this window

79
1.7 Running an App on the Emulator in Eclipse There are several different ways of running an app in the emulator Later on you will find out that you can create run configurations and debug configurations which are linked to a project This is a fine way of doing business, but not necessarily the best way initially

80
Starting the emulator can take a lot of time Trying to run the app and having that process start the emulator isn’t necessarily the best plan The alternative is to start the emulator and then run the app in it This second approach is a better way to do it initially

81
Starting the Emulator The Android Virtual Device screen is shown again on the following overhead with the created virtual device in it The screenshot shows the device as being selected and you’ll note a Start… button on the right hand side

83
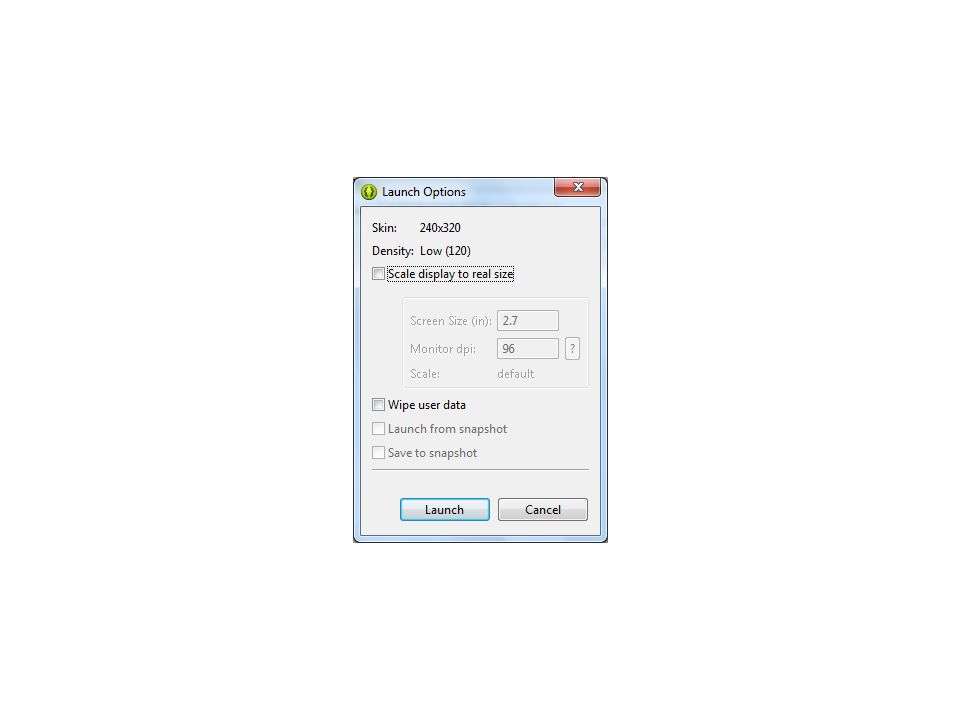
If you click the Start button the following screen should appear This is the magic moment Click Launch

85
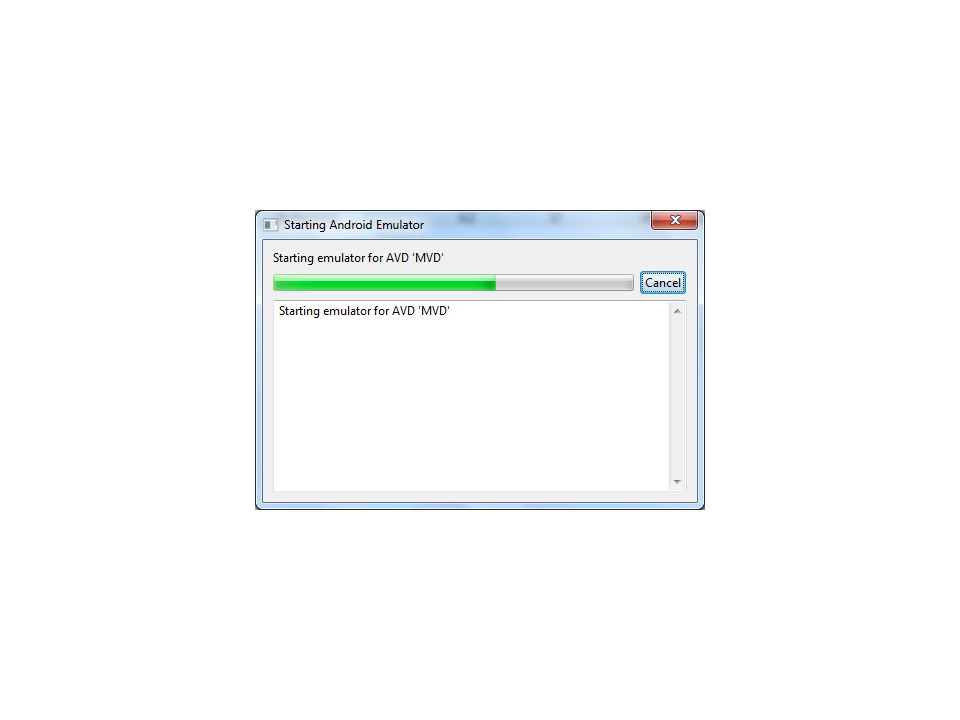
After clicking launch, you should see the screen with the progress bar shown on the following overhead So far so good

87
Even before the previous screen goes away, or at the very least, as soon as it finishes, you should see the emulator on the screen It’s conceivable that you’ll have to close some things to find it It may be hidden In any case, the initial stage of launch shouldn’t take a long time, and this is what you should see

89
Even If Things are Going OK, This is the Painful Part What you need now is tremendous patience and faith The Android message will flash white for an indeterminate period of time The emulator is still launching As long as that process is going on, there’s nothing else that you should do Find something to kill a little time with, because a watched pot never boils

90
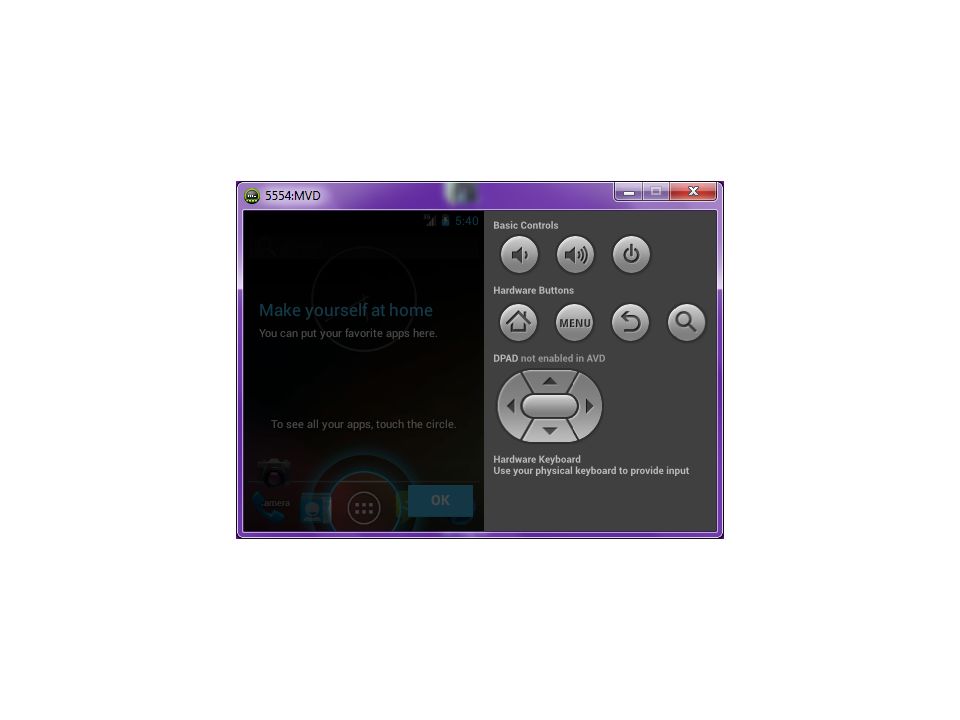
Edging Towards Success Eventually, with good luck, the emulator will look as shown on the following overhead In the screenshot that is shown, the emulator screen is grayed out

92
If your emulator is grayed out, click and drag over the emulator screen with the mouse This should wake it up, as shown on the following overhead

94
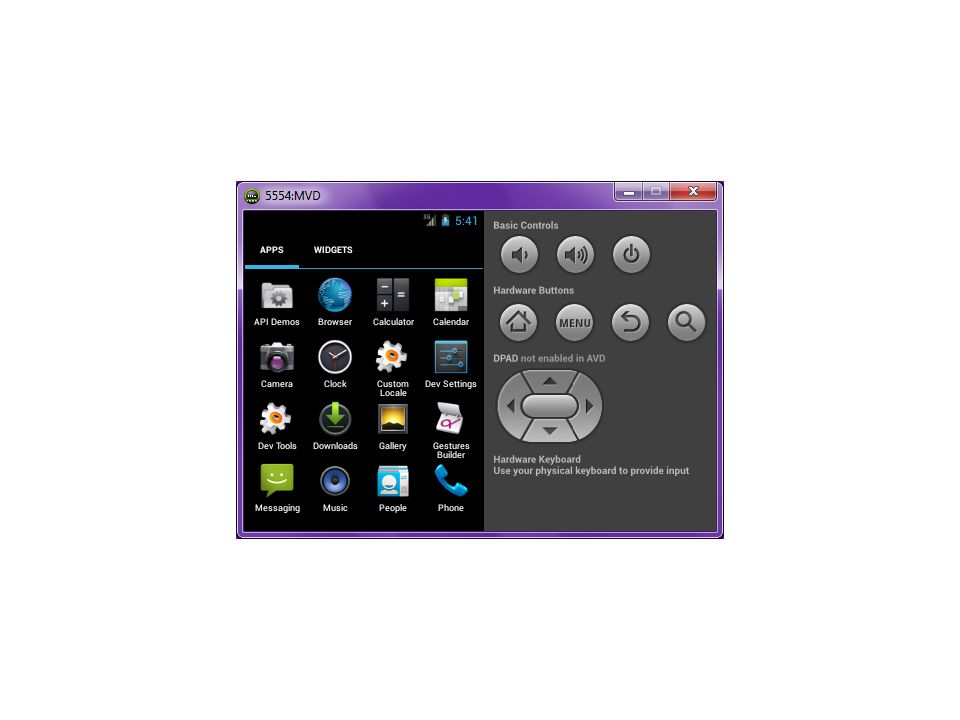
Click on the circle as directed If the apps are shown, as they are in the following screenshot, you have been successful The emulator has been launched and is running

96
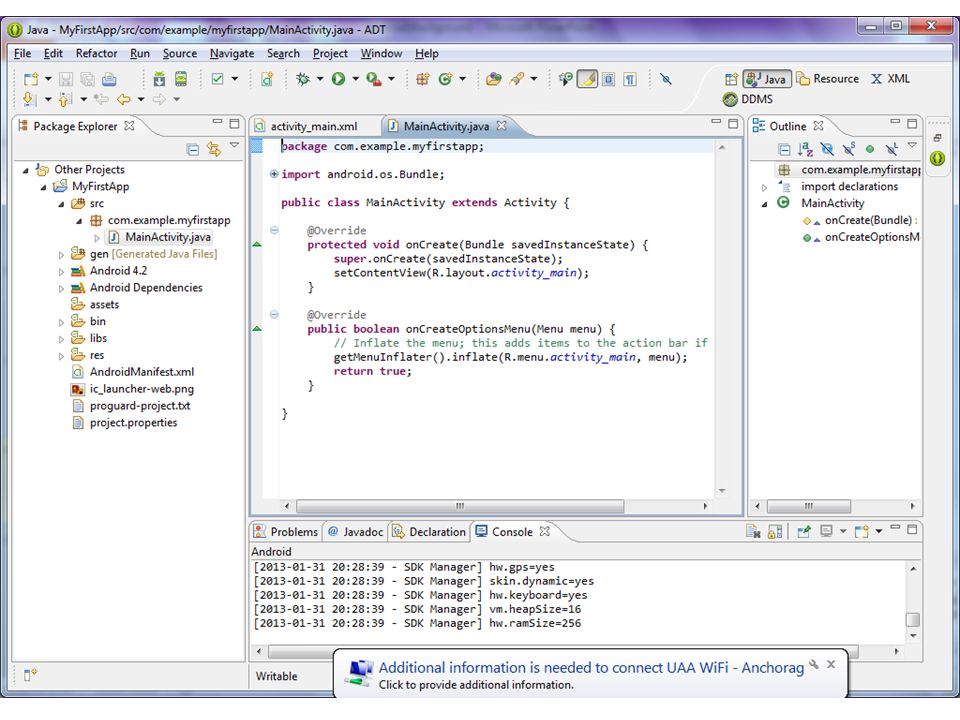
Running the Project in the Emulator If you want to run the project (without setting up run or debug) configurations, you need a source file for the project open in the Eclipse environment The screenshot on the following overhead shows the explorer on the left tracing the path to the MyFirstApp.java file, with that file open in the editor in the middle
 configurations, you need a source file for the project open in the Eclipse environment The screenshot on the following overhead shows the explorer on the left tracing the path to the MyFirstApp.java file, with that file open in the editor in the middle")
98
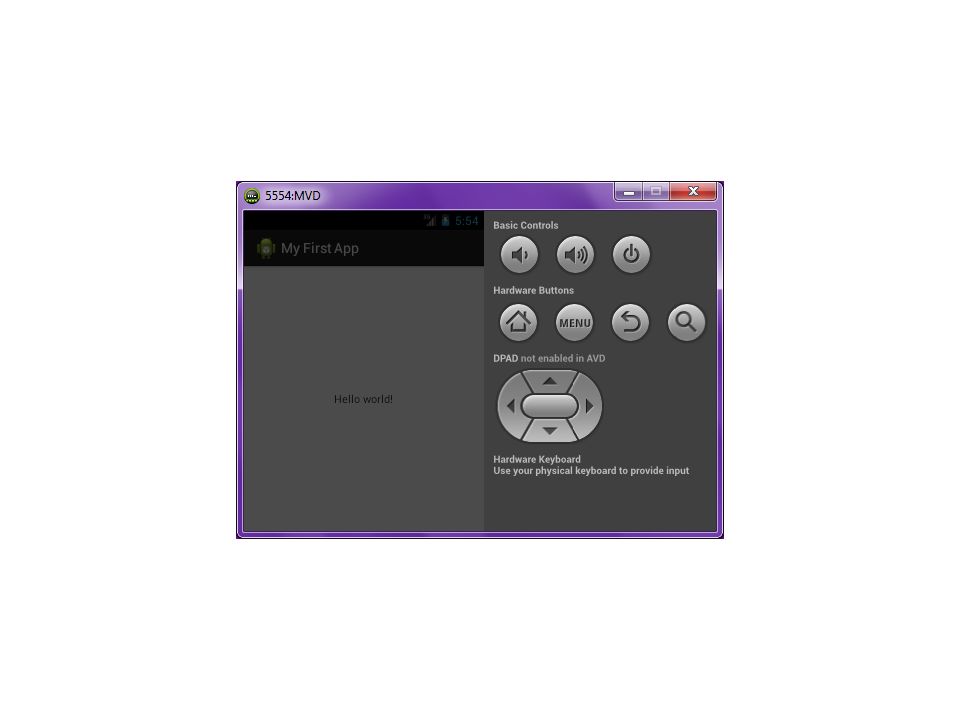
Now go to the Run menu in the menu bar and take the Run option in it Or, there is a Run tool in the toolbar which you can click on Don’t mistakenly take the dropdown option on the tool Once again there may be a certain amount of waiting, but with luck, when you look at the emulator, this is what you’ll see

100
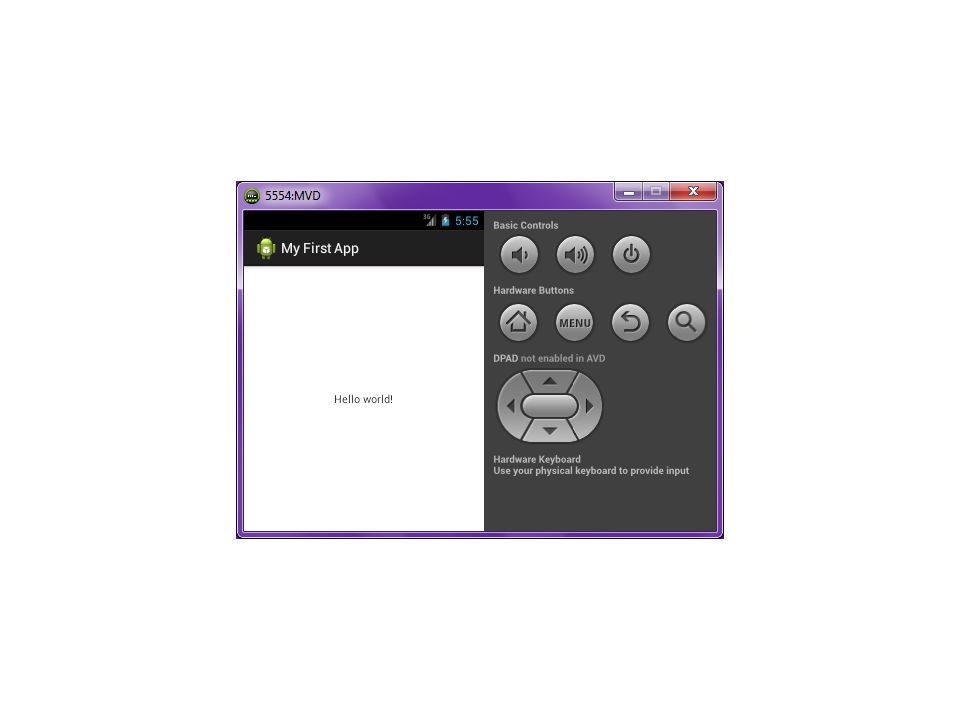
Click and drag over the emulator screen, and voila

102
1.8 Running the Project on an Attached Device Instead of an Emulator

103
For reference purposes, these overheads were prepared with the following: Windows 7 Eclipse, as already described A Nexus 7 tablet

104
Getting the Device Ready On the running device, go to the App screen Tap on Settings Under System, find About tablet Tap Build number 7 times When you return from doing this you should find Developer options under System

105
Take Developer options Under Debugging, enable USB debugging Connect the device to your system using a USB cable

106
Downloading and Installing the Driver Downloading: Go to the Nexus 7 Web site Get the download installer Follow the download directions Note which folder the driver is saved in

107
Installing: Right click on your computer Take the Manage option Select the Device Manager on the left Find and expand the Other devices Find the Nexus 7 device in the list and right click on it Take the Update Driver Software… option Follow the directions and browse to the location where the driver was saved to

108
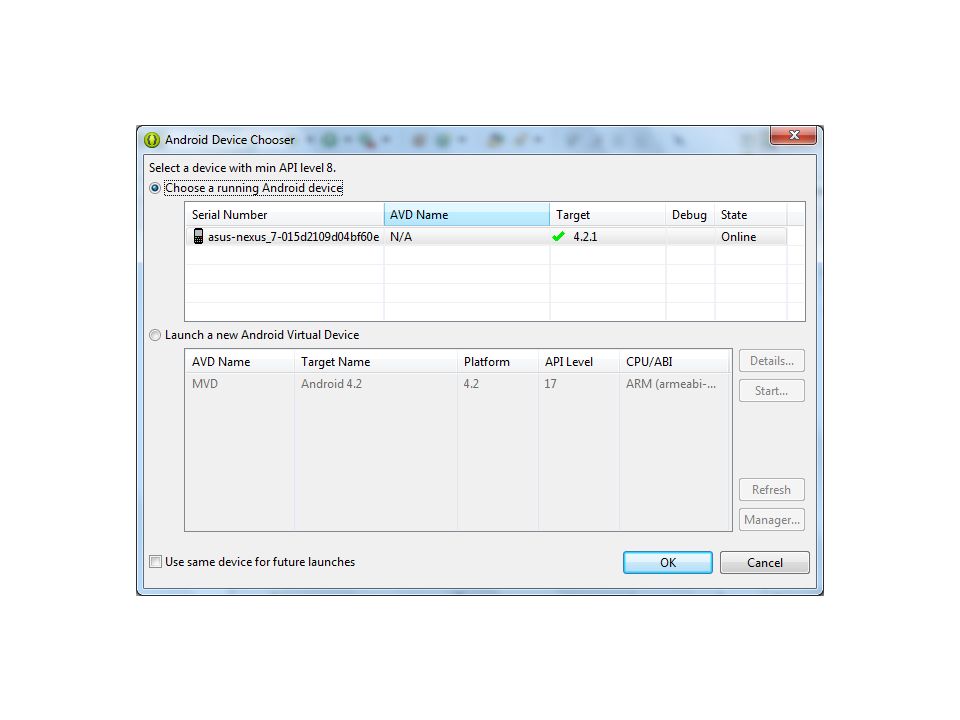
Running the App on the Device Open your app in Eclipse Take the Run tool or the Run option in the menu If all of the preliminary steps were taken, this should cause the Android Device Chooser to appear on the screen, with the Nexus 7 device in the list This is shown on the following overhead

110
Select your device and click OK The magic should happen

111
The End

Similar presentations


 Copyright 2015 by Janson Industries.>")


